Old-Fashioned Buttermilk Donut Bars
Old-Fashioned Buttermilk Donut Bars are tender, cake-like treats with a signature crackly glaze—easier than yeast donuts and ready in under 2 hours. Perfect for weekend baking!
Hey there, I’m Claire Whitmore—a pastry whisperer in Asheville, NC, where butter totally counts as self-care. This Old-Fashioned Buttermilk Donut Bars recipe is my love letter to nostalgic bakery treats, the kind with that signature crackly vanilla glaze and tender crumb that makes you close your eyes on the first bite.
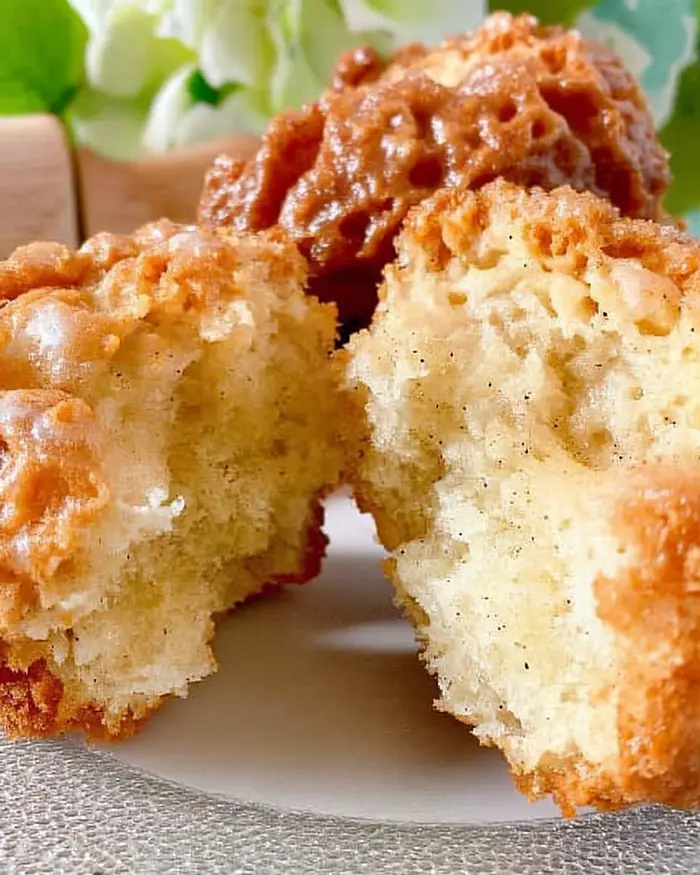
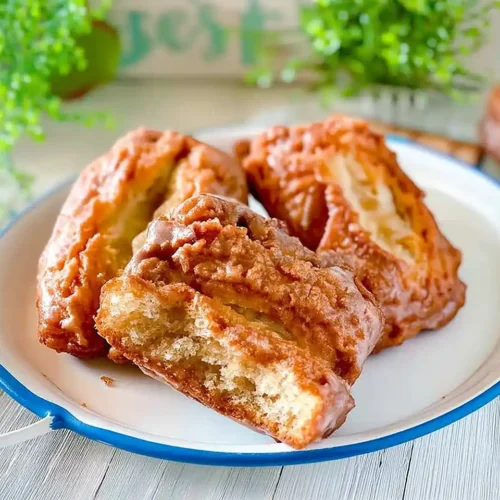
These beauties are cake donuts shaped into bars, fried to golden perfection, and dunked in a shiny vanilla bean glaze that sets with the most satisfying snap.
Unlike yeast donuts that need hours of rising, these buttermilk donut bars come together with simple pantry ingredients like cake flour, buttermilk, and vanilla paste, then get a quick chill before frying.
You’ll love the tender, slightly tangy interior and that iconic center crease that screams “old-school bakery.” They’re crowd-pleasers for breakfast spreads, brunch gatherings, or any time you want to feel like a baking rockstar without the fuss.
Table of Contents
Little Snapshot: What This Recipe Delivers
These Old-Fashioned Buttermilk Donut Bars deliver tender, cake-style donuts with a tangy buttermilk crumb and a signature crackly vanilla glaze. With just 30 minutes of chill time and a quick fry, you’ll have 18 bakery-worthy bars that taste like nostalgia and look fancy enough for any brunch spread.
Why You’ll Love This Recipe 🌸
- This Old-Fashioned Buttermilk Donut Bars recipe takes less time than scrolling through your morning feed—no yeast, no waiting, just mix, chill, and fry.
- The buttermilk gives these bars a tender crumb and subtle tang that balances perfectly with the sweet vanilla glaze—it’s like a hug in donut form.
- They look bakery-level impressive with that signature center crease, but honestly? The technique is so forgiving that even your first batch will turn out gorgeous.
- According to King Arthur Baking in their guide to cake versus yeast doughnuts, cake donuts offer a denser, more tender crumb that holds up beautifully to glazes—and this buttermilk donut bars recipe proves exactly why.
Quick Facts ⚡
Here’s the quick scoop on this Old-Fashioned Buttermilk Donut Bars recipe.
- CourseDessert / Breakfast
- Prep Time20 minutes
- Chill Time30-60 minutes
- Cook Time20 minutes
- Total Time1 hour 10 minutes
- Servings18 donut bars
- DifficultyMedium
Old-Fashioned Buttermilk Donut Bars
Equipment
- Stand mixer with paddle attachment
- Large mixing bowl
- Rubber spatula
- Bench scraper or small offset spatula
- Rolling Pin
- Large heavy-bottomed pot for frying
- Candy thermometer
- Thin metal spatula or fish spatula
- cooling rack
- Paper towels
- Pastry brush
- Whisk
Ingredients
For the Doughnuts
- 3 ½ cups cake flour
- 2 ¾ tsp baking powder
- ¼ tsp baking soda
- 1 ½ tsp salt
- 1 cup granulated sugar
- 2 tbsp vanilla paste or extract
- 2 tbsp shortening
- 2 tbsp butter melted
- 4 egg yolks room temperature
- ¾ cup buttermilk room temperature
- 6 cups shortening for frying
For the Vanilla Bean Glaze
- 2 cups confectioners’ sugar sifted
- 2 tbsp vanilla bean paste or extract
- ¼ cup warm water
Instructions
- Sift or whisk together 3 1/2 cups cake flour, 2 3/4 teaspoons baking powder, 1/4 teaspoon baking soda, and 1 1/2 teaspoons salt in a large bowl. Set this aside while you work on the wet ingredients.
- In the bowl of a stand mixer fitted with the paddle attachment, combine 1 cup granulated sugar, 2 tablespoons vanilla paste or extract, 2 tablespoons shortening, and 2 tablespoons melted butter. Beat on medium speed until creamy and fluffy, about 3 minutes. Use a rubber spatula to scrape down the sides of the bowl so everything gets incorporated evenly.
- With the mixer on low, add the 4 room-temperature egg yolks one at a time, stopping to scrape down the bowl as needed. Pour in 3/4 cup room-temperature buttermilk and continue mixing until everything is well combined and smooth.
- With the mixer still on low, add all of the dry ingredients at once. Mix until the flour is just combined—don’t overmix or your bars will be tough. Use a rubber spatula to fold in any stubborn flour clinging to the sides of the bowl. Transfer the very sticky dough to a clean bowl, cover it, and refrigerate for 30 to 60 minutes minimum. This chill time is crucial for making the dough easier to handle.
- Heavily flour a clean work surface and your hands—don’t be shy with the flour here. Turn the chilled dough out onto the floured surface and gently roll it around to coat it lightly with flour. Pat the dough into a rectangle about 1/2 inch thick and 3 1/2 inches wide, adding more flour to the work surface if the dough starts sticking. Flour a bench scraper or small spatula, then cut the rectangle into bars that are 3 1/2 inches by 1 1/2 inches by 1/2 inch. Once all the bars are cut, dip the scraper in flour again and very gently press it down the center of each bar to make a light indentation—this creates that iconic buttermilk bar look. Use a pastry brush to lightly dust off any excess flour if needed.
- Fill a large, heavy-bottomed pot with 6 cups of shortening. Once melted, it should measure about 2 inches deep—if not, add more shortening. Attach a candy thermometer to the side of the pot and heat the shortening over medium-high heat until it reaches exactly 350°F.
- Line a cooling rack with a thick layer of paper towels, about 4 sheets thick. Once the oil hits 350°F, flour a very thin metal spatula or fish spatula and use it to carefully transfer one donut bar to the hot oil, bottom side down first. This lets the top puff up beautifully. Fry for 1 to 2 minutes until golden brown, then use the spatula or a pair of chopsticks to gently flip the bar over. Fry for another 1 to 2 minutes until both sides are evenly golden. Carefully transfer the fried donut to the prepared cooling rack. Repeat with the remaining bars, making sure the oil temperature stays at 350°F between batches.
- Let the bars come to room temperature before glazing—this prevents the glaze from melting into a puddle. To make the glaze, whisk together 2 cups sifted confectioners’ sugar, 2 tablespoons vanilla bean paste or extract, and 1/4 cup warm water until the mixture is shiny and smooth. Dunk each cooled bar top side down into the glaze, then set it on a cooling rack. The glaze will set in about 4 to 5 minutes, creating that signature crackly finish that’s bakery-perfect.
Notes
Nutritional Peek
Here’s a friendly look at what you’re working with per donut bar. Remember, these are treats meant to be savored, not stress over!
| Nutrient | Amount per Serving |
|---|---|
| Calories | 245 kcal |
| Protein | 3g |
| Carbohydrates | 38g |
| Total Fat | 9g |
| Saturated Fat | 3g |
| Fiber | 0.5g |
| Sugar | 22g |
Old-Fashioned Buttermilk Donut Bars Ingredients
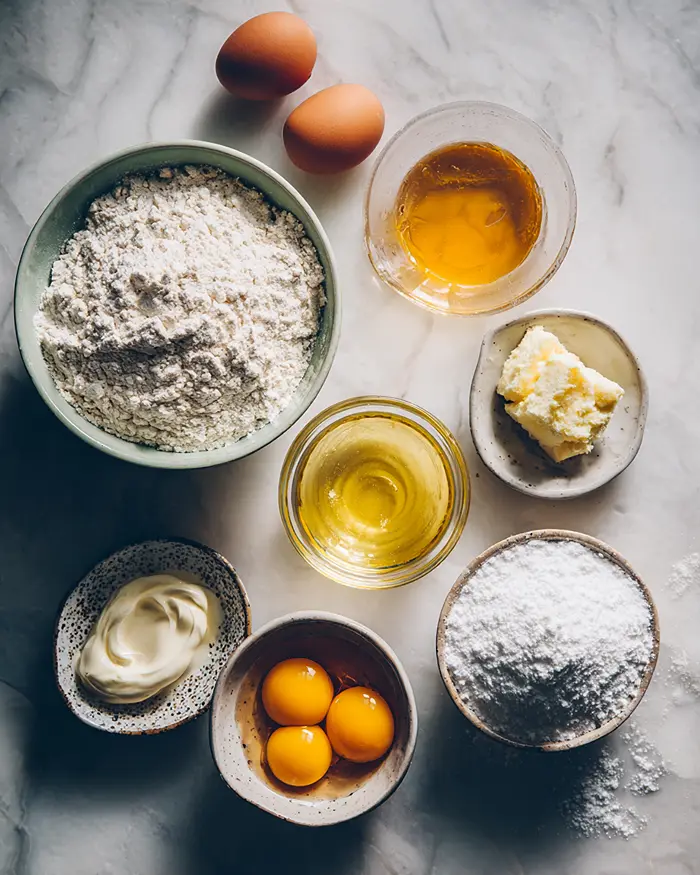
Let me walk you through what makes these buttermilk recipes so special. For the donut dough, you’ll want cake flour for that signature tender crumb, real buttermilk for tang, and vanilla paste for those gorgeous little flecks.
The wet ingredients—butter, shortening, egg yolks, and buttermilk—should all be at room temperature so they blend smoothly without overworking the dough. For the glaze, confectioners’ sugar and vanilla bean paste create that iconic crackly coating that bakeries are famous for.
For the Doughnuts
| Amount | Ingredient |
|---|---|
| 3 1/2 cups | cake flour (yes, cake flour specifically—it makes all the difference) |
| 2 3/4 tsp | baking powder |
| 1/4 tsp | baking soda |
| 1 1/2 tsp | salt |
| 1 cup | granulated sugar |
| 2 tbsp | vanilla paste or extract (paste gives you those pretty flecks) |
| 2 tbsp | shortening |
| 2 tbsp | butter, melted (real butter—margarine just doesn’t cut it here) |
| 4 | egg yolks, room temperature |
| 3/4 cup | buttermilk, room temperature |
| 6 cups | shortening for frying |
For the Vanilla Bean Glaze
| Amount | Ingredient |
|---|---|
| 2 cups | confectioners’ sugar, sifted |
| 2 tbsp | vanilla bean paste or extract |
| 1/4 cup | warm water |
Tools You’ll Actually Use
- Stand mixer with paddle attachment (or a hand mixer and a strong arm)
- Large mixing bowl
- Rubber spatula
- Bench scraper or small offset spatula
- Rolling pin (optional—I usually just pat the dough with my hands)
- Large heavy-bottomed pot for frying
- Candy thermometer (non-negotiable for perfect frying temps)
- Thin metal spatula or fish spatula
- Cooling rack
- Paper towels
- Pastry brush
- Whisk for the glaze
Step-by-Step Instructions
Making these Old-Fashioned Buttermilk Donut Bars is easier than you think, I promise. The dough is sticky and soft—somewhere between cookie dough and cake batter—but that’s exactly what gives you that tender, melt-in-your-mouth texture. Let’s walk through it together.
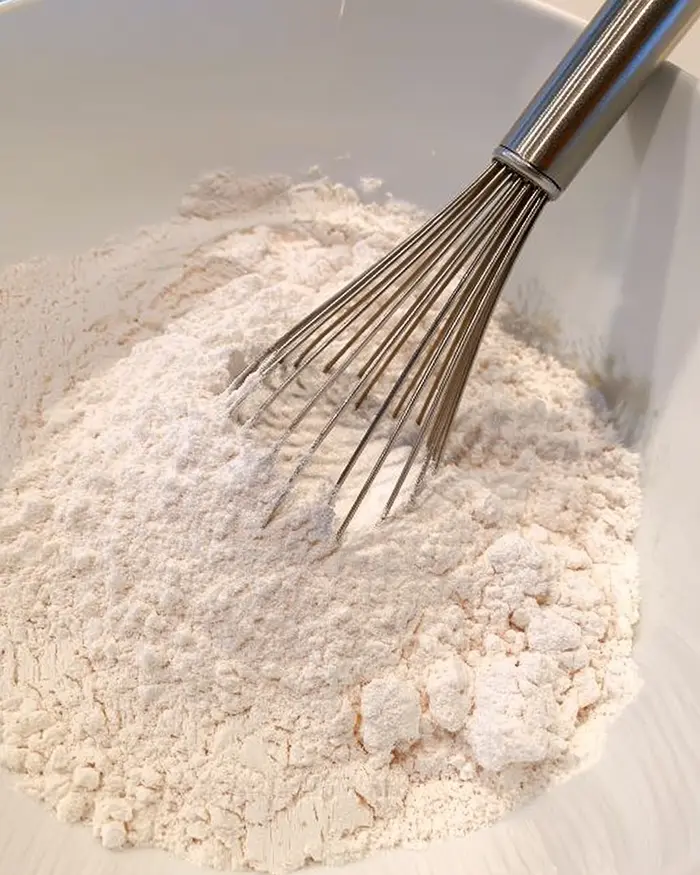
Step 1: Prep the dry ingredients. Sift or whisk together 3 1/2 cups cake flour, 2 3/4 teaspoons baking powder, 1/4 teaspoon baking soda, and 1 1/2 teaspoons salt in a large bowl. Set this aside while you work on the wet ingredients.
Step 2: Cream the fats and sugar. In the bowl of a stand mixer fitted with the paddle attachment, combine 1 cup granulated sugar, 2 tablespoons vanilla paste or extract, 2 tablespoons shortening, and 2 tablespoons melted butter.
Beat on medium speed until creamy and fluffy, about 3 minutes. Use a rubber spatula to scrape down the sides of the bowl so everything gets incorporated evenly.
Step 3: Add the yolks and buttermilk. With the mixer on low, add the 4 room-temperature egg yolks one at a time, stopping to scrape down the bowl as needed. Pour in 3/4 cup room-temperature buttermilk and continue mixing until everything is well combined and smooth.
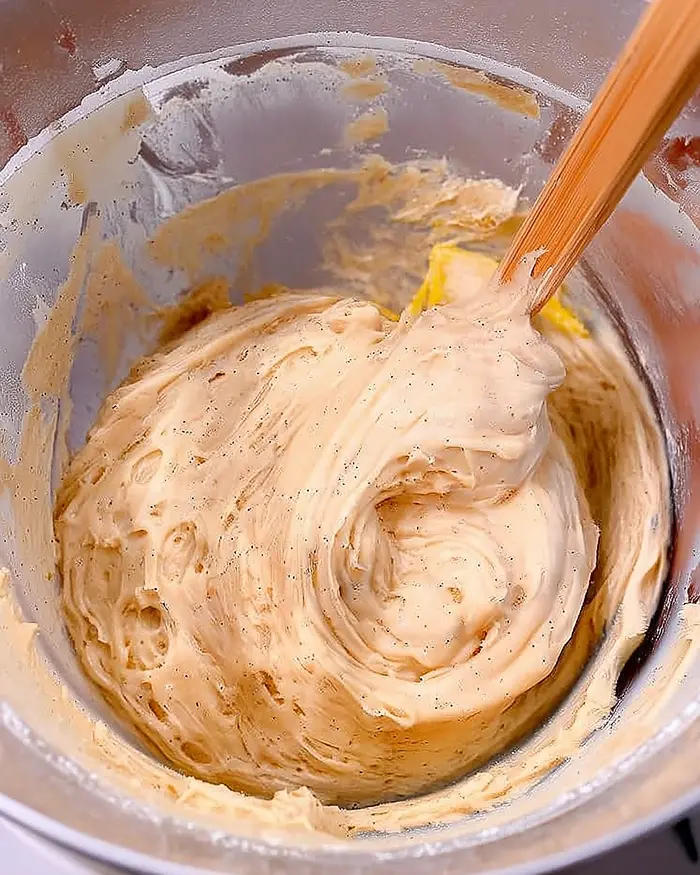
Step 4: Incorporate the dry ingredients. With the mixer still on low, add all of the dry ingredients at once. Mix until the flour is just combined—don’t overmix or your bars will be tough.
Use a rubber spatula to fold in any stubborn flour clinging to the sides of the bowl. Transfer the very sticky dough to a clean bowl, cover it, and refrigerate for 30 to 60 minutes minimum. This chill time is crucial for making the dough easier to handle.
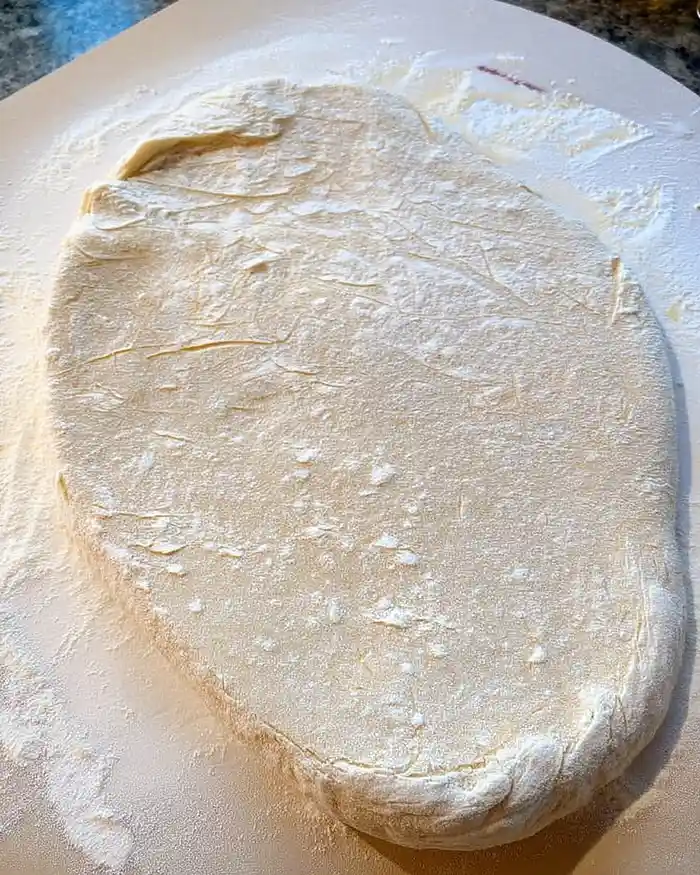
Step 5: Shape the bars. Heavily flour a clean work surface and your hands—don’t be shy with the flour here. Turn the chilled dough out onto the floured surface and gently roll it around to coat it lightly with flour.
Pat the dough into a rectangle about 1/2 inch thick and 3 1/2 inches wide, adding more flour to the work surface if the dough starts sticking. Flour a bench scraper or small spatula, then cut the rectangle into bars that are 3 1/2 inches by 1 1/2 inches by 1/2 inch.
Once all the bars are cut, dip the scraper in flour again and very gently press it down the center of each bar to make a light indentation—this creates that iconic buttermilk bar look. Use a pastry brush to lightly dust off any excess flour if needed.
Step 6: Heat the oil. Fill a large, heavy-bottomed pot with 6 cups of shortening. Once melted, it should measure about 2 inches deep—if not, add more shortening. Attach a candy thermometer to the side of the pot and heat the shortening over medium-high heat until it reaches exactly 350°F.
Step 7: Fry the bars. Line a cooling rack with a thick layer of paper towels, about 4 sheets thick. Once the oil hits 350°F, flour a very thin metal spatula or fish spatula and use it to carefully transfer one donut bar to the hot oil, bottom side down first. This lets the top puff up beautifully.
Fry for 1 to 2 minutes until golden brown, then use the spatula or a pair of chopsticks to gently flip the bar over. Fry for another 1 to 2 minutes until both sides are evenly golden. Carefully transfer the fried donut to the prepared cooling rack. Repeat with the remaining bars, making sure the oil temperature stays at 350°F between batches.
Step 8: Cool and glaze. Let the bars come to room temperature before glazing—this prevents the glaze from melting into a puddle. To make the glaze, whisk together 2 cups sifted confectioners’ sugar, 2 tablespoons vanilla bean paste or extract, and 1/4 cup warm water until the mixture is shiny and smooth.
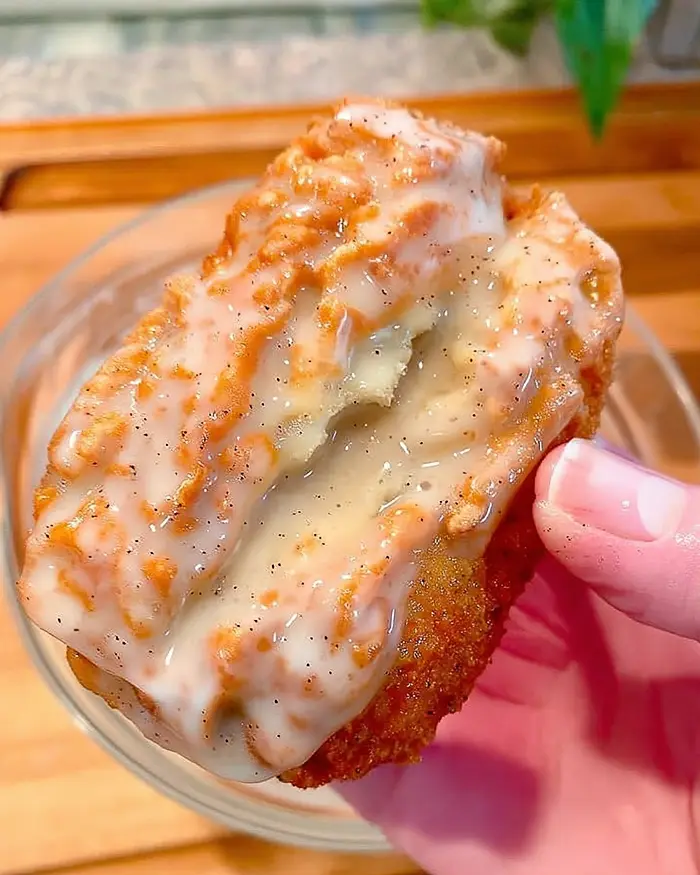
Dunk each cooled bar top side down into the glaze, then set it on a cooling rack. The glaze will set in about 4 to 5 minutes, creating that signature crackly finish that’s bakery-perfect.
Claire’s Pro Tips & Gentle Guidance
Let me share a few tricks I’ve learned from making these buttermilk donut bars way too many times (no regrets though). These little tips will save you from the sticky-dough frustration I went through on my first attempt.
Don’t skip the chill time. I know 30 minutes feels like forever when you’re excited to fry, but cold dough is so much easier to work with and holds its shape better in the hot oil.
Room temperature ingredients are your best friend here. Cold buttermilk and egg yolks won’t blend smoothly into the batter, and you’ll end up with a lumpy mess instead of that silky dough texture we’re after.
Use a candy thermometer and watch that oil temp like a hawk. Too hot and your bars will burn on the outside while staying raw inside; too cool and they’ll absorb way too much oil and turn greasy. Keep it steady at 350°F for perfect results every time.
When you’re shaping the bars, embrace the flour. This dough is meant to be sticky and soft, so don’t be afraid to dust your hands, the work surface, and your tools generously—it won’t make the bars tough, I promise.
According to Serious Eats in their comprehensive doughnut frying guide , maintaining consistent oil temperature is the single most important factor in achieving crispy exteriors and tender interiors—and I couldn’t agree more after years of testing these bars.
Quick Fixes for Old-Fashioned Buttermilk Donut Bars
Problem: The dough is too sticky to work with. Add more flour to your work surface and hands, and make sure you chilled the dough for the full 30 minutes minimum. If it’s still impossibly sticky, pop it back in the fridge for another 15 minutes.
Problem: The bars are browning too fast but still raw inside. Your oil temperature is too high—reduce the heat slightly and let it come back down to 350°F before continuing. Use your candy thermometer to monitor closely between batches.
Problem: The bars are greasy and heavy. The oil temperature was too low, so the bars absorbed excess oil instead of frying quickly. Make sure your oil is at a steady 350°F before adding each batch, and don’t overcrowd the pot.
Problem: The glaze is too thin and runs off. Add a bit more sifted confectioners’ sugar, a tablespoon at a time, until the glaze thickens to a consistency that coats the back of a spoon. If it’s too thick, add warm water by the teaspoon until it loosens up.
Problem: The center crease disappeared during frying. Press the indentation a bit deeper next time, and make sure you’re starting with the bottom side down in the oil—this lets the top puff up while keeping that signature crease visible.
Variations & Fun Twists
These donut bar treats are begging for your personal touch. Try swapping the vanilla glaze for a maple glaze by using pure maple syrup instead of water—it’s perfect for fall mornings with a cup of coffee.
For a chocolate lover’s version, add 2 tablespoons of cocoa powder to the glaze and top with sprinkles. You can also make a lemon buttermilk variation by adding 1 tablespoon of lemon zest to the dough and using lemon juice in place of some of the water in the glaze.
If you want a rustic bakery look, skip the full dunk and just drizzle the glaze over the bars in random stripes. For fancy brunches, top the glazed bars with edible flowers, crushed freeze-dried berries, or a light dusting of edible gold.
Can’t get enough of these flavors? You’re going to love what’s waiting in the Cookies & Brownies lineup. Every single recipe is made to impress without the stress. Happy cooking, friend!
Serving, Storage & Reheating
Serve these buttermilk donut bars fresh on the day they’re made for the best texture—that crackly glaze and tender crumb are absolute perfection within the first few hours. They’re incredible with hot coffee, cold milk, or even a scoop of vanilla ice cream if you’re feeling extra indulgent.
Store any leftovers (if you actually have leftovers, which I doubt) in an airtight container at room temperature for up to 2 days. The glaze may soften slightly, but they’ll still taste amazing. Don’t refrigerate them or they’ll dry out and lose that signature tender texture.
To refresh day-old bars, pop them in a 300°F oven for about 5 minutes to warm them through. The glaze won’t get crackly again, but the donut itself will taste freshly made. You can also re-glaze them if you want that shiny finish back—just make a fresh batch of glaze and dip away.
No-Waste Kitchen Magic
Got leftover donut bars that are starting to get a little stale? Cut them into cubes and use them as a base for a decadent bread pudding—the vanilla glaze adds extra sweetness so you can cut back on the sugar in your custard.
Crumble up day-old bars and mix them into vanilla ice cream for a homemade donut bar ice cream that tastes like a fancy scoop shop creation. You can also pulse them in a food processor to make donut crumbs, then use them as a crust for cheesecake or as a topping for yogurt parfaits.
Old-Fashioned Buttermilk Donut Bars FAQs
Can I freeze Old-Fashioned Buttermilk Donut Bars?
Yes, you can freeze these bars for up to 2 months. Freeze them unglazed in a single layer on a baking sheet, then transfer to a freezer bag once solid. Thaw at room temperature and glaze just before serving for the best texture and flavor.
What’s the best way to store buttermilk donut bars?
Store them in an airtight container at room temperature for up to 2 days. Don’t refrigerate or they’ll dry out and lose their tender crumb. If you need to stack them, place parchment paper between layers to prevent sticking.
How do I know when the donut bars are done frying?
They’ll be deep golden brown on both sides and will feel light when you lift them with a spatula—usually about 1 to 2 minutes per side at 350°F. If you’re unsure, fry one test bar first and break it open to check for doneness.
Can I make these donut bars without a stand mixer?
Absolutely! You can use a hand mixer or even mix by hand with a wooden spoon and a lot of elbow grease. Just make sure to cream the butter mixture really well and fold in the dry ingredients gently to avoid tough bars.
Will vanilla extract work if I don’t have vanilla paste?
Yes, vanilla extract works perfectly fine in both the dough and the glaze. You’ll miss out on those pretty vanilla bean flecks, but the flavor will still be rich and delicious. Use the same measurements as the paste.
Cozy Closing
There’s something magical about pulling off a batch of homemade Old-Fashioned Buttermilk Donut Bars that taste just like the ones from your favorite bakery.
These bars are proof that you don’t need fancy equipment or culinary school training to create something absolutely spectacular—just a little patience, some room-temperature ingredients, and a willingness to get a bit flour-dusted.
I’d love to see your spin on this Old-Fashioned Buttermilk Donut Bars recipe! Drop a comment below with your donut bar photos—I’d love to see how you made them your own.
Whether you stuck with classic vanilla glaze or went wild with maple and sprinkles, these buttermilk donut bars are so versatile that I bet you’ve got amazing variations already in mind. Happy frying, friend!
About the Author: I’m Claire Whitmore—a dessert daydreamer from Asheville, NC. For me, baking isn’t about perfect pastries—it’s about the joy of sharing something sweet (and maybe sneaking an extra scoop of icing).
When I’m not covered in powdered sugar, you’ll find me hunting down the best local honey or convincing my friends that yes, we absolutely need a fourth batch of brownies this week. My philosophy? If it tastes amazing and makes someone smile, it’s a win—even if it’s a little messy along the way. Come bake with me and let’s make some magic together! ✨