Whole Wheat Breadsticks Recipe
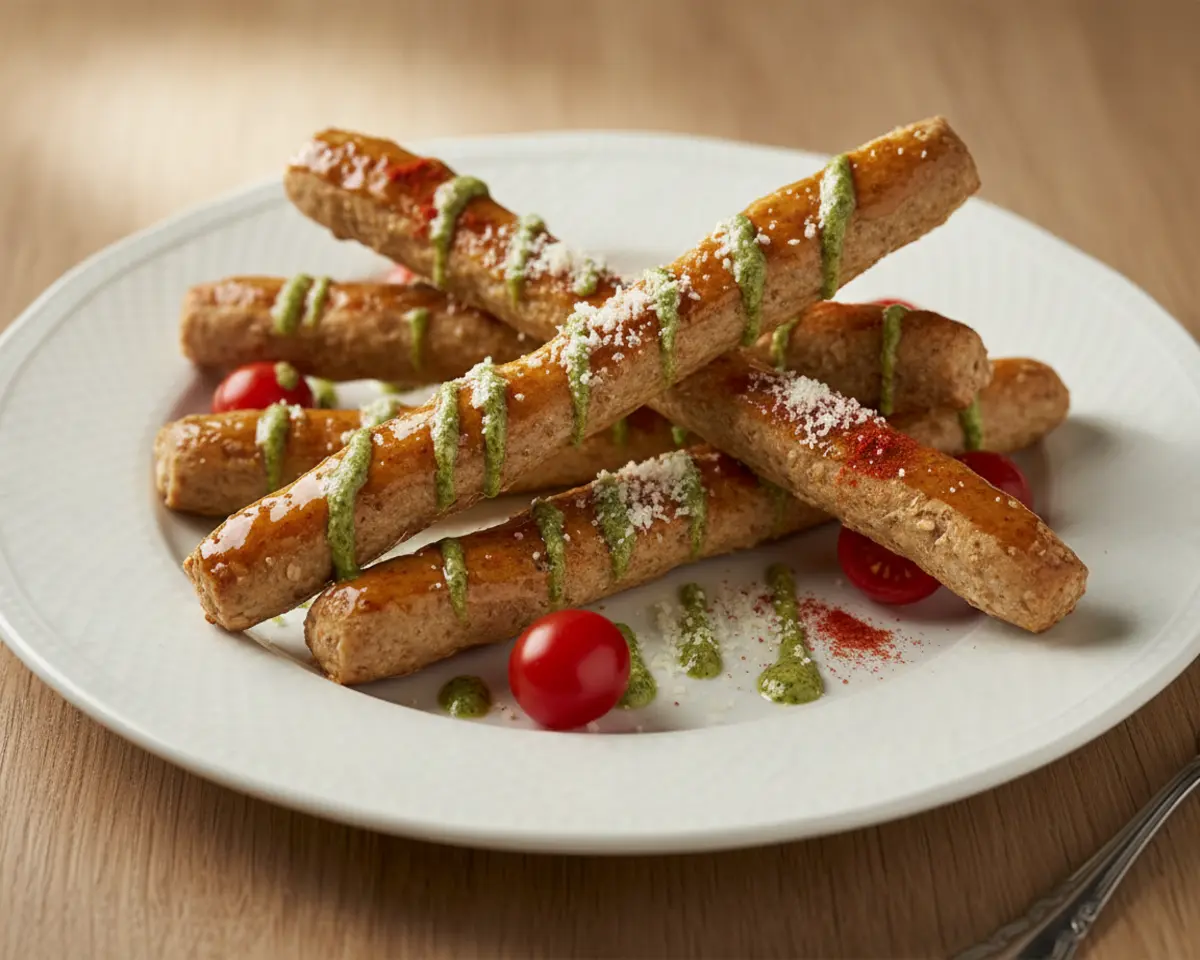
This whole wheat breadsticks recipe brings a cozy, nutty warmth to your table with a tender crunch that’s impossible to resist. You’ll love how simple homemade whole wheat breadsticks are to pull together — just a handful of pantry staples and a little rise time.
These healthy breadstick recipe beauties pair perfectly with marinara, soup, or a simple swipe of garlic butter. They’re the kind of easy breadstick recipe you’ll want to bake every week, and your kitchen will smell like pure magic while they bake.
Table of Contents
Quick Overview
While these wholesome breadsticks are baking, why not browse our irresistible collection of best cookies and brownies for your next sweet craving? We’ve got delightful treats perfect for any occasion!
Little Snapshot: What This Recipe Delivers: This whole wheat breadsticks recipe yields 24 tender, golden-brown breadsticks made with wholesome whole grain flour, just 10 ingredients, and about 30 minutes of hands-on time. Perfect for busy weeknights, they’re healthier than store-bought and endlessly adaptable with your favorite herbs and toppings.
Why You’ll Love This Recipe 🌸
- This easy breadstick recipe takes less active time than folding laundry — just mix, rise, roll, and bake.
- Whole grain breadsticks give you that wholesome, nutty flavor without sacrificing the soft, chewy texture everyone craves.
- They’re endlessly customizable with garlic, herbs, seeds, or sea salt — perfect for picky eaters and adventurous snackers alike.
- According to Harvard Health, whole grains can support heart health and steady energy — and this recipe proves exactly why.
Quick Facts ⚡
Here’s the quick scoop on this whole wheat breadsticks recipe.
- CourseAppetizer / Side Dish
- Prep Time15 minutes
- Cook Time15 minutes
- Total Time1 hour 45 minutes
- Servings24 breadsticks
- DifficultyEasy
Nutritional Peek (Per Breadstick):
| Nutrient | Amount per Serving |
|---|---|
| Calories | 65 kcal |
| Protein | 2 g |
| Carbohydrates | 12 g |
| Fat | 1.5 g |
| Fiber | 1.5 g |
| Sugar | 1 g |
What You’ll Need
Just a few simple tools will help you roll out these beauties with ease. No fancy equipment required — promise!
- Large mixing bowl (or stand mixer with dough hook)
- Wooden spoon or sturdy spatula
- Clean kitchen towel or plastic wrap
- Two baking sheets
- Parchment paper
- Pastry brush (for olive oil)
- Wire cooling rack
Ingredients
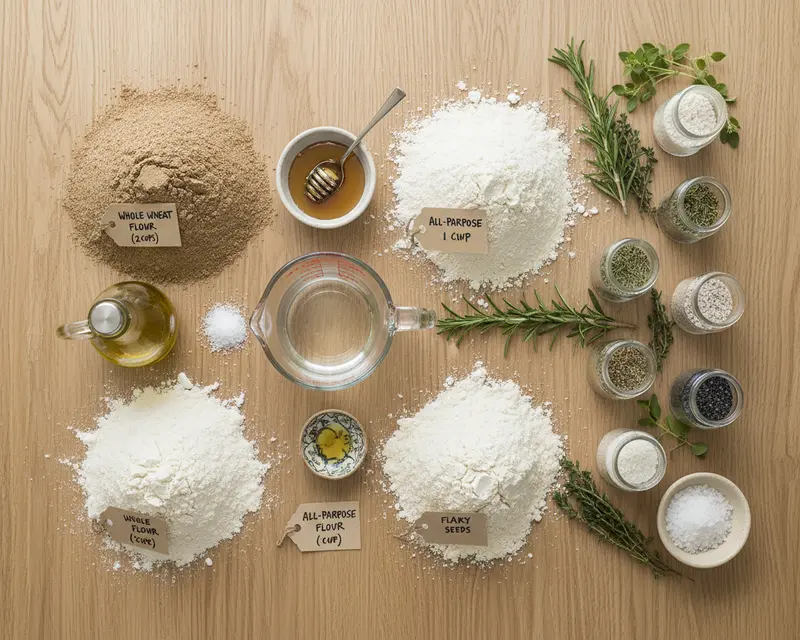
Homemade whole wheat breadsticks start with a beautiful balance of whole wheat and all-purpose flour, giving you that wholesome heartiness without the heaviness. You’ll need warm water to wake up the yeast, a touch of honey for a hint of sweetness, and olive oil for tender texture.
The toppings? Totally your call — go classic with garlic and herbs, or keep it simple with just a sprinkle of flaky sea salt.
| Group | Ingredient | Amount | Notes |
|---|---|---|---|
| Dough Base | Warm water | 1 cup | 105-115°F — like a cozy bath |
| Dough Base | Active dry yeast | 2 teaspoons | The magic that makes them rise |
| Dough Base | Honey or maple syrup | 1 tablespoon | Feeds the yeast, adds a whisper of sweetness |
| Dry Ingredients | Whole wheat flour | 2 cups | Nutty, wholesome, and sturdy |
| Dry Ingredients | All-purpose flour | 1 cup | Keeps them tender and light |
| Dry Ingredients | Salt | 1 teaspoon | Don’t skip — it wakes up all the flavors |
| Fat & Flavor | Olive oil | 2 tablespoons, plus more for brushing | Makes them tender and golden |
| Toppings (Optional) | Garlic powder | To taste | For cozy, savory vibes |
| Toppings (Optional) | Dried herbs (rosemary, oregano) | To taste | Fancy them up with a garden twist |
| Toppings (Optional) | Sesame seeds or poppy seeds | To taste | Adds crunch and visual pop |
| Toppings (Optional) | Flaky sea salt | To taste | Keeps it simple and elegant |
Step-by-Step Instructions
Let’s make this happen. These whole wheat breadsticks come together with a gentle rhythm — mix, rise, roll, and bake — and the smell alone will make your kitchen feel like the coziest spot on earth.
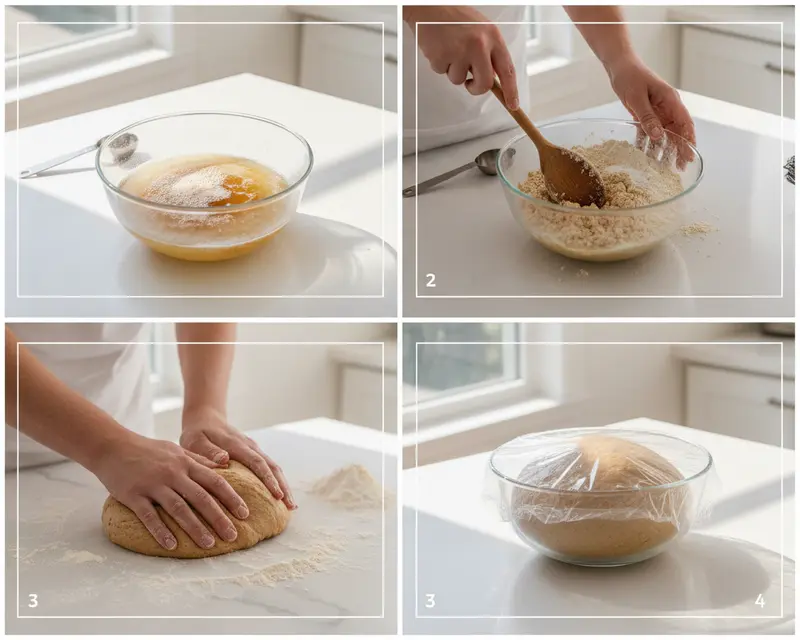
Step 1: Wake Up the Yeast
In a large mixing bowl, combine 1 cup warm water (about 105-115°F), 2 teaspoons active dry yeast, and 1 tablespoon honey or maple syrup. Give it a gentle stir, then let it sit for 5-10 minutes until the mixture gets foamy and bubbly on top — that’s how you know your yeast is awake and ready to work its magic.
Step 2: Mix the Dough
Add 2 cups whole wheat flour, 1 cup all-purpose flour, 1 teaspoon salt, and 2 tablespoons olive oil to the yeast mixture. Stir with a wooden spoon or use a stand mixer fitted with the dough hook until a shaggy, slightly rough dough forms. It’ll look messy at first, but that’s totally normal!
Step 3: Knead Until Smooth
Turn the dough out onto a lightly floured surface and knead by hand for 5-7 minutes, or let your stand mixer do the work on medium-low speed. You’re looking for smooth, elastic dough that’s slightly tacky but not sticky — if it clings to your hands, dust with a tiny bit more flour.
Step 4: Let It Rise
Lightly grease a clean bowl with a drizzle of olive oil, place your dough inside, and turn it once so the top is coated. Cover the bowl with plastic wrap or a clean kitchen towel, then let it rise in a warm, draft-free spot for 1 to 1.5 hours, or until the dough has doubled in size.
Step 5: Preheat and Prep
While the dough finishes rising, preheat your oven to 400°F (200°C) and line two baking sheets with parchment paper. This keeps cleanup easy and ensures your breadsticks bake evenly without sticking.
Step 6: Divide the Dough
Gently punch down the risen dough to release the trapped air, then turn it out onto a lightly floured surface. Use a bench scraper or knife to divide the dough into approximately 24 equal pieces — they don’t have to be perfect, just roughly the same size so they bake evenly.
Step 7: Roll into Breadsticks
Take each piece of dough and roll it between your palms and the counter into a pencil-thin rope, about 8-10 inches long. If the dough resists or springs back, let it rest for a minute or two — that relaxes the gluten and makes rolling easier. Place each rolled breadstick on your prepared baking sheets, leaving a little space between them.
Step 8: Brush and Top
Use a pastry brush to lightly coat the tops of your breadsticks with olive oil — this helps them turn golden and gorgeous in the oven. Sprinkle on your favorite toppings: garlic powder, dried rosemary or oregano, sesame seeds, poppy seeds, or just a pinch of flaky sea salt.
Step 9: Bake Until Golden
Slide the baking sheets into your preheated 400°F oven and bake for 12-15 minutes, or until the breadsticks are golden brown and smell irresistible. Keep an eye on them in the last few minutes — oven temperatures vary, and you want them crisp outside but still tender inside.
Step 10: Cool and Serve
Remove the baking sheets from the oven and let the breadsticks cool on a wire rack for a few minutes before serving. They’re best enjoyed warm, dunked into marinara, hummus, or melted garlic butter.
Pro Tips & Gentle Guidance
Every healthy breadstick recipe benefits from a few gentle nudges in the right direction. These tips will help you troubleshoot as you go and turn out tender, flavorful breadsticks every single time.
Check Your Water Temperature: Yeast is picky — too hot and it dies, too cool and it won’t activate. Aim for 105-115°F (a comfortable baby-bottle temp). If you don’t have a thermometer, test a drop on your wrist — it should feel warm but not hot.
Don’t Rush the Rise: Whole wheat dough can take a little longer to double in size, especially in cooler kitchens. If your house is chilly, try placing the covered bowl in a turned-off oven with just the oven light on — it creates a cozy, draft-free rise zone.
Flour Your Hands, Not the Dough: When rolling out breadsticks, dust your hands and the counter lightly with flour instead of adding too much to the dough itself. This keeps the dough soft and prevents it from getting tough or dry.
Rotate Your Pans: Halfway through baking, swap the positions of your baking sheets (top to bottom, front to back) so all the breadsticks bake evenly. Ovens have hot spots, and this simple trick ensures uniform golden color.
Experiment with Whole Wheat Flour Blends: You can use 100% whole wheat flour if you prefer a heartier texture, but combining it with all-purpose flour gives you a lighter, more tender crumb. For even more nutrition, try swapping in sourdough starter discard for part of the liquid and flour.
Brush with Butter Instead: If you want an even richer flavor, brush your baked breadsticks with melted butter (plain or garlic-infused) as soon as they come out of the oven. According to King Arthur Baking, adding fat after baking can enhance softness and add a beautiful sheen.
Variations & Adaptations
Once you’ve mastered the base whole wheat breadsticks recipe, the world of flavor is wide open. Here are some fun twists to keep things exciting.
Cheesy Garlic Breadsticks: Before baking, sprinkle grated Parmesan or shredded mozzarella over the oiled breadsticks along with garlic powder and Italian seasoning. You’ll get crispy, cheesy edges that are downright addictive — similar to these sourdough cheesy breadsticks.
Everything Bagel Breadsticks: Brush with olive oil and top generously with everything bagel seasoning for a fun, savory snack. They’re perfect for dunking into cream cheese or hummus.
Sweet Cinnamon-Sugar Breadsticks: Swap the savory toppings for melted butter, cinnamon, and a sprinkle of sugar after baking. Serve them with a side of vanilla yogurt or cream cheese frosting for dipping.
Herb & Olive Oil Dipping Breadsticks: Keep the breadsticks plain or lightly salted, then serve with a small bowl of olive oil mixed with balsamic vinegar, crushed red pepper, and fresh herbs. It’s an elegant appetizer with almost no effort.
Gluten-Free Adaptation: Use a 1:1 gluten-free baking flour blend in place of the whole wheat and all-purpose flours. The texture will be slightly different — a bit more delicate — but still delicious.
Quick Fixes for Whole Wheat Breadsticks Recipe
Even the best bakers hit a snag now and then. Here’s how to troubleshoot the most common breadstick hiccups with grace and confidence.
Problem: Dough Won’t Rise
Your yeast might be expired, or the water was too hot or too cold. Check the expiration date on your yeast packet, and next time test your water temperature with a thermometer or your wrist. If your dough hasn’t risen after 2 hours, start fresh with new yeast.
Problem: Breadsticks Are Too Dense
You may have added too much whole wheat flour or didn’t knead the dough long enough to develop the gluten. Measure flour by spooning it into the cup and leveling off, and make sure to knead for the full 5-7 minutes until the dough feels smooth and elastic.
Problem: Breadsticks Are Dry or Crumbly
Overbaking or not enough moisture in the dough can cause dryness. Check your breadsticks a minute or two before the timer goes off, and make sure you’re measuring liquids accurately. A light brush of olive oil or melted butter right after baking can also help restore softness.
Problem: Breadsticks Burn on the Bottom
Your oven’s bottom element might be running hot, or your baking sheets are too dark. Try baking on the middle rack, use light-colored baking sheets, and double up on parchment paper if needed to create a buffer between the dough and direct heat.
Problem: Toppings Fall Off
If you skip the olive oil brush before adding toppings, they won’t stick well. Make sure to lightly coat each breadstick with oil, then press your toppings gently into the dough so they adhere during baking.
Storage & Reheating
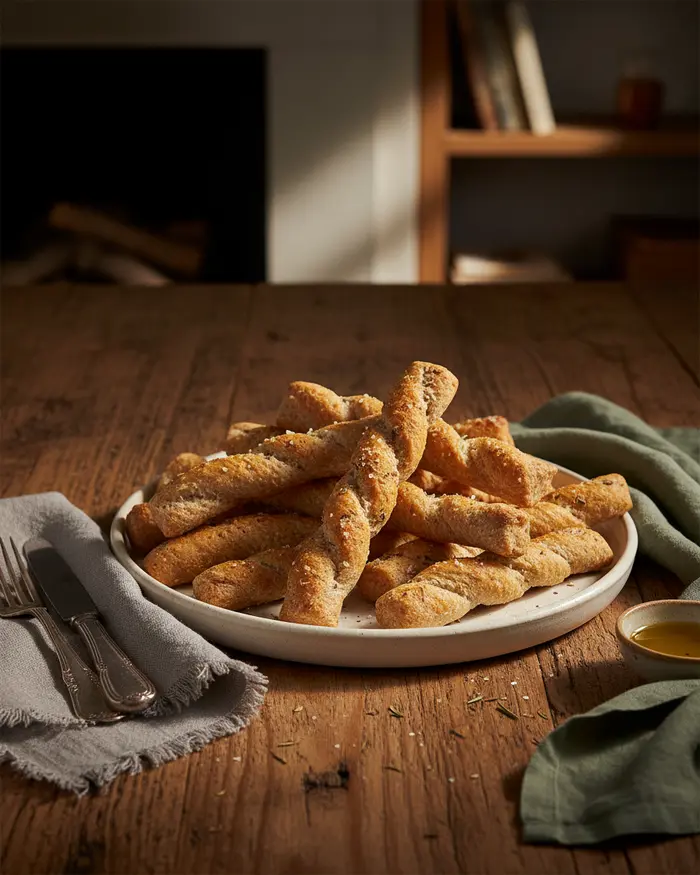
Whole grain breadsticks are best enjoyed fresh and warm, but they store beautifully for later snacking. Here’s how to keep them tasting their best.
Serving Suggestions: Serve these homemade whole wheat breadsticks alongside a big bowl of marinara, creamy tomato soup, or a fresh Italian salad. They’re also wonderful with hummus, tzatziki, or a simple olive oil and balsamic dip. For a cozy bread basket, pair them with fluffy buttermilk biscuits or homemade soft pretzels.
Storage: Let the breadsticks cool completely, then store them in an airtight container or zip-top bag at room temperature for up to 3 days. If you want to keep them longer, freeze them in a freezer-safe bag for up to 2 months — just thaw at room temperature before reheating.
Reheating: To bring back that fresh-from-the-oven warmth and crispness, wrap the breadsticks loosely in foil and reheat in a 350°F oven for 5-7 minutes. You can also pop them in the toaster oven for a few minutes until they’re warm and slightly crispy on the outside.
| Storage Method | Duration | Best For |
|---|---|---|
| Room temperature (airtight container) | Up to 3 days | Quick snacking and serving within the week |
| Refrigerator (airtight container) | Up to 5 days | Slightly longer shelf life (may lose some softness) |
| Freezer (freezer-safe bag) | Up to 2 months | Batch baking and meal prep |
| Reheat in oven (wrapped in foil) | 5-7 minutes at 350°F | Restoring crispness and warmth |
No-Waste Kitchen Magic
Breadsticks are forgiving, and there are so many creative ways to use every last bite — even the ones that get a little too crispy or don’t turn out picture-perfect.
Turn Stale Breadsticks into Croutons: Cut day-old or slightly stale breadsticks into bite-sized pieces, toss with olive oil, garlic powder, and Italian herbs, then bake at 375°F for 10 minutes until crispy. Toss them on salads or into soups for extra crunch.
Make Breadcrumbs: Pulse fully cooled (or even slightly stale) breadsticks in a food processor until you have coarse or fine breadcrumbs. Store them in an airtight container in the freezer and use them to coat chicken, top casseroles, or add texture to pasta dishes.
Breadstick Snack Mix: Break leftover breadsticks into chunks and toss them with nuts, dried fruit, and a drizzle of honey for a homemade snack mix. It’s a fun lunchbox addition or after-school treat.
Compost the Scraps: If you have any dough scraps or bits that didn’t quite make it into breadstick form, toss them in your compost bin. Flour and yeast dough break down beautifully and enrich your garden soil.
Save the Olive Oil: If you have leftover herb-infused olive oil from brushing, store it in a small jar in the fridge and use it to dress salads, drizzle over roasted veggies, or brush onto your next batch of homemade bread.
Frequently Asked Questions
Here are answers to the most common questions about making and enjoying this whole wheat breadsticks recipe.
How long do whole wheat breadsticks stay fresh?
Whole wheat breadsticks stay fresh for 2-3 days when stored in an airtight container at room temperature. For longer storage, you can freeze them for up to 3 months and reheat in the oven before serving.
Can I use all-purpose flour instead of whole wheat flour?
Yes, you can substitute all-purpose flour for whole wheat flour in a 1:1 ratio. However, the breadsticks will have a lighter texture and milder flavor. You may need to slightly reduce the liquid as all-purpose flour absorbs less moisture than whole wheat flour.
Why are my whole wheat breadsticks hard instead of crispy?
Breadsticks become hard when overbaked or when too much flour is added to the dough. To achieve crispy breadsticks, bake them just until golden brown and ensure your dough is soft and slightly sticky. Brushing with olive oil before baking also helps create the right texture.
Do I need to let the dough rise for whole wheat breadsticks?
Yes, allowing the dough to rise is important for developing flavor and achieving a lighter texture. Most recipes require one rise of about 1 hour, or until the dough doubles in size. Whole wheat dough may take slightly longer to rise than white flour dough.
What seasonings work best for whole wheat breadsticks?
Popular seasonings include garlic powder, Italian herbs, rosemary, sesame seeds, parmesan cheese, sea salt, and everything bagel seasoning. You can brush the breadsticks with olive oil or melted butter before sprinkling seasonings on top for better adherence.
Final Dish
This whole wheat breadsticks recipe is the kind of simple, wholesome baking project that fills your kitchen with warmth and your table with smiles. Whether you’re serving them alongside soup, dunking them in marinara, or packing them in lunchboxes, these homemade whole wheat breadsticks deliver comfort, flavor, and a little bit of magic in every bite.
I’d love to see your beautiful batches — tag me in your photos and let me know what toppings you loved best!
I’m Linda Sandra — a Charleston home chef and comfort-food daydreamer. Around here, cooking’s not about perfection — it’s about cozy vibes, creative twists, and food that feels like love.

Whole Wheat Breadsticks
Ingredients
- 1 cup warm water 105-115°F
- 2 teaspoons active dry yeast
- 1 tablespoon honey or maple syrup
- 2 cups whole wheat flour
- 1 cup all-purpose flour
- 1 teaspoon salt
- 2 tablespoons olive oil plus more for brushing
- Optional toppings: garlic powder dried herbs (like rosemary or oregano), sesame seeds, poppy seeds, flaky sea salt
Instructions
- In a large bowl, combine the warm water, yeast, and honey (or maple syrup). Let sit for 5-10 minutes, or until foamy.
- Add the whole wheat flour, all-purpose flour, salt, and 2 tablespoons of olive oil to the yeast mixture. Mix with a wooden spoon or stand mixer until a shaggy dough forms. If using a stand mixer, attach the dough hook.
- Knead the dough on a lightly floured surface (or in the stand mixer) for 5-7 minutes, until smooth and elastic. The dough should be slightly tacky but not sticky.
- Lightly grease a clean bowl with olive oil. Place the dough in the bowl, turning once to coat. Cover with plastic wrap or a clean kitchen towel and let rise in a warm place for 1-1.5 hours, or until doubled in size.
- Preheat your oven to 400°F (200°C). Line two baking sheets with parchment paper.
- Gently punch down the risen dough to release the air. Turn the dough out onto a lightly floured surface. Divide the dough into approximately 24 equal pieces.
- Roll each piece of dough into a pencil-thin breadstick, about 8-10 inches long. Place the breadsticks on the prepared baking sheets, leaving some space between them.
- Brush the tops of the breadsticks with a little olive oil and sprinkle with desired toppings (garlic powder, herbs, seeds, flaky sea salt).
- Bake for 12-15 minutes, or until golden brown and cooked through.
- Remove from the oven and let cool slightly on a wire rack before serving. Serve warm.