Easy Sourdough Sandwich Bread
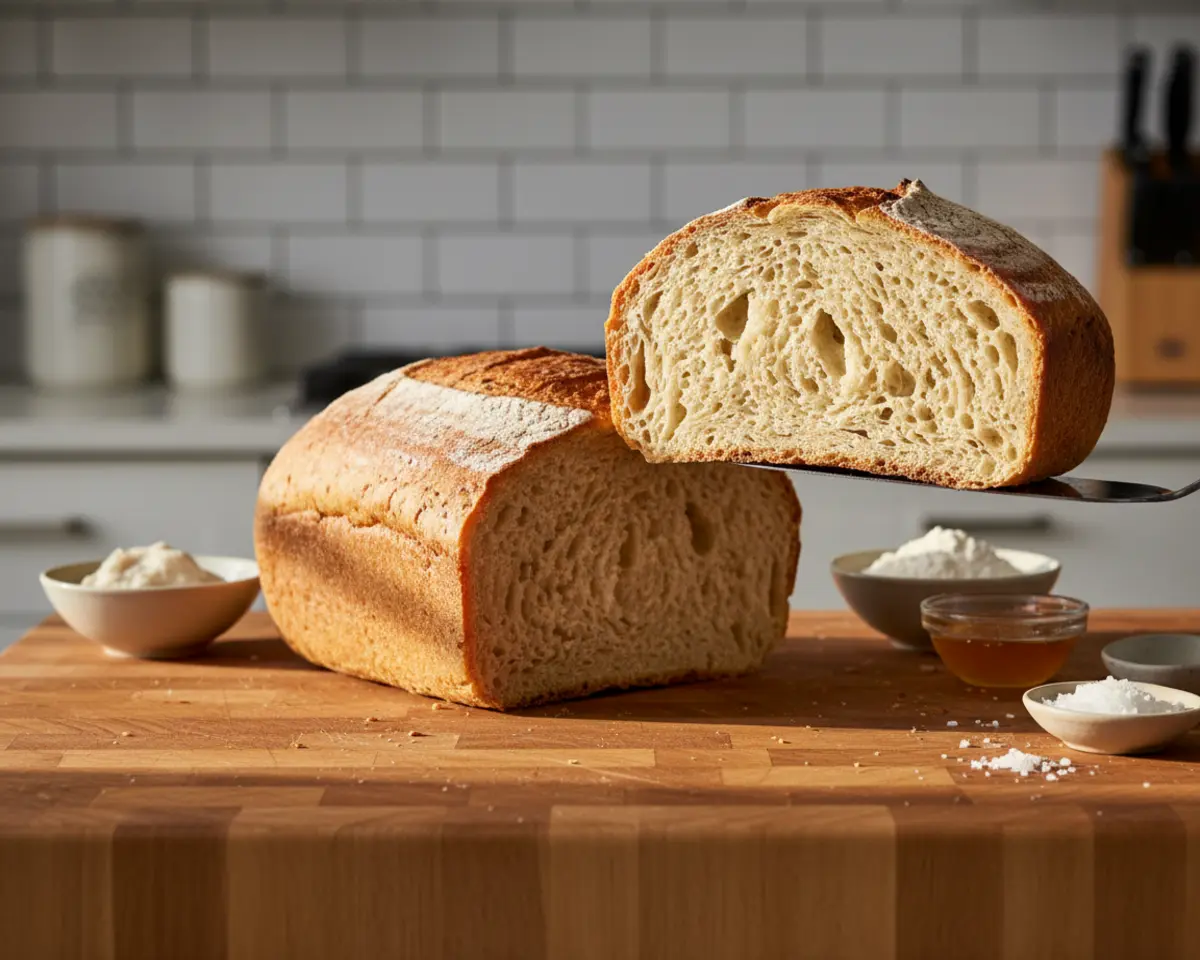
This Sourdough Sandwich Bread recipe delivers a soft, fluffy loaf perfect for everyday sandwiches, toast, and family meals. With just a few simple ingredients and your active sourdough starter, you’ll bake a gorgeous homemade bread that rivals any bakery loaf.
Hey there, friend! I’m Linda Sandra, and if you’ve been wanting to bake your own Sourdough Sandwich Bread at home, you’re in exactly the right place. This isn’t one of those crusty artisan loaves — it’s soft, sliceable, and perfect for everything from morning toast to lunchbox PB&Js.
I’ll never forget the first time I pulled a golden loaf of homemade sandwich bread from my oven — the kitchen smelled like a Charleston bakery on King Street, and my kids were hovering like little bread-loving hawks. Now it’s a weekend ritual, and honestly, nothing beats slicing into that first warm piece with a smear of butter.
Table of Contents
Quick Overview
This recipe is just the start of something delicious. Browse the entire Sourdough Recipes collection and discover all the ways you can bring more flavor to your table. Your family will thank you.
Little Snapshot: What This Recipe Delivers
This Sourdough Sandwich Bread recipe gives you a soft, pillowy loaf with a tender crumb and mild tang, baked in a standard loaf pan for perfect slicing. It’s ideal for sandwiches, toast, or simply enjoying warm with butter.
Why You’ll Love This Recipe 🌸
- This Sourdough Sandwich Bread takes less active time than scrolling through your feed — just mix, wait, and bake.
- You get bakery-quality bread without any fancy equipment or kneading marathons.
- It’s soft enough for kids’ lunches but flavorful enough to impress your pickiest brunch guest.
- According to the National Institutes of Health, sourdough fermentation can improve nutrient bioavailability and digestibility — and this recipe proves exactly why.
Quick Facts ⚡
Here’s the quick scoop on this Sourdough Sandwich Bread.
- CourseBread / Side
- Prep Time20 minutes
- Cook Time45 minutes
- Total Time24 hours (includes rise times)
- Servings12 slices
- DifficultyEasy
Nutritional Peek
| Nutrient | Amount per Serving |
|---|---|
| Calories | 180 kcal |
| Protein | 5 g |
| Carbohydrates | 32 g |
| Fat | 4 g |
| Fiber | 1 g |
| Sugar | 2 g |
What You’ll Need
You don’t need a fancy bread studio to make this magic happen. Just a few trusty kitchen tools and you’re golden.
- Stand mixer with dough hook attachment (or strong arms and a sturdy bowl)
- Large mixing bowl
- Dough whisk or stiff spatula
- Clean glass jar for feeding starter
- 9×5-inch loaf pan
- Parchment paper (optional, for easy removal)
- Kitchen scale (highly recommended for accuracy)
- Cooling rack
Ingredients
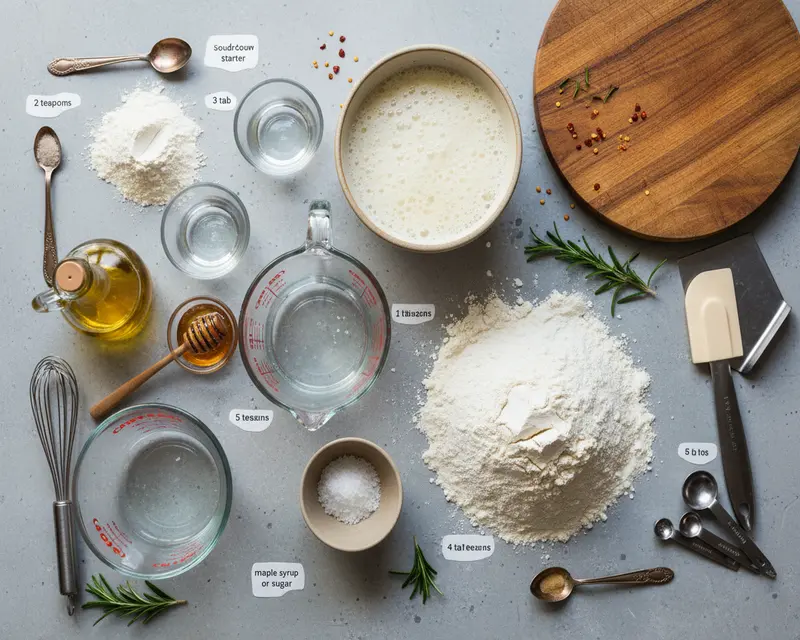
Soft Sourdough Sandwich Bread starts with your bubbly, active starter and a handful of pantry staples. I’ve grouped everything by function so you can see exactly what each ingredient does — from building structure to adding that gentle sweetness.
| Group | Ingredient | Amount | Notes |
|---|---|---|---|
| Starter Feed (Day 1 Morning) | Sourdough starter | 2 teaspoons | Your sleepy starter, ready to wake up |
| Starter Feed | All-purpose flour | 3 tablespoons | Feeds the wild yeast |
| Starter Feed | Water | 5 teaspoons | Room temperature is perfect |
| Dough (Day 1 Evening) | Active sourdough starter | 1/4 cup | Bubbly and doubled from morning feed |
| Dough | Water | 1 cup + 2 1/2 tablespoons | Slightly warm helps the dough come together |
| Dough | Olive oil | 4 tablespoons | Creates that soft sandwich texture |
| Dough | Honey | 1 tablespoon | Maple syrup or sugar work too |
| Dough | All-purpose flour | 4 cups + 2 tablespoons | Bread flour works if that’s what you’ve got |
| Dough | Sea salt | 2 teaspoons | Balances the sweetness beautifully |
Step-by-Step Instructions
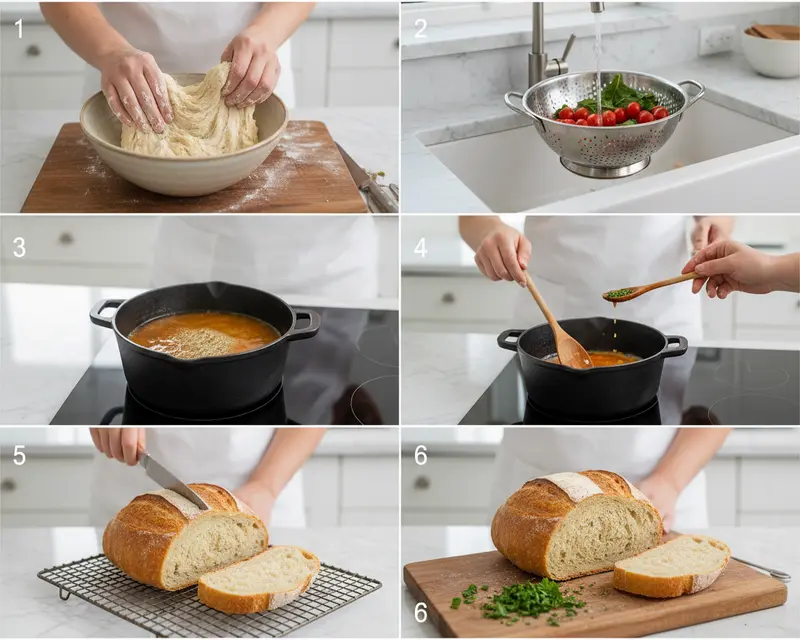
Let’s make this happen. Sourdough Sandwich Bread follows a gentle two-day rhythm that fits beautifully into your life — a little morning love, an evening mix, and a next-day bake.
Day 1 — Morning (7 AM): Feed Your Sourdough Starter
Twelve hours before you plan to mix your dough, wake up your starter with a fresh feeding. In a clean glass jar, combine 2 teaspoons of your existing starter with 3 tablespoons of all-purpose flour and 5 teaspoons of water. Stir until smooth, cover loosely with a lid or cloth, and let it rise at room temperature (68-72°F) until it’s doubled and bubbly.
Day 1 — Evening (7 PM): Mix the Dough
Add your active starter, water, olive oil, honey, flour, and sea salt to the bowl of your stand mixer. Use a dough whisk or stiff spatula to bring everything together into a shaggy, sticky mass with no dry flour pockets visible. Cover the bowl with a damp towel or plastic wrap and let it rest for 1 hour — this is called autolyse, and it helps the flour fully hydrate.
Day 1 — Evening (8 PM): Knead and First Rise
Attach your dough hook and knead the dough on low speed (speed 3 on most mixers) for 8-10 minutes until the dough is smooth, elastic, and pulls away from the sides of the bowl. Remove the dough hook, cover the bowl again, and allow the dough to rise at room temperature for 10-12 hours or until doubled in size. The long fermentation builds flavor and breaks down gluten for easier digestion.
Day 2 — Morning (6 AM): Shape and Second Rise
Turn your puffy dough out onto a lightly floured work surface and gently press it into a rectangle with the short end closest to you. Fold the left and right sides into the center like a letter. Starting from the far end, roll the dough toward yourself into a tight log, using your palms to create gentle tension on the surface. Pinch the seam and ends to seal.
Transfer the shaped loaf seam-side down into a lightly greased 9×5-inch loaf pan (or line with parchment paper for easy removal). Leave it uncovered at room temperature until the dough crowns about 1 inch above the rim of the pan — this usually takes 2-3 hours depending on your kitchen warmth.
Day 2 — Morning (9 AM): Bake
Preheat your oven to 450°F (232°C). Once hot, slide the loaf pan onto the center rack and immediately reduce the temperature to 375°F (190°C). Bake for 45-50 minutes until the crust is deeply golden and the internal temperature reads 190-200°F on an instant-read thermometer.
Let the bread cool in the pan for 10-15 minutes, then turn it out onto a cooling rack. Resist slicing until it’s completely cool — I know it’s hard, but warm bread gums up when you cut it!
Pro Tips & Gentle Guidance
Soft Sourdough Sandwich Bread is forgiving, but a few little tricks will take your loaf from good to bakery-gorgeous every single time. These tips come straight from my Charleston kitchen, where I’ve baked more loaves than I can count.
Use a Kitchen Scale for Consistency
Measuring flour by weight instead of volume makes a huge difference in bread baking. All-purpose flour can vary wildly in cup measurements depending on how you scoop it, but 4 cups plus 2 tablespoons is roughly 520 grams. Weighing ensures your dough hydration is spot-on every time.
Keep Your Dough Warm (But Not Hot)
Sourdough thrives at 68-72°F, but if your kitchen runs cold, tuck your covered bowl into the oven with just the light on. That gentle warmth is perfect for encouraging a strong rise without overproofing.
Don’t Skip the Autolyse Rest
That 1-hour rest after mixing lets the flour absorb the water fully, which makes kneading easier and builds better gluten structure. It’s a small pause that pays off in texture and tenderness.
Check for the Windowpane Test
After kneading, pinch off a small piece of dough and gently stretch it between your fingers. If it forms a thin, translucent “windowpane” without tearing, your gluten is perfectly developed. If it rips, knead for another minute or two.
Watch the Crown, Not the Clock
Your second rise is done when the dough peaks about an inch above the loaf pan rim, not when the timer goes off. Kitchen temperature, starter strength, and humidity all affect timing, so trust your eyes more than the recipe times.
Cool Completely Before Slicing
I know it’s tempting to slice into warm bread, but the interior is still steaming and setting. Cutting too early leads to gummy, compressed slices. Wait at least an hour for the cleanest cuts and best texture. According to King Arthur Baking, the cooling process is actually part of the baking, allowing moisture to redistribute evenly.
Variations & Adaptations
Once you’ve mastered the classic Sourdough Sandwich Bread, the fun really begins. Here are some of my favorite ways to riff on this recipe and make it your own.
Whole Wheat Sourdough Sandwich Bread
Swap up to half of the all-purpose flour (about 2 cups) with whole wheat flour for a nuttier, heartier loaf. Add an extra 2-3 tablespoons of water since whole wheat absorbs more liquid. The result is wholesome, fiber-rich, and perfect for hearty steak sandwiches.
Honey Oat Sandwich Bread
Replace 1/2 cup of the flour with rolled oats (blend them into oat flour in a food processor first). Increase the honey to 2 tablespoons for a touch more sweetness. This version is fantastic for breakfast toast with jam.
Herb and Garlic Sourdough
Fold in 2 tablespoons of chopped fresh rosemary, thyme, or basil and 2 cloves of minced garlic during the kneading stage. This savory twist is incredible alongside soups or turned into garlic bread for pasta night.
Cinnamon Raisin Swirl
After pressing your dough into a rectangle for shaping, brush it lightly with melted butter, sprinkle with cinnamon sugar, and scatter 1/2 cup of raisins over the surface. Roll it up tightly and bake as directed. Morning toast just got a major upgrade.
Dairy-Free and Vegan Adaptation
This recipe is already dairy-free! To make it fully vegan, simply swap the honey for maple syrup or coconut sugar. The texture and rise remain beautifully soft.
Seeded Multigrain Loaf
Fold in 1/4 cup each of sunflower seeds, flax seeds, and sesame seeds during kneading. Brush the top of the shaped loaf with water and sprinkle extra seeds on top before the second rise. It adds crunch, nutrition, and visual appeal.
Quick Fixes for Sourdough Sandwich Bread
Even the most experienced bakers hit little snags. Here’s how to troubleshoot common Sourdough Sandwich Bread hiccups with grace and confidence.
Problem: My dough didn’t rise much overnight.
Your starter might not have been active enough, or your kitchen was too cold. Give it more time — sourdough is patient. If it’s been 14-16 hours and still flat, your starter may need a few more feedings to build strength before baking.
Problem: The dough is too sticky to handle.
Sourdough dough is naturally tacky, but if it’s unmanageably wet, lightly flour your work surface and hands. Avoid adding too much extra flour during shaping — a bench scraper is your best friend here for handling sticky dough without overworking it.
Problem: My loaf didn’t rise above the pan rim.
This usually means the dough was underproofed or your starter wasn’t strong enough. Let it rise longer — even if it takes 4-5 hours. A slightly overproofed loaf is better than an underproofed brick.
Problem: The crust is too dark or the bottom burned.
Your oven might run hot, or the pan was too close to the bottom heating element. Next time, lower the temperature by 25°F and place the pan on the center rack. You can also tent the loaf loosely with foil for the last 15 minutes of baking.
Problem: The bread is dense and gummy inside.
This often happens when you slice the bread before it’s fully cooled. The interior needs time to set and finish steaming. Wait at least an hour, or better yet, two, before cutting in.
Problem: My loaf has a strong sour taste.
A longer, cooler fermentation increases acidity. If you prefer a milder tang, shorten the first rise to 8 hours or let the dough rise in a slightly warmer spot to speed up fermentation and reduce sourness.
Storage & Reheating
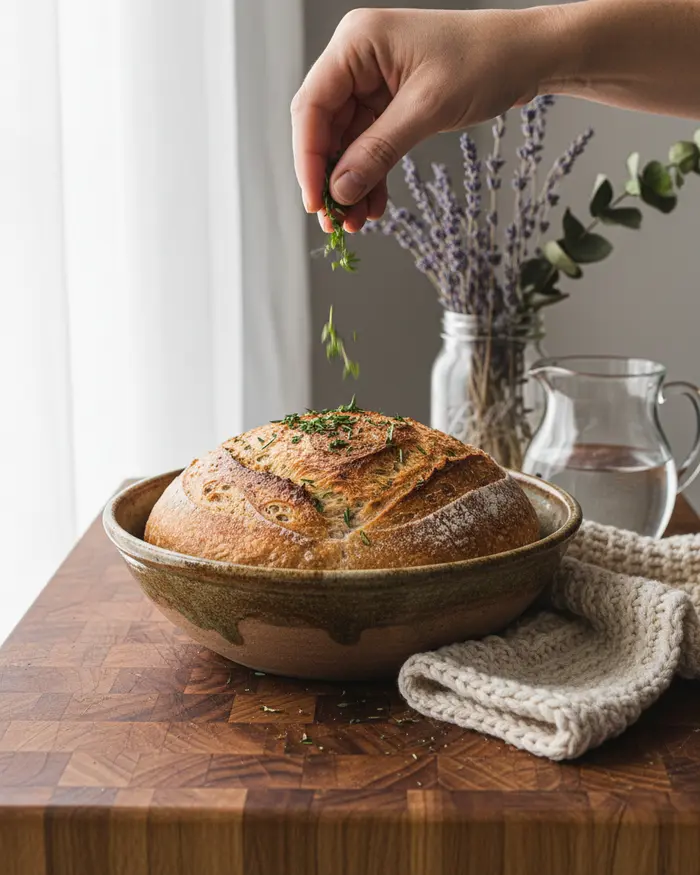
Soft Sourdough Sandwich Bread stays fresh longer than most homemade breads thanks to the natural preservatives in sourdough fermentation. Here’s how to keep it at its best.
Serving Suggestions
Slice this beauty thick for hearty sandwich boards, toast it golden with butter and jam, or use it for French toast that’ll make your whole family swoon. It’s also perfect for grilled cheese, avocado toast, or simple buttered slices alongside soup.
Storage
Once completely cooled, store your Sourdough Sandwich Bread in an airtight plastic bag or bread box at room temperature for up to 5 days. Avoid the fridge — it dries out bread faster. If you notice it starting to stale, pop slices in the toaster to refresh them.
Reheating and Freezing
To freeze, slice the loaf first, then wrap tightly in plastic wrap and place in a freezer-safe bag. Frozen slices stay fresh for up to 3 months and can go straight from freezer to toaster. For reheating whole slices, wrap in foil and warm in a 300°F oven for 10 minutes.
| Storage Method | Duration | Best For |
|---|---|---|
| Room temperature (airtight bag) | Up to 5 days | Daily slicing and sandwiches |
| Refrigerator | Not recommended | Dries out bread quickly |
| Freezer (sliced, wrapped) | Up to 3 months | Long-term storage, easy toasting |
| Toasted from frozen | Immediate | Quick breakfast or snacks |
No-Waste Kitchen Magic
Nothing goes to waste in a cozy kitchen, and Sourdough Sandwich Bread is full of opportunities to stretch every crumb and make magic from leftovers.
Turn Stale Bread into Croutons
Cube leftover bread, toss with olive oil, garlic powder, and sea salt, then bake at 375°F for 10-12 minutes until golden and crispy. Perfect for salads, soups, or snacking straight from the pan.
Make Sourdough Bread Crumbs
Tear stale slices into chunks and pulse in a food processor until you have fine crumbs. Store in an airtight container in the freezer and use for meatballs, casserole toppings, or crispy coatings for chicken. You can even fold them into sourdough cheesy breadsticks for extra texture.
Create Sourdough Bread Pudding
Whisk together eggs, milk, sugar, vanilla, and cinnamon, then pour over cubed stale bread in a baking dish. Bake until golden and custard-like for a comforting dessert or brunch treat.
Blend into Panzanella Salad
Toss cubed sourdough with ripe tomatoes, cucumbers, red onion, fresh basil, olive oil, and red wine vinegar for a rustic Italian bread salad that celebrates summer produce and leftover loaves.
Feed Your Starter with Discard
If you have leftover starter after feeding, don’t toss it! Use it in sourdough discard peach cobbler or sourdough discard chocolate chip cookies for a sweet treat that honors your starter’s hard work.
Frequently Asked Questions
Got questions about baking Sourdough Sandwich Bread? Here are the answers to the most common ones to help you bake with confidence.
How long does sourdough sandwich bread stay fresh?
Sourdough sandwich bread typically stays fresh for 3-5 days when stored at room temperature in a bread box or paper bag. For longer storage, you can refrigerate it for up to a week or freeze it for up to 3 months. The natural acids in sourdough help preserve the bread longer than conventional bread.
Can I use sourdough sandwich bread for toast?
Yes, sourdough sandwich bread makes excellent toast. Its sturdy texture holds up well to toasting and develops a crispy exterior while maintaining a soft interior. The tangy flavor of sourdough adds extra depth to your toast, making it perfect for both sweet and savory toppings.
Is sourdough sandwich bread easier to digest than regular bread?
Sourdough sandwich bread is often easier to digest than regular bread because the fermentation process breaks down gluten and phytic acid. The beneficial bacteria and longer fermentation time pre-digest some of the starches, which can reduce bloating and make nutrients more bioavailable. However, it still contains gluten and is not suitable for people with celiac disease.
How is sourdough sandwich bread different from artisan sourdough?
Sourdough sandwich bread is typically softer and has a tighter crumb structure compared to artisan sourdough, making it better for slicing and sandwiches. It often contains added fats like butter or oil for a softer texture and may have a milder tang. Artisan sourdough usually has a chewier crust, larger air pockets, and a more pronounced sour flavor.
What is the best way to slice sourdough sandwich bread?
The best way to slice sourdough sandwich bread is to let it cool completely first, ideally for at least one hour after baking. Use a sharp serrated bread knife and cut with a gentle sawing motion rather than pressing down. For even slices, turn the loaf on its side and cut from the top down. A bread slicing guide can help ensure uniform thickness.
Final Dish
There’s something deeply satisfying about pulling a golden loaf of Sourdough Sandwich Bread from your oven — the crackle of the crust, the soft, pillowy interior, and that gentle sourdough tang that makes every bite feel like home. Whether you’re making school lunches, breakfast toast, or a celebratory sandwich spread, this bread delivers comfort and quality every single time.
I hope this recipe becomes a staple in your kitchen, just like it has in mine. If you bake it, I’d love to see your beautiful loaves — tag me in your photos, drop a comment below, and let me know how it turned out. Happy baking, friend!
I’m Linda Sandra — a Charleston home chef and comfort-food daydreamer. Around here, cooking’s not about perfection — it’s about cozy vibes, creative twists, and food that feels like love.
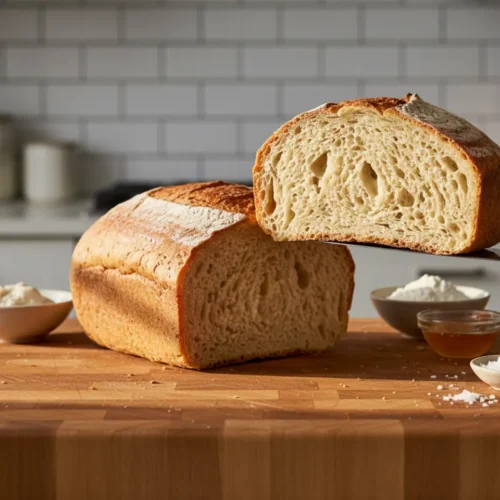
Sourdough Sandwich Bread
Ingredients
Sourdough Starter Feed
- 2 teaspoons sourdough starter
- 3 tablespoons all-purpose flour
- 5 teaspoons water
Dough
- ¼ cup sourdough starter active
- 1 cup + 2 1/2 tablespoons water
- 4 tablespoons olive oil
- 1 tablespoon honey maple syrup or sugar
- 4 cups + 2 tablespoons all-purpose flour
- 2 teaspoons sea salt
Instructions
- Day 1 – 7 AM – Feed your sourdough starter: 12 hours before you mix the dough feed your sourdough starter. Add 2 teaspoons sourdough starter, 3 tablespoons all-purpose flour, and 5 teaspoons water to a clean jar, stir, cover loosely, and let rise at room temperature, 68-72°F (20-22°C), until doubled.
- Day 1 – 7 PM – Mix the dough: Add the dough ingredients (1/4 cup active sourdough starter, 1 cup + 2 1/2 tablespoons water, 4 tablespoons olive oil, 1 tablespoon honey, 4 cups + 2 tablespoons all-purpose flour, and 2 teaspoons sea salt) to the bowl of a stand mixer. Use a dough whisk or a stiff spatula to get the dough started. Switch to your hands and mix the dough until it resembles a shaggy mess and there are no dry bits in the bowl. Cover the bowl and let the dough rest for 1 hour for the flour to fully absorb the water.
- Day 1 – 8 PM – Knead and First Rise: Mix the dough on LOW speed (3) for 8-10 minutes, using the dough hook attachment. Remove the dough hook, cover the bowl, and allow the dough to rise at room temperature, 68-72°F (20-22°C), for 10-12 hours or until it has doubled in size.
- Day 2 – 6 AM – Shape and second rise: Turn the dough out onto a lightly floured work surface and gently press it into a rectangle with the short end closest to you. Fold the left and right sides of the dough into the middle. Starting from the end farthest from you, roll the dough towards yourself into a log shape. Use your hands to gently cup the dough and pull it towards yourself to create tension on the outside. Pinch the ends to seal any edges.
- Transfer the dough, seam-side down, into a lightly greased bread pan. For easier removal, you can also line the pan with parchment paper. Allow the dough to rest at room temperature, uncovered until the dough has risen 1 inch above the rim of the pan, about 2-3 hours depending on the temperature of your kitchen.
- Day 2 – 9 AM – Bake: Preheat the oven to 450°F (232°C). Transfer the pan to the oven and turn the oven down to 375°F (190°C). Bake for 45-50 minutes.
- Allow the bread to cool in the pan for 10-15 minutes before transferring the loaf to a cooling rack.