Tini’s Mac and Cheese
I’m Linda Sandra — a Charleston home cook who believes comfort food should feel like a warm hug, and this Tini’s Mac and Cheese recipe is exactly that kind of magic. When TikTok creator Tini Younger shared her ultra-creamy, three-cheese pasta creation, the internet collectively lost its mind (in the best way possible).
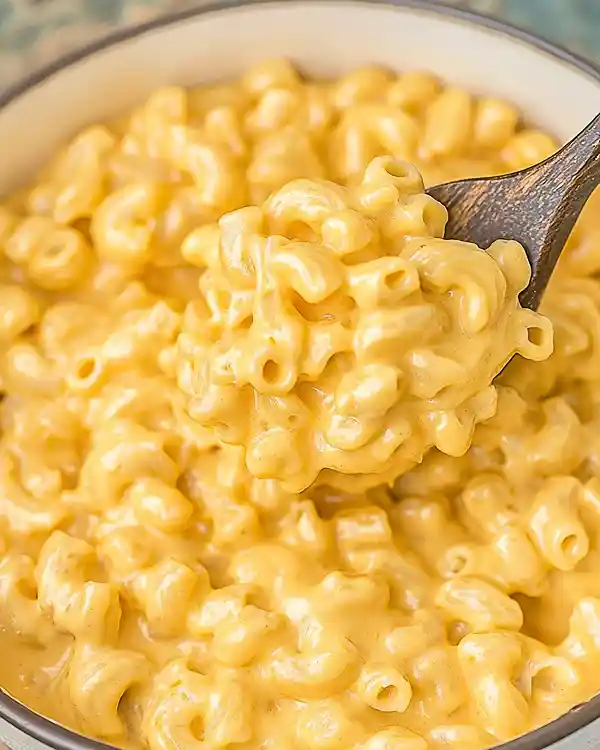
This isn’t your average boxed mac and cheese. We’re talking mozzarella, Colby Jack, and sharp cheddar melted into a velvety sauce with cavatappi noodles — those spiral tubes that catch every bit of cheesy goodness. It’s the kind of baked mac and cheese that makes you forget about portion control.
I first made this on a rainy Tuesday when my family needed serious comfort food. The kitchen smelled like a gourmet grilled cheese, and my kids were literally hovering by the oven asking “Is it ready yet?” every two minutes. That’s when I knew this recipe was a keeper.
What This Recipe Delivers
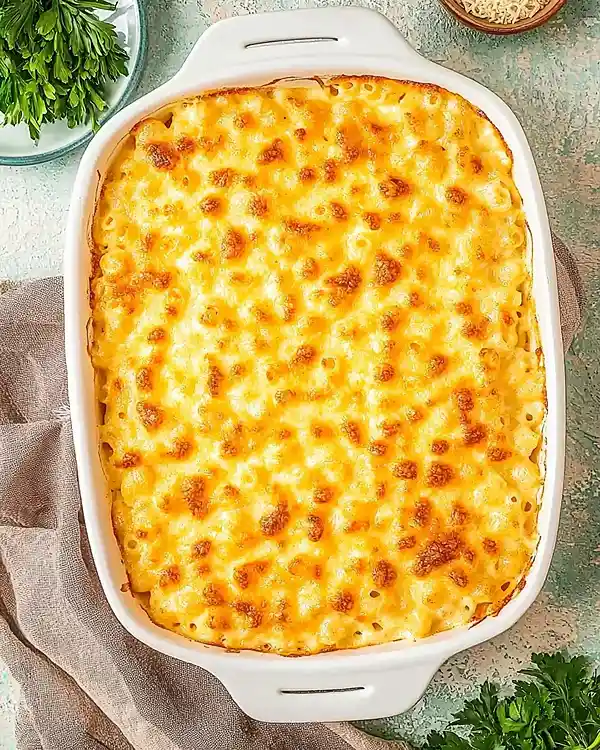
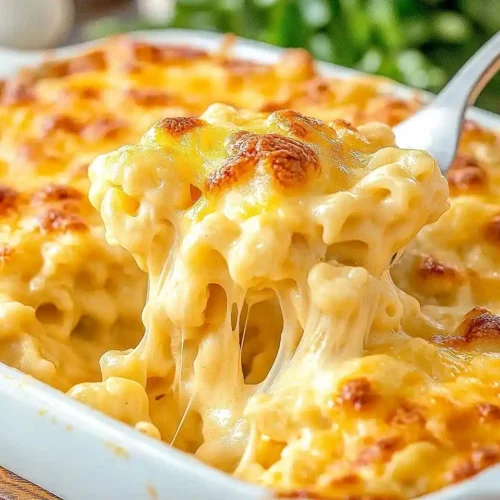
This Tini’s Mac and Cheese combines three melty cheeses (mozzarella, Colby Jack, and sharp cheddar) with cavatappi pasta in a rich, evaporated milk and cream sauce, baked until bubbly and golden. It takes about 45 minutes start to finish and serves 8-10 hungry people with that signature gooey, stretchy cheese pull everyone’s obsessed with.
Why You’ll Love This Recipe 🌸
- This three cheese mac and cheese uses cavatappi noodles that trap every bit of sauce — no sad, naked noodles here.
- It’s fancy enough for potlucks but secretly easy enough for weeknight dinner when you need a win.
- The cheese pull is absolutely Instagram-worthy, and your family will think you spent hours on it (spoiler: you didn’t).
- According to Serious Eats in their ultimate baked mac and cheese guide, evaporated milk creates a smoother sauce than regular milk — and this recipe proves exactly why.
Quick Facts ⚡
Here’s the quick scoop on this Tini’s Mac and Cheese.
- CourseMain Dish
- Prep Time15 minutes
- Cook Time30 minutes
- Total Time45 minutes
- Servings8-10 servings
- DifficultyEasy
Table of Contents
Tini’s Mac and Cheese
Equipment
- Large mixing bowls
- Box grater
- Large pot
- Colander
- Small prep bowl
- Large skillet or saucepan
- Whisk
- 9×13 inch baking pan
- Wooden spoon or spatula
Ingredients
Ingredients
- 1 pound Mozzarella cheese block, shredded
- 1 pound Colby Jack cheese shredded
- 8 ounces Sharp cheddar cheese yellow preferred, shredded
- 1 pound Cavatappi pasta
- 1 teaspoon Garlic powder
- 1 teaspoon Smoked paprika
- 1 teaspoon Coarse salt
- ½ teaspoon Ground black pepper
- 3 tablespoons Salted butter
- 3 tablespoons All-purpose flour
- 12 ounces Evaporated milk 1 can
- 2 cups Heavy cream
- 1 tablespoon Dijon mustard
- Fresh parsley chopped, for garnish
Instructions
- Preheat oven to 350°F.
- Shred mozzarella, Colby Jack, and cheddar and divide into two bowls.
- Cook cavatappi in salted water until al dente, then drain.
- Mix garlic powder, smoked paprika, salt, and pepper in a small bowl.
- Melt butter in a skillet, then add half the seasoning blend and stir.
- Add flour and whisk to form a roux; cook 1–2 minutes.
- Whisk in evaporated milk, then add heavy cream, remaining seasoning, and Dijon mustard. Cook until thickened.
- Add half the cheese mixture gradually, stirring until melted and smooth.
- Stir cooked pasta into the cheese sauce until fully coated.
- Spread half the pasta mixture in a greased baking pan and top with a third of the remaining cheese. Add remaining pasta and top with all remaining cheese.
- Bake 25–30 minutes until bubbly, then broil 1–2 minutes to brown the top.
- Garnish with parsley and rest 5 minutes before serving.
Notes
Nutritional Peek
Here’s what you’re working with per generous serving (because let’s be real, no one’s having a tiny portion of this gooey mac and cheese):
| Nutrient | Amount per Serving |
|---|---|
| Calories | 620 kcal |
| Protein | 28g |
| Carbohydrates | 38g |
| Fat | 38g |
| Saturated Fat | 23g |
| Fiber | 2g |
| Sugar | 6g |
| Sodium | 680mg |
Ingredients
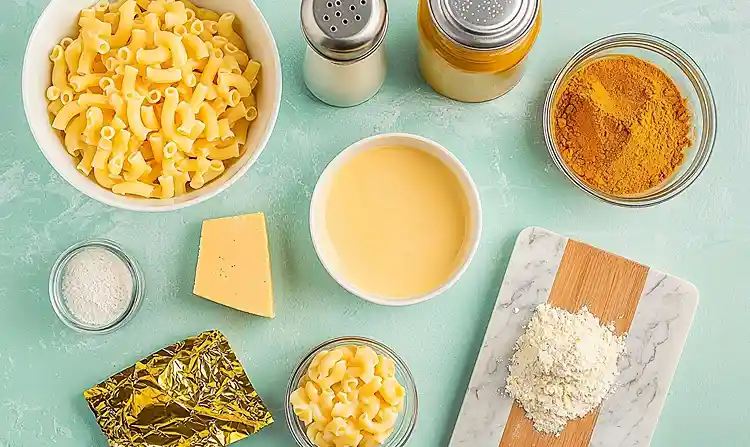
Let’s talk about what makes this mac and cheese recipe so ridiculously good. For the cheese blend — mozzarella, Colby Jack, and sharp cheddar — you’ll want blocks from the deli counter, not pre-shredded bags (those have anti-caking agents that mess with the melt). For the sauce base — evaporated milk, heavy cream, and butter — room temperature works best for a silky texture. And for the seasoning — garlic powder, smoked paprika, salt, pepper, and Dijon mustard — these add depth without overpowering that gorgeous cheese flavor.
| Amount | Ingredient |
|---|---|
| 1 pound | Mozzarella cheese (get a block from the deli; it’s harder, cheaper, and easier to shred than the softer packaged balls) |
| 1 pound | Colby Jack cheese |
| 8 ounces | Sharp cheddar (yellow preferred) |
| 1 pound | Cavatappi pasta |
| 1 teaspoon | Garlic powder |
| 1 teaspoon | Smoked paprika |
| 1 teaspoon | Coarse salt |
| ½ teaspoon | Ground black pepper |
| 3 tablespoons | Salted butter |
| 3 tablespoons | All-purpose flour |
| 1 can (12 oz.) | Evaporated milk |
| 2 cups | Heavy cream |
| 1 tablespoon | Dijon mustard |
| Fresh | Chopped parsley for garnish |
Tools You’ll Actually Use
- Large mixing bowls (at least two)
- Box grater or food processor with grating attachment
- Large pot for boiling pasta
- Colander
- Small prep bowl for seasonings
- Large skillet or saucepan (at least 4-quart)
- Whisk
- 9×13-inch baking pan
- Wooden spoon or spatula
How to Make Tini’s Mac and Cheese
Making Tini’s Mac and Cheese from scratch is way easier than you’d think. Let me walk you through it like we’re cooking together in my kitchen.
Step 1: Preheat your oven to 350°F. This gives you time to prep everything without rushing.
Step 2: Shred the blocks of cheese — 1 pound mozzarella, 1 pound Colby Jack, and 8 ounces sharp cheddar — into a large mixing bowl using a box grater. Toss them together so you get an even blend, then split the mixture in half into two separate bowls. Trust me, dividing it now makes the layering so much easier later.
Step 3: Cook 1 pound of cavatappi pasta in well-salted water (the water should taste like the ocean) according to package directions for al dente. Those corkscrew noodles need to be firm because they’ll continue cooking in the oven. Drain in a colander and set aside — don’t rinse them or the cheese sauce won’t stick as well.
Step 4: While the pasta’s bubbling away, combine 1 teaspoon garlic powder, 1 teaspoon smoked paprika, 1 teaspoon coarse salt, and ½ teaspoon ground black pepper in a small prep bowl. Mix it up and set it aside — this seasoning blend is what gives the sauce that extra oomph.
Step 5: Melt 3 tablespoons salted butter in a large skillet over medium heat. Once it’s foamy, add half of your seasoning mix and stir it around for about 30 seconds until it smells amazing.
Step 6: Add 3 tablespoons all-purpose flour to the melted butter and immediately start whisking like your life depends on it. Cook this roux for 1 to 2 minutes — it should be bubbling and turning a light golden color. This step cooks out the raw flour taste and creates the base for your silky cheese sauce.
Step 7: Pour in the 12-ounce can of evaporated milk and whisk constantly. You’ll see it start to thicken pretty quickly. Once it begins to bubble in the middle of the pan (that’s when you know the flour is fully activated), add 2 cups heavy cream, the remaining half of the seasoning mix, and 1 tablespoon Dijon mustard. Keep whisking until the sauce thickens to a consistency that coats the back of a spoon.
Step 8: Now for the fun part — add half of your shredded cheese mixture to the skillet, a handful at a time. Stir constantly and let each handful melt completely before adding more. This gradual method prevents the cheese from clumping and creates that smooth, velvety texture we’re after. The sauce should be thick, glossy, and absolutely irresistible.
Step 9: Add the cooked cavatappi pasta to your cheese sauce and stir everything together until every single noodle is coated. It should look obscenely cheesy — that’s exactly what we want.
Step 10: Transfer half of the pasta mixture to your greased 9×13-inch baking pan and spread it evenly. Sprinkle a third of your remaining cheese over this layer. Add the rest of the mac and cheese on top, then finish with the remaining cheese in a generous, beautiful blanket.
Step 11: Bake for 25 to 30 minutes until the edges are bubbling and the cheese on top is melted. Then switch your oven to broil and give it 1 to 2 minutes to create that gorgeous golden-brown, bubbly top. Watch it like a hawk during broiling — it goes from perfect to burnt in seconds.
Step 12: Pull it out of the oven and garnish with fresh chopped parsley. Let it rest for about 5 minutes before serving (I know, torture) so the sauce can set up slightly and you don’t burn your mouth in your excitement.
Pro Tips & Gentle Guidance
This homemade mac and cheese is already pretty foolproof, but here are some tricks I’ve learned from making it about a dozen times.
Shred your own cheese from blocks instead of buying pre-shredded. Those bags contain cellulose (wood pulp, yep) to prevent clumping, which means your sauce won’t be as smooth and melty. The deli blocks are also usually cheaper per pound.
Room temperature ingredients are your friend here. If your butter, evaporated milk, and cream are cold straight from the fridge, the sauce takes longer to come together and you risk lumps. I usually pull everything out while I’m prepping the cheese.
Don’t skip the al dente pasta step. Since your cavatappi mac and cheese bakes for another 25-30 minutes, starting with slightly undercooked noodles prevents them from turning mushy. They should have a tiny bit of resistance when you bite into them.
The Dijon mustard isn’t just random — it adds tanginess that cuts through all that cheese richness and makes the flavors pop. If you’re worried about mustard flavor, don’t be. It completely disappears into the background and just makes everything taste more “mac and cheese-y.”
If you’re looking for more ways to perfect your cheese game King Arthur Baking’s detailed cheese sauce techniques cover everything from preventing graininess to adjusting consistency.
This is just one of the many gems in our Classic Comfort Foods series. Every recipe there has been tested and loved in real kitchens, and I promise there’s something for every craving. Go see for yourself.
Quick Fixes for Tini’s Mac and Cheese
Problem: The sauce is too thick and gloppy. Add a splash of whole milk or cream, about ¼ cup at a time, and stir it in before baking. Sometimes the cheese blend or evaporated milk brand can vary slightly in moisture content.
Problem: The top is browning too fast but the inside isn’t hot enough. Cover your pan loosely with aluminum foil for the first 20 minutes of baking, then remove it for the final 10 minutes. This lets the inside heat through before the top gets too dark.
Problem: The cheese sauce broke and looks grainy. Your heat was probably too high or the cheese was added too fast. If it happens, remove from heat immediately and whisk in a tablespoon of cold cream. Prevention tip: keep your heat at medium and add cheese gradually.
Problem: The mac and cheese is dry after baking. This usually means the pasta absorbed too much sauce. Next time, add an extra ½ cup of heavy cream to your sauce before baking, or pull it from the oven when it still looks slightly wet — it’ll continue to thicken as it cools.
Variations & Adaptations
This baked mac and cheese is incredibly versatile once you nail the base recipe. Here are some fun ways to make it your own.
Buffalo Chicken Mac: Stir in 2 cups of shredded rotisserie chicken and ¼ cup of Frank’s RedHot sauce with the pasta. Top with crumbled blue cheese before baking.
Bacon & Jalapeño: Mix in 6 strips of crumbled crispy bacon and 2 diced jalapeños (seeds removed if you’re spice-sensitive). The smoky-spicy combo is addictive.
Lobster Upgrade: Fold in 1 pound of cooked lobster meat during the last 10 minutes of baking. Fancy enough for date night, easy enough for a Tuesday.
Gluten-Free Version: Swap the cavatappi for your favorite gluten-free pasta and use a gluten-free flour blend instead of all-purpose in the roux. I’ve had great results with Bionaturae GF elbows.
Veggie-Packed: Stir in steamed broccoli florets, roasted cauliflower, or sautéed mushrooms with the pasta. It won’t fool anyone into thinking it’s health food, but at least you’re getting some vegetables in there.
You might also love this cheesy garlic pizza bread as a side, or check out my complete guide to cavatappi noodles if you’re obsessed with these pasta shapes now.
Serving, Storage & Reheating
Serve this gooey mac and cheese straight from the oven while it’s at peak bubbliness. It pairs beautifully with simple proteins like rotisserie chicken, grilled steak, or even just a crisp green salad to balance all that richness. I also love it alongside Korean-inspired noodles for a fun fusion dinner party.
If you somehow manage not to demolish the entire pan in one sitting, store leftovers in an airtight container in the fridge for up to 4 days. The cheese sauce will thicken as it cools, but that’s totally normal.
To reheat, add a splash of milk (about 2 tablespoons per serving) and warm it in the microwave in 1-minute intervals, stirring between each, until heated through. Or reheat in a 350°F oven covered with foil for 15-20 minutes. The microwave is faster, but the oven brings back more of that fresh-baked texture.
No-Waste Kitchen Magic
Got leftover Tini’s Mac and Cheese? Here’s how to give it a delicious second life instead of letting it languish in the back of your fridge.
Mac and Cheese Balls: Scoop cold mac and cheese into portions, roll them in panko breadcrumbs, and pan-fry until crispy. Instant appetizers that’ll make you look like a genius.
Stuffed Peppers: Hollow out bell peppers, stuff them with leftover mac and cheese, top with extra shredded cheese, and bake at 375°F for 25 minutes. It’s like two comfort foods had a baby.
Mac and Cheese Grilled Cheese: Spread cold mac and cheese between two slices of buttered bread and grill until golden. Is it over the top? Absolutely. Is it amazing? Also absolutely.
Pasta Frittata: Mix leftover mac and cheese with beaten eggs (about 4 eggs per 2 cups of mac and cheese) and bake in a skillet for a protein-packed breakfast or brunch situation.
Soup Booster: Thin out leftover mac and cheese with chicken or vegetable broth and turn it into a creamy cheese soup. Add some roasted vegetables or shredded chicken for a complete meal.
Tini’s Mac and Cheese FAQs
How do I make Tini’s Mac and Cheese from scratch?
Start by shredding three types of cheese (mozzarella, Colby Jack, and sharp cheddar), then make a roux with butter and flour. Add evaporated milk and heavy cream to create the sauce, melt in half your cheese, toss with cooked cavatappi pasta, layer in a baking pan with remaining cheese, and bake at 350°F for 25-30 minutes until bubbly.
Is Tini’s mac n cheese recipe actually good?
Yes, it’s legitimately delicious — that’s why it went viral. The combination of three melty cheeses with cavatappi noodles creates incredible texture, and the evaporated milk makes the sauce ultra-creamy. It’s richer than standard mac and cheese recipes but not heavy or overly complicated.
Why is everyone mad about Tini’s Mac and Cheese recipe?
Some people got frustrated because the original viral video wasn’t super detailed, and when home cooks tried to recreate it without measurements, results varied. There was also some drama about recipe ownership and whether it was truly “original.” But honestly, the recipe itself works beautifully when you have proper measurements and clear instructions like these.
Can I freeze Tini’s Mac and Cheese before baking?
Absolutely! Assemble the entire dish in a freezer-safe baking pan, cover tightly with plastic wrap and then foil, and freeze for up to 3 months. Bake from frozen at 350°F covered for 45 minutes, then uncovered for 15-20 minutes until hot and bubbly.
What can I serve alongside this three cheese mac and cheese?
Keep it simple — a crisp green salad with vinaigrette cuts through the richness perfectly, or try roasted vegetables, grilled chicken, or even chilli paneer for an unexpected fusion pairing. You could also serve it as a side dish to BBQ or roasted meats.
Closing
So there you go — Tini’s Mac and Cheese that looks and tastes like you slaved over a hot stove for hours, but really took you less time than scrolling through TikTok. It’s creamy, gooey, stretchy, and exactly the kind of comfort food that makes everyone at the table unreasonably happy.
I’d love to see your spin on this Tini’s Mac and Cheese! Drop a comment below or tag me with your mac and cheese photos — especially if you tried any of those fun variations. Did you go full-on lobster? Sneak in some veggies? Make those mac and cheese balls? This baked mac and cheese is so versatile, and I bet you’ve already got amazing ideas brewing.
If you’re craving more melty, cheesy goodness, check out my tartiflette recipe — it’s basically the French cousin of mac and cheese and equally swoon-worthy.
Happy cooking, and remember: calories don’t count when you’re making memories around the dinner table.
I’m Linda Sandra — a Charleston home chef and comfort-food daydreamer who believes the best meals are the ones that make you reach for seconds (and thirds). Around here, cooking’s not about perfection — it’s about cozy vibes, creative twists, and food that feels like love.