Strawberry Pink Marshmallows
Strawberry Pink Marshmallows are fluffy, homemade treats made with real strawberry compote. This easy recipe delivers bakery-style marshmallows in just 4 hours with minimal hands-on time.
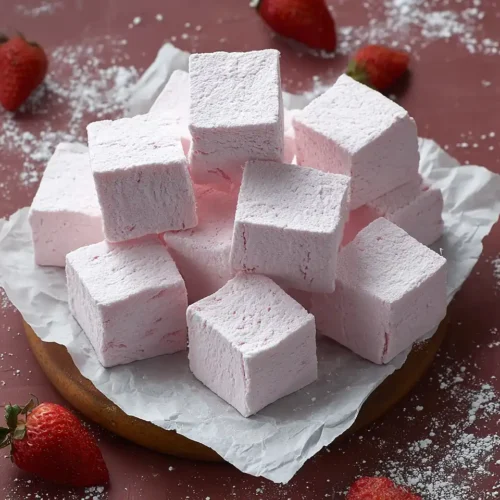
Strawberry Pink Marshmallows are soft, pillowy homemade confections swirled with real strawberry compote for natural pink color and sweet berry flavor.
They’re easier than you’d think—just a little gelatin magic, some patience, and basic pantry ingredients transform into bakery-quality marshmallows perfect for hot cocoa, s’mores, or just eating straight from the pan (no judgment).
Hey there, I’m Claire Whitmore — a pastry whisperer in Asheville, NC, where butter totally counts as self-care. These strawberry marshmallows came about during a rainy spring afternoon when I had a mountain of berries that needed using.
I’d been intimidated by homemade marshmallows for years, convinced they required pastry school credentials. Turns out? They’re shockingly forgiving.
Table of Contents
Little Snapshot: What This Recipe Delivers
These Strawberry Pink Marshmallows combine real strawberry compote with fluffy gelatin-based marshmallow for naturally pink, bakery-style treats. With about 30 minutes of active prep and 4 hours of setting time, you’ll get 16 soft, pillowy squares perfect for gifting, snacking, or elevating your hot chocolate game.
Why You’ll Love This Recipe 🌸
- These Strawberry Pink Marshmallows look fancy but honestly take less active time than scrolling through your phone.
- You get that gorgeous natural pink color without any weird artificial dyes—just real strawberries doing their thing.
- They’re way softer and fluffier than anything you’d find at the store, and they make the best gifts (if you can resist eating them all first).
- According to Serious Eats’ comprehensive marshmallow-making guide, homemade marshmallows are all about controlling temperature and whipping time — and this recipe makes both steps totally foolproof.
Quick Facts ⚡
Here’s the quick scoop on this Strawberry Pink Marshmallows recipe.
- CourseDessert/Snack
- Prep Time30 minutes
- Cook Time10 minutes
- Setting Time4 hours
- Total Time4 hours 40 minutes
- Servings16 marshmallows
- DifficultyMedium
Strawberry Pink Marshmallows
Equipment
- Small skillet or saucepan
- 9×9-inch baking pan
- Stand mixer with whisk attachment
- Candy thermometer
- Medium saucepan
- Sharp knife
- Spatula
- Cooking spray
Ingredients
For the Compote
- 1 cup strawberries diced
- 1 Tablespoon granulated sugar
- 1 Tablespoon lemon juice
For the Marshmallows
- 1 cup water divided (½ cup + ½ cup)
- 3 envelopes unflavored powdered gelatin about 7½ teaspoons
- 1½ cups granulated sugar
- 1 cup light corn syrup
- ¼ teaspoon kosher salt
- 2 teaspoons vanilla extract
- as needed confectioner’s sugar for dusting
Instructions
- In a small skillet or saucepan over medium heat, combine 1 cup diced fresh strawberries, 1 Tablespoon granulated sugar, and 1 Tablespoon lemon juice. Stir gently until the sugar dissolves completely. When the mixture starts bubbling, reduce the heat to low and let it simmer for 10 minutes, stirring occasionally and mashing those berries with your spoon until they break down into a chunky, jammy compote.
- Transfer your strawberry compote to a small bowl and pop it in the refrigerator for at least 30 minutes. It needs to be completely cooled before you mix it with the gelatin.
- Grease a 9×9-inch baking pan generously with cooking spray. Set it aside where you can reach it quickly once your marshmallow mixture is ready.
- In the bowl of your stand mixer, stir together the chilled strawberry compote and ½ cup cold water until combined. Sprinkle all 3 envelopes of unflavored gelatin evenly over the surface and let it sit undisturbed for about 5 minutes to bloom.
- In a medium saucepan over medium-high heat, combine 1½ cups granulated sugar, 1 cup light corn syrup, and the remaining ½ cup water. Stir constantly until the sugar dissolves completely. Clip your candy thermometer to the side of the pan, then stop stirring. Let the mixture boil, swirling the pan occasionally, until it reaches exactly 240°F, which should take about 10-12 minutes. Remove it from the heat immediately.
- With your stand mixer running on low speed, very slowly and carefully pour the hot sugar syrup into the bloomed gelatin mixture in a thin, steady stream. Add 2 teaspoons vanilla extract and ¼ teaspoon kosher salt. Gradually increase the mixer speed to high and let it whip for 10-12 minutes. The mixture will transform into a thick, glossy, pale pink cloud. When you lift the whisk, you should see stiff peaks that hold their shape for a few seconds before slowly collapsing back.
- Working quickly, pour the fluffy marshmallow into your prepared 9×9-inch pan. Use a greased spatula to spread it evenly into the corners. Let the marshmallows sit at room temperature for at least 4 hours or refrigerate for at least 2 hours until they’re completely firm and springy to the touch.
- Generously dust your work surface with confectioner’s sugar. Run a butter knife around the edges of the pan to loosen the marshmallow slab, then flip the pan upside down onto your sugared surface. Use a sharp knife (lightly sprayed with cooking spray if needed) to cut the marshmallow into 16 squares. Toss each piece in confectioner’s sugar on all sides to prevent them from sticking together.
Notes
Nutritional Peek
Here’s a friendly breakdown of what you’re getting per marshmallow (because honestly, knowing never hurt anyone):
| Nutrient | Amount per Serving |
|---|---|
| Calories | 85 kcal |
| Protein | 1g |
| Carbohydrates | 21g |
| Fat | 0g |
| Fiber | 0g |
| Sugar | 18g |
These marshmallows are basically fat-free (hello, gelatin!), though they’re definitely a sweet treat. Perfect for when you want something indulgent but not overly heavy.
Strawberry Pink Marshmallows Ingredients
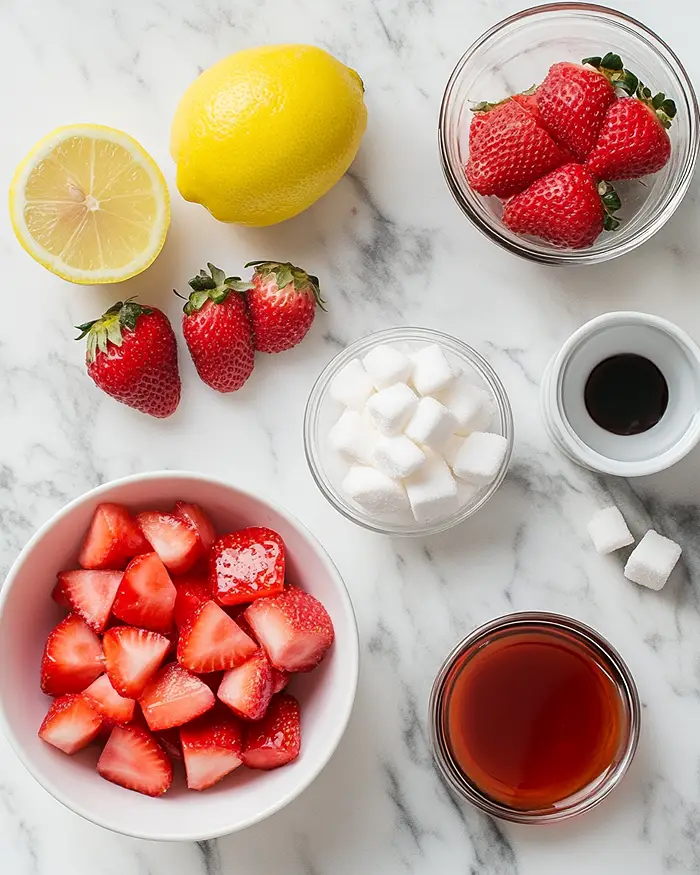
These homemade marshmallows start with a quick strawberry compote that gives them that dreamy pink color and natural berry sweetness.
For the strawberry compote—fresh diced strawberries, granulated sugar, and bright lemon juice—you’ll simmer everything down until it’s jammy and concentrated.
For the marshmallow base—unflavored gelatin, more sugar, light corn syrup, and vanilla extract—you’ll need a candy thermometer and a little patience to hit that magic 240°F mark. Room-temperature ingredients aren’t as critical here as in baking, but cold water is key for blooming your gelatin properly.
| Amount | Ingredient |
|---|---|
| For the Compote | |
| 1 cup | strawberries, diced |
| 1 Tablespoon | granulated sugar |
| 1 Tablespoon | lemon juice |
| For the Marshmallows | |
| 1 cup | water, divided (½ cup + ½ cup) |
| 3 envelopes | unflavored powdered gelatin (about 7½ teaspoons) |
| 1½ cups | granulated sugar |
| 1 cup | light corn syrup |
| ¼ teaspoon | kosher salt |
| 2 teaspoons | vanilla extract |
| as needed | confectioner’s sugar (for dusting) |
Yes, you really do need the corn syrup—it prevents crystallization and keeps these babies soft. And don’t skimp on the gelatin; that’s what gives marshmallows their signature bounce.
Tools You’ll Actually Use
You probably have most of these already, but here’s what’ll make your life easier:
- Small skillet or saucepan (for the compote)
- 9×9-inch baking pan
- Stand mixer with whisk attachment (trust me, hand mixing isn’t worth the arm workout)
- Candy thermometer (this is non-negotiable—guessing temps = sticky disasters)
- Medium saucepan
- Sharp knife
- Spatula
- Cooking spray
Step-by-Step Instructions
Let’s make some Strawberry Pink Marshmallows that’ll have everyone asking for your secret.
Step 1: Make the strawberry compote
In a small skillet or saucepan over medium heat, combine 1 cup diced fresh strawberries, 1 Tablespoon granulated sugar, and 1 Tablespoon lemon juice. Stir gently until the sugar dissolves completely—you’ll see it get a little syrupy.
When the mixture starts bubbling, reduce the heat to low and let it simmer for 10 minutes, stirring occasionally and mashing those berries with your spoon until they break down into a chunky, jammy compote.
Step 2: Chill the compote
Transfer your strawberry compote to a small bowl and pop it in the refrigerator for at least 30 minutes. It needs to be completely cooled before you mix it with the gelatin, otherwise you’ll end up with a weird, clumpy mess instead of fluffy marshmallows. I usually make this the night before just to get ahead.
Step 3: Prep your pan
Grease a 9×9-inch baking pan generously with cooking spray—don’t be shy here. You want every corner and edge coated so your marshmallow slab releases easily later. Set it aside where you can reach it quickly once your marshmallow mixture is ready.
Step 4: Bloom the gelatin
In the bowl of your stand mixer, stir together the chilled strawberry compote and ½ cup cold water until combined. Sprinkle all 3 envelopes of unflavored gelatin evenly over the surface and let it sit undisturbed for about 5 minutes.
It’ll look wrinkly and weird—that’s exactly what you want. This “blooming” step lets the gelatin absorb liquid so it dissolves smoothly later.
Step 5: Make the sugar syrup
In a medium saucepan over medium-high heat, combine 1½ cups granulated sugar, 1 cup light corn syrup, and the remaining ½ cup water. Stir constantly until the sugar dissolves completely—no gritty bits. Clip your candy thermometer to the side of the pan (make sure the tip isn’t touching the bottom), then stop stirring.
Let the mixture boil, swirling the pan occasionally, until it reaches exactly 240°F, which should take about 10-12 minutes. The second it hits that temp, remove it from the heat immediately.
Step 6: Combine and whip
With your stand mixer running on low speed, very slowly and carefully pour the hot sugar syrup into the bloomed gelatin mixture in a thin, steady stream. Aim for the side of the bowl to avoid splashing.
Add 2 teaspoons vanilla extract and ¼ teaspoon kosher salt. Now here’s where the magic happens: gradually increase the mixer speed to high and let it whip for 10-12 minutes.
The mixture will transform from a thin, pale liquid into a thick, glossy, pale pink cloud that’s tripled in volume. When you lift the whisk, you should see stiff peaks that hold their shape for a few seconds before slowly collapsing back. That’s your cue—it’s ready.
Step 7: Spread and set
Working quickly (the mixture starts setting fast), pour the fluffy marshmallow into your prepared 9×9-inch pan. Use a greased spatula to spread it evenly into the corners—it doesn’t have to be perfectly smooth, honestly.
Let the marshmallows sit at room temperature for at least 4 hours or refrigerate for at least 2 hours until they’re completely firm and springy to the touch. I usually just let mine hang out on the counter overnight.
Step 8: Cut and coat
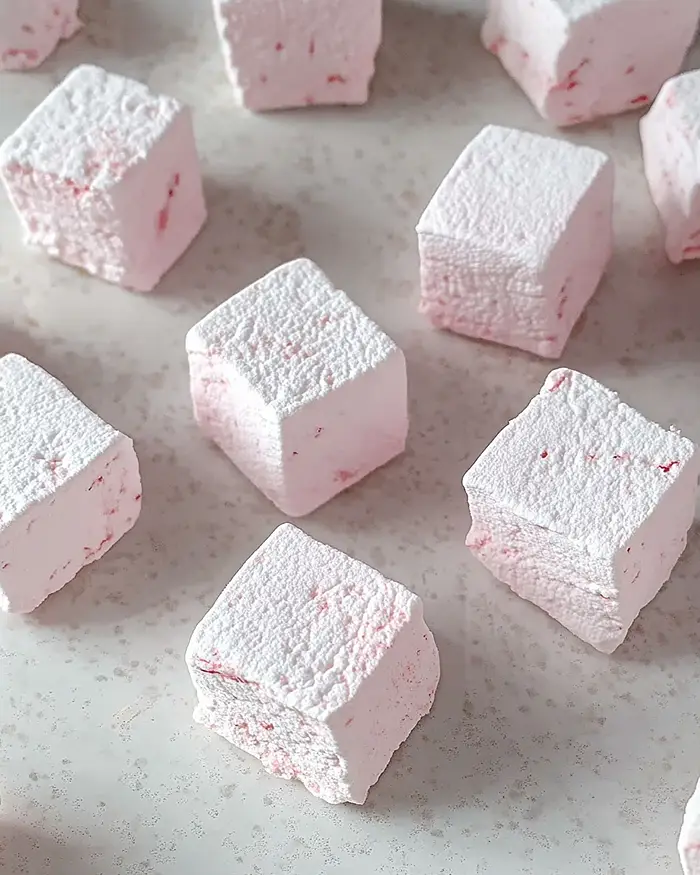
Generously dust your work surface with confectioner’s sugar. Run a butter knife around the edges of the pan to loosen the marshmallow slab, then confidently flip the pan upside down onto your sugared surface.
You might need to gently pry up a corner to get it started—don’t panic if it sticks a little. Use a sharp knife (lightly sprayed with cooking spray if needed) to cut the marshmallow into 16 squares.
Toss each piece in confectioner’s sugar on all sides to prevent them from sticking together, dabbing off any excess with a paper towel if your knife left oily spots.
Serve these beauties in hot cocoa, pack them up as gifts, or just eat them straight up. Your kitchen should smell like a strawberry dream right about now.
Claire’s Pro Tips & Gentle Guidance
Here’s where I share the little secrets that took me a few batches (and one very sticky disaster) to figure out with these sweet marshmallow treats.
Nail that temperature, seriously. The 240°F mark isn’t a suggestion—it’s the difference between perfectly fluffy marshmallows and a sticky goo situation. Invest in a good candy thermometer if you don’t have one. I learned this the hard way when I tried to “eyeball it” and ended up with something closer to strawberry taffy.
According to King Arthur Baking’s detailed candy temperature guide, hitting the soft-ball stage at 240°F is crucial for marshmallow structure, and honestly, they’re not wrong.
Fresh strawberries are your friend here. Frozen berries release too much liquid and make the compote watery, which throws off the whole marshmallow texture. If you absolutely must use frozen, thaw them completely and drain off the excess liquid before measuring.
I’ve also tried this with slightly overripe strawberries from the farmers market, and they actually work beautifully—more concentrated flavor.
Don’t rush the whipping time. Those 10-12 minutes feel like forever when you’re standing there watching the mixer, but that’s when air gets incorporated and your marshmallows get their signature fluff.
If you stop too early, they’ll be dense and gummy. Keep whipping until you see stiff peaks that hold their shape—your arm might get tired if you’re doing this by hand, which is why I’m firmly team stand mixer for this recipe.
Grease everything generously. I mean it—your pan, your spatula, even your knife. Marshmallow mixture is basically professional-grade glue before it sets. A light coating of cooking spray on your knife between cuts makes slicing so much easier, though you’ll still want to wipe it occasionally.
Quick Fixes for Strawberry Pink Marshmallows
Problem: Marshmallows are too sticky and won’t set properly
You probably didn’t reach 240°F with your sugar syrup, or your compote was still warm when you added it to the gelatin. Next time, use a reliable candy thermometer and make absolutely sure your compote is refrigerator-cold.
If they’re already made and sticky, try refrigerating them for a few extra hours—sometimes they just need more time.
Problem: Marshmallows are tough and chewy instead of fluffy
This usually means you overcooked your sugar syrup past 240°F or didn’t whip the mixture long enough.
The sweet spot is exactly 240°F (not 245°F, not 250°F), and you really do need those full 10-12 minutes of whipping to incorporate enough air. They should look pale, glossy, and tripled in volume before you pour them.
Problem: The marshmallow won’t release from the pan
You didn’t grease the pan enough, friend. Next time, be generous with that cooking spray—every corner, every edge.
For now, try warming the bottom of the pan slightly with a warm towel or running warm water over the outside (not inside!) for a few seconds to loosen it up, then flip it out onto a heavily sugared surface.
Problem: The pink color is too pale or not visible
Your strawberries might not have been concentrated enough in the compote. Try simmering them a bit longer next time (12-15 minutes instead of 10) to reduce more liquid and intensify the color.
Darker, riper strawberries also give a deeper pink. Remember, homemade marshmallows will always be more subtle in color than store-bought versions with artificial dyes, and that’s a good thing.
Variations & Fun Twists
These marshmallows are pretty perfect as-is, but here are some ways to make them your own.
Try different berries. Raspberries give a more vibrant pink and slightly tart flavor, while blackberries create a gorgeous lavender-gray color that’s totally Instagram-worthy. Just use the same amount (1 cup) and follow the compote method exactly the same way.
Add a chocolate drizzle. Once your marshmallows are cut and coated, melt some dark chocolate and drizzle it over the tops. Let them set on parchment paper in the fridge for 10 minutes. These make gorgeous gifts and taste like chocolate-covered strawberries.
Make them holiday-themed. Swap the strawberries for cranberries around the holidays for a festive red color, or use freeze-dried strawberry powder (about 3 Tablespoons) mixed into the gelatin mixture if you can’t find fresh berries off-season.
Go gluten-free. Good news—these are naturally gluten-free as long as you check that your gelatin and corn syrup don’t have any sneaky additives. Most brands are totally safe, but always double-check labels if you’re serving someone with celiac.
Serving, Storage & Reheating
These Strawberry Pink Marshmallows are ridiculously versatile—float them in hot cocoa, sandwich them between graham crackers for gourmet s’mores, or just pop them straight into your mouth (my preferred method). They’re also adorable packaged in clear bags tied with ribbon as homemade gifts, especially around Valentine’s Day.
Store your marshmallows in an airtight container at room temperature for up to 2 weeks, with parchment or wax paper between layers if you’re stacking them. They’ll stay soft and pillowy as long as they’re sealed properly. Don’t refrigerate them unless your kitchen is super humid—cold air can make them weep and get sticky.
These don’t really need reheating, but if you want to toast them over a campfire or under the broiler for s’mores, they’ll get gloriously melty and caramelized on the outside. Just know they’ll melt faster than store-bought marshmallows because they’re so much softer.
This is just one of the many gems in our Delicious Desserts series. Every recipe there has been tested and loved in real kitchens, and I promise there’s something for every craving. Go see for yourself.
No-Waste Kitchen Magic
Got leftover marshmallows that are starting to firm up after a few days? Don’t toss them.
Chop them into chunks and fold them into brown sugar overnight oats for a sweet, chewy breakfast surprise. They soften beautifully in the oats overnight and add pockets of strawberry flavor.
You can also use slightly stale marshmallows in rice crispy treats—they’ll actually melt more smoothly than fresh ones. Or blend them into a strawberry milkshake for extra body and sweetness.
If you have extra strawberry compote from doubling the batch, swirl it into easy cookie dough overnight oats or use it as a filling for dark chocolate raspberry macarons (the strawberry-raspberry combo is unreal).
Strawberry Pink Marshmallows FAQs
Can I freeze Strawberry Pink Marshmallows for later?
Yep, you absolutely can! Wrap them individually or in small batches in plastic wrap, then store them in a freezer-safe container for up to 3 months. Let them thaw at room temperature for about 30 minutes before eating—they’ll return to their original soft texture.
What’s the best way to store homemade marshmallows so they stay fresh?
Keep them in an airtight container at room temperature with parchment or wax paper between layers if you’re stacking them. They’ll stay perfectly soft and fluffy for up to 2 weeks.
How do I know when the marshmallow mixture is done whipping?
You’re looking for stiff peaks that hold their shape for a few seconds before slowly falling back into the bowl when you lift the whisk. The mixture should be pale pink, glossy, and tripled in volume.
Why should I use real vanilla extract in Strawberry Pink Marshmallows instead of imitation?
Real vanilla extract has depth and complexity that imitation just can’t match, especially in delicate recipes like marshmallows where flavors really shine through.
Cozy Closing
And there you have it—fluffy, naturally pink, absolutely dreamy Strawberry Pink Marshmallows that prove homemade is always better. Once you nail that candy thermometer technique (which honestly gets easier every time), you’ll be churning out batches for every occasion.
I’d love to see your spin on this Strawberry Pink Marshmallows recipe! Drop a comment below with your photos or tell me what flavor variation you tried—I’m already thinking about a lemon-blueberry version for summer. These marshmallows are so versatile; I bet you’ve got amazing ideas already brewing.
Now go make your kitchen smell like a strawberry cloud and enjoy every pillowy, sweet bite. You’ve earned it.
I’m Claire Whitmore — a dessert daydreamer from Asheville, NC. For me, baking isn’t about perfect pastries—it’s about the joy of sharing something sweet (and maybe sneaking an extra marshmallow when no one’s looking).