No-Bake Chocolate Peanut Butter Protein Balls
These No-Bake Chocolate Peanut Butter Protein Balls are ready in 10 minutes with just 4 simple ingredients. Perfect healthy protein snacks for busy moms—no oven required!
No-Bake Chocolate Peanut Butter Protein Balls are the ultimate grab-and-go snack when you need something quick, nourishing, and satisfying without turning on the oven.
Hey there, I’m Claire Whitmore—a dessert daydreamer from Asheville, NC, where chocolate chips are basically a food group and peanut butter is always kept within arm’s reach.
These easy protein snacks healthy enough for breakfast and delicious enough for dessert are made with just four pantry staples: quick oats, creamy peanut butter, honey, and mini chocolate chips.
Table of Contents
Little Snapshot: What This Recipe Delivers
These No-Bake Chocolate Peanut Butter Protein Balls combine wholesome oats, protein-rich peanut butter, natural honey sweetness, and chocolate chips into 12 perfectly portioned energy bites.
Ready in just 10 minutes with no cooking required, they’re the ideal healthy protein snack for busy mornings, post-workout refueling, or whenever you need a quick nutrient boost without processed ingredients.
Why You’ll Love This Recipe 🌸
- This No-Bake Chocolate Peanut Butter Protein Balls recipe takes less time than answering one work email—seriously, 10 minutes from start to snack.
- They’re made with just four pantry staples you probably already have, so no special shopping trip or fancy ingredients needed.
- Perfect for busy moms who need portable, protein-packed snacks that actually taste like a treat instead of cardboard.
- According to EatingWell’s guide to protein-rich snacks for sustained energy, combining protein with whole grains creates lasting fullness between meals—and these protein balls deliver exactly that balance.
Quick Facts ⚡
Here’s the quick scoop on this No-Bake Chocolate Peanut Butter Protein Balls recipe.
- CourseSnack / Breakfast
- Prep Time10 minutes
- Cook Time0 minutes
- Total Time10 minutes
- Servings12 protein balls
- DifficultyEasy
Nutritional Peek
Here’s what you’re getting in each of these little energy powerhouses—because it’s nice to know your snack is actually working for you, not against you.
| Nutrient | Amount per Serving (1 ball) |
|---|---|
| Calories | 85 kcal |
| Protein | 3g |
| Carbohydrates | 10g |
| Fat | 4g |
| Fiber | 1g |
| Sugar | 5g |
Each ball gives you a nice balance of sustained energy from oats, protein from peanut butter, and just enough sweetness to satisfy that 3 p.m. chocolate craving. They’re filling without being heavy, which is exactly what you want in a snack.
Ingredients
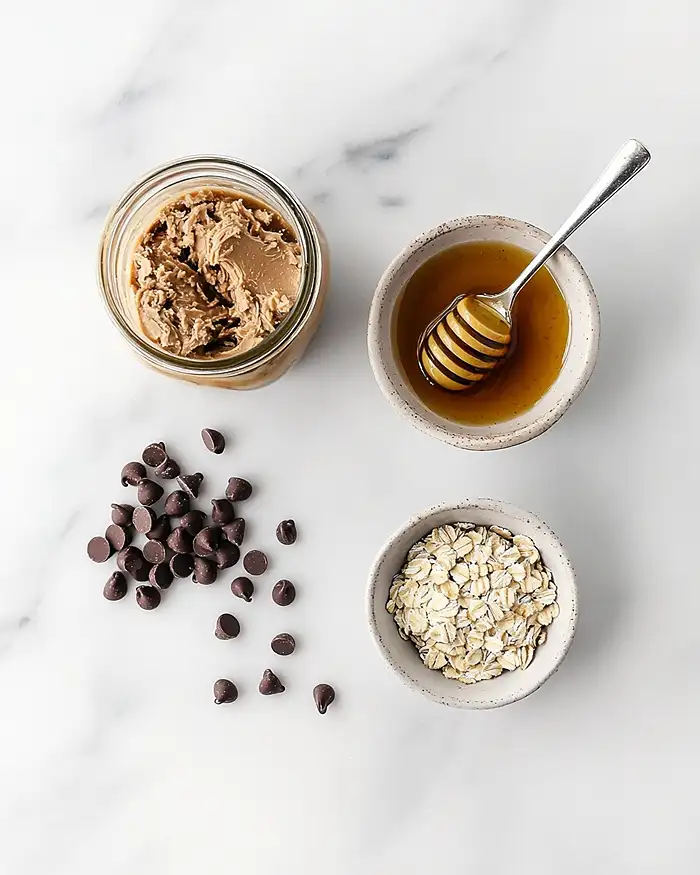
These easy protein snacks healthy enough to fuel your whole day come together with just four simple ingredients. I’m talking pantry staples—the kind of stuff you probably already have tucked away in your cupboard right now.
For the base—quick oats and mini chocolate chips—you’ll want to grab a medium bowl and measure everything out first so you’re not scrambling mid-mix. The binding ingredients—creamy peanut butter and honey—need to be stirred in thoroughly to create that perfect sticky texture that holds everything together without being too wet or too dry.
| Amount | Ingredient |
|---|---|
| ½ cup | Quick oats (not instant, not old-fashioned—quick oats give the best texture here) |
| ¼ cup | Mini chocolate chips (yes, mini matters—they distribute better than regular-sized chips) |
| ¼ cup | Peanut butter (creamy works best, but crunchy adds nice texture if that’s your jam—literally) |
| 2 tablespoons | Honey (pure honey, not the honey-flavored syrup—trust me, you’ll taste the difference) |
Tools You’ll Actually Use
You don’t need a fancy kitchen for these protein recipes snacks—just a few basic tools and your hands. Here’s what to grab:
- Medium mixing bowl
- Measuring cups and spoons
- Sturdy spoon or spatula for mixing
- Airtight container for storage
- Your hands (for rolling—no cookie scoop needed!)
Honestly, the hardest part is resisting the urge to eat the mixture straight from the bowl. I won’t judge if you do, though.
Step-by-Step Instructions
Making these No-Bake Chocolate Peanut Butter Protein Balls is so simple, you could probably do it while helping with homework and answering texts. Let’s walk through it together.
Step 1: Combine the dry ingredients In your medium bowl, add the ½ cup quick oats and ¼ cup mini chocolate chips. Give them a quick stir to distribute the chocolate chips evenly throughout the oats. This prevents you from ending up with some balls that are all oats and others that are all chocolate (though let’s be honest, neither would be terrible).
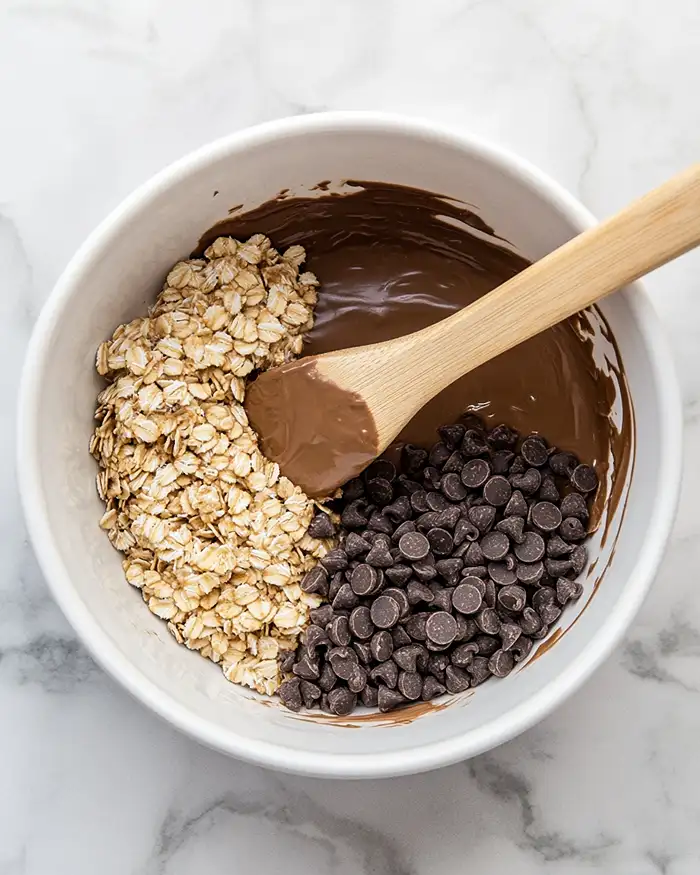
Step 2: Add the sticky stuff Plop in the ¼ cup peanut butter and drizzle the 2 tablespoons honey right on top. Now comes the arm workout—stir everything together until it’s completely combined and there are no dry oat pockets hiding at the bottom of your bowl.
The mixture should look sticky and slightly glossy, and when you press it between your fingers, it should hold together easily without crumbling.
Step 3: Roll into balls Here’s where it gets fun (and slightly messy, but in a good way). Scoop out about a tablespoon of the mixture and roll it between your palms to form a ball about 1 inch in diameter.
Don’t stress about making them perfectly round—rustic is charming, and they all taste the same anyway. Repeat until you’ve got 12 protein balls lined up like little chocolate-flecked soldiers.
Step 4: Store and enjoy Transfer your protein balls to an airtight container. You can eat them right away (warm from your hands, which is actually kind of lovely), or pop them in the fridge for 20-30 minutes to firm up. They’ll keep at room temperature for up to a week or in the fridge for two weeks—though honestly, they rarely last that long in my house.
Claire’s Pro Tips & Gentle Guidance
I’ve made these protine balls more times than I can count, and along the way I’ve picked up a few tricks that make them even better. Here’s what I’ve learned so you don’t have to figure it out yourself.
If your mixture feels too dry and won’t hold together when you try to roll it, add another teaspoon of honey or a tiny splash of water and mix again. The humidity in your kitchen can affect how much moisture the oats absorb, so sometimes you need a little extra binding power.
On the flip side, if your mixture is too wet and sticky (like, coating your entire hand kind of sticky), add another tablespoon of oats and mix thoroughly. Quick oats are thirsty little guys and will soak up that extra moisture beautifully.
Want to level up your protein ball game? According to the expert guidance from King Arthur Baking on energy ball techniques, slightly wetting your hands before rolling prevents the mixture from sticking to your palms and creates smoother, more uniform balls. Game changer, honestly.
If you’re meal-prepping, make a double or triple batch and store them in the freezer in a freezer-safe container or bag. They thaw in about 10 minutes at room temp, or you can eat them semi-frozen for a firmer, almost fudge-like texture that’s perfect on hot summer days.
My biggest mistake when I first started making these? Not stirring the peanut butter and honey mixture long enough. If you see dry oat patches, keep stirring—everything needs to be evenly coated or some balls will fall apart and others will be too dense. Aim for consistent stickiness throughout.
Quick Fixes for No-Bake Chocolate Peanut Butter Protein Balls
Even with a recipe this simple, things can occasionally go sideways. Here’s how to rescue your batch without starting over.
Problem: The balls keep falling apart or won’t hold their shape. This usually means there’s not enough binding moisture. Add another tablespoon of honey or peanut butter (start with honey since it’s stickier) and mix thoroughly until everything is evenly coated. Then try rolling again—they should stick together much better now.
Problem: The mixture is too sticky and glues itself to your hands. Too much liquid can make these impossible to roll without coating your entire kitchen in peanut butter.
Add 2 tablespoons of quick oats at a time, mixing well between additions, until the mixture firms up enough to handle. You can also try lightly wetting your hands or coating them with a tiny bit of coconut oil before rolling.
Problem: Some balls have all the chocolate chips and others have none. This happens when the chips settle to the bottom during mixing. After you’ve combined everything, give the mixture one final stir right before you start rolling to redistribute the chocolate evenly.
You can also intentionally place a chip or two on the outside of each ball as you roll them for guaranteed chocolate in every bite.
Problem: The balls taste bland or boring. Sometimes a batch needs a little extra oomph. Try adding a pinch of sea salt to the mixture (salt enhances both the chocolate and peanut butter flavors), or mix in ¼ teaspoon vanilla extract with the honey. A tiny pinch of cinnamon also works magic if you like warm, cozy flavors.
Variations & Fun Twists
These easy protein snacks healthy and delicious as written, but they’re also basically a blank canvas begging for your creativity. Here are some of my favorite ways to switch things up.
Chocolate Lover’s Dream: Swap the peanut butter for almond butter or Nutella, and add an extra tablespoon of mini chocolate chips. If you’re feeling fancy, roll the finished balls in cocoa powder for an extra-chocolatey coating.
Tropical Vacation: Replace the chocolate chips with unsweetened shredded coconut and dried pineapple or mango pieces. Add a squeeze of lime zest to the mixture before rolling. Suddenly you’re on a beach somewhere, at least in your imagination.
Fall Spice Vibes: Mix ¼ teaspoon cinnamon and a pinch of nutmeg into the oats, and swap the chocolate chips for chopped dried cranberries and pepitas (pumpkin seeds). These taste like autumn in ball form.
Allergy-Friendly Version: Use sunflower seed butter instead of peanut butter, and swap honey for maple syrup if you need a vegan option. Use dairy-free chocolate chips and you’ve got an allergy-friendly snack that everyone can enjoy.
Protein Power Boost: Add 1-2 tablespoons of your favorite vanilla or chocolate protein powder to the mixture. You might need an extra teaspoon of honey to compensate for the dryness, but you’ll get even more protein per ball.
Fancy Presentation: After rolling, you can roll the balls in toppings like crushed graham crackers, extra mini chocolate chips, shredded coconut, or finely chopped nuts. This makes them look bakery-level impressive for basically zero extra effort.
Serving, Storage & Reheating
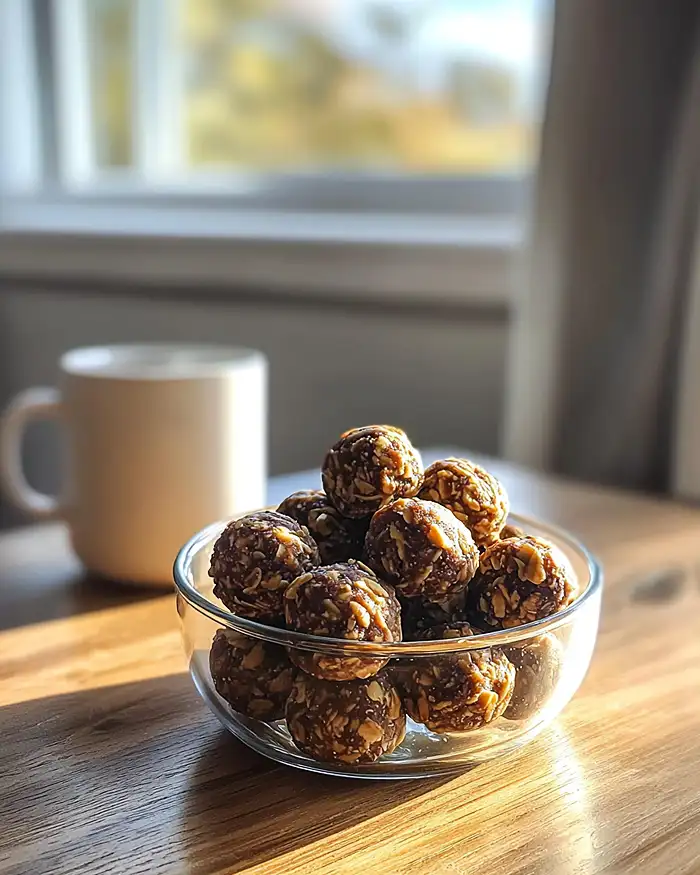
These protein recipes snacks are incredibly versatile when it comes to serving and storing. You can grab them straight from the counter, pack them in lunchboxes, or toss them in your gym bag for post-workout fuel.
I like to keep mine in an airtight container on the counter for the first few days since we eat them so quickly. They’ll stay fresh at room temperature for up to a week as long as your kitchen isn’t crazy hot.
If it’s summer or you live somewhere humid, the fridge is your friend—they’ll last up to two weeks chilled and the texture actually gets a bit firmer and fudgier, which I personally love.
For longer storage, freeze them in a freezer-safe container or bag with parchment paper between layers so they don’t stick together. They’ll keep beautifully for up to three months in the freezer. Thaw at room temperature for 10-15 minutes, or eat them semi-frozen if you like a harder, truffle-like texture.
Honestly, there’s no “reheating” involved with these since they’re never cooked in the first place. But if you’ve stored them in the fridge and want them softer, just let them sit out for 10 minutes before eating. Room temperature is when they’re at their most peanut-buttery, melt-in-your-mouth best.
No-Waste Kitchen Magic
If you actually manage to have leftovers (which, respect), here are some creative ways to repurpose or extend these protine balls beyond just eating them plain.
Crumble them over yogurt: Break up 1-2 balls and sprinkle the chunks over Greek yogurt with fresh berries for an instant parfait that feels way fancier than it actually is.
Stuff them inside dates: Remove the pits from Medjool dates and press a small ball inside each one. It’s like a homemade Lärabar but better because you made it yourself.
Use as ice cream topping: Chop up a few balls and scatter them over vanilla ice cream. The cold makes the chocolate chips firm up and creates this amazing texture contrast with the creamy ice cream.
Bake them into cookies: If your batch didn’t turn out quite right (too crumbly, wrong texture, whatever), don’t throw them away. Crumble them up and fold the mixture into your favorite cookie dough as an add-in. Instant oatmeal chocolate chip cookies with extra protein.
Make energy bar squares: Press the mixture firmly into a parchment-lined 8×8 pan instead of rolling balls, then cut into squares after chilling. Same great taste, different shape, and perfect for packing in lunchboxes.
Freeze for smoothie bombs: Pop a ball or two into your morning smoothie for extra protein, oats, and that chocolate-peanut butter flavor. They blend up beautifully and add body to thin smoothies.
No-Bake Chocolate Peanut Butter Protein Balls FAQs
Can I freeze these No-Bake Chocolate Peanut Butter Protein Balls for meal prep?
Absolutely! These freeze beautifully for up to three months. Layer them in a freezer-safe container with parchment paper between layers so they don’t stick together. Thaw for 10-15 minutes at room temperature before eating, or enjoy them semi-frozen for a firmer, fudge-like texture that’s honestly incredible on hot days.
What’s the best way to store protein balls so they stay fresh?
Store them in an airtight container at room temperature for up to one week, or in the refrigerator for up to two weeks. The fridge makes them firmer and slightly chewier, which I actually prefer. Just make sure your container seals well to prevent them from drying out or absorbing fridge odors.
How do I know when the mixture is the right consistency for rolling?
When you press a bit of mixture between your fingers, it should stick together easily without crumbling, but it shouldn’t coat your entire hand in goo. If you can form a ball and it holds its shape without falling apart, you’re golden. If it’s too dry, add a teaspoon of honey; if it’s too wet, add another tablespoon of oats.
Why should I use quick oats instead of old-fashioned oats in protein balls?
Quick oats have a finer texture that absorbs moisture better and creates smoother, more cohesive balls that hold together beautifully. Old-fashioned oats are chunkier and don’t bind as well, which can result in balls that fall apart. If you only have old-fashioned oats, pulse them a few times in a food processor to break them down closer to quick oat size.
Could I make these protein recipes snacks without honey for a vegan version?
Yes! Swap the honey for pure maple syrup or agave nectar in the same amount (2 tablespoons). Make sure your chocolate chips are also dairy-free if you’re going fully vegan. The texture will be nearly identical, though maple syrup adds a slightly different flavor that’s still delicious.
Cozy Closing
And there you have it—the easiest, most satisfying No-Bake Chocolate Peanut Butter Protein Balls you’ll ever make. These little power-packed bites have saved me on countless rushed mornings, pre-workout panic moments, and mid-afternoon energy crashes when I needed something that was both nourishing and genuinely delicious.
I’d love to see your spin on this No-Bake Chocolate Peanut Butter Protein Balls recipe! Drop a comment below with your photos or tell me about the flavor variations you tried—did you go tropical? Fall spice? Triple chocolate? I’m always hunting for new ideas to add to my rotation.
These protein balls are so versatile and forgiving; I bet you’ve already got amazing variations in mind.
Now go make yourself a batch, and don’t forget to hide a few in the back of the fridge if you want to make sure you get some before the rest of your family discovers them. Happy snacking, friend!
There’s a whole world of delicious desserts waiting for you over at the Delicious Desserts collection. Each one is made with the same love and attention, and they’re all absolutely worth trying. Happy cooking!
Internal Links You Might Love
Looking for more quick, healthy recipes that fit into your busy life? Check out these Eden Plate favorites:
- Need a protein-packed lunch? Try these Greek Chicken Bowls for a Mediterranean-inspired meal that’s just as easy as these protein balls.
- Planning a summer cookout? This Steakhouse Potato Salad is the creamy, flavorful side dish everyone will ask you to bring again.
- Craving more vibrant, veggie-forward dishes? This Mexican Street Corn Salad brings the farmer’s market vibes straight to your table.
I’m Claire Whitmore—a dessert daydreamer from Asheville, NC, where the mountains are misty and the chocolate chips are always within reach.
For me, baking isn’t about perfect pastries or Instagram-worthy creations—it’s about the joy of sharing something sweet (and maybe sneaking an extra protein ball when no one’s looking). Thanks for letting me into your kitchen today.

No-Bake Chocolate Peanut Butter Protein Balls
Equipment
- Medium mixing bowl
- Measuring cups and spoons
- Sturdy spoon or spatula
- Airtight container
Ingredients
- ½ cup quick oats not instant, not old-fashioned—quick oats give the best texture
- ¼ cup mini chocolate chips mini matters—they distribute better than regular-sized chips
- ¼ cup peanut butter creamy works best, but crunchy adds nice texture
- 2 tablespoons honey pure honey, not honey-flavored syrup
Instructions
- In your medium bowl, add the ½ cup quick oats and ¼ cup mini chocolate chips. Give them a quick stir to distribute the chocolate chips evenly throughout the oats. This prevents you from ending up with some balls that are all oats and others that are all chocolate.
- Plop in the ¼ cup peanut butter and drizzle the 2 tablespoons honey right on top. Stir everything together until it’s completely combined and there are no dry oat pockets hiding at the bottom of your bowl. The mixture should look sticky and slightly glossy, and when you press it between your fingers, it should hold together easily without crumbling.
- Scoop out about a tablespoon of the mixture and roll it between your palms to form a ball about 1 inch in diameter. Don’t stress about making them perfectly round—rustic is charming. Repeat until you’ve got 12 protein balls.
- Transfer your protein balls to an airtight container. You can eat them right away, or pop them in the fridge for 20-30 minutes to firm up. They’ll keep at room temperature for up to a week or in the fridge for two weeks.