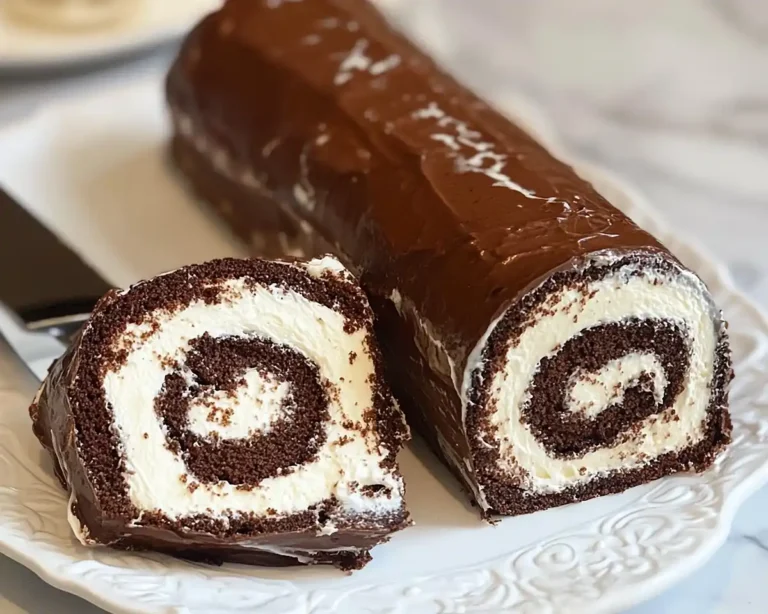
Biscoff Icebox Cake
Biscoff Icebox Cake is the no bake cake you’ll want to make every single week. It’s creamy, layered, cookie butter-packed, and honestly kind of magical — no oven, no stress, just pure cookie butter dessert bliss.
This layered icebox cake comes together with just four ingredients: Lotus Biscoff cookies, Biscoff spread, all-purpose cream, and condensed milk. Prep takes under 20 minutes, and a few hours in the freezer does all the heavy lifting. It serves 12 people and tastes like something from a fancy café.
Hey there, I’m Claire Whitmore — a dessert daydreamer from Asheville, NC, where butter totally counts as self-care. This Biscoff Icebox Cake recipe came into my life during a chaotic weeknight when I desperately needed dessert but refused to turn on the oven.
Table of Contents
Little Snapshot: What This Recipe Delivers
This Biscoff Icebox Cake is a creamy, no bake layered dessert made with whipped all-purpose cream, condensed milk, and Biscoff cookie butter spread, all sandwiched between crisp Lotus Biscoff cookies.
Ready in under 4 hours (mostly hands-off freezer time), it slices beautifully into 12 servings and delivers rich caramel-spice flavor in every bite. It’s the easiest cookie butter dessert you’ll ever make — and one of the most impressive looking.
Why You’ll Love This Recipe
- This Biscoff Icebox Cake takes less active time than folding a load of laundry — seriously, under 20 minutes of hands-on effort and the freezer does the rest.
- It’s a total crowd-pleaser that looks like you spent hours in the kitchen, even though you very much did not — perfect for busy moms, potlucks, and last-minute guests.
- Four ingredients. That’s it. No fancy equipment, no baking skills required, no seven-step ganache — just layer, freeze, and done.
- According to The Kitchn’s complete guide to no bake icebox cakes, layered cookie desserts soften into something that genuinely resembles a fancy torte — and this Biscoff version takes that magic to a whole new level.
Quick Facts
Here’s the quick scoop on this Biscoff Icebox Cake.
- CourseDessert
- Prep Time20 minutes
- Cook Time0 minutes
- Total Time3–4 hours (includes freezing and chilling)
- Servings12 servings
- DifficultyEasy
Nutritional Peek
Here’s a rough per-serving breakdown for this Biscoff Icebox Cake based on 12 servings. Numbers are estimates and can vary slightly based on exact brands used.
| Nutrient | Amount Per Serving |
|---|---|
| Calories | ~370 kcal |
| Total Fat | ~22g |
| Saturated Fat | ~13g |
| Carbohydrates | ~40g |
| Sugar | ~27g |
| Protein | ~4g |
| Fiber | ~0.5g |
Ingredients.

This cookie butter dessert keeps things beautifully simple. For the cream layer — chilled all-purpose cream, condensed milk, and Biscoff spread — you’ll want everything cold so it whips up light and fluffy.
For the structure — the Lotus Biscoff cookies — grab about two packs. Some go into the layers whole, and a few get crushed for that irresistible crumbly topping.
| Amount | Ingredient |
|---|---|
| 500 ml | Nestle All-Purpose Cream, chilled (this is key — cold cream whips so much better) |
| 8 oz (½ of a 14 oz can) | Carnation Condensed Milk |
| 13.4 oz (1 jar) | Biscoff Spread, creamy variety (yes, the whole jar — no regrets) |
| 40 pieces (~2 packs) | Lotus Biscoff Cookies |
Tools You’ll Actually Use
- Large mixing bowl
- Electric hand mixer or stand mixer
- 9×9 inch square baking pan
- Spatula or offset spatula for spreading
- Microwave-safe bowl (for warming the Biscoff spread)
- Zip-lock bag or rolling pin (for crushing cookies)
- Plastic wrap or foil for covering the pan
Step-by-Step Instructions for Biscoff Icebox Cake
Let’s build this beauty. Every step is straightforward, and I promise it’s harder to mess up than it is to get right.

Step 1: Crush the Cookies
Place 6 Lotus Biscoff Cookies into a zip-lock bag and crush them into small, rough pieces using a rolling pin or the bottom of a glass. You don’t want fine crumbs here — a little texture is what makes the topping so satisfying. Set the crushed pieces aside.
Step 2: Whip the Cream
Pour all 500 ml of the cold Nestle All-Purpose Cream into a large mixing bowl. Using an electric mixer, whip on medium-high speed until soft peaks form — this takes about 4 to 5 minutes. The cream should look light, fluffy, and hold a gentle wave when you lift the beaters.
Step 3: Mix the Filling
Microwave 5 tablespoons of the Biscoff Spread for about 10 seconds until slightly warm and pourable. Add it to the whipped cream along with all 8 oz of the Carnation Condensed Milk and two-thirds of your crushed cookies. Fold and mix gently until everything is combined and you’ve got one glorious, cookie-speckled cream.
Step 4: Layer It Up
In your 9×9 inch pan, arrange a single layer of whole Lotus Biscoff Cookies across the bottom, fitting them in snugly. Spread half of the cream mixture evenly on top. Add another single layer of Biscoff Cookies, then top with the remaining cream mixture, smoothing it to the edges. Your final layer should be cream — this is what becomes that dreamy, silky top surface.
Step 5: Freeze
Cover the pan tightly with plastic wrap and transfer to the freezer. Let it firm up for 2 to 3 hours. You want it solid enough to hold its shape when you pour the topping on — not a melty puddle situation.
Step 6: Add the Biscoff Drizzle
Microwave the remaining Biscoff Spread (from the jar) for about 30 seconds until it becomes fully pourable — it should drizzle smoothly like a warm caramel sauce. Pour it over the frozen cake and use a spatula to spread it all the way to the edges. Sprinkle the remaining crushed cookie pieces generously across the top.
Step 7: Refrigerate and Serve
Move the pan from the freezer to the refrigerator and let the Biscoff topping set for about 1 hour. Once it’s firm and glossy, slice into squares and serve cold. Your kitchen will smell like a Belgian bakery and your guests will absolutely lose their minds.
Claire’s Pro Tips for the Best No Bake Cake
Here are my tried-and-true tips for nailing this recipe every single time.
Chill your cream before whipping. Seriously, pop the cream in the fridge for a few hours — or even overnight — before you start. Cold cream whips faster and holds its shape better, which gives you a sturdier, fluffier filling that won’t deflate into a sad puddle.
Warm the Biscoff spread just enough. Ten seconds in the microwave is all you need for the filling, and thirty for the drizzle. Over-heating it can make it too runny and change the texture. You want it silky and pourable, not soupy.
Don’t skip the freezer step. I know it’s tempting to just refrigerate and serve, but freezing first gives the cake structure. When you pour the warm Biscoff drizzle on top, you need a solid frozen base — otherwise you’re just pouring warm spread into a soft cream situation. Chaos.
Crush the cookies loosely. Big chunky pieces in the cream add a lovely little bite of texture. If you crush them into fine powder, that textural contrast disappears. Rough is better here — imperfect is part of the charm.
Quick Fixes for Biscoff Icebox Cake
Things don’t always go exactly to plan — here’s how to handle the most common hiccups.
The cream won’t whip into peaks. Your cream probably wasn’t cold enough. Return it to the fridge for 30 minutes and try again. Also make sure your bowl and beaters are clean — any grease or moisture can prevent whipping.
The Biscoff drizzle is too thick to pour. Give it an extra 10–15 seconds in the microwave and stir well. If it’s still stiff, add just a teaspoon of neutral oil and stir — it’ll loosen right up.
The cake won’t slice cleanly. Run a sharp knife under hot water, dry it quickly, and slice while it’s still cold. Repeat between cuts. A warm blade glides through the frozen cream layers beautifully.
The layers are falling apart when I slice. It probably needed more time in the freezer. Pop it back in for another hour before attempting to slice again. Patience is everything here.
The top layer of Biscoff spread is cracking. This just means the cake was very cold when you spread the warm Biscoff on. Totally normal and still delicious — just let it sit at room temperature for 5 minutes before serving.
One recipe down, and so many more to explore! Head over to our complete Cakes & Cupcakes lineup for more delicious ideas that’ll keep your kitchen buzzing. Bookmark this one — you’ll thank yourself later.
Variations and Fun Twists
Once you’ve made this layered icebox cake once, you’ll start dreaming up ways to riff on it. Here are some favorites.
Chocolate Biscoff version: Drizzle melted dark chocolate over the top alongside the Biscoff spread for a mocha-caramel combo that’ll make people actually gasp.
Banana Biscoff: Tuck thin banana slices between the cream layers. The banana softens into the cream and takes on an almost banana pudding quality — dreamy.
Mini individual cups: Skip the pan and layer in small glasses or ramekins for an elegant dinner party dessert. They look fancy and you can assemble them in advance.
Gluten-free swap: Use a certified gluten-free speculoos-style cookie in place of the Lotus Biscoff Cookies. The texture may vary slightly, but the flavor will still be wonderful.
Extra-indulgent version: Add a thin layer of Nutella between the cookie layers alongside the Biscoff cream. Cookie butter meets hazelnut. You’re welcome.
Serving, Storage and Reheating

This layered icebox cake is best served straight from the fridge, sliced cold into neat squares. A small dollop of whipped cream on top and an extra whole Biscoff cookie propped against each slice makes it look absolutely gorgeous on a dessert table. Pair it with a hot cup of coffee or chai and you’ve got a moment.
Store any leftovers covered tightly with plastic wrap or in an airtight container in the refrigerator for up to 3 days. The cookies will continue to soften over time, which some people actually prefer — the texture gets almost mousse-like by day two.
This cake also freezes well for up to 2 weeks. Slice into individual portions before freezing so you can grab one at a time without thawing the whole pan. To serve from frozen, just let it sit in the fridge for 30–45 minutes and it’s ready to go.
No-Waste Kitchen Magic
Got a few leftover Biscoff cookies that didn’t make it into the layers? Crumble them over vanilla ice cream or stir crushed pieces into plain yogurt for a quick breakfast treat.
If you have leftover Biscoff spread in the jar, spread it on toast, stir it into oatmeal, or swirl it into your morning coffee. It also works beautifully as a dip for apple slices — don’t knock it until you’ve tried it.
Any cake that’s gotten a little soft and lost its pretty shape? Scoop it into small dessert glasses and serve it as a deconstructed Biscoff parfait. Nobody needs to know it started as “leftovers.”
FAQs About Biscoff Icebox Cake
Can I freeze this Biscoff Icebox Cake for longer storage?
Yes, you can freeze this Biscoff Icebox Cake for up to 2 weeks. Wrap the pan tightly in plastic wrap and foil to prevent freezer burn. Thaw individual slices in the fridge for 30 to 45 minutes before serving.
What’s the best way to store Biscoff Icebox Cake?
Store your Biscoff Icebox Cake covered in the refrigerator for up to 3 days. Keep it tightly wrapped so it doesn’t absorb any fridge odors. The texture actually gets creamier and more cake-like as the cookies soften over time.
How do I know when the Biscoff Icebox Cake is done freezing?
After 2 to 3 hours in the freezer, the cake should feel firm and solid when you press the center gently. It won’t be rock-hard — more like a very firm semifreddo. If it still feels soft or jiggly in the middle, give it another 30 to 60 minutes.
Why should I use chilled cream in this Biscoff Icebox Cake?
Cold cream whips significantly faster and holds peaks much better than cream at room temperature. Warm cream tends to stay liquid or collapse before reaching soft peak stage. Chilling your cream for a few hours before whipping is one of the easiest ways to guarantee a fluffy, stable filling.
Could I use a different brand of cookie butter spread?
You can, but the flavor will vary. Biscoff Spread has a very specific caramel-cinnamon-spice profile that makes this no bake cake so distinctive. Other speculoos or cookie butter spreads work in a pinch, but the Biscoff brand really does give the most recognizable and beloved flavor.
Cozy Closing
If you’ve been looking for a dessert that’s effortlessly impressive, deeply satisfying, and ridiculously easy — this Biscoff Icebox Cake is exactly it. No oven, no drama, no complicated techniques. Just layers of cookie butter goodness that disappear way too fast.
I’d love to see your spin on this Biscoff Icebox Cake! Drop a comment below with your photos — I really do love seeing how you make it your own. And if you’re in a savory mood before dessert, these BBQ Ranch Chicken Sliders make the most perfect pairing for a full crowd-pleasing spread.
This Biscoff Icebox Cake is so versatile — I bet you’ve already got amazing variations in mind. Tell me everything in the comments below.
About Claire
I’m Claire Whitmore — a dessert daydreamer from Asheville, NC. For me, baking isn’t about perfect pastries — it’s about the joy of sharing something sweet (and maybe sneaking an extra drizzle of Biscoff spread when no one’s looking).

Biscoff Icebox Cake (No Bake, 4 Ingredients, Irresistibly Creamy)
Equipment
- Large mixing bowl
- Electric hand mixer or stand mixer
- 9×9-inch square baking pan
- Spatula or offset spatula
- Microwave-safe bowl
- Zip-lock bag or rolling pin
- Plastic wrap or foil
Ingredients
Biscoff Icebox Cake
- 500 ml Nestle All-Purpose Cream chilled
- 8 oz Carnation Condensed Milk half of a 14 oz can
- 13.4 oz Biscoff Spread creamy variety
- 40 pieces Lotus Biscoff Cookies approximately 2 packs
Instructions
- Place 6 Lotus Biscoff Cookies into a zip-lock bag and crush into rough pieces using a rolling pin or the bottom of a glass. Set aside.
- Pour the chilled Nestle All-Purpose Cream into a large mixing bowl and whip with an electric mixer on medium-high speed until soft peaks form, about 4 to 5 minutes.
- Microwave 5 tablespoons of Biscoff Spread for about 10 seconds until slightly warm and pourable. Add to the whipped cream along with the condensed milk and two-thirds of the crushed cookies. Fold gently until fully combined.
- Arrange a single layer of whole Lotus Biscoff Cookies in a 9×9 inch pan. Spread half of the cream mixture evenly over the cookies. Add another layer of cookies, then spread the remaining cream mixture on top, smoothing to the edges.
- Cover the pan tightly with plastic wrap and freeze for 2 to 3 hours until firm enough to hold its shape.
- Microwave the remaining Biscoff Spread for about 30 seconds until pourable. Pour over the frozen cake, spread evenly to the edges, and sprinkle with the remaining crushed cookies.
- Transfer the cake to the refrigerator and chill for about 1 hour until the topping is firm and glossy. Slice into squares and serve cold.