Sourdough Hamburger Buns Recipe
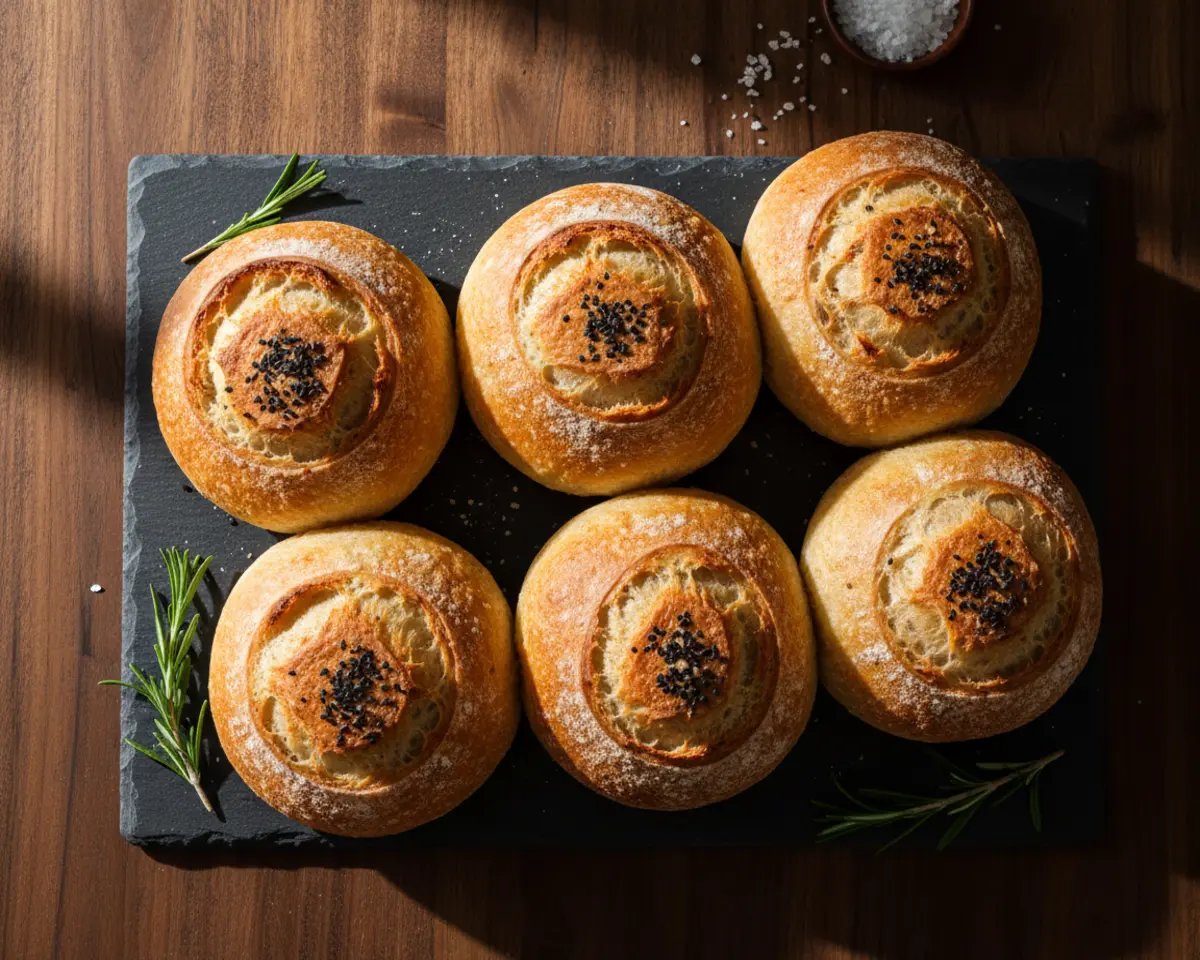
Sourdough hamburger buns are soft, tangy homemade burger buns made with active sourdough starter or sourdough discard, offering a delicious artisan twist on classic hamburger rolls. These pillowy sourdough bread rolls pair perfectly with juicy burgers, crispy chicken sandwiches, or your favorite deli fillings.
I’m Linda Sandra, and I’ve been baking these sourdough hamburger buns in my Charleston kitchen for years now. There’s something magical about combining that gentle sourdough tang with the soft, buttery texture of a classic burger bun.
I remember the first time I made homemade burger buns for a backyard cookout. My kids were skeptical until they bit into those golden, sesame-topped beauties. Now they request these sourdough discard buns for every family gathering, and I’m never mad about it.
Table of Contents
Quick Overview
I have a feeling you’ll love what’s next. The Sourdough Recipes favorites are packed with recipes that disappear fast at every gathering. Go check them out before someone else snags them!
Little Snapshot: What This Recipe Delivers
These sourdough hamburger buns deliver bakery-quality artisan burger buns with a subtle tang, pillowy soft crumb, and golden crust. Ready in about 6-10 hours total (mostly hands-off rising time), they’re perfect for elevating your next cookout or weeknight burger night.
Why You’ll Love This Recipe 🌸
- These sourdough hamburger buns take less active effort than arguing with a toddler about vegetables.
- They’re the perfect way to use up that sourdough discard sitting in your fridge, so nothing goes to waste.
- Soft enough for little hands to grip, sturdy enough to hold all the toppings without falling apart.
- According to King Arthur Baking, sourdough discard adds incredible depth of flavor to everyday baked goods — and these buns prove exactly why.
Quick Facts ⚡
Here’s the quick scoop on this sourdough hamburger buns recipe.
- CourseSide Dish / Bread
- Prep Time20 minutes
- Cook Time18 minutes
- Total Time6-10 hours (including rise time)
- Servings8 buns
- DifficultyEasy
Nutritional Peek
| Nutrient | Amount per Serving |
|---|---|
| Calories | 260 kcal |
| Protein | 8g |
| Carbohydrates | 44g |
| Fat | 6g |
| Fiber | 2g |
| Sugar | 7g |
What You’ll Need
You don’t need fancy equipment for these homemade burger buns. Just a few kitchen basics and a little patience.
- Large mixing bowl
- Wooden spoon or dough whisk
- Kitchen scale (highly recommended for accuracy)
- Clean kitchen towel or plastic wrap
- Baking sheet
- Parchment paper
- Pastry brush (for egg wash)
- Wire cooling rack
Ingredients
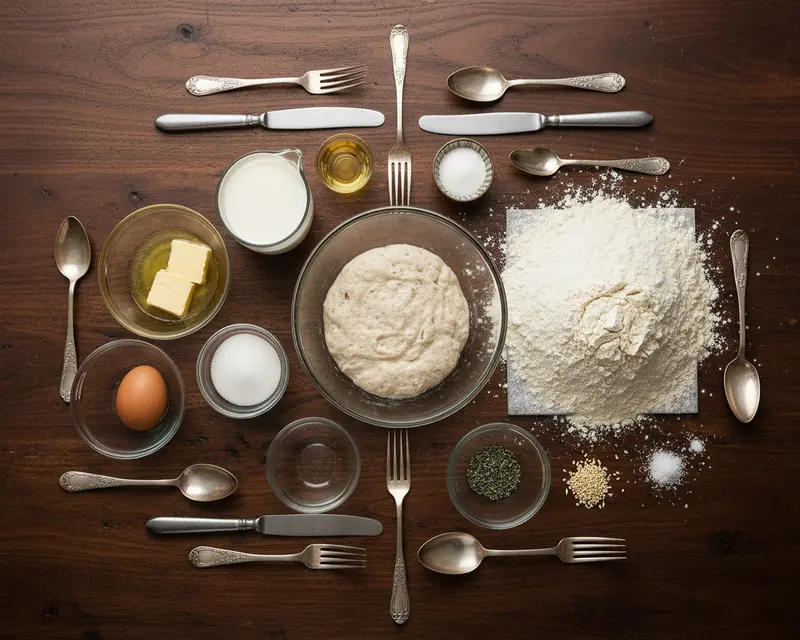
These sourdough discard buns come together with simple pantry staples and your bubbly starter. I love how the warm milk and melted butter create that tender, bakery-style crumb. The touch of sugar balances the sourdough tang beautifully, and those sesame seeds on top? Pure magic.
| Group | Ingredient | Amount | Notes |
|---|---|---|---|
| Wet Ingredients | Active sourdough starter | 150g | Fed and bubbly, or use discard |
| Wet Ingredients | Warm milk | 300g | Around 100°F, not hot |
| Wet Ingredients | Granulated sugar | 50g | Feeds the yeast, adds softness |
| Wet Ingredients | Unsalted butter | 50g, melted | Cooled slightly so it doesn’t cook the egg |
| Wet Ingredients | Large egg | 1 | Room temperature works best |
| Dry Ingredients | All-purpose flour | 500g | Bread flour works too for extra chew |
| Dry Ingredients | Salt | 10g | Don’t skip — it boosts flavor |
| Optional Topping | Sesame seeds | To taste | Classic burger bun style |
| Optional Topping | Egg wash | 1 egg + 1 tbsp water | For that golden, glossy finish |
Step-by-Step Instructions
Let’s make this happen. These sourdough hamburger buns are easier than you think, and your kitchen is about to smell like a Charleston bakery.
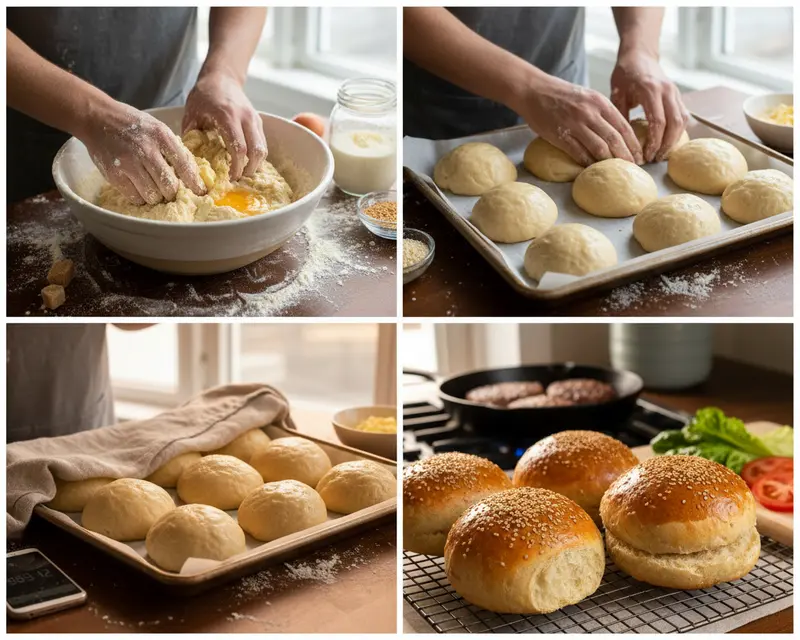
Step 1: Mix the Wet Ingredients
In your large mixing bowl, combine the active sourdough starter, warm milk, granulated sugar, melted butter, and egg. Use a wooden spoon or dough whisk to mix everything together until it’s smooth and well blended. The mixture should look creamy with little bubbles from the starter.
Step 2: Add Flour and Salt
Add the all-purpose flour and salt directly to your wet mixture. Stir with your spoon until a shaggy, sticky dough forms. It won’t look pretty yet, and that’s perfectly fine — you’re about to work some magic into it.
Step 3: Knead the Dough
Turn your shaggy dough out onto a lightly floured surface. Knead it for 8-10 minutes using the heels of your hands, folding and pressing until the dough becomes smooth, elastic, and slightly tacky. It should bounce back when you poke it gently.
Step 4: First Rise
Place your smooth dough ball into a lightly greased bowl. Cover it with plastic wrap or a damp kitchen towel and let it rise in a warm spot for 4-8 hours, or until it’s doubled in size. For overnight magic, pop it in the fridge for a slow, cold fermentation that deepens the flavor.
Step 5: Divide and Shape
Gently deflate your puffy dough and turn it out onto your work surface. Divide it into 8 equal pieces, each weighing about 90-100g. Shape each piece into a tight, smooth ball by cupping your hand over it and rolling it in small circles on the counter.
Step 6: Proof the Buns
Place your shaped buns on a parchment-lined baking sheet, leaving about 2 inches between them. Cover loosely with plastic wrap or a clean towel and let them proof for 1-2 hours, until they’re visibly puffy and soft to the touch. They should jiggle slightly when you gently shake the pan.
Step 7: Preheat and Prepare
While your buns are doing their final puff-up, preheat your oven to 375°F (190°C). Whisk together one egg and a tablespoon of water for your egg wash. When the buns are ready, gently brush the tops with egg wash and sprinkle with sesame seeds if you’re using them.
Step 8: Bake to Golden Perfection
Slide your baking sheet into the preheated oven and bake for 15-20 minutes. The buns are done when they’re golden brown on top and sound hollow when you tap the bottom. The smell will be absolutely intoxicating.
Step 9: Cool Completely
Transfer your beautiful sourdough bread rolls to a wire rack and let them cool completely before slicing. I know it’s tempting to cut into them right away, but patience here prevents gummy centers.
Pro Tips & Gentle Guidance
These sourdough discard buns are forgiving, but a few little tricks will take them from good to bakery-level amazing. I’ve learned these lessons through plenty of trial and error in my own Charleston kitchen.
Use a Kitchen Scale
Weighing your ingredients, especially the flour, makes a huge difference in consistency. Cup measurements can vary wildly depending on how you scoop. A scale takes the guesswork out and gives you perfect buns every single time.
Test Your Starter’s Activity
If you’re using active starter, make sure it’s passed the float test — drop a spoonful in water and it should float. Even if you’re using discard, make sure it’s not too old or separated. Fresh discard (within a week) gives the best flavor and rise.
Don’t Rush the Rise
Sourdough works on its own timeline, not yours. If your kitchen is cool, the rise might take longer — that’s okay. The dough should truly double in size and feel airy and soft, not dense. According to The Perfect Loaf’s fermentation guide, warmer temperatures speed up fermentation while cooler temps develop more complex flavor.
Shape with Confidence
When shaping your buns, create tension on the surface by pulling the dough down and under as you roll. This helps them hold their round shape and rise evenly. Loose shaping leads to flat, sad buns.
Egg Wash Is Your Secret Weapon
That glossy, golden top doesn’t happen by accident. The egg wash creates a beautiful sheen and helps the sesame seeds stick. Brush gently so you don’t deflate your puffy buns.
Cool Before Slicing
I know, I know — the hardest part. But slicing warm bread releases too much steam and can make the interior gummy. Let them cool completely, and you’ll be rewarded with perfect texture.
Variations & Adaptations
Whole Wheat Sourdough Buns
Swap out 150g of the all-purpose flour for whole wheat flour. You might need to add a tablespoon or two more milk since whole wheat absorbs more liquid. The result is nuttier, heartier artisan hamburger buns.
Garlic Herb Burger Buns
Mix 2 teaspoons of garlic powder and 1 tablespoon of dried Italian herbs into your flour before adding it to the wet ingredients. Brush the tops with melted garlic butter right after baking. Absolute flavor bombs.
Pretzel-Style Sourdough Buns
After shaping, dip each bun briefly in a baking soda bath (1/4 cup baking soda dissolved in 4 cups warm water). Let them drain, then brush with egg wash and sprinkle with coarse salt. Bake as directed for that classic pretzel twist.
Sweet Hawaiian-Style Buns
Increase the sugar to 75g and add 2 tablespoons of pineapple juice to the wet ingredients. These turn out slightly sweet and incredibly soft — perfect for pulled pork or teriyaki burgers.
Everything Bagel Topping
Skip the sesame seeds and sprinkle everything bagel seasoning on top before baking. These are amazing for breakfast sandwiches or as a savory side for soups.
Slider-Size Buns
Divide your dough into 16 smaller portions (about 45-50g each) instead of 8. Reduce baking time to 12-15 minutes. Perfect for parties or little kid hands.
Quick Fixes for Sourdough Hamburger Buns
Problem: Buns Are Dense and Heavy
Your starter might not have been active enough, or the dough didn’t rise long enough. Make sure your starter passes the float test and give the dough plenty of time to truly double in size. Patience is key here.
Problem: Buns Spread Out Instead of Rising Up
The dough was likely too wet or not shaped tightly enough. Make sure you’re creating good surface tension when shaping each bun. If your dough feels very sticky, add a tablespoon more flour next time.
Problem: Tops Are Too Dark but Insides Are Underdone
Your oven temperature might be running hot. Use an oven thermometer to check, and if needed, reduce the temperature by 25°F and bake a few minutes longer. You can also tent the buns with foil halfway through baking.
Problem: Buns Are Dry
Overbaking is usually the culprit. Check your buns at the 15-minute mark and pull them as soon as they’re golden and sound hollow when tapped. Also, make sure you’re measuring your flour accurately — too much flour creates dry dough.
Problem: Sourdough Tang Is Too Strong
Long fermentation times at warm temperatures can create intense tanginess. Try a shorter bulk rise or do a cold overnight fermentation in the fridge, which develops milder, more complex flavors.
Storage & Reheating
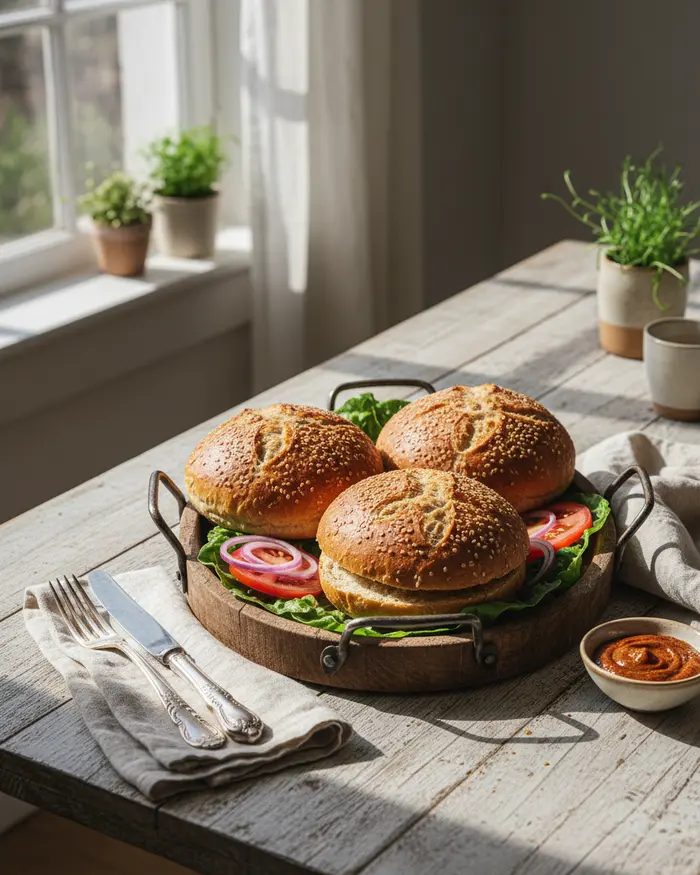
These sourdough discard buns stay soft and delicious for several days when stored properly. I love having a batch on hand for quick weeknight dinners or impromptu cookouts.
Serving Suggestions
Slice your buns in half and toast them lightly on the grill or in a skillet with a little butter. They’re perfect for classic beef burgers, pulled pork, grilled chicken sandwiches, or even breakfast sandwiches with eggs and bacon. Try them with my easy sourdough sandwich bread techniques if you want to explore more sourdough baking.
Storage
Store cooled buns in an airtight container or resealable bag at room temperature for up to 3 days. For longer storage, freeze them in a freezer bag for up to 3 months. Just thaw at room temperature or pop them straight into the toaster from frozen.
Reheating
To refresh day-old buns, wrap them in foil and warm in a 300°F oven for 5-7 minutes. You can also microwave individual buns for 10-15 seconds wrapped in a damp paper towel. For a crispy exterior, split and toast them face-down in a dry skillet.
| Storage Method | Duration | Best For |
|---|---|---|
| Room Temperature (airtight container) | 3 days | Immediate use, soft texture |
| Refrigerator (sealed bag) | 5-7 days | Slightly longer storage (may dry slightly) |
| Freezer (freezer bag) | 3 months | Long-term storage, batch prep |
No-Waste Kitchen Magic
Use Your Sourdough Discard
This recipe is perfect for using up that discard you’d otherwise toss. You’re transforming what many consider “waste” into absolutely gorgeous homemade burger buns. If you love finding creative uses for discard, check out my easy sourdough discard crackers recipe too.
Turn Stale Buns into Breadcrumbs
If your buns get a little stale, don’t toss them. Cut them into cubes and toast them in the oven at 300°F until completely dry and golden. Pulse in a food processor for homemade breadcrumbs. They’re fantastic for meatballs, casserole toppings, or coating chicken.
Make Garlic Bread
Slice leftover buns in half, slather with garlic butter, and broil until golden. Serve alongside pasta or soup. My kids request this almost as often as fresh buns.
French Toast Buns
Day-old buns make incredible French toast. Slice them thickly, dip in your favorite egg mixture, and cook until golden. The slightly tangy flavor is absolutely divine with maple syrup.
Burger Bun Croutons
Cube your buns, toss with olive oil and your favorite seasonings, then bake until crispy. These add amazing texture to salads and are way better than store-bought croutons.
Variations & Adaptations
Dairy-Free Version
Replace the milk with unsweetened almond milk, oat milk, or soy milk. Swap the butter for melted coconut oil or vegan butter. The texture stays beautifully soft.
Egg-Free Option
Use a flax egg (1 tablespoon ground flaxseed mixed with 3 tablespoons water, let sit 5 minutes) in place of the egg in the dough. Skip the egg wash or brush with a little plant-based milk instead.
Gluten-Free Adaptation
This one’s tricky with sourdough, but you can try using a gluten-free sourdough starter and a good 1:1 gluten-free flour blend with xanthan gum. The texture will be different but still delicious. You might need to add a bit more liquid.
Lower Sugar Version
Cut the sugar down to 25g if you prefer less sweetness. The buns will still rise beautifully, just with a slightly more savory profile. Perfect for pairing with rich, saucy burgers.
Pro Tips & Gentle Guidance
Create a Warm Proofing Environment
In winter, I proof my dough in the oven with just the light on. It creates a gentle, consistent warmth that helps the dough rise beautifully even when my Charleston kitchen feels chilly.
Don’t Overkneading
Yes, you can overknead, especially by hand. Once the dough is smooth and elastic and bounces back when poked, you’re done. Overkneaded dough can become tough.
Watch the Second Rise Carefully
During the final proof, the buns should be puffy and soft but not overproofed. If they collapse when you touch them, they’ve gone too far. Slightly underproofed is better than overproofed.
Rotate Your Baking Sheet
Halfway through baking, rotate your pan 180 degrees to ensure even browning. Ovens have hot spots, and this simple step makes all the buns bake uniformly.
Frequently Asked Questions
Here are answers to the most common questions about making these sourdough hamburger buns at home.
How long does it take to make sourdough hamburger buns?
Making sourdough hamburger buns typically takes 12-24 hours total, including 8-12 hours for bulk fermentation, 1-2 hours for shaping and proofing, and about 20 minutes for baking. The extended fermentation time develops the characteristic tangy flavor and improves digestibility.
Can I freeze sourdough hamburger buns?
Yes, sourdough hamburger buns freeze very well. Allow them to cool completely after baking, then wrap individually in plastic wrap or place in freezer bags. They can be stored frozen for up to 3 months. Thaw at room temperature or warm in the oven before serving.
Why are my sourdough hamburger buns too dense?
Dense sourdough hamburger buns usually result from under-proofing, inactive starter, or too much flour. Make sure your sourdough starter is active and bubbly before use, allow adequate time for fermentation, and avoid adding excess flour during shaping. Proper hydration and gentle handling also help create lighter buns.
What is the best flour to use for sourdough hamburger buns?
Bread flour is ideal for sourdough hamburger buns because its higher protein content provides better structure and a soft, tender crumb. All-purpose flour can also work but may result in slightly less chewy buns. Some recipes use a combination of bread flour and whole wheat flour for added flavor and nutrition.
How should I store sourdough hamburger buns?
Store sourdough hamburger buns at room temperature in an airtight container or plastic bag for up to 3 days. Do not refrigerate as this accelerates staling. For longer storage, freeze the buns. If they become slightly stale, you can refresh them by warming in a 300-degree oven for a few minutes.
Final Dish
These sourdough hamburger buns have become a staple in my kitchen, and I hope they find a cozy place in yours too. There’s nothing quite like biting into a burger cradled in a bun you made from scratch — soft, tangy, and absolutely delicious.
Whether you’re firing up the grill for a weekend cookout or just want to elevate your weeknight burger game, these homemade burger buns are worth every minute.
I’d love to see your beautiful creations! Snap a photo of your sourdough bread rolls and tag me on social media, or drop a comment below telling me how your batch turned out. Did you try any fun variations? Let’s chat!
I’m Linda Sandra — a Charleston home chef and comfort-food daydreamer. Around here, cooking’s not about perfection — it’s about cozy vibes, creative twists, and food that feels like love.
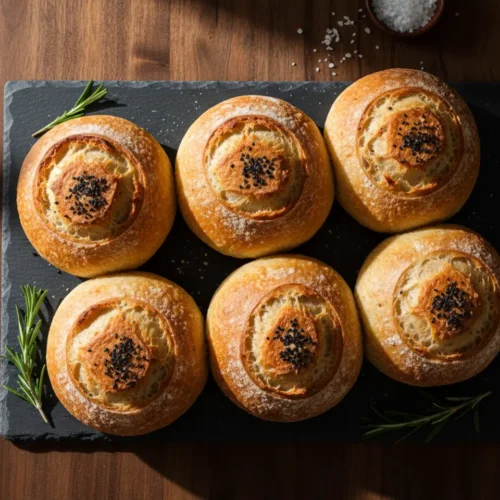
Sourdough Hamburger Buns
Ingredients
- 150 g active sourdough starter
- 300 g warm milk
- 50 g granulated sugar
- 50 g unsalted butter melted
- 1 large egg
- 500 g all-purpose flour
- 10 g salt
- Optional: sesame seeds for topping
Instructions
- In a large bowl, combine the active sourdough starter, warm milk, sugar, melted butter, and egg. Mix until well combined.
- Add the flour and salt to the wet ingredients. Mix until a shaggy dough forms.
- Turn the dough out onto a lightly floured surface and knead for 8-10 minutes, or until the dough is smooth and elastic.
- Place the dough in a lightly greased bowl, cover with plastic wrap, and let it rise in a warm place for 4-8 hours, or until doubled in size. Alternatively, you can refrigerate it overnight for a slower rise.
- Gently deflate the dough and divide it into 8 equal pieces (approximately 90-100g each).
- Shape each piece into a tight, round bun. Place the shaped buns on a baking sheet lined with parchment paper, leaving some space between them.
- Cover the buns loosely with plastic wrap or a clean kitchen towel and let them proof for another 1-2 hours, or until visibly puffy.
- Preheat your oven to 375°F (190°C).
- If desired, brush the tops of the buns with an egg wash (1 egg whisked with 1 tablespoon of water) and sprinkle with sesame seeds.
- Bake for 15-20 minutes, or until the buns are golden brown and sound hollow when tapped on the bottom.
- Transfer the baked buns to a wire rack to cool completely before slicing and serving.