Crispy Roasted Green Beans
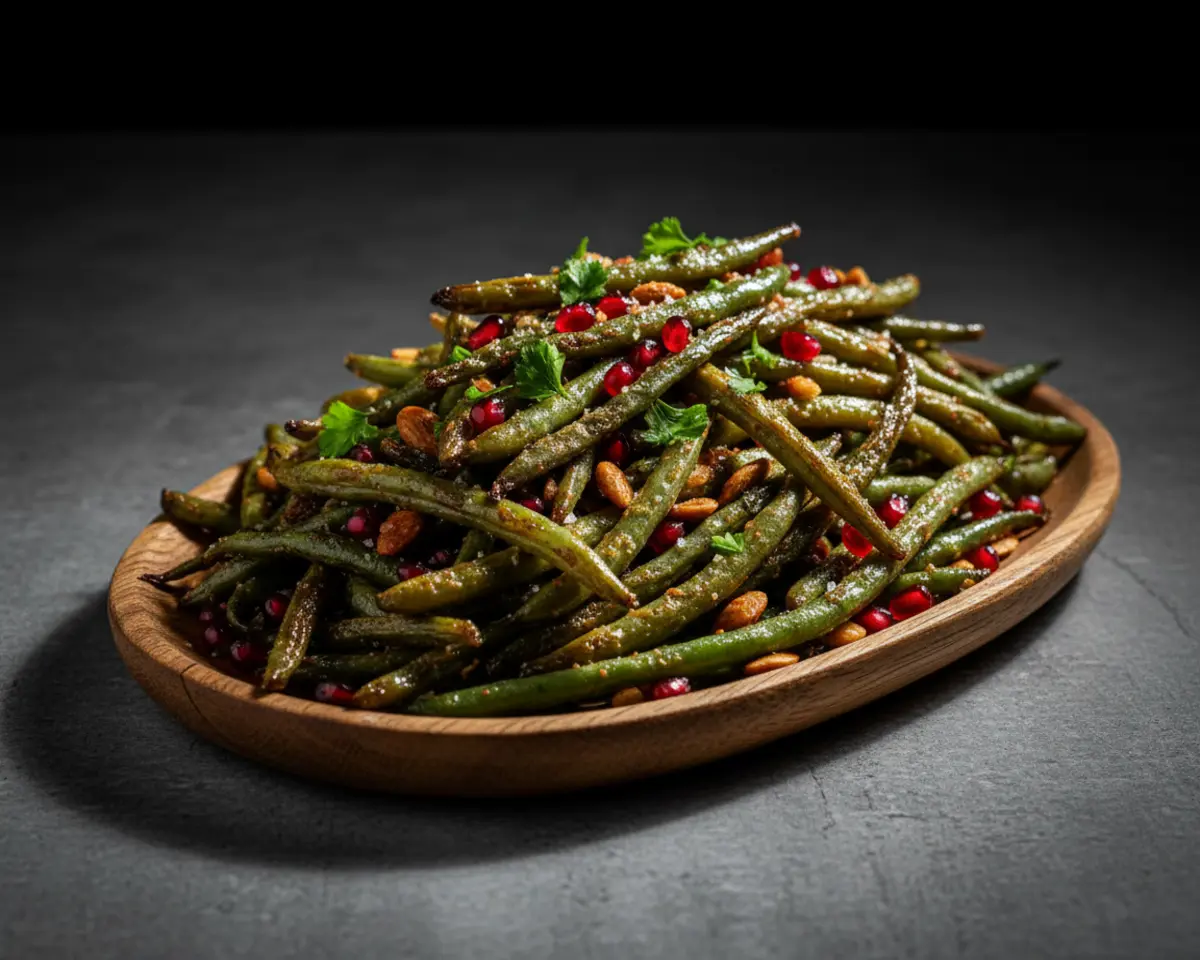
Roasted green beans are a simple, delicious green bean side dish that comes together in under 30 minutes. This easy vegetable recipe transforms fresh beans into a tender-crisp, caramelized masterpiece with just a handful of pantry staples.
I’m Linda Sandra, and I’ve been roasting green beans in my Charleston kitchen for years now. It’s one of those go-to healthy roasted vegetables that never disappoints, whether I’m hosting Sunday supper or just need something green on a Tuesday night.
The first time I made roasted green beans, I was trying to impress my neighbor at a potluck. I’d always steamed them before, but roasting? That changed everything. The kitchen smelled like a cozy bistro, and those beans disappeared faster than I could refill the platter.
Table of Contents
Quick Overview
This is just one of the many gems in our Vegetable & Side Dishes series. Every recipe there has been tested and loved in real kitchens, and I promise there’s something for every craving. Go see for yourself.
Little Snapshot: What This Recipe Delivers
This roasted green beans recipe delivers tender-crisp, caramelized beans in just 20 minutes with five simple ingredients. Perfect as a quick green bean side dish for weeknight dinners or holiday spreads.
Why You’ll Love This Recipe 🌸
- This easy vegetable recipe takes less time than scrolling through your phone while dinner cooks.
- It’s a hands-off green bean side dish that frees you up to focus on the main course or just breathe for a minute.
- Even picky eaters love the crispy, caramelized edges — it’s a veggie win every single time.
- According to Harvard Health, colorful vegetables like green beans support heart health and provide essential nutrients — and this recipe proves exactly why.
Quick Facts ⚡
Here’s the quick scoop on this roasted green beans.
- CourseSide Dish
- Prep Time5 minutes
- Cook Time20 minutes
- Total Time25 minutes
- Servings4 servings
- DifficultyEasy
Nutritional Peek
| Nutrient | Amount per serving |
|---|---|
| Calories | 90 kcal |
| Protein | 2 g |
| Carbohydrates | 9 g |
| Fat | 7 g |
| Fiber | 3 g |
| Sugar | 4 g |
What You’ll Need
You don’t need fancy gadgets for this easy vegetable recipe. Just a few basics from your kitchen and you’re set to make magic happen.
- Large mixing bowl
- Rimmed baking sheet (preferably half-sheet size)
- Measuring spoons
- Sharp knife for trimming
- Cutting board
Ingredients
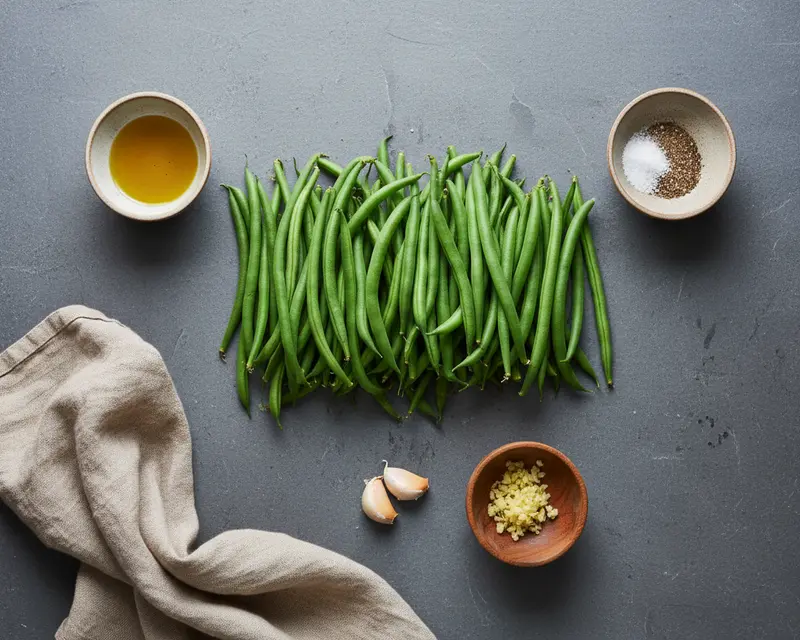
This green bean side dish relies on fresh, vibrant ingredients you probably already have. Olive oil brings richness, garlic adds warmth, and a touch of salt and pepper lets the natural flavor of the beans shine through beautifully.
| Group | Ingredient | Amount | Notes |
|---|---|---|---|
| Vegetables | Fresh green beans, trimmed | 1 pound | Look for firm, bright beans with no browning |
| Fats | Olive oil | 2 tablespoons | Extra virgin is lovely here |
| Seasonings | Salt | 1/2 teaspoon | Sea salt or kosher works great |
| Seasonings | Black pepper | 1/4 teaspoon | Freshly cracked if you have it |
| Aromatics | Garlic, minced | 2 cloves | Optional but highly recommended |
Step-by-Step Instructions
Let’s make this happen.
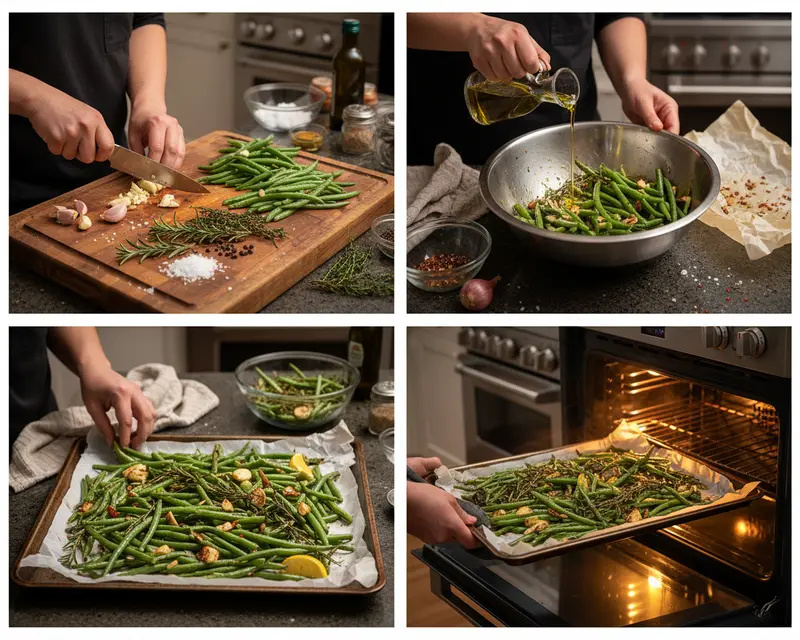
Step 1: Preheat and Prep
Preheat your oven to 400°F (200°C). While it warms, trim the stem ends off your green beans — you can line them up in small bunches and slice them all at once to save time.
Step 2: Toss with Oil and Seasonings
In a large mixing bowl, combine the trimmed green beans, olive oil, salt, and black pepper. If you’re adding garlic (and I really hope you are), toss it in now. Use your hands or a big spoon to coat every bean evenly.
Step 3: Arrange on Baking Sheet
Spread the seasoned green beans in a single layer on a rimmed baking sheet. Don’t crowd them — they need space to roast properly and get those gorgeous caramelized edges we’re after.
Step 4: Roast Until Tender-Crisp
Slide the baking sheet into your preheated oven and roast for 15 to 20 minutes. The beans should be tender-crisp with slightly charred spots. For extra crispiness, roast a few minutes longer — just keep an eye on them.
Step 5: Serve Immediately
Pull the roasted green beans from the oven and transfer them to a serving dish. They’re at their best when served right away, with all that roasted flavor still singing.
Pro Tips & Gentle Guidance
Making the perfect green bean side dish is all about a few small details. These healthy roasted vegetables shine when you respect their space on the pan and let the oven work its magic.
Here’s what I’ve learned from years of roasting beans in my Charleston kitchen.
Use Fresh, Dry Beans
Moisture is the enemy of crispiness. After washing your green beans, pat them completely dry with a clean kitchen towel or paper towels. Wet beans will steam rather than roast.
Don’t Skimp on the Baking Sheet
A rimmed half-sheet pan gives you the most space. If your beans are piled on top of each other, they won’t caramelize — they’ll just turn soggy and sad.
Add Garlic Midway for Less Bitterness
If you’re worried about the garlic burning, toss it with the beans halfway through roasting instead of at the start. It’ll still infuse beautifully without any bitter char.
Bump Up the Heat for Extra Crisp
Want even crispier beans? Crank the oven to 425°F and watch them closely. The higher heat intensifies caramelization and delivers restaurant-quality texture at home.
Try a Finishing Sprinkle
A squeeze of fresh lemon juice, a pinch of red pepper flakes, or a sprinkle of grated Parmesan right before serving takes these healthy roasted vegetables to the next level.
According to research published in the Journal of Food Science, roasting vegetables at high temperatures preserves more antioxidants than boiling or steaming — so you’re not just eating something delicious, you’re maximizing nutrition too.
Variations & Adaptations
Once you master roasted green beans, the flavor possibilities open wide. You can dress them up or keep them simple depending on what’s in your pantry or what the meal calls for.
Garlic Parmesan Green Beans
Toss your roasted beans with freshly grated Parmesan cheese and an extra clove of minced garlic right when they come out of the oven. The heat melts the cheese into a savory, nutty coating.
Asian-Inspired Sesame Beans
Swap the olive oil for sesame oil and add a drizzle of soy sauce or tamari before roasting. Finish with toasted sesame seeds and a sprinkle of sliced green onions for a completely different vibe.
Lemon Zest & Almond Crunch
After roasting, toss the beans with fresh lemon zest and toasted sliced almonds. It’s bright, nutty, and pairs beautifully with fish or chicken.
Spicy Chili-Lime Beans
Add a pinch of chili powder or smoked paprika to the oil before roasting, then finish with a squeeze of fresh lime juice. It’s a zippy twist that wakes up your taste buds.
Honey-Glazed Green Beans
Drizzle a teaspoon of honey over the beans halfway through roasting. The honey caramelizes and adds a subtle sweetness that pairs wonderfully with savory mains like honey-glazed carrots and green beans.
Balsamic Roasted Beans
Toss the beans with a tablespoon of balsamic vinegar before roasting. The vinegar reduces into a tangy-sweet glaze that clings to every bean.
Quick Fixes for Roasted Green Beans
Even the simplest recipes can throw a little curveball now and then. Here’s how to troubleshoot common hiccups with roasted green beans so you can get back to enjoying them.
Problem: Beans Are Soggy Instead of Crispy
This usually means they were too wet before roasting or overcrowded on the pan. Pat them completely dry next time and spread them out in a true single layer. If they’re already cooked, pop them under the broiler for 2-3 minutes to crisp them up.
Problem: Garlic Burned and Tastes Bitter
Minced garlic can char quickly at 400°F. Next time, add it halfway through roasting, or use whole smashed cloves that are less likely to burn. You can also toss the beans with garlic powder instead for a gentler flavor.
Problem: Beans Are Too Tough
They likely needed a few more minutes in the oven. Green beans vary in thickness, so thicker beans need closer to 20-25 minutes. Taste one at the 15-minute mark and adjust from there.
Problem: Beans Are Mushy
You roasted them a bit too long, or they were older beans to begin with. Fresh, firm beans hold up best. If this happens, turn them into a warm green bean salad by tossing with vinaigrette and diced tomatoes.
Problem: Flavor Tastes Flat
Don’t be shy with the salt and pepper, and make sure you’re using good-quality olive oil. A finishing squeeze of lemon juice or a pinch of red pepper flakes can also brighten things up beautifully.
Storage & Reheating
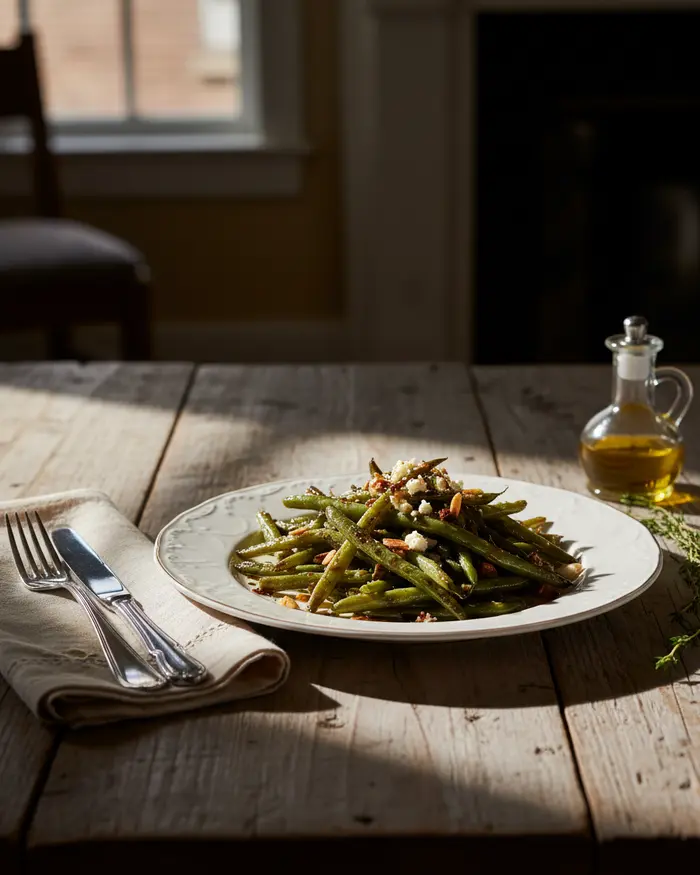
This green bean side dish is at its absolute best served fresh from the oven. But if you do have leftovers (or you’re meal-prepping ahead), they store and reheat beautifully with just a little care.
Serving Fresh
Roasted green beans are perfect alongside roasted chicken, grilled steak, or garlic Parmesan roasted baby potatoes. They also shine on a holiday table next to turkey or ham. Serve them hot for the best texture and flavor.
Storing Leftovers
Let the beans cool completely, then transfer them to an airtight container. They’ll keep in the fridge for up to 4 days. The texture softens a bit, but the flavor stays delicious.
Reheating
For the crispiest results, reheat leftover roasted green beans in a 375°F oven for 5-7 minutes. You can also use an air fryer at 375°F for 3-4 minutes. Avoid the microwave if possible — it makes them soggy.
| Storage Method | Duration | Best For |
|---|---|---|
| Room Temperature | Up to 2 hours | Serving at a gathering |
| Refrigerator | Up to 4 days | Meal prep and leftovers |
| Freezer | Up to 2 months | Batch cooking (texture may soften) |
No-Waste Kitchen Magic
Green beans are pretty low-waste to begin with, but there are still a few clever ways to use every bit and keep your kitchen as sustainable as possible.
Save the Trimmings
Toss those stem ends into a freezer bag along with other vegetable scraps like onion peels, carrot tops, and celery leaves. When the bag is full, simmer everything into a rich homemade vegetable stock.
Turn Leftovers into a Salad
Chop leftover roasted green beans and toss them with mixed greens, cherry tomatoes, feta cheese, and a lemony vinaigrette. It’s a quick, hearty lunch that tastes completely different from the original dish.
Blend into Soup
If your beans got a little too soft or you just want to use them up, blend them into a creamy vegetable soup with a bit of broth, garlic, and a splash of cream. It’s cozy and comforting on a chilly evening.
Add to Grain Bowls
Leftover roasted green beans are perfect stirred into quinoa or rice bowls with roasted chickpeas, tahini dressing, and a sprinkle of sunflower seeds. They add color, texture, and nutrition.
Compost What You Can’t Use
If you have a compost bin, any beans that didn’t make the cut or trimmings you can’t save are perfect additions. They break down quickly and enrich your garden soil beautifully.
Frequently Asked Questions
Got questions about roasted green beans? You’re not alone — here are answers to the most common ones I hear from readers.
What temperature should I roast green beans at?
Roast green beans at 425 degrees Fahrenheit for optimal results. This high temperature helps them caramelize and develop a crispy exterior while remaining tender inside. The cooking time is typically 15-20 minutes, depending on your desired level of crispness.
Do I need to blanch green beans before roasting them?
No, you do not need to blanch green beans before roasting them. Simply wash them, trim the ends, pat them dry, and toss with oil and seasonings. Roasting raw green beans directly in the oven produces the best texture and flavor with a nice caramelized finish.
What seasonings work best with roasted green beans?
Popular seasonings for roasted green beans include garlic powder, salt, black pepper, parmesan cheese, lemon zest, and red pepper flakes. You can also use fresh garlic, balsamic vinegar, or almonds. Olive oil is essential for helping the beans roast evenly and achieve a crispy texture.
How do I prevent roasted green beans from becoming soggy?
To prevent soggy green beans, make sure to dry them thoroughly after washing and arrange them in a single layer on the baking sheet without overcrowding. Use enough oil to coat them lightly but not excessively. A hot oven temperature of 425 degrees Fahrenheit also helps achieve crispness instead of sogginess.
Can I roast frozen green beans or do they need to be fresh?
You can roast frozen green beans, but fresh green beans typically yield better results with superior texture and flavor. If using frozen, do not thaw them first. Pat them dry to remove excess moisture, increase the roasting time by 5-10 minutes, and expect a slightly softer texture compared to fresh beans.
Final Dish
Roasted green beans are one of those easy vegetable recipes that prove simple really is best. With just a handful of ingredients and 25 minutes, you’ve got a green bean side dish that’s crispy, flavorful, and beautiful enough for any table.
Whether you’re serving them alongside air fryer roasted bell peppers for a veggie-forward dinner or pairing them with your favorite protein, these healthy roasted vegetables never disappoint. They’re proof that cooking doesn’t have to be complicated to be delicious.
I’d love to see how yours turn out! Snap a photo, tag me, and let me know if you tried any fun variations. And if you have questions or tips of your own, drop them in the comments — I read every single one.
I’m Linda Sandra — a Charleston home chef and comfort-food daydreamer. Around here, cooking’s not about perfection — it’s about cozy vibes, creative twists, and food that feels like love.
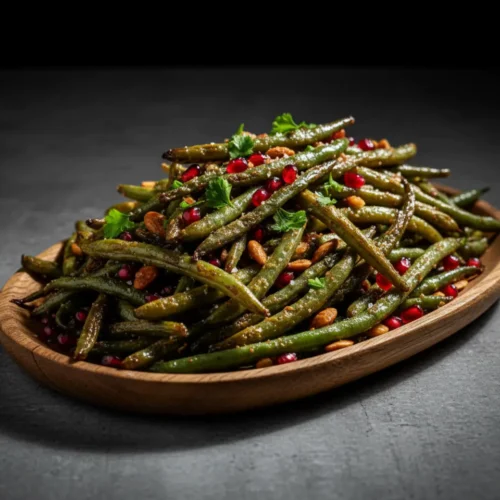
Roasted Green Beans
Ingredients
- 1 pound fresh green beans trimmed
- 2 tablespoons olive oil
- ½ teaspoon salt
- ¼ teaspoon black pepper
- 2 cloves garlic minced (optional)
Instructions
- Preheat your oven to 400°F (200°C).
- In a large bowl, toss the trimmed green beans with olive oil, salt, and pepper. If using, add the minced garlic and toss to combine.
- Spread the green beans in a single layer on a baking sheet.
- Roast for 15-20 minutes, or until tender-crisp and slightly charred. For crispier beans, roast a few minutes longer.
- Serve immediately.