Quick Sourdough Discard French Bread
I’m Linda Sandra — a Charleston home chef who believes that every meal should feel like a hug, and this Quick Sourdough Discard French Bread recipe is about to change the way you think about using up that extra starter.
If you’ve been feeding your sourdough and stashing discard in the fridge, wondering what magic you can create with it, this is your answer.
This French bread sourdough recipe gives you two gorgeous, crusty loaves with that perfect chewy interior and golden-brown exterior. We’re combining the tangy flavor of sourdough discard with the reliable rise of instant yeast, so you get the best of both worlds without the fussiness.
I started making this sourdough French bread with yeast on a Sunday morning when I had more discard than I knew what to do with and a serious craving for fresh bread. Now it’s become my weekend ritual — the house smells incredible, and there’s something so satisfying about slicing into warm, homemade bread that you made from “waste.”
Table of Contents
Little Snapshot: What This Recipe Delivers
This Quick Sourdough Discard French Bread creates two bakery-quality loaves using sourdough discard, bread flour, instant yeast, honey, and coconut oil.
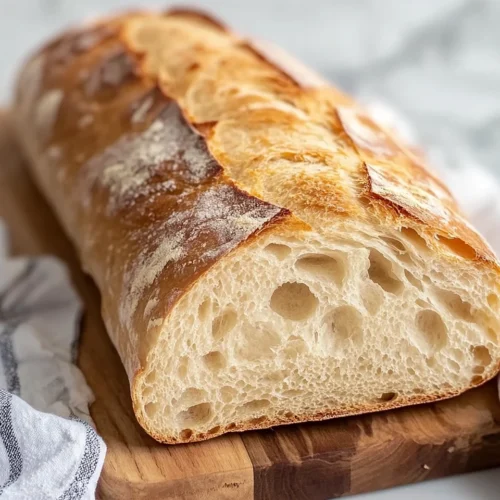
With a total time of about 3-4 hours including rise time and a 30-35 minute bake, you’ll get crusty, golden loaves with a tender, airy crumb and subtle sourdough tang — perfect for sandwiches, toast, or eating warm with butter.
Why You’ll Love This Recipe 🌸
- This Quick Sourdough Discard French Bread gives you that artisan bakery taste without the 24-hour wait — you’ll have fresh bread in under 4 hours.
- You’re using up sourdough discard that would otherwise go to waste, which makes this both economical and eco-friendly (your kitchen guilt can take a break).
- The combination of sourdough discard and instant yeast means you get reliable rises every single time, even if your starter isn’t super active.
- According to King Arthur Baking’s expert guide on creative sourdough discard uses, adding discard to yeasted breads enhances flavor and texture — and this French bread proves exactly why.
Quick Facts ⚡
Here’s the quick scoop on this Quick Sourdough Discard French Bread.
- CourseSide Dish/Bread
- Prep Time20 minutes
- Rise Time2-3 hours
- Cook Time30-35 minutes
- Total Time3-4 hours
- Servings2 loaves (about 16 slices each)
- DifficultyMedium
Nutritional Peek
Here’s what you’re getting in each generous slice of this beautiful French bread:
| Nutrient | Amount per Serving |
|---|---|
| Calories | 145 |
| Protein | 4g |
| Carbohydrates | 26g |
| Fat | 3g |
| Fiber | 1g |
| Sugar | 2g |
| Sodium | 220mg |
Ingredients
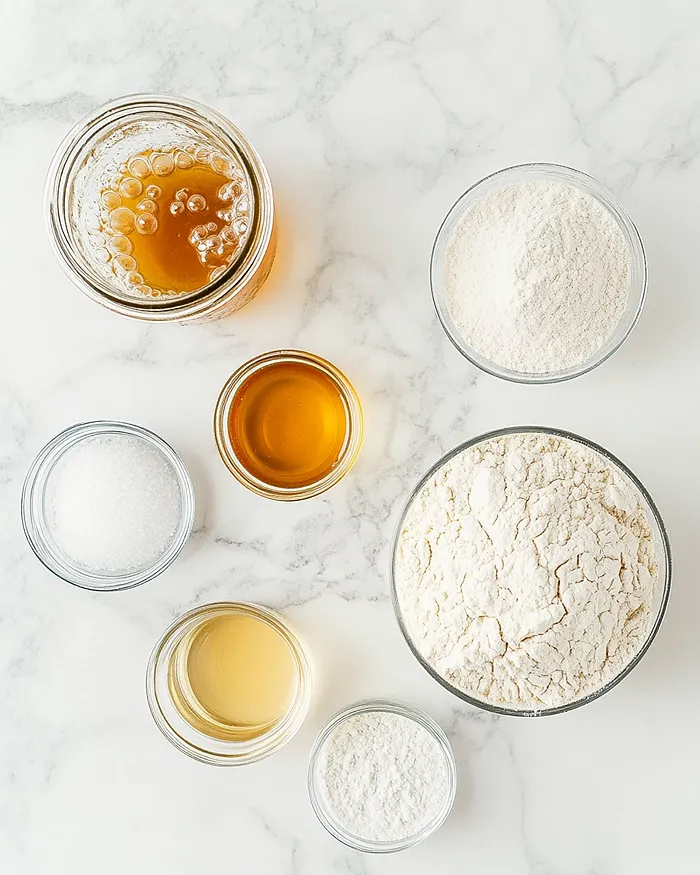
This French bread sourdough discard recipe starts with ingredients you probably already have on hand. For the sourdough mixture — sourdough discard, warm water, honey, and instant yeast — you’re building flavor and activating the yeast to get those gorgeous rises.
For the dough itself — coconut oil, bread flour, and salt — you’re creating structure and that perfect chewy texture that makes French bread so irresistible.
For the Sourdough Mixture:
| Amount | Ingredient |
|---|---|
| 200g (about 3/4 cup) | Sourdough discard (100% hydration, cold from the fridge is fine) |
| 430g (about 1 3/4 cups) | Warm water (95-105°F — warm to the touch but not scalding) |
| 10g (about 1 tablespoon) | Instant yeast (I use Red Star or SAF instant yeast) |
| 40g (about 2 tablespoons) | Honey (Sue Bee honey is my go-to, but any will work) |
For the Dough:
| Amount | Ingredient |
|---|---|
| 70g (about 1/3 cup) | Coconut oil (melted and cooled slightly, or use any neutral oil) |
| 860g (about 6 cups) | Bread flour (King Arthur bread flour gives the best results) |
| 20g (about 1 tablespoon) | Salt (sea salt or kosher) |
For Brushing (Optional):
| Amount | Ingredient |
|---|---|
| As needed | Melted butter (for that bakery-style glossy finish) |
Tools You’ll Actually Use
- Stand mixer with dough hook (or strong arms for hand-kneading)
- Large mixing bowl
- Dough container or bowl for rising
- Parchment paper
- Large baking sheet
- Kitchen towel or plastic wrap
- Bread lame or sharp knife for scoring
- Instant-read thermometer (helpful for checking water temperature)
- Pastry brush (for the butter)
Step-by-Step Instructions
Let me walk you through this Quick Sourdough Discard French Bread — it’s easier than you think, and the results are absolutely worth it.
Prepare the Sourdough Mixture
In the bowl of your stand mixer, combine 200 grams (about 3/4 cup) of sourdough discard with 430 grams (about 1 3/4 cups) of warm water.
If your discard is straight from the fridge and ice-cold, make sure that water is quite warm — even hot — because you need to balance the temperature. Use a spoon or just your hands to mix them together until the discard is evenly distributed and the mixture feels lukewarm to the touch.
Add 10 grams (about 1 tablespoon) of instant yeast and 40 grams (about 2 tablespoons) of honey to your discard mixture. Give it a gentle stir, then let this sit for about 5-10 minutes until it becomes foamy and smells yeasty — that’s your sign that the yeast is alive and ready to work its magic.
Form the Dough
Add 70 grams (about 1/3 cup) of melted and slightly cooled coconut oil, 20 grams (about 1 tablespoon) of salt, and 860 grams (about 6 cups) of bread flour to your foamy yeast mixture. Attach the dough hook to your stand mixer and let it knead on medium speed for about 8 minutes.
You’re looking for smooth, elastic dough that’s tacky to the touch but not sticky enough to leave residue all over your fingers.
If you’re kneading by hand (bless you), turn the dough out onto a lightly floured surface and knead for 10-12 minutes until it becomes smooth and springs back when you poke it. If the dough feels too sticky at any point, add flour one tablespoon at a time while continuing to knead.
Let the Dough Rise
Transfer your beautifully kneaded dough to a lightly oiled container or bowl. Cover it with a kitchen towel or plastic wrap and let it rise at room temperature for about an hour, or until it doubles or even triples in size.
The exact timing depends on how warm your kitchen is — in my Charleston kitchen during summer, this happens fast, but in winter it takes the full hour or sometimes a bit longer.
If you’re in a hurry, you can place the dough in a warm spot like near a sunny window, on top of the fridge, or even in an oven with just the light on. A dough proofing mat also works beautifully if you’ve got one.
Shape the Dough
Once your dough has risen gorgeously, turn it out onto your work surface (you don’t need flour here — the dough should be manageable now). Divide it into two equal portions using a bench scraper or knife. Press each portion into a rectangle shape with your fingers — aim for something slightly shorter in length than your baking sheet.
Starting from the long side, roll each rectangle up tightly like you’re making a jelly roll, pinching the seam closed as you go. Pinch the ends closed too, then tuck them slightly under the loaf. Place each rolled loaf seam-side down on a parchment-lined baking sheet, spacing them apart so they have room to expand.
Second Rise and Preheat the Oven
Cover your shaped loaves gently with a clean kitchen towel and let them rise again for 1-2 hours, depending on the temperature of your dough and your kitchen. You’re looking for loaves that have doubled in size and look puffy, light, and airy — when you gently press a finger into the dough, it should slowly spring back but leave a slight indent.
About 20 minutes before you think your loaves will be ready, preheat your oven to 375°F. This gives the oven plenty of time to get evenly hot.
Score and Bake
Using a bread lame or a very sharp knife, score your loaves by making several diagonal slashes across the top (I usually do 3-4), or make one long slash down the middle — totally your call on the style. Scoring isn’t just pretty; it gives the bread a place to expand during baking so it doesn’t burst randomly.
Bake your loaves in the preheated 375°F oven for 30-35 minutes until they turn a gorgeous golden brown and sound hollow when you tap the bottom. If you want to be precise, the internal temperature should read around 190-200°F on an instant-read thermometer.
As soon as you pull them from the oven, brush the warm loaves generously with melted butter for that professional bakery shine and extra flavor. Let them cool for at least 15-20 minutes before slicing (I know it’s torture to wait, but cutting too soon makes the interior gummy).
Pro Tips & Gentle Guidance
This sourdough French bread with yeast is pretty forgiving, but here are some tips to make your loaves even better.
The water temperature is crucial for activating the yeast properly. Aim for 95-105°F — if it’s too hot, you’ll kill the yeast; too cold, and it won’t activate well. When in doubt, lukewarm like a baby’s bath is perfect.
If you’re new to bread-making, The Perfect Loaf’s detailed shaping tutorial has step-by-step photos that really helped me master the rolling technique. The tighter you roll, the better your bread’s structure will be.
Don’t skip the second rise — it’s what gives you that light, airy texture inside. Rushing this step leads to dense bread, and we’re going for bakery-quality here.
For the crispiest crust possible, place a metal pan on the bottom oven rack and add a cup of hot water just before baking. The steam creates a better crust and helps the bread expand.
Quick Fixes for Quick Sourdough Discard French Bread
Dough isn’t rising well during the first rise? Your yeast might not have been active, or your kitchen is too cold. Move the dough to a warmer spot (like an oven with just the light on), and give it another 30-60 minutes. Fresh yeast makes a huge difference — check the expiration date on your packet.
Dough feels too sticky to work with during shaping? Lightly dust your work surface and hands with flour, but resist adding too much — tacky dough creates a better crumb. If it’s really unmanageable, let it rest for 10 minutes; the gluten will relax and make it easier to handle.
Loaves spread out instead of rising up during the second rise? You probably didn’t roll them tightly enough. Next time, really pull and stretch the dough as you roll, creating more tension. The seam should be pinched very well and placed face-down on the pan.
Crust is too hard or too pale? Too hard means you overbaked or your oven runs hot (try 350°F next time). Too pale means you need more time or slightly higher heat. The butter brush at the end also helps with color and softness.
Bread is dense instead of airy? This usually means you didn’t let the dough rise enough during one or both rises, or you added too much flour while kneading. Make sure your dough really doubles — it should look noticeably puffy and jiggly.
Variations & Adaptations
This French bread sourdough recipe is incredibly versatile and loves a good twist.
For herbed French bread, add 2 tablespoons of dried Italian herbs (basil, oregano, thyme) or 1/4 cup of fresh chopped rosemary directly to the dough during the kneading step. The whole house will smell like an Italian restaurant.
Want garlic bread built right in? Mix 4 cloves of minced garlic and 2 tablespoons of melted butter, then brush it on the loaves before the second rise. You’ll get crispy, garlicky edges that are absolutely addictive.
For a whole grain version, replace up to 2 cups of the bread flour with whole wheat flour. The bread will be slightly denser but with a wonderful nutty flavor. You might need to add a tablespoon or two more water since whole wheat absorbs more liquid.
If you want individual rolls instead of loaves, divide the dough into 16-20 pieces after the first rise, shape into balls, and reduce the baking time to 18-22 minutes. Perfect for dinner rolls or sandwich buns.
Serving, Storage & Reheating
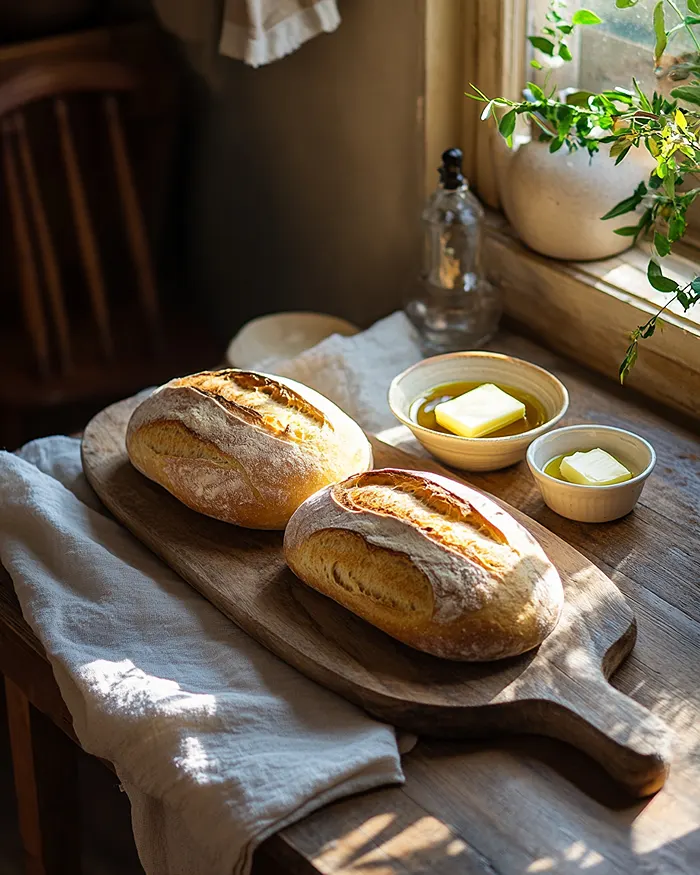
This Quick Sourdough Discard French Bread is perfect sliced thick for toast, cut into chunks for dipping in olive oil and balsamic, or split lengthwise for the most amazing sandwiches. I love mine warm with salted butter and a drizzle of honey for breakfast.
Store the cooled loaves wrapped in a clean kitchen towel or paper bag at room temperature for up to 3 days. Avoid plastic bags — they make the crust soft and chewy instead of crispy. If you won’t finish both loaves within a few days, slice one and freeze it.
To reheat and restore that fresh-baked crispiness, wrap the bread loosely in foil and warm in a 350°F oven for 10-15 minutes. For individual slices, a quick toast in the toaster or toaster oven works beautifully.
No-Waste Kitchen Magic
Day-old French bread is honestly a gift because it’s perfect for so many second-life recipes. Cut it into cubes and make croutons by tossing with olive oil, garlic, and herbs, then baking at 375°F until crispy. They’ll last for weeks in an airtight container.
Stale bread also makes the best French toast — slice it thick, soak it in a mixture of eggs, milk, vanilla, and cinnamon, then fry until golden. The sturdy texture holds up beautifully without getting soggy.
For bread crumbs, just tear the bread into chunks and pulse in a food processor until you get your desired texture. Store in the freezer and you’ll always have fresh breadcrumbs on hand. They’re perfect for meatballs, breading chicken, or topping casseroles.
FAQs
Can I freeze this Quick Sourdough Discard French Bread?
Absolutely! Let the loaves cool completely, then wrap them tightly in plastic wrap followed by aluminum foil or a freezer bag. They’ll keep beautifully for up to 3 months. Thaw overnight at room temperature, then reheat in a 350°F oven for 10-15 minutes to restore the crust.
What’s the best way to store sourdough French bread?
Store it wrapped in a clean kitchen towel or paper bag at room temperature for up to 3 days. Don’t use plastic bags — they trap moisture and make the crust soft. For longer storage, slice and freeze individual pieces.
How do I know when my Quick Sourdough Discard French Bread is done baking?
The loaves should be deep golden brown and sound hollow when you tap the bottom. If you have an instant-read thermometer, the internal temperature should read 190-200°F. The crust should feel firm and crispy, not soft or pale.
Why should I use bread flour in this French bread recipe?
Bread flour has a higher protein content (around 12-14%) compared to all-purpose flour, which develops more gluten and creates that chewy, structured crumb French bread is known for. You can use all-purpose in a pinch, but bread flour gives you the best texture.
Can I make this without a stand mixer?
Definitely! Just knead the dough by hand on a lightly floured surface for 10-12 minutes until it becomes smooth and elastic. It’s a bit of a workout, but it’s totally doable and some people find it therapeutic.
How long should I let the dough rise?
The first rise takes about 1 hour until the dough doubles or triples. The second rise takes 1-2 hours until the shaped loaves double and look puffy. Exact timing depends on your kitchen temperature — warmer rises faster, cooler takes longer.
Closing
So there you go — Quick Sourdough Discard French Bread that looks and tastes like it came from a fancy bakery but actually came from your kitchen using ingredients you already had. I’d love to see your spin on this sourdough French bread! Drop a comment below with photos of your loaves — I’d love to see how yours turned out.
This French bread sourdough recipe is so versatile; I bet you’ve already got ideas for flavor variations or ways to use it. Maybe herb and cheese? Cinnamon swirl for French toast? The possibilities are endless.
Thank you for baking along with me today. There’s something so special about filling your home with the smell of fresh bread, and I hope this becomes a regular part of your weekend routine like it has mine.
I’m Linda Sandra — a Charleston home chef and comfort-food daydreamer. Around here, cooking’s not about perfection — it’s about cozy vibes, creative twists, and food that feels like love. If you enjoyed this recipe, you might also love my crispy mini tacos or easy mini bacon ranch cheeseballs for your next gathering!
Quick Sourdough Discard French Bread
Equipment
- Stand mixer with dough hook
- Large mixing bowl
- Dough container or bowl for rising
- Parchment paper
- Large baking sheet
- Kitchen towel or plastic wrap
- Bread lame or sharp knife
- Instant-read thermometer
- Pastry brush
Ingredients
For the Sourdough Mixture
- 200 g Sourdough discard 100% hydration, about 3/4 cup, cold from fridge is fine
- 430 g Warm water 95-105°F, about 1 3/4 cups
- 10 g Instant yeast about 1 tablespoon
- 40 g Honey about 2 tablespoons
For the Dough
- 70 g Coconut oil about 1/3 cup, melted and cooled, or any neutral oil
- 860 g Bread flour about 6 cups, King Arthur preferred
- 20 g Salt about 1 tablespoon, sea salt or kosher
For Brushing (Optional)
- Melted butter as needed for brushing
Instructions
- In the bowl of your stand mixer, combine 200 grams (about 3/4 cup) of sourdough discard with 430 grams (about 1 3/4 cups) of warm water. If your discard is straight from the fridge and ice-cold, make sure that water is quite warm — even hot — because you need to balance the temperature. Use a spoon or just your hands to mix them together until the discard is evenly distributed and the mixture feels lukewarm to the touch.
- Add 10 grams (about 1 tablespoon) of instant yeast and 40 grams (about 2 tablespoons) of honey to your discard mixture. Give it a gentle stir, then let this sit for about 5-10 minutes until it becomes foamy and smells yeasty — that’s your sign that the yeast is alive and ready to work its magic.
- Add 70 grams (about 1/3 cup) of melted and slightly cooled coconut oil, 20 grams (about 1 tablespoon) of salt, and 860 grams (about 6 cups) of bread flour to your foamy yeast mixture. Attach the dough hook to your stand mixer and let it knead on medium speed for about 8 minutes. You’re looking for smooth, elastic dough that’s tacky to the touch but not sticky enough to leave residue all over your fingers.
- If you’re kneading by hand, turn the dough out onto a lightly floured surface and knead for 10-12 minutes until it becomes smooth and springs back when you poke it. If the dough feels too sticky at any point, add flour one tablespoon at a time while continuing to knead.
- Transfer your beautifully kneaded dough to a lightly oiled container or bowl. Cover it with a kitchen towel or plastic wrap and let it rise at room temperature for about an hour, or until it doubles or even triples in size. The exact timing depends on how warm your kitchen is.
- Once your dough has risen gorgeously, turn it out onto your work surface. Divide it into two equal portions using a bench scraper or knife. Press each portion into a rectangle shape with your fingers — aim for something slightly shorter in length than your baking sheet.
- Starting from the long side, roll each rectangle up tightly like you’re making a jelly roll, pinching the seam closed as you go. Pinch the ends closed too, then tuck them slightly under the loaf. Place each rolled loaf seam-side down on a parchment-lined baking sheet, spacing them apart so they have room to expand.
- Cover your shaped loaves gently with a clean kitchen towel and let them rise again for 1-2 hours, depending on the temperature of your dough and your kitchen. You’re looking for loaves that have doubled in size and look puffy, light, and airy — when you gently press a finger into the dough, it should slowly spring back but leave a slight indent.
- About 20 minutes before you think your loaves will be ready, preheat your oven to 375°F. This gives the oven plenty of time to get evenly hot.
- Using a bread lame or a very sharp knife, score your loaves by making several diagonal slashes across the top (usually 3-4), or make one long slash down the middle. Scoring gives the bread a place to expand during baking so it doesn’t burst randomly.
- Bake your loaves in the preheated 375°F oven for 30-35 minutes until they turn a gorgeous golden brown and sound hollow when you tap the bottom. The internal temperature should read around 190-200°F on an instant-read thermometer.
- As soon as you pull them from the oven, brush the warm loaves generously with melted butter for that professional bakery shine and extra flavor. Let them cool for at least 15-20 minutes before slicing.