No Bake Pumpkin Cheesecake Balls
No Bake Pumpkin Cheesecake Balls are creamy, spiced, and ready in minutes. Perfect for Thanksgiving parties, they’re the easiest dessert you’ll make all season—no oven required!
Hey there, I’m Claire Whitmore — a pastry whisperer in Asheville, NC, where butter totally counts as self-care. This No Bake Pumpkin Cheesecake Balls recipe is basically autumn wrapped up in a bite-sized package, and honestly? It’s become my secret weapon for holiday gatherings.
Last Thanksgiving, I whipped these up while the turkey was doing its thing, and they disappeared faster than I could say “pumpkin spice.” No oven drama, no stress—just creamy, dreamy pumpkin cheesecake goodness that looks like you spent hours but actually took about ten minutes of hands-on time.
Little Snapshot: What This Recipe Delivers
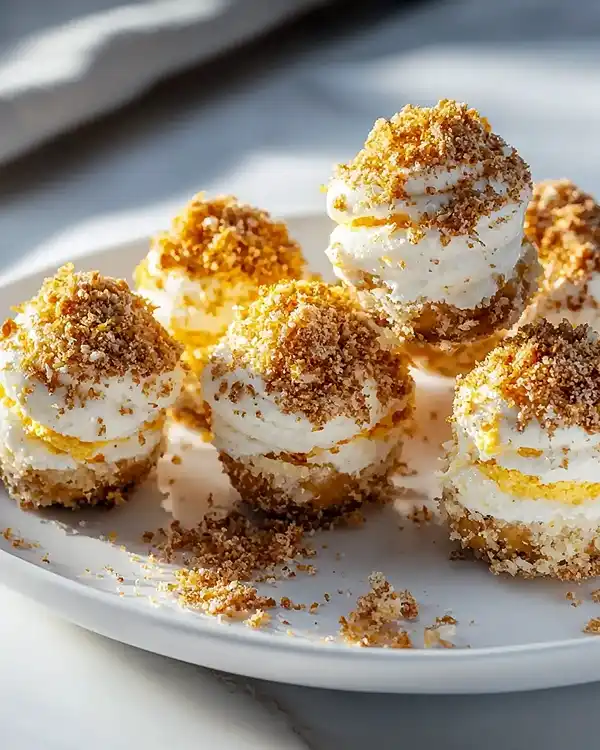
These No Bake Pumpkin Cheesecake Balls combine tangy cream cheese with velvety pumpkin puree and warm fall spices, all rolled in crunchy graham cracker crumbs. They’re ridiculously easy to make, require zero baking, and taste like the fancy cousin of a pumpkin cheesecake—perfect for busy moms who want to impress without the fuss.
Why You’ll Love This Recipe 🌸
- This No Bake Pumpkin Cheesecake Balls recipe takes less time than arguing with a toddler about wearing pants—seriously, like 15 minutes of actual work.
- They’re perfectly portioned so you don’t have to slice anything or worry about serving sizes at your holiday parties—just grab and go.
- You can make them ahead (like, days ahead), which means one less thing on your Thanksgiving morning panic list.
- According to
Quick Facts ⚡
Here’s the quick scoop on this No Bake Pumpkin Cheesecake Balls recipe.
- CourseDessert
- Prep Time15 minutes
- Chill Time1 hour 30 minutes
- Total Time1 hour 45 minutes
- Servings20 balls
- DifficultyEasy
Table of Contents
Nutritional Peek
Here’s what you’re looking at per cheesecake ball (because we’re all about being real here):
| Nutrient | Amount per Serving |
|---|---|
| Calories | 75 kcal |
| Protein | 1g |
| Carbohydrates | 10g |
| Fat | 4g |
| Fiber | 0.5g |
| Sugar | 7g |
These aren’t exactly a health food, but they’re portion-controlled sweetness that won’t wreck your holiday meal. Plus, there’s actual pumpkin in there, so… vegetables, right?
Ingredients
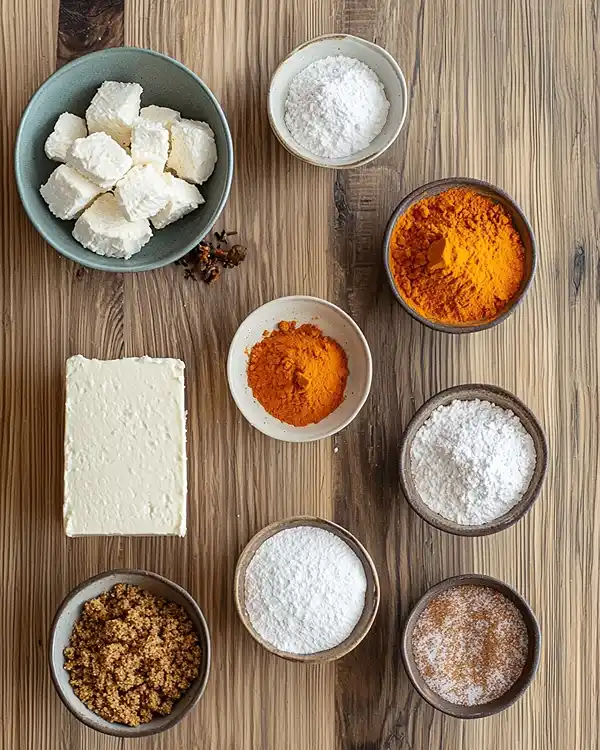
This Cheesecake Balls recipe starts with ingredients you probably already have hanging out in your fridge and pantry. Nothing fancy, nothing weird—just good, simple stuff that comes together like magic.
| Amount | Ingredient |
|---|---|
| 8 oz | Cream cheese, softened (Yes, real cream cheese—leave it out for about 30 minutes so it’s not a brick.) |
| 1/2 cup | Pumpkin puree (Pure pumpkin, not pie filling! There’s a difference and it matters.) |
| 1 cup | Powdered sugar |
| 1 tsp | Vanilla extract (The good stuff if you’ve got it.) |
| 1 tsp | Pumpkin pie spice (Or make your own blend—cinnamon, nutmeg, ginger, and a tiny bit of cloves.) |
| 1 cup | Graham cracker crumbs for rolling (Crush ’em yourself or grab a box—either works.) |
Tools You’ll Actually Use
Equipment Needed:
- Large mixing bowl
- Electric hand mixer (or a really strong arm and a wooden spoon)
- Small cookie scoop or melon baller (makes life so much easier for uniform balls)
- Baking sheet
- Parchment paper or silicone mat
- Plastic wrap
Step-by-Step Instructions
Alright, let’s make these No Bake Pumpkin Cheesecake Balls happen. Trust me, if I can do this while my neighbor’s dog is barking and my phone is dinging, you’ve totally got this.
Step 1: Whip up that creamy base
Grab your large bowl and toss in that softened cream cheese. Beat it with your hand mixer until it’s smooth and fluffy—like clouds, but edible. Now add your pumpkin puree, powdered sugar, vanilla extract, and pumpkin pie spice.
Mix everything together until it’s completely combined and looks like the most gorgeous sunset-colored fluff you’ve ever seen. The mixture should be creamy, smooth, and already smell like fall walked into your kitchen wearing a cozy sweater.
Step 2: Let it chill (literally)
Cover your bowl with plastic wrap and pop it in the fridge for about an hour. I know, I know—waiting is the hardest part. But this step is crucial because it firms up the mixture so you can actually roll it into balls without it sticking to everything including your soul.
Use this time to clean up, prep your Italian Sausage and Potato Soup for dinner, or just sit down with a cup of coffee. You’ve earned it.
Step 3: Roll, baby, roll
Once your mixture is nice and firm, pour those graham cracker crumbs into a shallow dish. Using your cookie scoop or a spoon, scoop out about a tablespoon of the pumpkin mixture and roll it between your palms to form a ball (about 1 inch in diameter).
Drop it into the graham cracker crumbs and roll it around until it’s completely coated. Place it on your lined baking sheet and repeat until you’ve used up all the mixture. It’s kind of meditative, actually—like edible meditation.
Step 4: Final chill
Pop that baking sheet back in the fridge for at least 30 minutes. This sets everything up so the balls hold their shape and the coating sticks properly. When they’re done chilling, they’re ready to serve! Your kitchen will smell amazing, and you’ll feel like a total baking genius.
Claire’s Pro Tips & Gentle Guidance
Making these Pumpkin Cheesecake bites is pretty foolproof, but here are a few things I’ve learned after making them approximately a million times:
Soften that cream cheese properly. I cannot stress this enough. Cold cream cheese = lumpy mixture = sad times. Leave it on the counter for 30-45 minutes, or microwave it for about 10 seconds if you’re in a rush. You want it spreadable, not melty.
Don’t skip the first chill. I tried once to roll these without chilling the mixture first because I was impatient, and let me tell you—it was a sticky disaster. The chilling time is non-negotiable if you want balls that actually look like balls and not like abstract pumpkin art.
Size matters. Keep your balls on the smaller side (about 1 inch). They’re rich, so bite-sized is perfect. Plus, smaller balls means more servings, which means more people thinking you’re a dessert wizard.
Get creative with the coating. Graham cracker crumbs are classic, but you could also roll these in crushed gingersnaps, chopped pecans, or even a mix of cinnamon and sugar. The folks at Bon Appétit have amazing ideas for coating sweet treats, and trust me, experimenting is half the fun.
Make them ahead. These actually taste better after hanging out in the fridge for a day because the flavors have time to meld together. I usually make them two days before I need them, and it takes so much pressure off.
Quick Fixes for No Bake Pumpkin Cheesecake Balls
Even the easiest recipes can throw you a curveball. Here’s how to handle whatever comes your way:
Too soft to roll? Your mixture needs more chill time. Pop it back in the fridge for another 30 minutes. If it’s still too soft after that, you can add a couple tablespoons more powdered sugar to firm it up.
Too stiff? This usually means your cream cheese was too cold when you mixed everything. Try adding a tablespoon of heavy cream or milk and mixing it in until you reach a better consistency.
Coating won’t stick? Your balls might be too cold and dry on the outside. Let them sit at room temperature for about 5 minutes, then roll them in the crumbs. Slightly tacky surface = better adhesion.
Grainy texture? Make sure you’re sifting your powdered sugar, and that your cream cheese was properly softened. Lumps happen when ingredients aren’t the same temperature.
Variations & Fun Twists
This No Bake Dessert is super versatile, so let’s talk about how you can make it your own:
Chocolate lover’s version: Swap the graham cracker crumbs for crushed Oreo cookies (yeah, really). Or drizzle melted dark chocolate over the finished balls for extra drama.
Maple pecan twist: Add 2 tablespoons of pure maple syrup to the mixture and roll the balls in finely chopped toasted pecans instead of graham crumbs. It’s like fall decided to throw a party in your mouth.
Gluten-free option: Use gluten-free graham crackers for the coating, or skip crackers entirely and roll them in shredded coconut or crushed nuts.
Dairy-free adaptation: Swap the cream cheese for dairy-free cream cheese (Kite Hill or Miyoko’s work great) and you’re good to go. The texture is nearly identical.
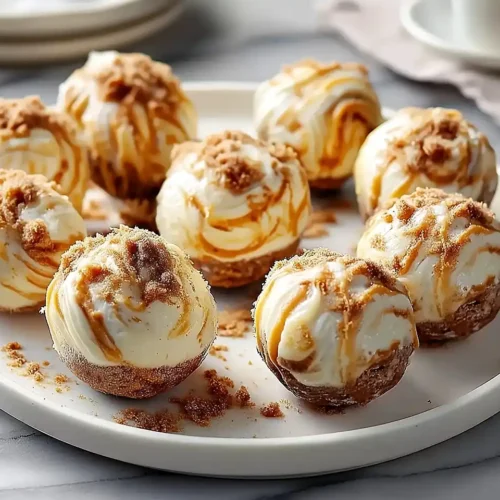
Fancy presentation: After rolling in graham crumbs, drizzle with white chocolate and sprinkle with a tiny pinch of sea salt. Suddenly your easy dessert looks like it came from a boutique bakery.
Mini Apple Cider Donuts pairing: Serve these alongside apple cider donuts for a fall dessert spread that’ll make everyone wonder if you secretly went to culinary school.
Serving, Storage & Reheating
Let’s talk about the practical stuff for this Thanksgiving Recipe that you’ll want to make again and again:
Serving: These cheesecake balls are best served chilled, straight from the fridge. Arrange them on a pretty plate (maybe with some fall leaves or mini pumpkins for that Instagram-worthy moment).
They’re perfect for dessert tables, potlucks, or just having around when you need a little sweet treat. I love putting them out after a big meal alongside my Honey Bourbon Cranberry Sauce for a complete fall flavor experience.
Storage: Keep these in an airtight container in the fridge for up to 5 days. Layer them between sheets of parchment paper so they don’t stick together. Honestly though, they never last that long in my house.
Freezing: Yes! You can totally freeze these. Place them on a baking sheet and freeze until solid (about 2 hours), then transfer to a freezer-safe container or bag. They’ll keep for up to 2 months. Thaw in the fridge overnight before serving.
Reheating: No reheating needed—these are meant to be enjoyed cold! If they’re too firm from the freezer, let them sit at room temperature for about 10 minutes to soften slightly.
No-Waste Kitchen Magic
I’m all about using every bit of what we buy, so here are some ways to make sure nothing goes to waste with this recipe:
Leftover pumpkin puree: That opened can of pumpkin? Use it in your morning smoothie, mix it into oatmeal, or make a batch of Pumpkin Patch Deviled Eggs for your holiday spread.
Extra graham cracker crumbs: Store them in a sealed bag in the freezer. They’re perfect for pie crusts, topping yogurt parfaits, or making another batch of these balls in a few weeks.
Cream cheese packaging: Rinse it out and recycle it. And if you bought the block instead of the tub, that foil wrapper can be recycled too!
Day-old balls: If somehow these manage to stick around long enough to get a bit dry, crumble them over ice cream or use them as a topping for your Creamy Almond Latte. Waste not, want not!
No Bake Pumpkin Cheesecake Balls FAQs
Can I freeze No Bake Pumpkin Cheesecake Balls?
Absolutely! They freeze beautifully for up to 2 months. Just make sure they’re in a well-sealed container, and thaw them in the fridge before serving. Perfect for making ahead for big gatherings.
Can I use pumpkin pie filling instead of pure pumpkin puree?
I wouldn’t recommend it. Pie filling has added sugars and spices already mixed in, which will make your balls too sweet and throw off the texture. Stick with pure pumpkin puree—it’s usually right next to the pie filling at the store.
How do I keep the graham cracker coating from falling off?
Make sure your balls are slightly tacky (not too cold) when you roll them in the crumbs. Press gently as you roll so the crumbs really stick. And that final chill time helps set everything in place.
Can I make these Cheesecake Balls ahead of time for holiday parties?
That’s actually the best way to do it! Make them 2-3 days ahead and store them in the fridge. The flavors get even better as they sit, and you’ll have one less thing to worry about on party day.
Cozy Closing
And there you have it—your new go-to No Bake Pumpkin Cheesecake Balls recipe that’s going to save your sanity this holiday season.
Whether you’re bringing them to a Thanksgiving potluck, serving them at your own gathering, or just making them because you deserve something sweet on a random Tuesday, these little bites of fall are here for you.
They’re easy, they’re delicious, and they prove that impressive desserts don’t have to be complicated.
I’d love to see your spin on these No Bake Pumpkin Cheesecake Balls! Leave a note below or tag me on Instagram so we can share a sweet moment together. Did you try the chocolate version? Roll them in pecans? I want to hear all about it!
I’m Claire Whitmore — a dessert daydreamer from Asheville, NC. For me, baking isn’t about perfect pastries — it’s about the joy of sharing something sweet (and maybe sneaking an extra scoop of icing).
No Bake Pumpkin Cheesecake Balls
Equipment
- Large mixing bowl
- Electric hand mixer
- Small cookie scoop or melon baller
- Baking sheet
- Parchment paper or silicone mat
- Plastic wrap
Ingredients
Main
- 8 oz Cream cheese softened
- ½ cup Pumpkin puree pure pumpkin, not pie filling
- 1 cup Powdered sugar
- 1 tsp Vanilla extract
- 1 tsp Pumpkin pie spice
- 1 cup Graham cracker crumbs for rolling
Instructions
- In a large bowl, beat softened cream cheese with a hand mixer until smooth and fluffy. Add pumpkin puree, powdered sugar, vanilla extract, and pumpkin pie spice. Mix until completely combined.
- Cover the bowl with plastic wrap and refrigerate for about 1 hour to firm up the mixture.
- Place graham cracker crumbs in a shallow dish. Scoop out about a tablespoon of the mixture and roll into 1-inch balls. Coat each ball in graham cracker crumbs and place on a lined baking sheet.
- Chill the coated balls for at least 30 minutes before serving to set the texture and coating.