No-Bake Oreo Cheesecake Recipe
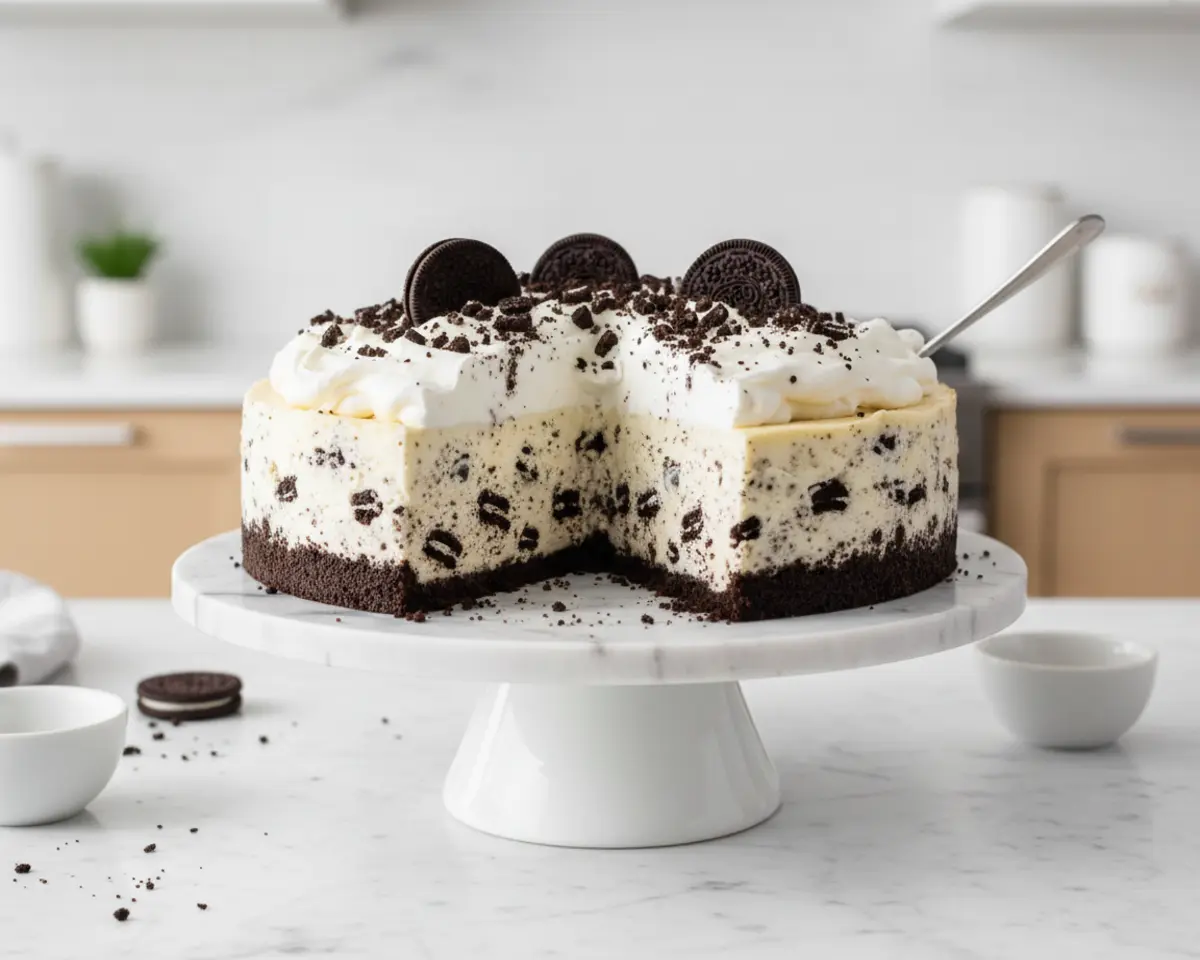
This No-Bake Oreo Cheesecake is a creamy, dreamy dessert with a crunchy Oreo crust, luscious cream cheese filling loaded with chopped cookies, and zero oven time required. Perfect for busy weeknights, potlucks, or when you need a stunning dessert without turning on the oven.
I’m Claire Whitmore, and if there’s one thing I’ve learned in my Asheville kitchen, it’s that the best desserts don’t always need an oven. This No-Bake Oreo Cheesecake has saved me more times than I can count—creamy, indulgent, and ridiculously easy.
I first made this cheesecake for a summer potluck when my oven was broken, and it became the most requested recipe of the season. Now it’s my go-to whenever I want maximum wow factor with minimal effort, proving that sometimes the simplest recipes create the sweetest memories.
Table of Contents
Quick Overview
I have a feeling you’ll love what’s next. The Delicious Desserts favorites are packed with recipes that disappear fast at every gathering. Go check them out before someone else snags them!
Little Snapshot: What This Recipe Delivers
This No-Bake Oreo Cheesecake combines a crunchy Oreo crust with a velvety cream cheese filling loaded with cookie chunks, requiring only 20 minutes of hands-on prep and chilling time in the fridge. It’s a crowd-pleasing dessert that delivers bakery-quality results without ever turning on your oven.
Why You’ll Love This Recipe 🌸
- This No-Bake Oreo Cheesecake takes less time than folding laundry and delivers show-stopping results every single time.
- No oven means no overheating your kitchen in summer, and the filling comes together in one bowl with minimal cleanup.
- It’s endlessly adaptable—swap in different cookie flavors, add chocolate chips, or top with fresh berries for a stunning presentation.
- According to Serious Eats, stabilized whipped cream creates the fluffiest no-bake cheesecake texture—and this recipe proves exactly why.
Quick Facts ⚡
Here’s the quick scoop on this No-Bake Oreo Cheesecake.
- CourseDessert
- Prep Time20 minutes
- Cook Time0 minutes
- Total Time4 hours 20 minutes (includes chilling)
- Servings12 slices
- DifficultyEasy
Nutritional Peek
| Nutrient | Amount per serving |
|---|---|
| Calories | 425 kcal |
| Protein | 5g |
| Carbohydrates | 38g |
| Fat | 29g |
| Fiber | 1g |
| Sugar | 27g |
What You’ll Need
You don’t need fancy equipment to make this stunning cheesecake. Just a few basic kitchen tools and you’re ready to create dessert magic without the oven.
- 9-inch springform pan
- Food processor (or rolling pin and zip-top bag for crushing cookies)
- Stand mixer or handheld electric mixer
- Large mixing bowls (at least two)
- Whisk attachment
- Rubber spatula
- Parchment paper
- Piping bag with star tip (optional, for decorative whipped cream)
Ingredients
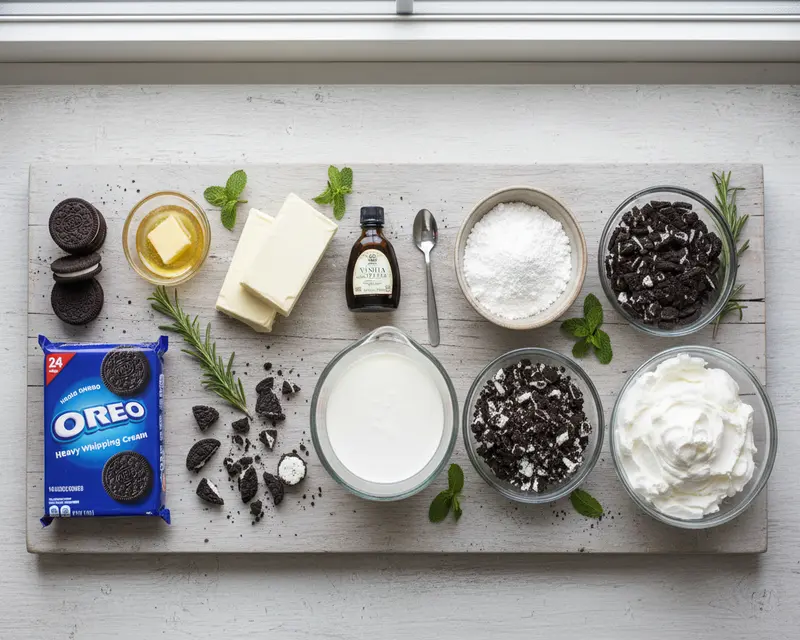
This No-Bake Oreo Cheesecake recipe uses simple pantry staples that come together into something truly spectacular. The cookie crust provides that essential crunch, while brick-style cream cheese creates the dense, tangy base that makes cheesecake so addictive. Cold heavy whipping cream whips into clouds of stabilizing fluff that keeps everything light yet sliceable.
| Group | Ingredient | Amount | Notes |
|---|---|---|---|
| Crust | Oreos | 24 cookies | Use the whole cookie, cream and all—it adds sweetness and helps bind the crust |
| Crust | Unsalted butter | 4 tablespoons (60g), melted | Melted butter acts as the glue that holds those cookie crumbs together |
| Filling | Brick-style cream cheese | 16 ounces, softened | Must be softened to room temperature for a silky-smooth filling—cold cream cheese = lumpy disaster |
| Filling | Powdered sugar | 1 cup (120g) | Also called confectioners’ sugar—it dissolves instantly for velvety texture |
| Filling | Vanilla extract | 1 teaspoon | Pure extract gives the best flavor, but imitation works in a pinch |
| Filling | Cold heavy whipping cream | 2 cups (480ml) | Must be cold for proper whipping—pop your bowl in the freezer for 10 minutes if you’re in a hurry |
| Filling | Oreos, chopped | 16 cookies | Rough chop these for textural contrast throughout the filling |
| Topping | Homemade whipped cream | As desired | Optional but gorgeous for piping decorative swirls |
| Topping | Mini Oreos or halved full-size Oreos | 12-14 mini or 6 full-size | These make your cheesecake instantly Instagram-worthy |
Step-by-Step Instructions
Let’s make this happen. This No-Bake Oreo Cheesecake comes together in simple stages that even nervous bakers can master with confidence.
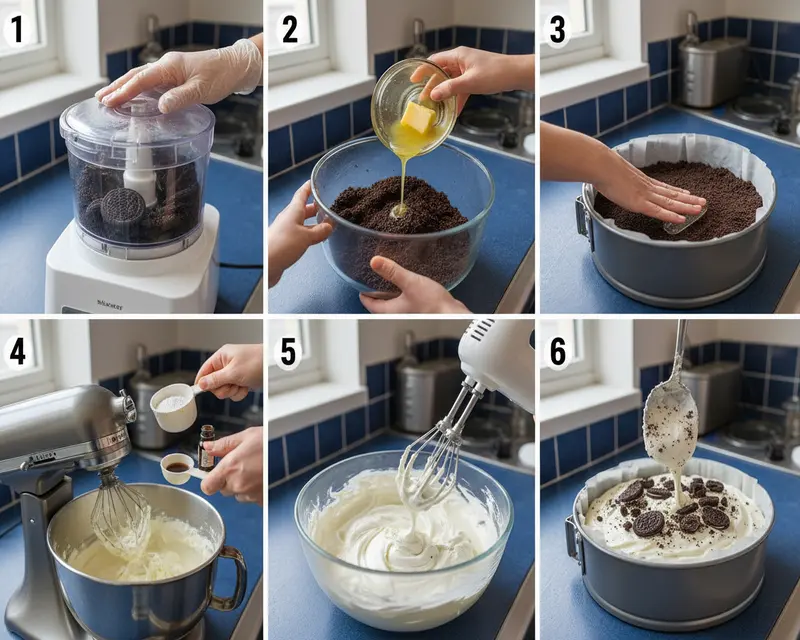
Prepare the Oreo Cookie Crust
Add 24 whole Oreos (cream filling and all) to your food processor and pulse until you have fine, uniform crumbs that look like dark sandy soil. If you don’t have a food processor, place the cookies in a zip-top bag and crush them with a rolling pin until finely ground—it takes a bit more elbow grease but works beautifully.
Transfer the Oreo crumbs to a mixing bowl and pour in 4 tablespoons of melted unsalted butter. Stir thoroughly with a fork or spatula until every crumb is moistened and the mixture looks like wet sand that clumps when squeezed.
Line the bottom of a 9-inch springform pan with a circle of parchment paper to prevent sticking. Dump the buttery crumb mixture into the pan and use the bottom of a measuring cup or your hands to press it firmly and evenly across the bottom, creating a compact, level layer.
Transfer the springform pan to the refrigerator to chill while you prepare the filling. This firms up the butter and creates a sturdy base that won’t crumble when you slice the finished cheesecake.
Make the Cream Cheese Filling Base
Place 16 ounces of softened brick-style cream cheese in the bowl of your stand mixer fitted with the whisk attachment, or use a large mixing bowl with a handheld electric mixer. Beat on medium speed for about 2 minutes until the cream cheese is completely smooth, fluffy, and free of lumps.
Add 1 cup of powdered sugar and 1 teaspoon of vanilla extract to the cream cheese. Mix on low speed initially to prevent a sugar cloud in your kitchen, then increase to medium speed and beat for another minute until everything is well combined and silky.
Scrape down the sides and bottom of the bowl with a rubber spatula to ensure no pockets of unmixed cream cheese are hiding. This step is crucial for avoiding lumpy bites in your finished cheesecake.
Whip the Heavy Cream to Stiff Peaks
Pour 2 cups of cold heavy whipping cream into a separate large mixing bowl. Using clean beaters or the whisk attachment, start mixing on low speed to prevent splattering, then gradually increase to medium-high speed as the cream begins to thicken.
Continue whipping for 3-4 minutes until the cream forms stiff peaks that hold their shape when you lift the beaters. You’ll know it’s ready when the whipped cream stands straight up without drooping—this texture is what gives your cheesecake its light, mousse-like consistency.
Be careful not to over-whip, or you’ll end up with butter instead of fluffy whipped cream. Stop as soon as stiff peaks form and the cream looks glossy and smooth.
Fold Together the Cheesecake Filling
Add the freshly whipped cream to your cream cheese mixture. Using a rubber spatula, gently fold the whipped cream into the cream cheese using broad, sweeping motions from the bottom of the bowl up and over the top, rotating the bowl as you go.
This folding technique preserves the airiness of the whipped cream while incorporating it evenly. Alternatively, you can use your mixer on the lowest speed for just 10-15 seconds until barely combined—any longer and you’ll deflate all that beautiful volume.
Once the mixture is almost uniform with just a few white streaks remaining, add 16 chopped Oreos to the filling. Fold gently just until the cookie pieces are evenly distributed throughout, creating that signature cookies-and-cream look.
Assemble and Chill the No-Bake Oreo Cheesecake
Remove your springform pan with the chilled crust from the refrigerator. Pour the cheesecake filling onto the Oreo crust, using a spatula to spread it into an even layer that reaches all the way to the edges.
If you want to make your cheesecake look bakery-professional, transfer some homemade whipped cream to a piping bag fitted with a large star tip. Pipe decorative swirls or rosettes around the top edge of the cheesecake, then press mini Oreos or halved full-size Oreos into the whipped cream for a stunning finish.
Cover the entire pan tightly with plastic wrap or aluminum foil, making sure the covering doesn’t touch the surface of the cheesecake. Transfer to the refrigerator and chill for at least 4-5 hours, though overnight is even better for the firmest, most sliceable texture.
Unmold and Serve
When you’re ready to serve, run a thin knife around the inside edge of the springform pan to loosen any spots where the filling might have stuck. Unlatch and carefully remove the outer ring of the pan, leaving the cheesecake on the base.
For the cleanest slices, dip a sharp knife in hot water, wipe it dry, and make each cut in one smooth motion. Wipe the knife clean between each slice to maintain those picture-perfect edges.
Serve chilled and watch as everyone’s eyes light up at that gorgeous layered cross-section. This Oreo-studded masterpiece tastes even better than it looks.
Expert Tips
Making a flawless No-Bake Oreo Cheesecake is all about technique and temperature control. These expert tips will help you avoid common pitfalls and create a dessert that rivals any fancy bakery version.
Use Full-Fat Cream Cheese at Room Temperature
Reduced-fat or Neufchâtel cream cheese contains more water and less fat, which can make your filling runny and prevent it from setting properly. Always use full-fat brick-style cream cheese, and let it sit at room temperature for at least 30-45 minutes before mixing so it whips smooth without lumps.
Don’t Skip the Parchment Paper Liner
That circle of parchment paper on the bottom of your springform pan is your insurance policy for easy release. Even when you remove the outer ring, you can slide a thin spatula under the parchment to transfer the whole cheesecake to a serving plate without any sticking or crumbling.
Whip Your Cream to the Right Consistency
Under-whipped cream won’t provide enough structure and your cheesecake may not set firm enough to slice cleanly. Over-whipped cream becomes grainy and buttery, ruining the silky texture. Stop exactly when stiff peaks form—when you lift the beaters, the cream should stand straight up with just a slight curl at the tip.
Fold Gently to Preserve Airiness
When combining whipped cream with cream cheese, aggressive stirring deflates all those air bubbles you worked so hard to create. Use broad, gentle folding motions and stop as soon as you no longer see distinct streaks—a few small white wisps are fine and will disappear as the cheesecake chills.
Give It Enough Chilling Time
Four hours is the bare minimum for this No-Bake Oreo Cheesecake to set properly, but overnight produces the best texture and easiest slicing. If you’re short on time, you can pop it in the freezer for 2-3 hours, though the texture will be slightly firmer and more frozen-cheesecake-like.
Customize Your Cookie Mix-Ins
While classic Oreos are perfection, you can swap in other flavors like Golden Oreos, mint Oreos, or peanut butter Oreos for fun variations. According to King Arthur Baking, keeping some cookie pieces larger (about quarter-size) creates delightful textural surprises in every bite.
Variations
This No-Bake Oreo Cheesecake is endlessly adaptable to different flavor profiles and dietary needs. Here are some of my favorite ways to switch things up while keeping that same creamy, dreamy base.
Mint Chocolate Oreo Cheesecake
Use Mint Oreos in both the crust and filling, and add 1/2 teaspoon of peppermint extract to the cream cheese mixture. Top with chocolate shavings and a drizzle of melted dark chocolate for a dessert that tastes like a fancy mint chocolate truffle.
Peanut Butter Cup Oreo Cheesecake
Swap regular Oreos for peanut butter Oreos and fold 1/2 cup of creamy peanut butter into the cream cheese mixture before adding the whipped cream. Sprinkle chopped Reese’s peanut butter cups on top for the ultimate candy-meets-cheesecake creation.
Berry Swirl Oreo Cheesecake
After spreading the filling onto the crust, dollop spoonfuls of strawberry or raspberry jam on top and swirl gently with a knife for beautiful marbled patterns. This version pairs beautifully with fresh berries on top, just like these red white blue berry cheesecake bars.
S’mores Oreo Cheesecake
Use chocolate graham crackers mixed with crushed Oreos for the crust, fold mini marshmallows and chocolate chips into the filling, and toast marshmallows on top with a kitchen torch for that campfire vibe. It’s like summer nostalgia in dessert form.
Cookies and Cream Layer Cake
Double the recipe and make it in a 9×13-inch pan, creating visible layers of crust, filling with chopped Oreos, a middle layer of whole Oreos, and more filling. Slice into bars instead of wedges for a stunning potluck presentation.
Individual No-Bake Cheesecake Cups
Instead of using a springform pan, divide the crust and filling among 12 clear plastic cups or mason jars. These individual servings are perfect for parties and allow guests to see all those gorgeous layers.
Troubleshooting
Even the easiest recipes can hit a few bumps, so here are solutions to the most common No-Bake Oreo Cheesecake challenges. Don’t worry—most issues have simple fixes.
Problem: My cheesecake filling is too runny and won’t set.
This usually means your whipped cream wasn’t whipped to stiff peaks, or your cream cheese was too warm when mixed. Pop the whole pan in the freezer for 2-3 hours to firm it up quickly, and make sure your heavy cream is very cold next time. You can also fold in 1 tablespoon of unflavored gelatin bloomed in 2 tablespoons of water for extra insurance.
Problem: The crust is crumbly and falls apart when I slice the cheesecake.
You likely didn’t use enough melted butter or didn’t press the crust down firmly enough. The crust needs to be compacted like you’re paving a tiny road—really press hard with the bottom of a measuring cup. If it’s already baked, there’s not much you can do except serve it in bowls as a “deconstructed” cheesecake.
Problem: My filling has lumps of cream cheese throughout.
Your cream cheese wasn’t softened to room temperature before mixing, causing it to remain in stubborn little chunks. Next time, leave it out for at least 45 minutes, and beat it thoroughly before adding any other ingredients. You can press the lumpy filling through a fine-mesh strainer if you catch it before assembling.
Problem: The cheesecake is difficult to remove from the springform pan.
Always run a thin knife around the inside edge of the pan before unlatching the ring—this releases any spots where the filling stuck to the sides. If your cheesecake still won’t budge, place a warm, damp towel around the outside of the pan for 30 seconds to slightly soften the edges.
Problem: My whipped cream turned into butter.
You over-whipped the heavy cream past the stiff peak stage, causing the fat to separate. Unfortunately, there’s no fix once this happens—you’ll need to start over with fresh cream. Watch carefully and stop the mixer the moment stiff peaks form and the cream looks glossy.
Problem: The Oreo pieces sank to the bottom instead of staying distributed.
Your filling may have been too thin when you folded in the cookie pieces, or you didn’t chill it long enough before adding toppings. Make sure your whipped cream is fully whipped to stiff peaks, and fold the Oreos in gently at the very end so they’re suspended in the thick mixture.
Storage & Reheating
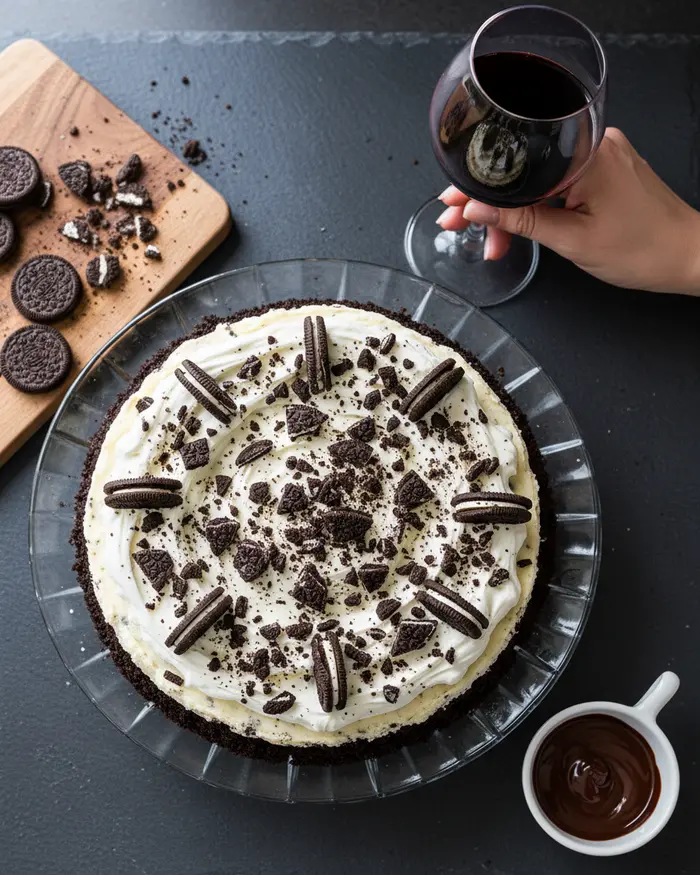
This No-Bake Oreo Cheesecake is best served cold and can be stored for several days with proper wrapping. The flavors actually deepen and improve after a day in the fridge, making it a perfect make-ahead dessert for parties and gatherings.
Serving Suggestions
Serve slices cold directly from the refrigerator with a dollop of extra whipped cream and fresh berries on the side. A drizzle of chocolate or caramel sauce takes it over the top, or keep it simple and let those Oreo flavors shine on their own. Pair with hot coffee or cold milk for the ultimate cookies-and-cream experience.
Storage Guidelines
Cover the cheesecake tightly with plastic wrap or aluminum foil and store in the refrigerator for up to 5 days. If you’ve already sliced it, place a piece of parchment paper directly on the cut surface to prevent it from drying out. Individual slices can be wrapped separately in plastic wrap and stored in an airtight container.
Freezing Instructions
This cheesecake freezes beautifully for up to 2 months. Wrap the whole cheesecake (or individual slices) tightly in plastic wrap, then in aluminum foil, and place in a freezer-safe container. Thaw overnight in the refrigerator before serving—never at room temperature, as that can make the texture weepy and separated.
| Storage Method | Duration | Best Practices |
|---|---|---|
| Refrigerator (whole) | 5 days | Cover tightly with plastic wrap or foil; keep away from strong-smelling foods |
| Refrigerator (sliced) | 3-4 days | Wrap individual slices in plastic wrap and store in airtight container |
| Freezer (whole) | 2 months | Double-wrap in plastic wrap and foil; thaw overnight in fridge before serving |
| Freezer (sliced) | 2 months | Wrap slices individually and freeze on baking sheet before transferring to freezer bag |
No-Waste Kitchen Ideas
Every ingredient in this No-Bake Oreo Cheesecake gets used efficiently, but here are some creative ways to make the most of any extras and reduce waste in your dessert-making adventures.
Use Leftover Oreo Crumbs
If you have extra Oreo crumbs from making the crust, store them in an airtight container in the pantry for up to 2 weeks. Sprinkle them over ice cream, yogurt parfaits, or blend them into milkshakes for instant cookies-and-cream flavor. You can also press them into the bottom of parfait glasses before layering in pudding or mousse.
Repurpose Extra Whipped Cream
Any leftover homemade whipped cream can be dolloped onto hot chocolate, stirred into coffee for a fancy latte, or spread between graham crackers for quick icebox sandwiches. It keeps in the fridge for 2-3 days, though you may need to whisk it briefly to restore its fluffy texture.
Transform Cheesecake Scraps
If you trim the edges for perfect slices, don’t toss those trimmings. Crumble them into parfait glasses with layers of whipped cream and fresh fruit, or roll them into cake pops by mixing with a bit of cream cheese and dipping in melted chocolate. They’re also delicious stirred into strawberry cheesecake overnight oats for breakfast.
Save and Reuse Parchment Paper
The parchment paper circle you used to line the springform pan can be wiped clean and reused several times for future cheesecakes or as a liner for baking cookies. Keep a dedicated drawer for reusable parchment pieces to reduce waste.
Compost Packaging and Wrappers
While the Oreo packaging itself isn’t compostable, you can recycle the outer cardboard sleeve and look for recycling programs that accept flexible plastic wrappers. Some grocery stores have dedicated bins for plastic film recycling.
Frequently Asked Questions
Here are answers to the most common questions about making and serving this No-Bake Oreo Cheesecake.
How long does no-bake Oreo cheesecake need to set in the refrigerator?
No-bake Oreo cheesecake typically needs to chill in the refrigerator for at least 4-6 hours, though overnight is recommended for best results. This allows the cheesecake to firm up properly and makes it easier to slice and serve.
Can I freeze no-bake Oreo cheesecake?
Yes, you can freeze no-bake Oreo cheesecake for up to 2-3 months. Wrap it tightly in plastic wrap and aluminum foil before freezing. Thaw it in the refrigerator overnight before serving for best texture and taste.
What kind of cream cheese should I use for no-bake Oreo cheesecake?
Use full-fat brick-style cream cheese at room temperature for the best results. Make sure it is softened before mixing to avoid lumps. Low-fat or whipped cream cheese is not recommended as it can affect the texture and stability of the cheesecake.
Do I need to bake the Oreo crust for no-bake cheesecake?
No, you do not need to bake the Oreo crust. Simply mix crushed Oreos with melted butter, press firmly into the pan, and refrigerate for about 30 minutes to set. The crust will hold together without baking.
How long will no-bake Oreo cheesecake last in the refrigerator?
No-bake Oreo cheesecake will stay fresh in the refrigerator for 5-7 days when stored properly in an airtight container or covered tightly with plastic wrap. Always keep it refrigerated as it contains perishable dairy ingredients.
Final Dish
This No-Bake Oreo Cheesecake is everything a dessert should be—decadent, easy, and absolutely crowd-pleasing without ever turning on your oven. The combination of that crunchy chocolate cookie crust and silky cream cheese filling studded with Oreo chunks creates the kind of dessert people request again and again.
Whether you’re making it for a special celebration, a potluck, or just because Tuesday needs more chocolate, this no-bake beauty delivers maximum impact with minimal stress. The best part? You can customize it endlessly while still keeping that foolproof base that works every single time.
I’d love to see your No-Bake Oreo Cheesecake creations—snap a photo and share it in the comments below, and tell me what fun variations you tried. Did you add peanut butter? Swirl in some caramel? Make it with different cookies? Let’s inspire each other with delicious ideas, and remember that similar no-bake cheesecake bars are just as simple when you need something portable.
I’m Claire Whitmore — a dessert daydreamer from Asheville, NC. For me, baking isn’t about perfect pastries — it’s about the joy of sharing something sweet (and maybe sneaking an extra scoop of icing).
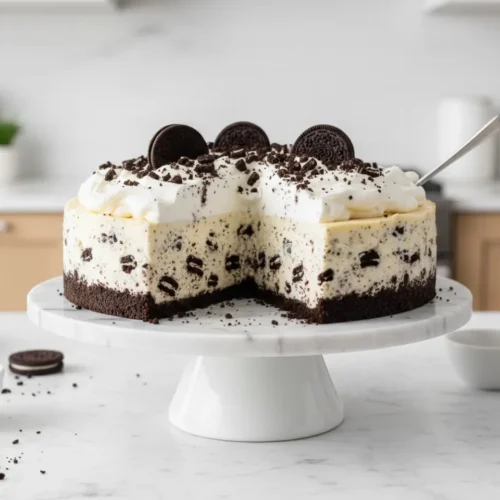
No-Bake Oreo Cheesecake
Ingredients
Crust
- 24 Oreos
- 4 tablespoons unsalted butter melted (60 grams)
Filling
- 16 ounces brick-style cream cheese softened
- 1 cup powdered sugar (120 grams)
- 1 teaspoon vanilla extract
- 2 cups cold heavy whipping cream (480 ml)
- 16 Oreos chopped
Topping
- Homemade whipped cream
- 12 to 14 mini Oreos chopped (or 6 full-size Oreos, cut in half)
Instructions
- To make the crust: Add the Oreos to a food processor and process until you have fine crumbs. Scoop the crumbs into a mixing bowl, add the melted butter, and mix until the crumbs are moistened.
- Line the bottom of a 9-inch springform pan with parchment paper, scoop the mixture into the pan, and firmly press it down into one even layer. Transfer to the refrigerator to chill while you make the cheesecake filling.
- To make the filling: Using a stand mixer fitted with the whisk attachment, or in a large mixing bowl using a handheld mixer, beat the cream cheese until smooth. Add in the powdered sugar and vanilla extract and mix until well combined.
- Pour the heavy whipping cream in a separate bowl. Start mixing on low speed, then increase the speed to medium-high until the mixture thickens and stiff peaks form. Add the whipped cream to the cream cheese mixture and gently fold it in or mix it in on low speed with your mixer until just combined. Then, fold in the chopped Oreos.
- Remove the springform pan from the refrigerator, scoop the cheesecake filling onto the crust, and carefully spread it around into one even layer.
- If desired, pipe whipped cream around the edges and top with the Oreos.
- Cover tightly and transfer back to the refrigerator to chill for at least 4 to 5 hours or overnight. Remove the no-bake cheesecake from the pan, slice and enjoy!