Melt-in-Your-Mouth Cake
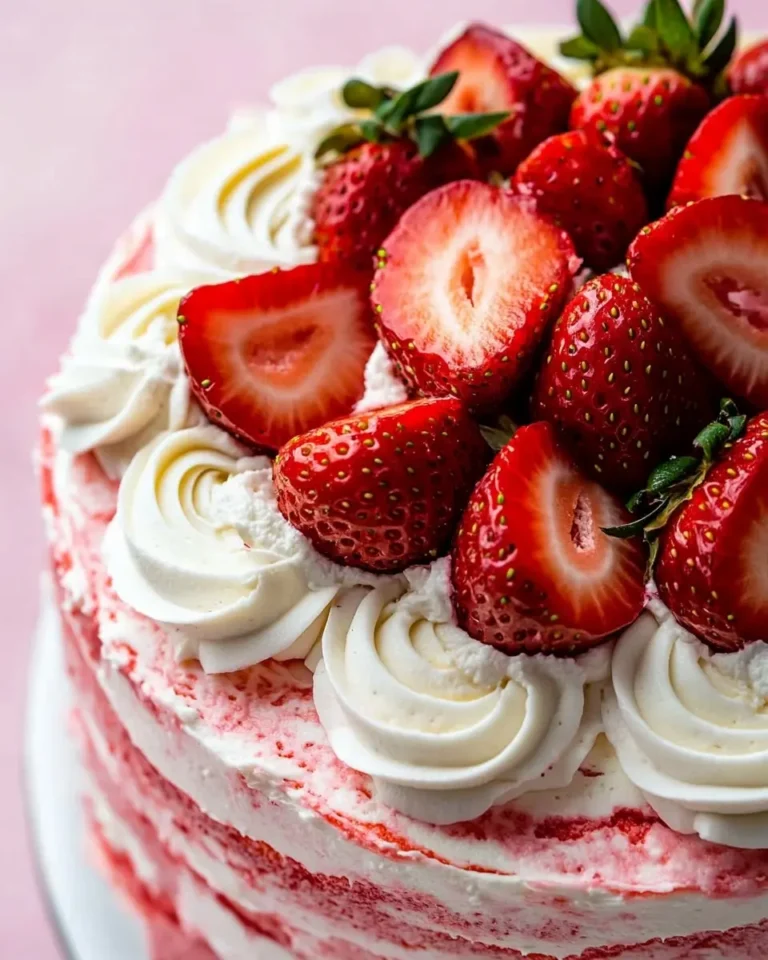
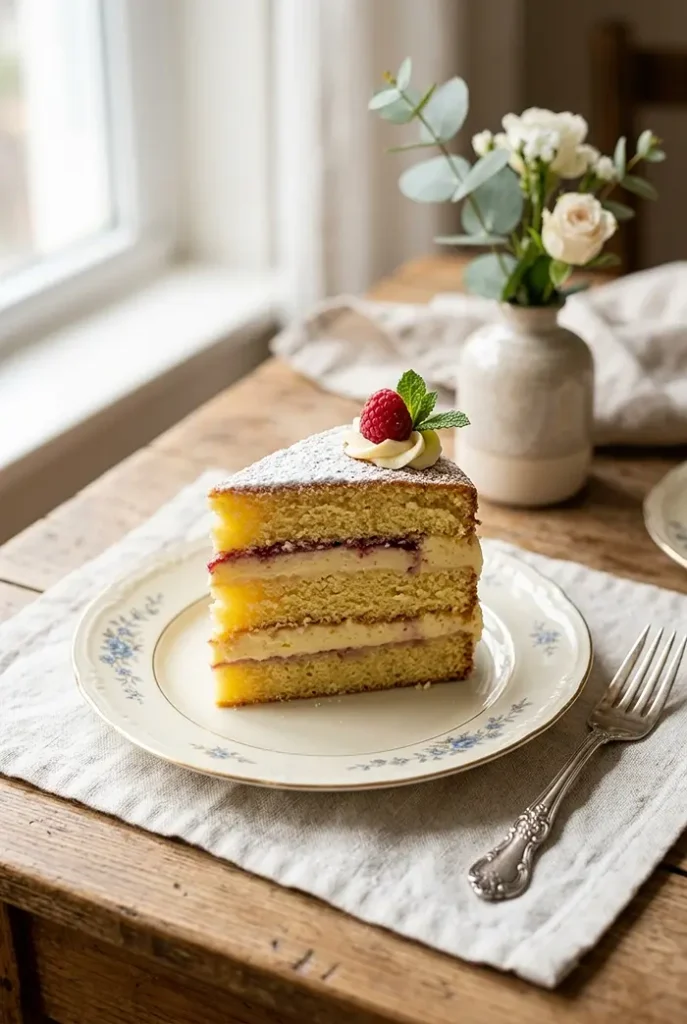
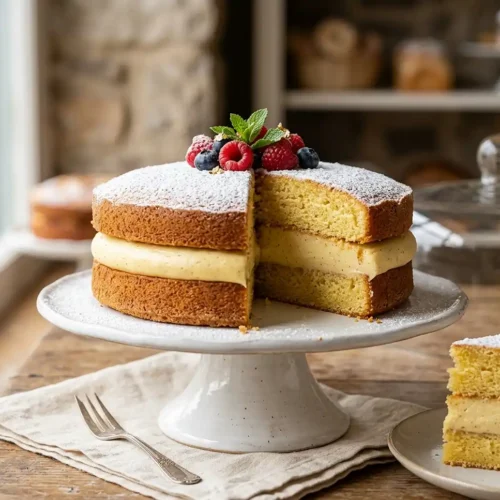
Melt-in-Your-Mouth Cake is one of those easy tasty dessert recipes that sounds way fancier than it actually is — two golden choux pastry layers hugging a silky, buttery cream filling, finished with a dusting of icing sugar.
It’s a stuffed dessert that checks every box: impressive enough for company, simple enough for a Tuesday night, and made with pantry staples you probably already have.
Hey there, I’m Claire Whitmore — a pastry whisperer in Asheville, NC, where butter totally counts as self-care. This Melt-in-Your-Mouth Cake recipe came into my life during a rainy Sunday when I desperately needed a good sweet recipe that didn’t require a trip to a specialty store.
Table of Contents
Little Snapshot: What This Recipe Delivers
This Melt-in-Your-Mouth Cake is a layered choux pastry dessert with two baked dough layers filled with a rich, cooked vanilla buttercream. It serves 8, takes about 90 minutes total (including chill time), and lands firmly in the “easy tasty dessert recipes” category despite its show-stopping appearance.
Think of it as a giant cream puff cake — crisp on the outside, cloud-soft and creamy inside, and absolutely unforgettable.
Why You’ll Love This Recipe
- This Melt-in-Your-Mouth Cake takes less time to prep than it does to watch an episode of your favorite show — and the payoff is so much better.
- It’s a genuine stuffed dessert that looks like you spent hours in the kitchen, but really, the steps are beginner-friendly and totally forgiving.
- No fancy equipment needed — just a saucepan, a bowl, and a regular round cake pan. That’s it.
- According to King Arthur Baking in their complete guide to pâte à choux, choux pastry requires nothing more than a saucepan and a spoon to execute — and this Melt-in-Your-Mouth Cake proves exactly why this dough is a home baker’s best friend.
Quick Facts
Here’s the quick scoop on this Melt-in-Your-Mouth Cake.
- CourseDessert
- Prep Time30 minutes
- Cook Time40 minutes
- Total Time3 hours (includes 2-hour chill time)
- Servings8 servings
- DifficultyEasy–Medium
Nutritional Peek
Here’s a look at the approximate nutrition per serving for this Melt-in-Your-Mouth Cake (based on 8 servings). These numbers are estimates — your exact totals may vary slightly depending on brands and portion sizes.
| Nutrient | Amount Per Serving |
|---|---|
| Calories | ~370 kcal |
| Protein | ~7 g |
| Total Carbohydrates | ~34 g |
| Total Fat | ~23 g |
| Saturated Fat | ~14 g |
| Sugar | ~18 g |
| Fiber | ~0.5 g |
Ingredients
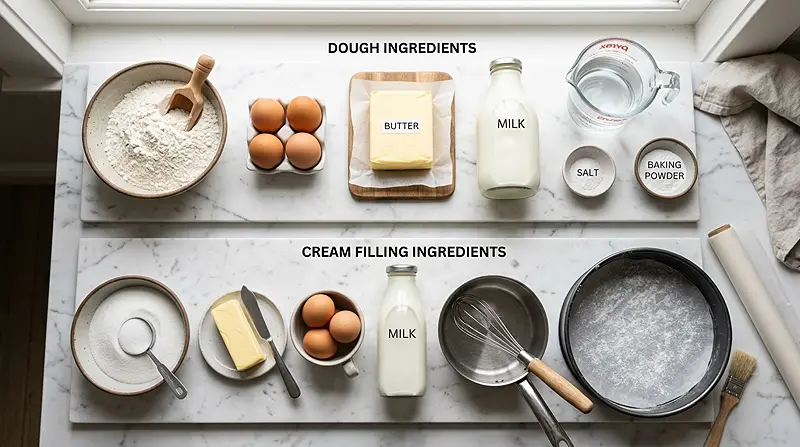
Good sweet recipes always start with quality basics — and this one is no exception. Here’s what you’ll need for this Melt-in-Your-Mouth Cake, split into two simple components.
For the dough, you’re working with a classic choux base: all-purpose flour and baking powder make up the dry team, while butter, milk, water, eggs, and salt form the wet side. For the cream filling, it’s a stovetop custard situation — milk, sugar, flour, and eggs cook together first, then get whipped with softened butter into something impossibly silky.
For the Dough
| Amount | Ingredient |
|---|---|
| 150 g (1½ cups) | All-purpose flour |
| 100 ml (½ cup) | Water |
| 100 ml (½ cup) | Milk |
| 80 g (⅓ cup) | Butter — yes, real butter, margarine just doesn’t cut it here |
| 4 large | Eggs — room temperature for best results |
| 1 tsp | Baking powder |
| ½ tsp | Salt |
For the Cream Filling
| Amount | Ingredient |
|---|---|
| 500 ml (2 cups) | Milk — whole milk gives the richest result |
| 150 g (¾ cup) | Sugar |
| 100 g (1 cup) | All-purpose flour |
| 2 large | Eggs |
| 180 g (¾ cup) | Butter, softened — again, real deal only |
Optional Topping
| Amount | Ingredient |
|---|---|
| To taste | Icing sugar or your favorite garnish |
Tools You’ll Actually Use
- Medium saucepan (for the dough and cream)
- Large mixing bowl
- Electric hand mixer or stand mixer
- 25 cm (10-inch) round baking pan
- Parchment paper
- Whisk
- Spatula or wooden spoon
- Plastic wrap (for cooling the cream)
- Fine mesh sieve (optional, for a lump-free cream)
Step-by-Step Instructions for This Melt-in-Your-Mouth Cake
Preparing the Dough
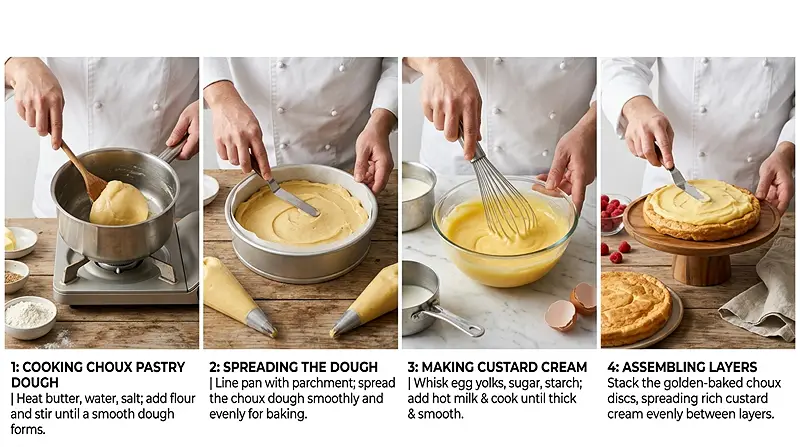
Step 1 — Melt the Butter and Combine Liquids: In a medium saucepan over medium heat, melt 80 g of butter. Add 100 ml of water, 100 ml of milk, and ½ tsp of salt. Stir until the butter is fully melted and everything is combined — you want one smooth, unified liquid base before moving forward.
Step 2 — Mix the Dry Ingredients: In a separate bowl, whisk together 150 g of all-purpose flour and 1 tsp of baking powder. Whisking them together first makes sure the baking powder is evenly distributed — no pockets of rising agent hiding anywhere.
Step 3 — Incorporate the Dry Mixture: Once your liquid mixture reaches a boil, reduce the heat and slowly add the flour-baking powder mixture, stirring continuously to prevent lumps. Keep stirring until the dough pulls cleanly away from the sides of the pan and forms a smooth ball — this is the magic moment right here.
Step 4 — Cool and Add Eggs: Transfer the dough to a mixing bowl and let it cool until it’s warm but not hot — about 10 minutes. This step matters! If the dough is too hot, it’ll scramble your eggs, and that’s nobody’s idea of a good time. Once cooled, add 4 room-temperature eggs one at a time, mixing well after each addition until the dough is smooth and slightly sticky.
Step 5 — Bake the Layers: Preheat your oven to 400°F (200°C) and line a 25 cm round baking pan with parchment paper. Divide the dough into two equal portions. Spread the first portion evenly in the pan and bake on the middle rack for 20 minutes, until golden and puffed. Repeat with the second portion. Let both layers cool completely before assembling — patience here pays off in perfect layers.
Making the Cream Filling
Step 6 — Whisk the Base Ingredients: In a large mixing bowl, beat 2 eggs and 150 g of sugar together until the mixture is pale and frothy. Gradually whisk in 100 g of flour, then slowly add 500 ml of milk, whisking the whole time to keep things smooth and lump-free.
Step 7 — Cook the Cream Mixture: Pour the egg-sugar-flour-milk mixture into a saucepan and cook over medium heat, stirring constantly as it thickens. Once it begins to boil, let it cook for a full 3 minutes while stirring — this cooks out the raw flour flavor. Remove from heat and press plastic wrap directly on the surface to prevent a skin from forming. Let it cool completely.
Step 8 — Blend the Butter and Cream: Beat 180 g of softened butter with a hand mixer until it’s light and fluffy, about 3–4 minutes. Gradually add the cooled custard mixture, a few spoonfuls at a time, blending well after each addition. The result should be a cloud-like, smooth, creamy filling that smells like a dream.
Assembling the Cake
Step 9 — Layer the Cake: Place one baked dough layer in a clean baking pan or on your serving plate. Spread half of the cream filling evenly over the surface. Lay the second dough layer on top, then spread the remaining cream generously over it.
Step 10 — Chill the Cake: Pop the assembled cake in the refrigerator for at least 2 hours. This chilling time lets the cream firm up and the flavors meld together into something truly special. It’s the hardest part of the recipe — just waiting.
Step 11 — Garnish and Serve: Just before serving, dust the top generously with icing sugar or your choice of garnish. Slice with a sharp knife into wedges or squares and enjoy with the people you love most (or, honestly, just yourself — no judgment).
Claire’s Pro Tips for the Best Easy Tasty Dessert Recipes
When it comes to good sweet recipes like this one, a few small habits make a huge difference. I’ve made this Melt-in-Your-Mouth Cake enough times to know exactly where things can go sideways — and how to avoid them.
These little tips have saved my cake more than once, and I’m passing them all along to you.
Room temperature everything. Both your eggs for the dough and the butter for the cream should be at room temperature before you start. Cold eggs can make the dough seize up, and cold butter won’t whip into that dreamy, fluffy filling you’re going for.
Don’t rush the cooling step. Adding eggs to hot dough = scrambled eggs. Adding warm custard to butter = greasy soup. Let both components cool down properly — your patience will be rewarded with a silky, beautiful result.
Spread the dough unevenly on purpose (for the top layer). A slightly rustic, uneven top layer actually looks gorgeous once it puffs up in the oven. Those little peaks give the cake character. Perfection is overrated.
Chill longer if you can. Two hours is the minimum, but overnight is where this cake really shines. The flavors deepen and the cream sets into something you could honestly eat with a spoon.
Quick Fixes for Your Melt-in-Your-Mouth Cake
My dough didn’t pull away from the pan. This usually means the heat was too low or you added the flour before the liquid fully boiled. Return the pan to medium heat and keep stirring — the dough will come together with a little more time and heat.
The cream is lumpy. Don’t panic — this is fixable! Pass the cooked custard through a fine mesh sieve while it’s still warm to remove any lumps before you cool it. Whisking vigorously throughout the cooking process also keeps things smooth from the start.
The filling looks greasy or separated. This usually happens if the custard was still warm when added to the butter. Make sure your custard is fully chilled before blending. If it’s already separated, try setting the bowl over a pan of hot water for a minute and then re-whipping — it usually comes right back together.
My layers went soft. This happens when the choux isn’t baked long enough or when the assembled cake sits too long at room temperature. Make sure your layers are deeply golden and fully cooled before adding the cream, and keep the finished cake refrigerated until right before serving.
The cake is too sweet for my taste. Reduce the sugar in the cream filling to 120 g instead of 150 g. The sweetness will still be there, just a little more balanced against the richness of the butter.
Variations and Fun Twists
This stuffed dessert is a wonderful canvas for creativity — don’t stop at the classic version if you’re feeling adventurous.
Chocolate lover’s version: Stir 2–3 tablespoons of cocoa powder into the cream mixture before cooking for a rich, chocolate custard filling. A drizzle of ganache over the top takes it even further.
Lemon brightness: Add the zest of one lemon and 1 tablespoon of lemon juice to the finished cream for a citrusy lift that cuts beautifully through the richness.
Vanilla bean upgrade: Swap vanilla extract for half a scraped vanilla bean pod added to the milk as it heats. The flavor difference is subtle but genuinely lovely.
Berry layer: Spread a thin layer of raspberry or strawberry jam between the cream and the top pastry layer for a fruity contrast that makes the whole dessert pop. This is especially gorgeous for spring entertaining — and pairs beautifully with the flavors in our fresh spring roll spread if you’re doing a full seasonal table.
Gluten-free swap: Replace the all-purpose flour in both the dough and the cream with a 1:1 gluten-free flour blend. The texture will be slightly different, but it’s still absolutely delicious.
Serving, Storage and Reheating
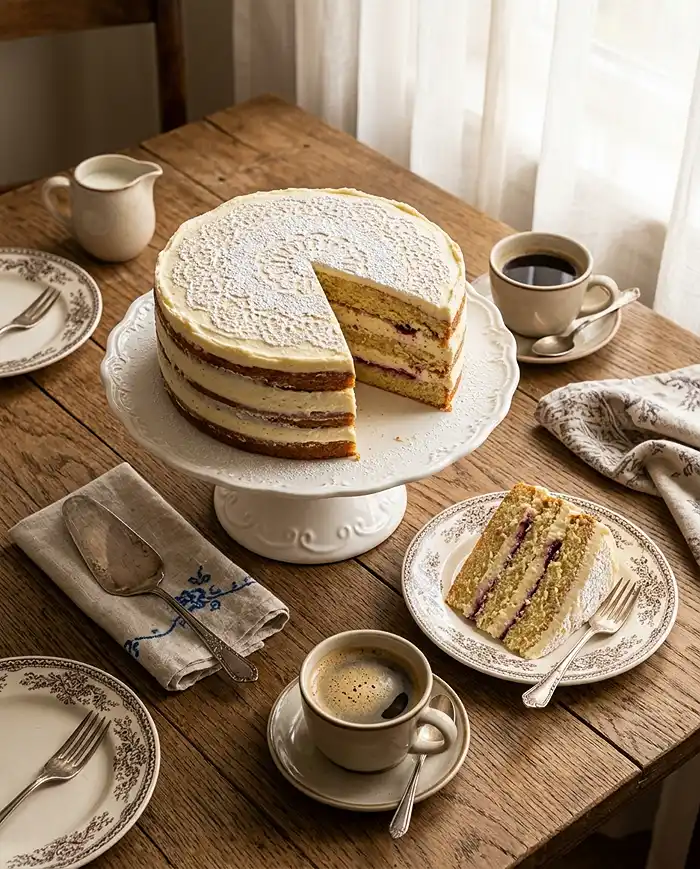
This Melt-in-Your-Mouth Cake is best served cold, straight from the fridge, dusted with icing sugar right before slicing. Pair it with coffee or tea for an afternoon treat, or serve it as a dinner party dessert alongside a simple fruit plate.
Store the cake in an airtight container in the refrigerator for up to 3 days. Over time, the pastry layers will absorb a little moisture from the cream — it softens slightly, which some people actually prefer. Day two is honestly when it hits peak flavor.
This cake is not suited to reheating or freezing once assembled — the cream doesn’t hold up well to temperature changes. That said, the baked choux layers on their own can be frozen for up to one month. Thaw and re-crisp at 325°F (165°C) for 5–8 minutes, then cool completely before adding the cream.
So glad you tried this one! The Cakes & Cupcakes collection has even more recipes that are just as comforting and crowd-pleasing. Go ahead, take a look — your next favorite dish is right there.
No-Waste Kitchen Magic
If you find yourself with leftover cream filling — which is rare, but it happens — don’t toss it. It makes an incredible topping for fresh berries, a filling for store-bought pastry cups, or a luxurious spread on thick slices of brioche toast.
Extra baked choux layers (without cream) store beautifully at room temperature for up to 2 days in a loosely covered container. Use them as a base for a quick weekday dessert by spreading with cream cheese and jam, or crumbling them over ice cream for a fancy-ish topping.
Got egg whites left over from a recipe you’ve adapted? Whip them into a simple meringue or fold into a light pavlova. Nothing in a cozy kitchen should go to waste — and if you love making the most of every ingredient, you’ll also enjoy our coconut macaroon nests, another recipe that uses pantry basics beautifully.
FAQs
Can I make this Melt-in-Your-Mouth Cake ahead of time?
Absolutely — this cake is actually better made ahead. Assemble it fully, then refrigerate for at least 2 hours or overnight. The flavors deepen and the cream sets more firmly, making it easier to slice cleanly.
What is the best way to store Melt-in-Your-Mouth Cake?
Keep it in an airtight container in the refrigerator for up to 3 days. The pastry will gradually soften as it absorbs moisture from the cream, but it stays delicious. Don’t leave it at room temperature for more than an hour or so.
How do I know when the choux layers are done baking?
The layers should be a deep golden brown all over — not pale or blond. They should also feel dry and slightly firm to the touch, not soft or springy. If in doubt, leave them in for an extra 2–3 minutes rather than pulling them early.
Why should I use real butter in this Melt-in-Your-Mouth Cake?
Real butter is what gives both the dough and the cream their rich flavor and smooth, silky texture. Margarine contains more water and different fats that don’t behave the same way when heated or whipped. The difference in taste is noticeable — and you deserve the good stuff.
Will this cake work with plant-based milk?
Yes, with some adjustments. Full-fat oat milk or unsweetened soy milk work best as swaps in both the dough and the cream. The flavor will be slightly different and the cream may be a touch less rich, but the overall result is still very good.
Cozy Closing
There’s a reason this Melt-in-Your-Mouth Cake has earned a permanent spot in my recipe rotation. It’s one of those good sweet recipes that feels special every single time, whether you’re making it for a birthday, a dinner party, or just because it’s Wednesday and you deserve something wonderful.
I’d love to see your spin on this Melt-in-Your-Mouth Cake! Drop a comment below with your photos — I’d love to see how you made it your own. Did you add a berry layer? Try the chocolate cream? Go full vanilla bean? This Melt-in-Your-Mouth Cake is so versatile; I bet you’ve already got amazing variations in mind!
I’m Claire Whitmore — a dessert daydreamer from Asheville, NC. For me, baking isn’t about perfect pastries — it’s about the joy of sharing something sweet (and maybe sneaking an extra spoonful of cream straight from the bowl).
Melt-in-Your-Mouth Cake
Equipment
- Medium saucepan
- Large mixing bowl
- Electric mixer
- 25 cm round baking pan
- Parchment paper
- Whisk
- Spatula or wooden spoon
- Plastic wrap
- Fine mesh sieve
Ingredients
For the Dough
- 150 g All-purpose flour
- 100 ml Water
- 100 ml Milk
- 80 g Butter use real butter
- 4 Eggs room temperature
- 1 tsp Baking powder
- 0.5 tsp Salt
For the Cream Filling
- 500 ml Milk whole milk preferred
- 150 g Sugar
- 100 g All-purpose flour
- 2 Eggs
- 180 g Butter softened
Optional Topping
- to taste Icing sugar
Instructions
- Melt butter in a saucepan, then add water, milk, and salt. Stir until combined.
- Whisk flour and baking powder together in a bowl.
- Bring liquid to a boil, reduce heat, and add flour mixture while stirring until dough forms and pulls away from the pan.
- Cool dough for 10 minutes, then mix in eggs one at a time until smooth.
- Divide dough into two portions and bake each layer at 200°C (400°F) for 20 minutes until golden. Cool completely.
- Beat eggs and sugar until pale, then whisk in flour and milk.
- Cook mixture over medium heat, stirring constantly until thickened and boiling for 3 minutes. Cool with plastic wrap on surface.
- Beat softened butter until fluffy, then gradually add cooled custard until smooth.
- Layer one pastry base, spread half the cream, add second layer, and top with remaining cream.
- Refrigerate the cake for at least 2 hours to set.
- Dust with icing sugar, slice, and serve chilled.