How to Make Authentic Croissants at Home
Learn how to make authentic croissants at home with this detailed guide. Flaky, buttery, and surprisingly doable—this croissant recipe brings French bakery magic to your kitchen with step-by-step lamination tips.
Hey there, I’m Claire Whitmore — a pastry whisperer in Asheville, NC, where butter totally counts as self-care. This how to make authentic croissants at home recipe is your ticket to creating those impossibly flaky, golden layers you thought only existed in Parisian bakeries.
With all-purpose flour, cold butter, and a little patience, you’ll master the art of lamination and fill your kitchen with that irresistible buttery aroma.
Whether you’re craving homemade croissants for a weekend brunch or just want to impress literally everyone you know, this croissant recipe breaks down each fold, turn, and bake into totally manageable steps.
Table of Contents
Little Snapshot: What This Recipe Delivers
This homemade croissant recipe walks you through classic French lamination techniques to create 12 flaky, buttery croissants in about 4–5 hours (mostly hands-off chilling time).
With simple ingredients like all-purpose flour, cold butter, and active dry yeast, you’ll master the art of folding dough into golden, airy layers that shatter with every bite.
Why You’ll Love This Recipe 🌸
- This authentic croissant recipe looks fancy but honestly just takes patience—not a culinary degree.
- You’ll finally understand what all those “turn” and “lamination” words actually mean (and feel like a total pastry genius).
- The ingredient list is short and sweet—no weird additives or mystery powders, just real butter and flour doing their thing.
- According to King Arthur Baking’s detailed lamination guide, mastering butter layers is the secret to bakery-quality pastries — and this recipe proves exactly why.
Quick Facts ⚡
Here’s the quick scoop on this homemade croissant recipe.
- CourseBreakfast / Brunch
- Prep Time45 minutes (active)
- Cook Time20 minutes
- Total Time4–5 hours (includes chilling)
- Servings12 croissants
- DifficultyMedium
Nutritional Peek
| Nutrient | Amount per Serving |
|---|---|
| Calories | 285 kcal |
| Protein | 5g |
| Carbohydrates | 32g |
| Total Fat | 15g |
| Saturated Fat | 9g |
| Fiber | 1g |
| Sugar | 4g |
| Sodium | 420mg |
Ingredients
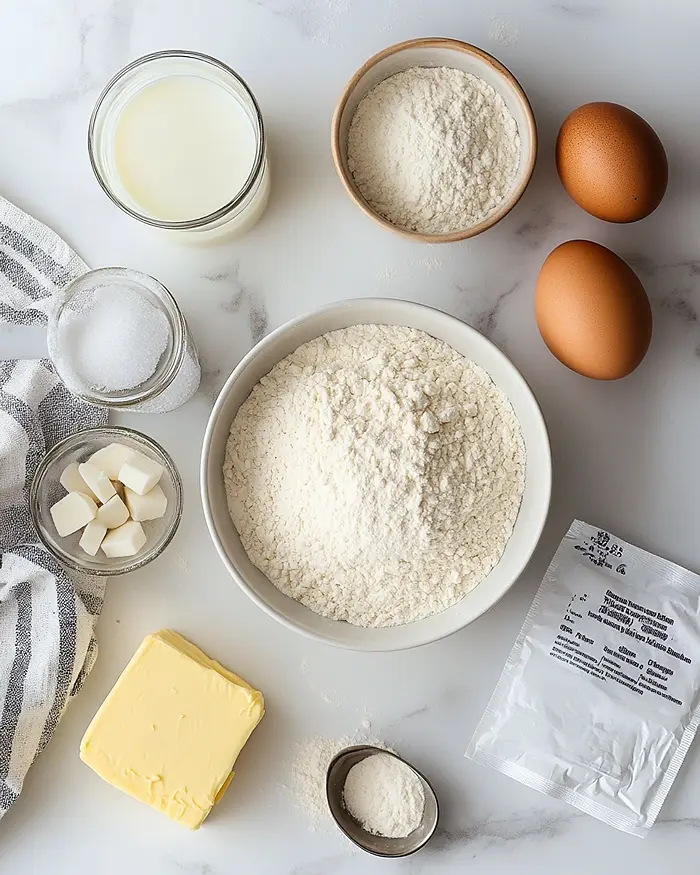
This croissant recipe thrives on quality ingredients and proper temperature control—seriously, cold butter is your best friend here.
Before we dive into measurements, let’s talk about the key players. For the dough base—flour, sugar, salt, yeast, warm milk, and melted butter—you’ll want everything at room temp except the milk, which should be just warm enough to wake up the yeast.
For the butter block (this is where the magic happens), you need cold, high-quality unsalted butter shaped into a flat square that’ll fold into all those dreamy layers.
| Amount | Ingredient |
|---|---|
| 4 cups (500g) | All-purpose flour |
| 1/4 cup (50g) | Granulated sugar |
| 1 tablespoon (10g) | Salt |
| 1 tablespoon (10g) | Active dry yeast |
| 1 1/4 cups (300ml) | Warm milk (about 110°F) |
| 2 tablespoons | Unsalted butter, melted |
| 1 cup (225g) | Unsalled butter, cold (for butter block) — Yes, real butter. Margarine will ruin your croissant dreams. |
| 1 | Egg (for egg wash) |
| 1 tablespoon | Milk (for egg wash) |
Tools You’ll Actually Use
- Stand mixer with dough hook (or a large mixing bowl + your hands)
- Rolling pin
- Parchment paper
- Ruler or measuring tape (trust me, precision matters here)
- Sharp knife or pizza cutter
- Baking sheet
- Pastry brush
- Plastic wrap or clean kitchen towel
Step-by-Step Instructions
Alright, let’s make some authentic croissants at home that’ll make your neighbors weirdly jealous.
Step 1: Make the Dough (Détrempe)
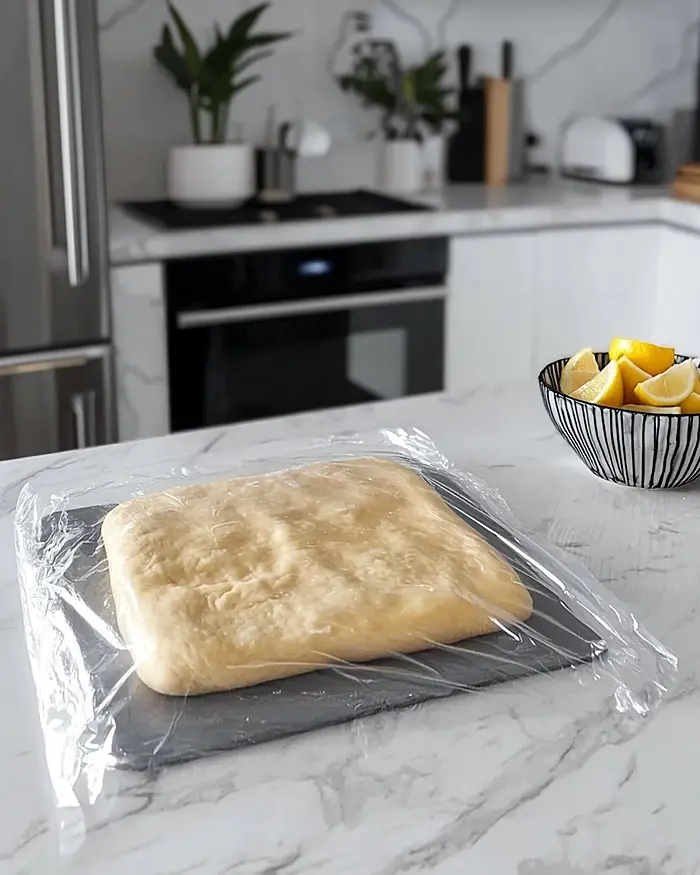
In a large bowl or stand mixer fitted with a dough hook, combine the all-purpose flour, granulated sugar, and salt. In a separate small bowl, dissolve the active dry yeast in warm milk (around 110°F—warm to the touch but not hot) and let it sit until it gets foamy and alive-looking, about 5 to 10 minutes.
Add the milk-yeast mixture and melted butter to the dry ingredients and knead on medium speed (or by hand) until the dough is smooth, elastic, and no longer sticky, about 3–5 minutes. Shape it into a disk, wrap it tightly in plastic wrap, and refrigerate for at least 1 hour or up to overnight.
Step 2: Prepare the Butter Block (Beurrage)
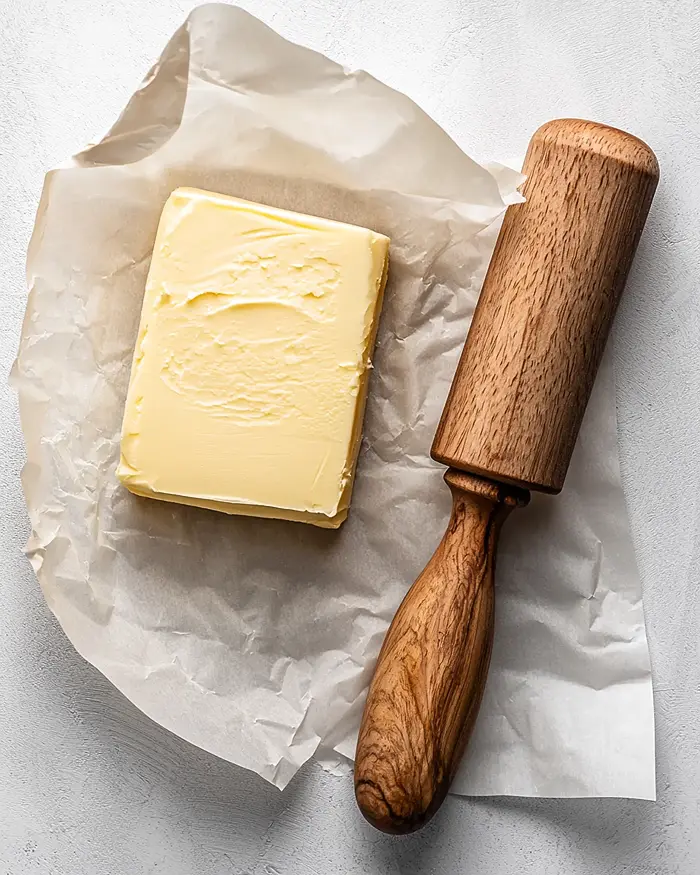
Place your cold unsalted butter (1 cup/225g) between two sheets of parchment paper. Use a rolling pin to pound and roll it into a neat 6-inch square—this takes a little elbow grease, but you want it pliable yet still cold.
If the butter gets too soft or greasy, pop it in the fridge for a few minutes. The goal is a butter block that’s firm but flexible, so it won’t crack when you fold it into the dough.
Step 3: Encase the Butter (First Fold)
Roll your chilled dough into a 12-inch square on a lightly floured surface. Place the cold butter block diagonally in the center of the dough, like a diamond sitting on a square.
Fold each corner of the dough over the butter to enclose it completely, pinching the seams tightly to seal—think of it like wrapping a really important gift. You want zero butter peeking through.
Step 4: First Turn
Roll the butter-wrapped dough into a long rectangle, about 8×20 inches—work gently and evenly so the butter doesn’t break through. Fold the dough into thirds, just like you’re folding a letter: bottom third up, top third down.
This is your first “turn.” Wrap the dough in plastic wrap and refrigerate for 30 minutes. This chilling step is non-negotiable—it keeps the butter from melting and maintains those distinct layers.
Step 5: Second and Third Turns
Repeat the rolling, folding, and chilling process two more times for a total of three turns. Each turn builds more layers—and more layers means flakier croissants with that signature honeycomb interior. Don’t rush this step. Cold dough and butter make all the difference between a gorgeous, flaky pastry and a greasy, dense disaster.
Step 6: Shape the Croissants
After the final 30-minute rest, roll the laminated dough out into a large rectangle on a lightly floured surface, about 1/4-inch thick and roughly 10×20 inches. Use a sharp knife or pizza cutter to trim the uneven edges (save those scraps for mini pastries!), then cut triangles that are roughly 5 inches wide at the base and about 8 inches tall.
Starting at the wide end, gently stretch the dough just a bit and roll each triangle toward the tip to form that classic crescent shape—don’t roll too tightly or the layers won’t expand properly.
Step 7: Proof the Croissants
Place your shaped croissants on a parchment-lined baking sheet, leaving about 2 inches between each one. Cover them loosely with a clean kitchen towel or plastic wrap and let them rise at room temperature for 1.5 to 2 hours.
They should look visibly puffed and a little jiggly when you gently shake the pan—this means the yeast is doing its job and the layers are expanding.
Step 8: Egg Wash and Bake
Preheat your oven to 400°F (200°C). In a small bowl, whisk together the egg and 1 tablespoon of milk. Using a pastry brush, gently brush the egg wash over each croissant—this gives them that glossy, golden, bakery-perfect finish.
Bake for 18–22 minutes until the croissants are deeply golden brown, puffed up like little clouds, and your kitchen smells like a Paris café. Rotate the baking sheet halfway through for even browning.
Step 9: Cool and Devour
Let the croissants cool on a wire rack for at least 10 minutes before tearing into them. I know waiting is torture, but this cooling time lets the layers set and makes them even flakier.
Claire’s Pro Tips & Gentle Guidance
These croissant recipes can feel a little fussy at first, but once you get the hang of lamination, you’ll be unstoppable.
Keep everything cold. If your butter starts melting into the dough during rolling, stop immediately and pop everything back in the fridge for 15 minutes. Warm butter = greasy, flat croissants instead of flaky, layered ones.
Use a ruler. I’m serious—measuring your dough rectangles and butter block ensures even layers and consistent results. Eyeballing it is how you end up with croissants that are thick on one end and tissue-paper thin on the other.
Don’t skip the resting times. I know it’s tempting to rush through the chilling steps, but cold dough is what keeps the butter from leaking out during baking.
According to Serious Eats‘ expert pastry guidance, proper rest periods are what separate mediocre croissants from bakery-quality magic.
Flour your surface lightly. Too much flour toughens the dough and messes with your layers. A light dusting is all you need—if the dough sticks, chill it longer rather than adding more flour.
I have a feeling you’ll love what’s next. The Classic Comfort Foods favorites are packed with recipes that disappear fast at every gathering. Go check them out before someone else snags them!
Quick Fixes for Croissants
Problem: My croissants didn’t puff up.
Your butter probably melted into the dough during lamination, or the dough wasn’t cold enough during shaping. Make sure you’re chilling between every turn, and if your kitchen is warm, work quickly and refrigerate more often.
Problem: Butter leaked out during baking.
This usually means the dough wasn’t sealed properly around the butter block, or the oven temperature was too low. Double-check that your butter is fully enclosed before the first turn, and make sure your oven is fully preheated to 400°F before baking.
Problem: The layers are dense and doughy, not flaky.
You might have over-proofed the dough (let it rise too long) or under-proofed it (didn’t let it rise enough). The croissants should look visibly puffy and jiggly before baking—if they’re flat or dense, give them more time to rise.
Problem: The croissants are pale and undercooked.
Your oven might be running cool, or you pulled them out too early. Use an oven thermometer to verify your temp, and don’t be afraid to bake them a few extra minutes until they’re deeply golden—pale croissants are doughy croissants.
Variations & Fun Twists
Once you’ve mastered this homemade croissant technique, the world is your buttery oyster.
Chocolate croissants (pain au chocolat): Skip the crescent shape and instead cut the dough into rectangles. Place a few pieces of dark chocolate at one end, roll it up like a log, and bake as directed.
Almond croissants: Slice day-old croissants in half, spread almond paste or frangipane inside, sprinkle with sliced almonds, and bake until golden and fragrant.
Savory ham and cheese croissants: Add a slice of ham and Gruyère cheese before rolling the dough into crescents. Bake until the cheese is melty and bubbly.
Whole wheat croissants: Swap half the all-purpose flour for whole wheat flour for a nuttier, heartier flavor—just know the texture will be slightly denser.
Serving, Storage & Reheating

These croissants are absolute perfection straight from the oven, but let’s be real—if you actually have leftovers, which I doubt, here’s how to keep them fresh.
Serving: Serve warm with butter, jam, or just tear into them plain while they’re still slightly warm. Pair them with your favorite Southwestern Chicken Salad for a fancy brunch spread.
Storage: Store cooled croissants in an airtight container at room temperature for up to 2 days. Don’t refrigerate them—it makes them stale faster. For longer storage, freeze them in a freezer-safe bag for up to 2 months.
Reheating: To bring back that fresh-baked magic, reheat croissants in a 350°F oven for 5–7 minutes until warmed through and slightly crispy again. Don’t microwave them unless you want sad, rubbery pastries.
No-Waste Kitchen Magic
Repurpose the trimmings: Those dough scraps from cutting triangles? Roll them up, twist them into spirals, brush with butter and cinnamon sugar, and bake for quick little pastry snacks.
Make bread pudding: Day-old croissants are perfect for a decadent bread pudding—tear them into chunks, soak in a custard mixture, and bake until golden.
Turn them into croutons: Cube stale croissants, toss with olive oil and herbs, and bake until crispy for the fanciest salad croutons you’ve ever had. They’re amazing on this 15-Minute Chicken Sausage Pasta.
Freeze for later: If you shaped croissants but don’t want to bake them all at once, freeze the unbaked, shaped croissants on a baking sheet, then transfer to a freezer bag. Bake from frozen, adding 5–10 extra minutes to the bake time.
How to Make Authentic Croissants at Home FAQs
Can I freeze croissant dough?
Absolutely! You can freeze the laminated dough after the third turn (before shaping) for up to 2 months. Thaw it overnight in the fridge, then roll, shape, and bake as directed.
What’s the best way to store baked croissants?
Keep them in an airtight container at room temperature for up to 2 days—they’ll stay flaky and delicious. If you freeze them, reheat in the oven to bring back that crispy exterior.
How do I know when my croissants are done baking?
They should be deeply golden brown all over, not pale or blonde. The layers should be visibly puffed and separated, and your kitchen should smell like a French bakery.
Why should I use cold butter in this croissant recipe?
Cold butter creates distinct layers during lamination—when it melts in the oven, it releases steam that puffs up the dough and creates those signature flaky pockets. Soft or melted butter just makes greasy, dense pastries.
Cozy Closing
There you have it—your complete guide to making authentic croissants at home that’ll make you feel like a total pastry rockstar. I’d love to see your spin on this croissant recipe!
Drop a comment below with your croissant photos—I’d love to see how you made it your own. This homemade croissant technique is so versatile; I bet you’ve got amazing variations already in mind, from chocolate-filled to savory ham and cheese!
And hey, if you loved these flaky layers, you’ll adore this Sourdough Lemon Blueberry Focaccia Bread—it’s another bread project that’s totally worth the effort.
I’m Claire Whitmore — a dessert daydreamer from Asheville, NC. For me, baking isn’t about perfect pastries — it’s about the joy of sharing something sweet (and maybe sneaking an extra bite while they’re still warm).

How to Make Authentic Croissants at Home
Equipment
- Stand mixer with dough hook
- Rolling Pin
- Parchment paper
- Ruler or measuring tape
- Sharp knife or pizza cutter
- Baking sheet
- Pastry brush
Ingredients
Croissant Dough
- 4 cups All-purpose flour about 500g
- ¼ cup Granulated sugar 50g
- 1 tablespoon Salt 10g
- 1 tablespoon Active dry yeast 10g
- 1 ¼ cups Warm milk about 110°F / 300ml
- 2 tablespoons Unsalted butter melted
Butter Block
- 1 cup Unsalted butter cold, 225g
Egg Wash
- 1 Egg
- 1 tablespoon Milk
Instructions
- Mix flour, sugar, and salt. Activate yeast in warm milk, then combine with dry ingredients and melted butter. Knead until smooth, shape into a disk, wrap, and refrigerate for at least 1 hour.
- Pound cold butter between parchment into a 6-inch square. Keep it firm but flexible, chilling if needed.
- Roll chilled dough into a square, place butter diagonally in the center, and fold dough corners over to fully enclose the butter.
- Roll dough into a long rectangle and fold into thirds (first turn). Wrap and chill for 30 minutes.
- Repeat rolling, folding, and chilling two more times for a total of three turns.
- Roll dough into a large rectangle, trim edges, cut into triangles, and roll each into a crescent shape.
- Place croissants on a lined baking sheet, cover loosely, and proof at room temperature for 1.5–2 hours until puffy.
- Brush with egg wash and bake at 400°F (200°C) for 18–22 minutes until deeply golden.
- Cool briefly on a wire rack before serving.