Homemade Onion Rings Recipe
Homemade Onion Rings made with panko, simple pantry spices, and a quick batter — perfectly crispy, golden, and ready in under 30 minutes. No deep fryer required!
Hey there, I’m Claire Whitmore — a pastry whisperer in Asheville, NC, where butter totally counts as self-care. This Homemade Onion Rings recipe is your new favorite side dish (or guilty-pleasure snack) because it’s crispy, golden, and uses ingredients you probably already have in your pantry.
We’re talking panko breadcrumbs for that extra crunch, a lightly spiced batter with smoked paprika and cayenne, and sweet yellow onions that fry up into crunchy, savory perfection. Plus, you can make them in a simple frying pan — no deep fryer or fancy equipment needed.
I’m a sucker for crispy textures and anything that makes you lick your fingers. Onion rings have always felt like restaurant food to me — something you’d order at a diner or fair, not something you’d whip up at home on a Tuesday.
Table of Contents
Little Snapshot: What This Recipe Delivers
Homemade Onion Rings are crispy, golden rings of sweet yellow onion coated in a seasoned batter and crunchy panko breadcrumbs, then fried until perfectly golden in about 5 minutes. They’re easy enough for beginners, use simple pantry ingredients, and deliver restaurant-quality crunch at home.
Why You’ll Love This Recipe 🌸
- This Homemade Onion Rings recipe takes less time than waiting for takeout — and tastes about a million times better.
- You get that crazy-crispy panko crunch without needing a deep fryer or half a gallon of oil.
- The smoked paprika and cayenne add just enough warmth to make these ridiculously addictive (trust me, you’ll want doubles).
- According to Serious Eats in their guide to perfecting crispy coatings, the secret to restaurant-quality crunch is double-coating with panko — and this recipe proves exactly why.
Quick Facts ⚡
Here’s the quick scoop on this Homemade Onion Rings recipe.
- CourseAppetizer / Side Dish
- Prep Time15 minutes
- Cook Time10 minutes
- Total Time25 minutes
- Servings2 servings (about 20-24 rings)
- DifficultyEasy
Nutritional Peek
Here’s a quick look at what you’re getting per serving — because knowing is half the battle (and the other half is eating them anyway).
| Nutrient | Amount per Serving |
|---|---|
| Calories | 420 kcal |
| Protein | 12g |
| Carbohydrates | 58g |
| Fat | 15g |
| Fiber | 3g |
| Sugar | 8g |
Note: Nutritional values are approximate and will vary based on oil absorption during frying.
Ingredients
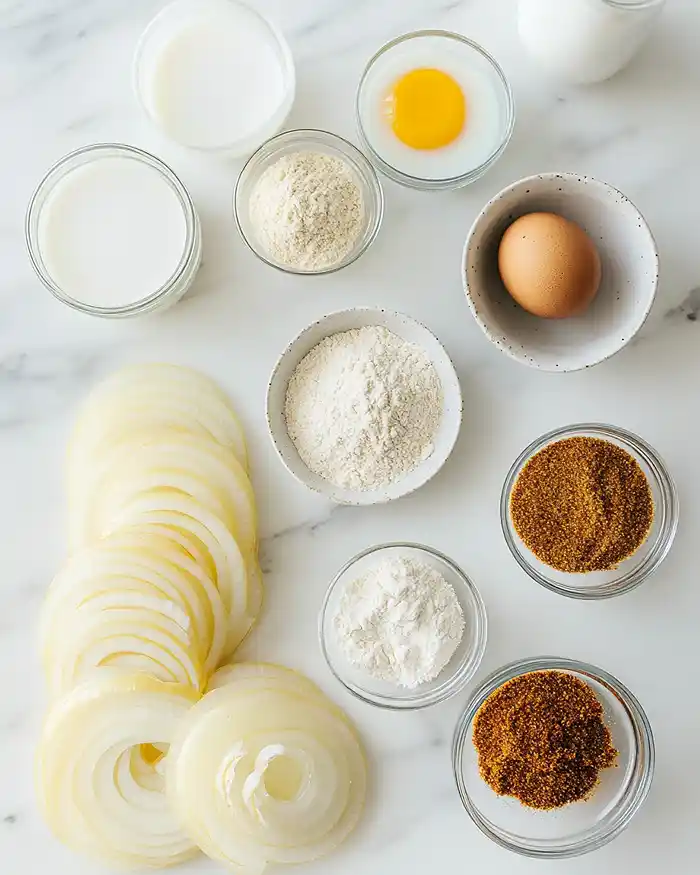
If you’ve been wondering how to make Homemade Onion Rings that actually taste like the ones from your favorite burger joint, it all starts with the right lineup. For the wet ingredients — milk, egg, and a touch of brown sugar — you’ll want everything at room temperature so the batter comes together smoothly.
For the dry mix — flour for dusting, seasoned flour for the batter, and panko for that signature crunch — we’re layering textures to create the ultimate crispy coating.
| Amount | Ingredient |
|---|---|
| 2 large | Yellow onions, sliced into 1/2 inch rings |
| 2 cups | Panko breadcrumbs (yes, panko — not regular breadcrumbs, trust me on this) |
| 1/2 cup | Flour for dusting |
| For the Batter | |
| 1/2 cup | Flour |
| 1 cup | Milk (whole milk works best, but 2% is fine) |
| 1 large | Egg |
| 1/2 tsp | Brown sugar (secret ingredient for a hint of caramelization) |
| 1 tsp | Garlic powder |
| 1 tsp | Onion powder (doubling down on that onion flavor!) |
| 1/4 tsp | Cayenne pepper (add more if you like heat) |
| 2 tsp | Smoked paprika |
| 1 tsp | Kosher salt |
| 1 tsp | Black pepper |
| 1 cup | Canola oil for frying (or vegetable oil) |
Tools You’ll Actually Use
- Sharp knife
- Cutting board
- 3 large bowls (for your breading station)
- Whisk
- Sheet tray
- Large frying pan or cast-iron skillet
- Tongs or a slotted spoon
- Paper towels for draining
Step-by-Step Instructions
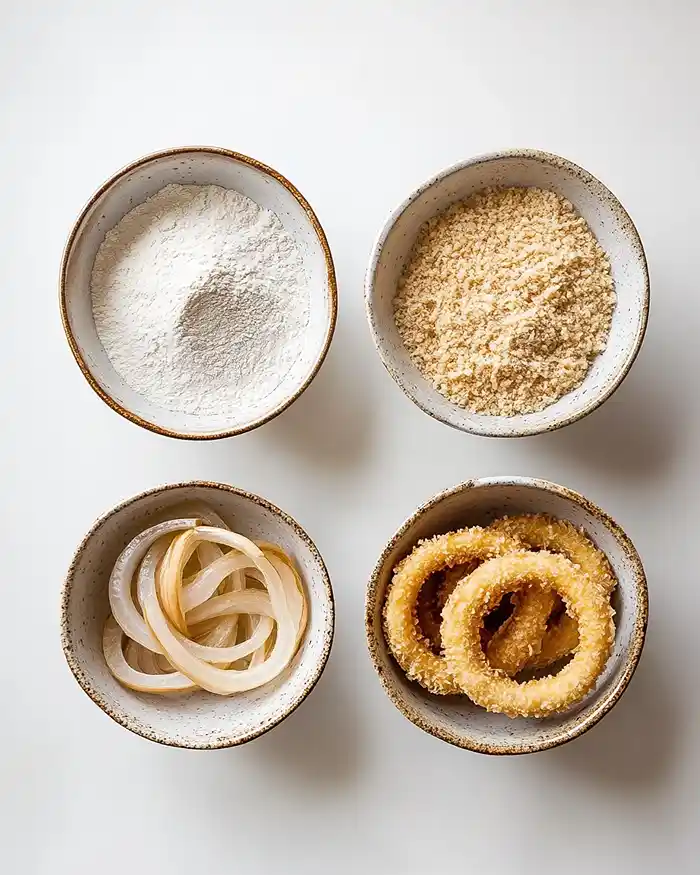
Making Homemade Onion Rings is easier than you think — it’s all about setting up a good breading station and keeping your oil at the right temperature. Here’s how we do it.
Step 1: Prep Your Onions
With a sharp knife, remove the outer skins of 2 large yellow onions. Slice each onion into ½-inch thick rings — not too thin or they’ll burn, not too thick or they won’t cook through. With your hands, gently push out the individual rings and separate them. You’ll get varying sizes, which is perfect for snacking.
Step 2: Set Up Your Breading Station
Into a large bowl, place ½ cup of flour for dusting. Into a second bowl, combine ½ cup flour, 1 cup of milk, and 1 large egg. Whisk together until a smooth batter forms with no lumps.
To your batter, add ½ tsp brown sugar, 1 tsp garlic powder, 1 tsp onion powder, ¼ tsp cayenne, 2 tsp smoked paprika, 1 tsp kosher salt, and 1 tsp black pepper. Mix well until all the spices are fully incorporated. Into a third bowl, add 2 cups of panko breadcrumbs.
Step 3: Coat the Rings
Working with one onion ring at a time, coat each ring in the plain flour, shaking off any excess. Next, dip each ring into your flavored batter, letting any extra drip off. Finally, press each ring into the panko breadcrumbs, making sure the entire ring is coated in batter and panko. Place each coated ring on a sheet tray as you go.
Step 4: Fry Until Golden
Place a large frying pan or cast-iron skillet over medium-high heat. Add in about 1 cup of canola oil — you want enough oil to come halfway up the sides of the rings. Once the oil is heated (test by dropping in a pinch of panko — it should sizzle immediately), gently drop your rings in, working in batches so you don’t overcrowd the pan.
Fry for 2-3 minutes on each side until golden brown and crispy. Remove from the oil with tongs or a slotted spoon and place on a paper towel-lined tray. Season each hot ring with a pinch of kosher salt right away.
Step 5: Serve Hot
Serve hot with a dip of your choosing — ketchup, ranch, spicy mayo, or even a garlic aioli. These are best eaten immediately while they’re still piping hot and crunchy!
Claire’s Pro Tips & Gentle Guidance
Here’s what I’ve learned from making these Easy Onion Rings way too many times (not that I’m complaining).
Keep your oil temperature steady. If the oil is too hot, the panko will burn before the onion cooks through. If it’s too cool, you’ll end up with greasy, soggy rings. Medium-high heat is the sweet spot — aim for around 350-375°F if you have a thermometer.
Don’t skip the flour dusting step. It seems unnecessary, but that first coat of flour helps the batter cling to the onion. Without it, the batter just slides right off into the oil. Trust the process.
Work in small batches. I know it’s tempting to fry everything at once, but overcrowding the pan drops the oil temperature and makes everything soggy. Fry 4-5 rings at a time, and let the oil come back up to temp between batches.
Season immediately after frying. The salt sticks way better when the rings are hot and slightly oily. Wait until they cool, and you’ll lose that perfect salty crunch.
For more expert frying techniques and how to avoid common mistakes, check out this trusted guide on mastering home frying— it’s a game-changer for getting restaurant-quality results every time.
Quick Fixes for Homemade Onion Rings
Problem: Batter keeps sliding off the onions.
This usually means you skipped the flour dusting step, or your onions were too wet. Pat them dry with a paper towel first, then coat in flour before dipping in batter. That extra layer helps everything stick.
Problem: Onion rings are greasy instead of crispy.
Your oil temperature is too low. Bump up the heat slightly and make sure the oil is shimmering before you add the rings. Also, don’t overcrowd the pan — that drops the temperature fast.
Problem: Panko is burning but the onion isn’t cooked.
Your heat is too high. Lower it to medium and give each side a bit more time. You want a gentle sizzle, not an aggressive fry.
Problem: Rings are falling apart after frying.
Make sure you’re coating every bit of the ring — any gaps in the panko coating will cause the batter to break apart. Press the panko on firmly and fry gently so you’re not jostling them too much.
Variations & Fun Twists
This Homemade Onion Rings recipe is super flexible — here are a few ways to make it your own.
Spicy Kick: Double the cayenne or add a pinch of chili powder to the batter. You can also drizzle with hot sauce or serve with a spicy sriracha mayo.
Gluten-Free Option: Swap the flour for a gluten-free all-purpose blend and use gluten-free panko. The texture stays just as crispy.
Oven-Baked Version: If you want to skip the frying, bake these at 425°F for 20-25 minutes, flipping halfway through. Spray them lightly with cooking spray for extra crispiness. They won’t be quite as crunchy as fried, but they’re still delicious.
Beer Batter Twist: Replace the milk in the batter with ½ cup of beer for a lighter, airier coating. It adds a subtle malty flavor that’s really good with burgers.
Sweet Onion Swap: Try Vidalia or Walla Walla onions if you want something a little sweeter and milder. They caramelize beautifully.
Serving, Storage & Reheating
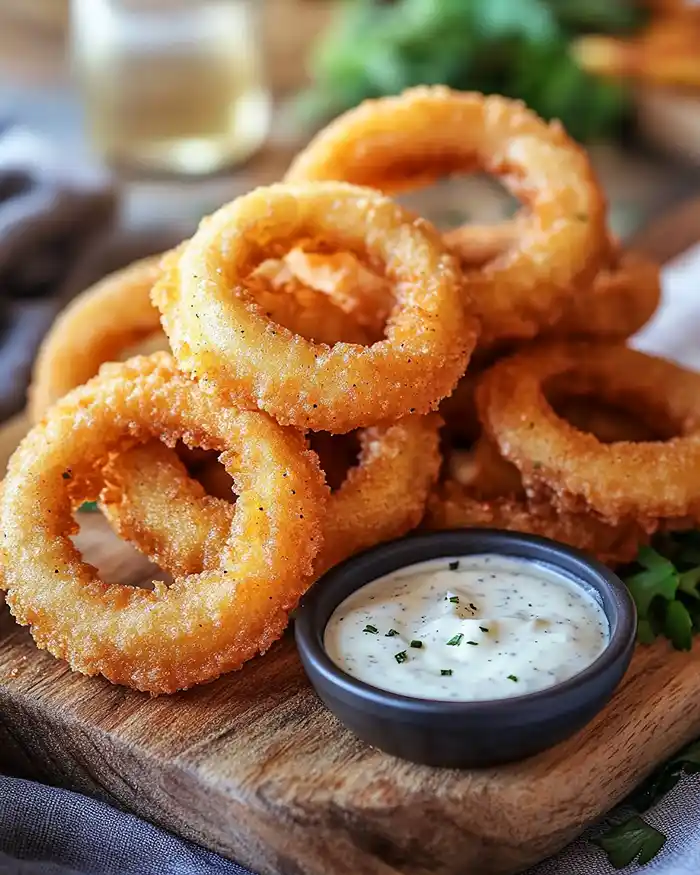
These Easy Onion Rings are best served hot and fresh, piled high on a plate with your favorite dipping sauces. I love them alongside burgers, sandwiches, or even just on their own as a snack. Pair them with ranch, ketchup, spicy mayo, or a tangy barbecue sauce.
If you somehow have leftovers (which, honestly, I doubt), store them in an airtight container in the fridge for up to 2 days. Just know they’ll lose some of their crunch.
To reheat, skip the microwave — it’ll make them soggy. Instead, pop them in a 400°F oven for 8-10 minutes until they crisp back up. You can also reheat them in an air fryer at 375°F for 5-6 minutes, which works beautifully.
No-Waste Kitchen Magic
Got leftover onion rings that didn’t quite make the cut? Chop them up and toss them into a salad for a crunchy topping, or crumble them over mac and cheese for a fun texture boost.
You can also freeze the coated (but uncooked) rings on a sheet tray, then transfer to a freezer bag. Fry them straight from frozen — just add an extra minute or two to the cooking time.
If you have extra batter, use it to coat other veggies like zucchini, mushrooms, or bell pepper rings. Same crispy magic, different veggie.
And if you’re looking for more easy, crispy recipes that make great use of pantry staples, check out these Eggless Brownies or these Dark Chocolate Sea Salt Nut Bars for your next sweet craving.
I have a feeling you’ll love what’s next. The Classic Comfort Foods favorites are packed with recipes that disappear fast at every gathering. Go check them out before someone else snags them!
Homemade Onion Rings FAQs
Can I freeze Homemade Onion Rings?
Yes! Freeze them coated but uncooked on a sheet tray, then transfer to a freezer bag. Fry them straight from frozen, adding an extra minute or two to the cooking time.
What’s the best way to store leftover onion rings?
Store them in an airtight container in the fridge for up to 2 days. Reheat in a 400°F oven for 8-10 minutes to crisp them back up.
How do I know when the oil is hot enough for frying?
Drop a pinch of panko into the oil — if it sizzles immediately, you’re good to go. If you have a thermometer, aim for 350-375°F.
Why should I use panko instead of regular breadcrumbs in Homemade Onion Rings?
Panko breadcrumbs are lighter and flakier than regular breadcrumbs, which gives you a crunchier, crispier coating. Regular breadcrumbs tend to get dense and heavy after frying.
Can I make these in an air fryer?
Absolutely! Spray the coated rings lightly with cooking spray and air fry at 400°F for 12-15 minutes, flipping halfway through. They won’t be quite as crispy as fried, but they’re still really good.
Cozy Closing
I’d love to see your spin on this Homemade Onion Rings recipe! Drop a comment below with your onion ring photos — I’d love to see how you made them your own. This Homemade Onion Rings recipe is so versatile; I bet you’ve got amazing dipping sauce ideas already in mind!
I’m Claire Whitmore — a dessert daydreamer from Asheville, NC. For me, baking isn’t about perfect pastries — it’s about the joy of sharing something sweet (and maybe sneaking an extra scoop of icing).
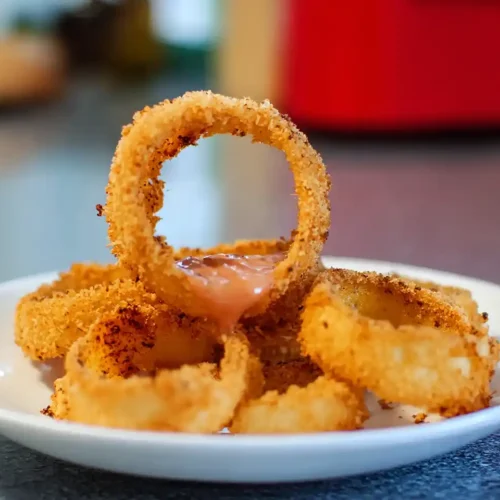
Homemade Onion Rings
Equipment
- Sharp knife
- Cutting board
- 3 large bowls
- Whisk
- Sheet tray
- Large frying pan or cast-iron skillet
- Tongs or slotted spoon
- Paper towels
Ingredients
- 2 large Yellow onions sliced into 1/2 inch rings
- 2 cups Panko breadcrumbs
- ½ cup Flour for dusting
For the Batter
- ½ cup Flour
- 1 cup Milk
- 1 large Egg
- ½ tsp Brown sugar
- 1 tsp Garlic powder
- 1 tsp Onion powder
- ¼ tsp Cayenne pepper
- 2 tsp Smoked paprika
- 1 tsp Kosher salt
- 1 tsp Black pepper
- 1 cup Canola oil for frying
Instructions
- With a sharp knife, remove the outer skins of 2 large yellow onions. Slice each onion into ½-inch thick rings — not too thin or they’ll burn, not too thick or they won’t cook through. With your hands, gently push out the individual rings and separate them. You’ll get varying sizes, which is perfect for snacking.
- Into a large bowl, place ½ cup of flour for dusting. Into a second bowl, combine ½ cup flour, 1 cup of milk, and 1 large egg. Whisk together until a smooth batter forms with no lumps. To your batter, add ½ tsp brown sugar, 1 tsp garlic powder, 1 tsp onion powder, ¼ tsp cayenne, 2 tsp smoked paprika, 1 tsp kosher salt, and 1 tsp black pepper. Mix well until all the spices are fully incorporated. Into a third bowl, add 2 cups of panko breadcrumbs.
- Working with one onion ring at a time, coat each ring in the plain flour, shaking off any excess. Next, dip each ring into your flavored batter, letting any extra drip off. Finally, press each ring into the panko breadcrumbs, making sure the entire ring is coated in batter and panko. Place each coated ring on a sheet tray as you go.
- Place a large frying pan or cast-iron skillet over medium-high heat. Add in about 1 cup of canola oil — you want enough oil to come halfway up the sides of the rings. Once the oil is heated (test by dropping in a pinch of panko — it should sizzle immediately), gently drop your rings in, working in batches so you don’t overcrowd the pan. Fry for 2-3 minutes on each side until golden brown and crispy. Remove from the oil with tongs or a slotted spoon and place on a paper towel-lined tray. Season each hot ring with a pinch of kosher salt right away.
- Serve hot with a dip of your choosing — ketchup, ranch, spicy mayo, or even a garlic aioli. These are best eaten immediately while they’re still piping hot and crunchy!