Flourless Chocolate Brownie Bites
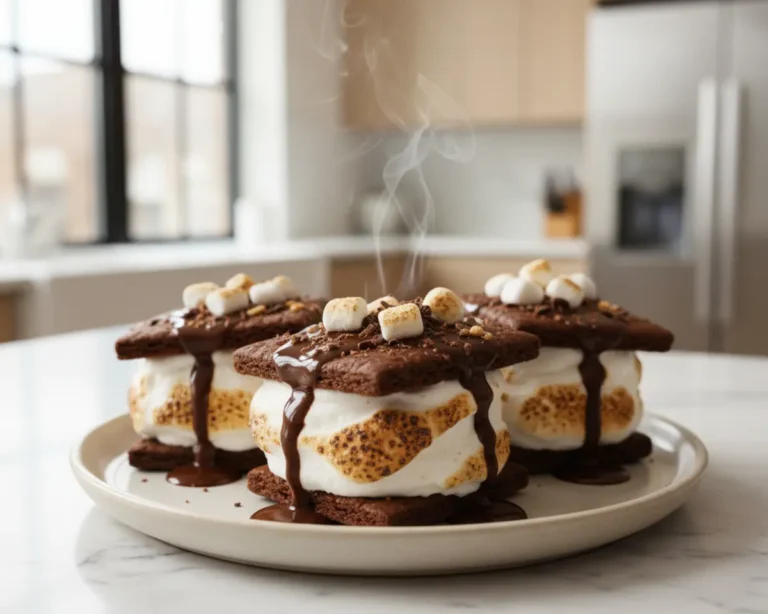
Flourless Chocolate Brownie Bites (Passover-Friendly) are rich, fudgy, and honestly one of the most crowd-pleasing desserts you can bring to a Passover Seder — or any table, really.
Hey there, I’m Claire Whitmore — a pastry whisperer in Asheville, NC, where butter totally counts as self-care. These flourless brownies come together with simple pantry staples, take under 30 minutes to bake, and happen to be completely gluten-free. No specialty flour needed, no compromises on flavor.
I first made these brownie bites when I needed a last-minute Passover dessert that didn’t taste like an afterthought. Spoiler: they disappeared before I even got a second one.
Little Snapshot: What This Recipe Delivers
These Flourless Chocolate Brownie Bites are a dense, fudgy gluten-free dessert made with cocoa powder, potato starch, eggs, and chocolate chips — ready in about 35 minutes and perfect for 8 servings.
They’re naturally Passover-friendly, kid-approved, and just as welcome at a holiday table as they are on a random Tuesday when you need chocolate immediately.
Why You’ll Love This Recipe
- This flourless chocolate brownie bites recipe takes less time than folding laundry — and the payoff is SO much better.
- They’re genuinely gluten-free without tasting like a compromise, which makes them perfect for feeding a crowd with mixed dietary needs.
- One bowl, a whisk, and a pan — that’s really all you need. Cleanup is a dream, and your kitchen will smell incredible.
- According to King Arthur Baking’s guide to flourless Passover desserts, the best flourless sweets don’t need to feel like substitutes — and this recipe proves exactly why.
Quick Facts
Here’s the quick scoop on this Flourless Chocolate Brownie Bites recipe.
- CourseDessert
- Prep Time10 minutes
- Cook Time25 minutes
- Total Time35 minutes
- Servings8 servings
- DifficultyEasy
Nutritional Peek
Here’s a general breakdown per serving for these brownie bites. Values are estimates and may vary based on mix-ins used.
| Nutrient | Amount Per Serving |
|---|---|
| Calories | ~420 kcal |
| Protein | 5 g |
| Carbohydrates | 52 g |
| Fat | 22 g |
| Fiber | 2 g |
| Sugar | 38 g |
Ingredients for Flourless Chocolate Brownie Bites
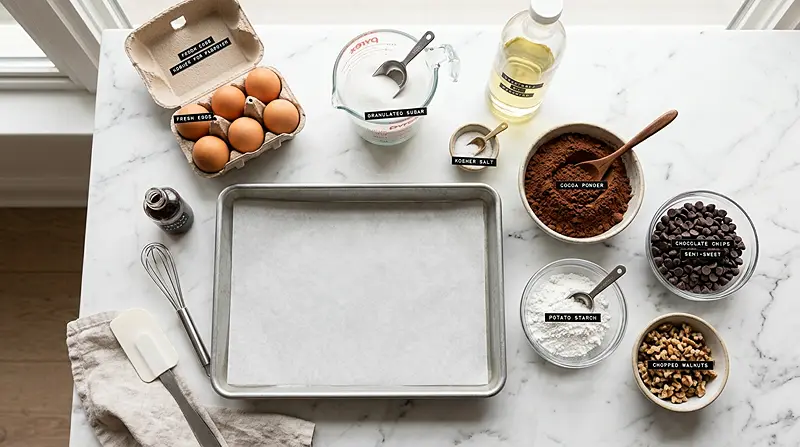
These brownie bites need just a handful of ingredients you probably already have on hand.
For the wet base — eggs, oil, and sugar — you’ll want to whisk them together until they’re fully combined and slightly lightened. For the dry mix — cocoa powder, potato starch, and salt — they blend right into the wet ingredients with no fuss.
Then come the good parts: chocolate chips for melty pockets of richness, and optional walnuts or pecans for a little crunch in every bite.
| Amount | Ingredient |
|---|---|
| 4 | eggs |
| 2 cups | sugar |
| 1 cup | oil (vegetable or neutral) |
| 1/2 tsp | salt |
| 3/4 cup | cocoa powder (unsweetened) |
| 1 cup | potato starch |
| 1 cup | chocolate chips |
| 1/4 cup | chopped walnuts or pecans (optional) |
If this recipe made your day, you’re in for a treat. The full Cookies & Brownies guide is filled with tried-and-true favorites that real home cooks swear by. Trust me, you won’t be able to pick just one.
Tools You’ll Actually Use
- 9×13 inch baking pan
- Large mixing bowl
- Whisk
- Measuring cups and spoons
- Spatula or wooden spoon
- Cooling rack
How to Make Flourless Chocolate Brownie Bites Step by Step
These flourless chocolate brownie bites come together fast, so let’s get into it.
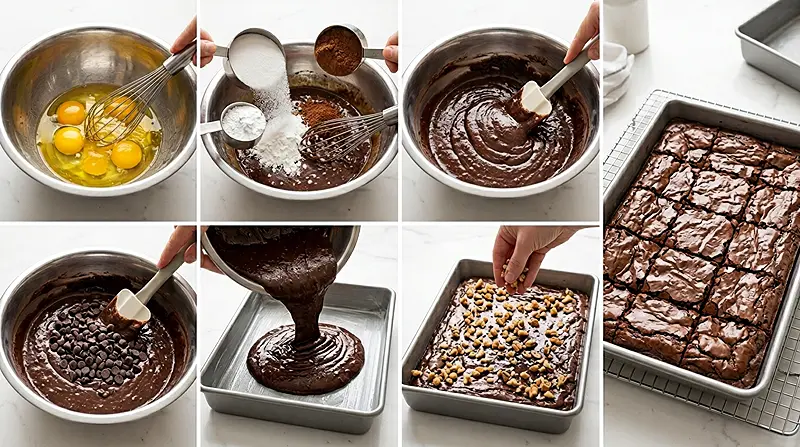
Step 1: Prep Your Pan and Oven
Grease a 9×13 inch baking pan generously with margarine or oil, making sure to coat the corners and sides. Preheat your oven to 350 degrees F so it’s hot and ready when the batter is.
Step 2: Whisk the Wet Ingredients
Crack the 4 eggs into a large mixing bowl, add 1 cup of neutral oil, and whisk them together until fully combined and slightly frothy. This takes about 30 to 60 seconds of good whisking — you want everything to look smooth and unified before moving on.
Step 3: Add the Dry Ingredients
Still whisking, add in 2 cups of sugar, 1 cup of potato starch, 3/4 cup of cocoa powder, and 1/2 teaspoon of salt. Keep whisking until the batter is completely smooth with no dry streaks hiding at the bottom of the bowl. The batter will be thick and glossy — that’s exactly what you want.
Step 4: Fold in the Chocolate Chips (and Nuts if Using)
Once the batter is fully blended, switch to a spatula and fold in 1 cup of chocolate chips. If you’re adding 1/4 cup of chopped walnuts or pecans, toss them in here too. Be gentle — you just want to distribute them evenly, not overmix.
Step 5: Pour and Spread
Pour the thick batter into your greased 9×13 pan and spread it out evenly with your spatula, nudging it into the corners. It’ll be dense, which is a very good sign for fudgy brownie bites ahead.
Step 6: Bake Until Set
Slide the pan into your preheated 350 degree F oven and bake for 20 to 25 minutes. You’ll know they’re done when the top looks set and matte (not wet or jiggly), and a toothpick inserted in the center comes out with just a few moist crumbs — not wet batter. Your kitchen will smell absolutely incredible by this point.
Step 7: Cool Before Cutting
Let the brownies cool in the pan for at least 15 minutes before slicing into bites. This patience step is what keeps them from crumbling and gives you those clean, satisfying squares. Worth it, I promise.
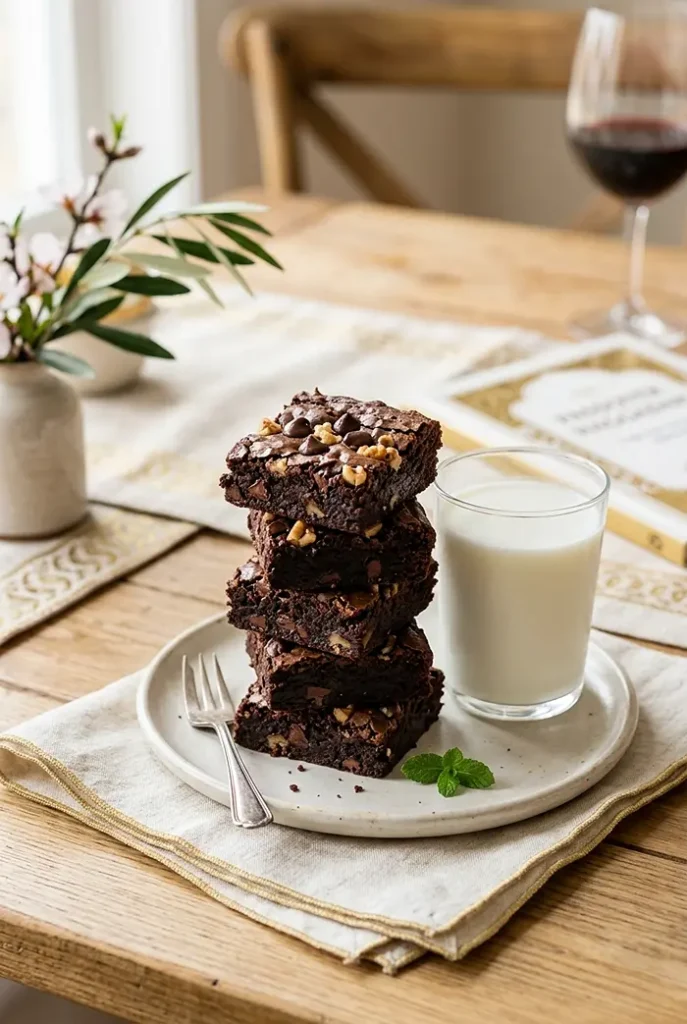
Claire’s Pro Tips for Perfect Gluten-Free Brownies
Baking gluten-free desserts doesn’t have to feel like guesswork. A few small tricks make a big difference with these brownie bites.
The biggest thing I’ve learned? Don’t overbake them. Flourless brownies firm up as they cool, so pulling them out when they still look slightly underdone in the center is actually right on track.
Use good quality cocoa powder. Since cocoa is doing most of the heavy lifting for chocolate flavor here, the quality really shows. Dutch-process cocoa gives a deeper, richer result if you have it on hand.
Let your eggs sit out for a few minutes. Room-temperature eggs blend more smoothly into the oil and sugar, giving you a silkier batter with fewer lumps to whisk out.
Grease the pan generously. Potato starch can stick, so don’t be shy with the oil or margarine. You can also line the pan with parchment for the cleanest removal.
Chill for even fudgier bites. These brownies are good warm, but honestly? They’re incredible the next day straight from the fridge. The texture gets denser and more intensely chocolatey overnight.
Quick Fixes for Flourless Chocolate Brownie Bites
My brownies came out too dry.
This usually means they were baked a few minutes too long. Flourless brownies rely on eggs and oil for moisture, so even a small amount of overbaking dries them out quickly. Next time, start checking at the 20-minute mark.
The batter is really thick — did I do something wrong?
Nope, that’s totally normal! Potato starch creates a denser batter than wheat flour. Just spread it evenly in the pan and trust the process — it bakes up beautifully.
My brownies are crumbling when I cut them.
They probably needed more cooling time. Let them sit for at least 15 to 20 minutes after coming out of the oven before slicing. For the cleanest cuts, wait until they’re fully cooled to room temperature.
The top looks sunken in the middle.
A slight sunken center is actually pretty common with flourless bakes and doesn’t affect the taste at all. If it’s very pronounced, the oven temperature may have been slightly too high — an oven thermometer is a great investment if this keeps happening.
My chocolate chips all sank to the bottom.
This can happen with a very liquid batter, but the thick potato starch batter in this recipe tends to hold them well. Make sure the chips are fully incorporated before pouring the batter in. A quick toss in a teaspoon of cocoa powder can help them stay suspended too.
Variations and Fun Twists on This Gluten-Free Dessert
Once you’ve made the base recipe, it’s really fun to play with flavors and textures.
Mint chocolate: Add 1/4 teaspoon of peppermint extract to the batter for a refreshing twist that’s especially festive during the spring holidays.
Espresso brownies: Dissolve 1 teaspoon of instant espresso powder into the oil before whisking. It deepens the chocolate flavor without making them taste like coffee — trust me on this one.
Dairy-free and Passover-strict: Use dairy-free chocolate chips and make sure your cocoa and oil are certified for your observance. This recipe is already pareve-friendly with those swaps.
Nut-free: Simply skip the walnuts and pecans — the brownies are just as good without them, and kid-friendly for nut-free households.
Rocky road style: Fold in a handful of mini marshmallows (if not observing Passover) along with the chocolate chips for an extra indulgent twist.
Serving, Storage, and Reheating
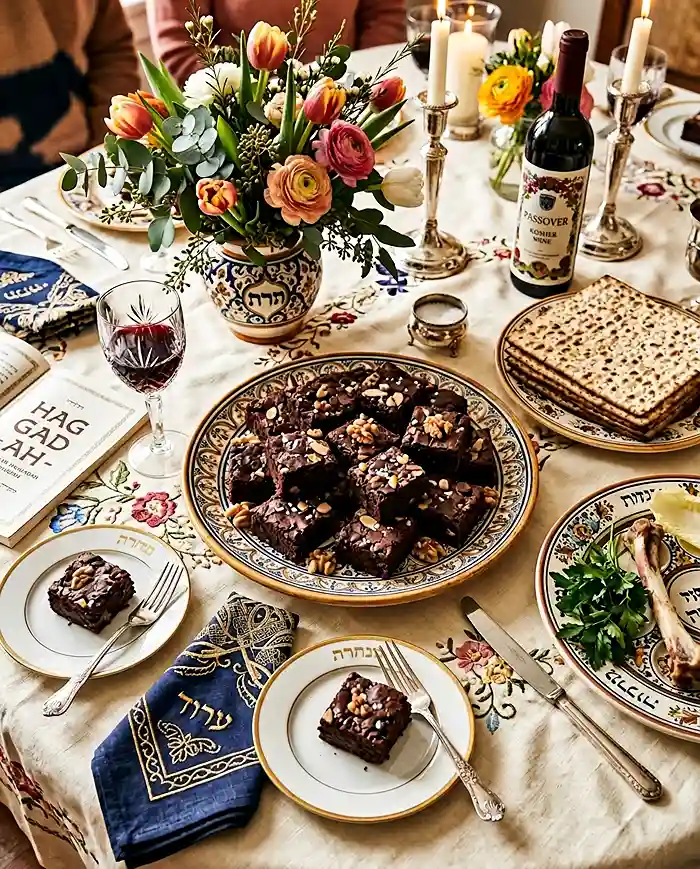
These brownie bites are wonderful served slightly warm with a dusting of powdered sugar or a scoop of vanilla ice cream on the side. They also pair beautifully with fresh berries for a lighter, more colorful presentation at a holiday table.
If you somehow end up with leftovers (I know, unlikely), store them in an airtight container at room temperature for up to 3 days. For longer storage, keep them in the fridge for up to a week — they actually get fudgier and more flavorful as they sit.
To reheat, pop a brownie bite in the microwave for 10 to 15 seconds until just warmed through. Don’t overdo it — you want them soft and gooey, not hot and dried out.
No-Waste Kitchen Magic
If your brownies are a day or two old and a little firmer than you’d like, crumble them over vanilla ice cream for a quick, impressive dessert. Brownie crumbles also make an amazing topping for yogurt parfaits.
Have extra cocoa powder or potato starch on hand? You can use them to make another batch of these or fold the starch into strawberry oatmeal crumble bars for a fun twist on a classic.
Day-old brownie bites can also be gently warmed and pressed into a crust for a chocolate tart base. Waste nothing, enjoy everything.
FAQs About Flourless Chocolate Brownie Bites
Can I freeze these flourless chocolate brownie bites?
Yes, absolutely! These brownies freeze really well. Wrap individual bites in plastic wrap and place them in a freezer-safe bag for up to 2 months. Thaw at room temperature for about an hour before serving.
What’s the best way to store flourless brownies?
Keep them in an airtight container at room temperature for up to 3 days, or in the fridge for up to a week. Refrigerating them actually improves the texture — they get denser and fudgier over time.
How do I know when flourless chocolate brownie bites are done baking?
Check at the 20-minute mark. The top should look set and matte rather than shiny or wet, and a toothpick inserted in the center should come out with just a few moist crumbs. Remember, they firm up as they cool.
Why should I use potato starch instead of regular flour in these brownies?
Potato starch keeps these brownies Passover-compliant and gluten-free while giving them a slightly denser, chewier texture than wheat flour. It also has a neutral flavor that lets the cocoa and chocolate really shine.
Can I use a different oil in this brownie bites recipe?
Yes! Any neutral oil works well — vegetable, canola, or sunflower oil are all great choices. Avoid strongly flavored oils like olive oil, as they can compete with the chocolate flavor.
More Recipes You’ll Love
If these brownie bites have you in the mood for more cozy baking, I’d love for you to try this strawberry pound cake with fresh strawberry glaze — it’s the kind of recipe that feels fancy but comes together with zero stress.
Cozy Closing
I genuinely hope these Flourless Chocolate Brownie Bites become a staple at your table, whether it’s Passover, a random weeknight, or any occasion that deserves something chocolatey and special.
I’d love to see your spin on this recipe! Drop a comment below with your photos — did you go nuts-free, add espresso, try a minty twist? I’d love to see how you made these brownie bites your own.
These gluten-free brownie bites are so versatile — I just know you’ve already got a fun variation in mind.
I’m Claire Whitmore — a dessert daydreamer from Asheville, NC. For me, baking isn’t about perfect pastries — it’s about the joy of sharing something sweet (and maybe sneaking an extra bite straight from the pan before anyone notices).
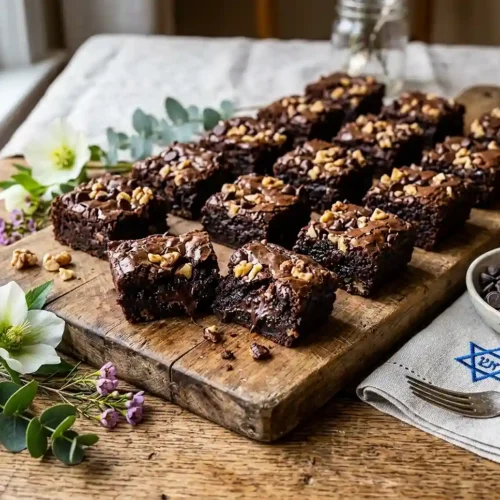
Flourless Chocolate Brownie Bites
Equipment
- 9×13 inch baking pan
- Large mixing bowl
- Whisk
- Measuring cups and spoons
- Spatula or wooden spoon
- cooling rack
Ingredients
Brownie Batter
- 4 Eggs
- 2 cups Sugar
- 1 cup Vegetable oil or neutral oil
- ½ tsp Salt
- ¾ cup Cocoa powder unsweetened
- 1 cup Potato starch
- 1 cup Chocolate chips
- ¼ cup Walnuts or pecans optional, chopped
Instructions
- Preheat oven to 350°F (175°C) and grease a 9×13 inch baking pan thoroughly.
- In a large bowl, whisk together eggs and oil until smooth and slightly frothy.
- Add sugar, potato starch, cocoa powder, and salt. Whisk until the batter is thick, smooth, and glossy.
- Fold in chocolate chips and optional nuts using a spatula.
- Pour batter into prepared pan and spread evenly.
- Bake for 20–25 minutes until the top is set and a toothpick comes out with a few moist crumbs.
- Cool for at least 15 minutes before slicing into brownie bites and serving.