Easy Japanese Katsu Bowls
Japanese Katsu Bowls are everything you want in a weeknight dinner — crispy, satisfying, and totally worth the happy dance you’ll do after that first crunchy bite.
Hey there, I’m Claire Whitmore — a pastry whisperer in Asheville, NC, where butter totally counts as self-care.
But here’s the thing: I don’t just love sweets. Some nights, I crave something savory and soul-hugging, and this Japanese Katsu Bowls recipe hits that sweet spot between comfort food and something that feels kinda fancy.
I first fell hard for katsu bowls during a cooking swap with a friend who’d just gotten back from Tokyo. She made me her version, and I nearly cried into my rice.
The crunch, the sauce, that perfect little pile of cabbage — it was like a hug in a bowl. So naturally, I had to figure out how to make it at home without needing a culinary degree or a plane ticket.
Little Snapshot: What This Recipe Delivers
This Japanese Katsu Bowls recipe gives you golden, panko-crusted chicken (or pork!) served over perfectly seasoned rice with a tangy-sweet tonkatsu sauce that’ll make you want to lick the plate.
It’s crispy on the outside, tender on the inside, and comes together in about 45 minutes — which is less time than it takes to decide what to watch on Netflix.
Why You’ll Love This Recipe 🌸
- This crispy chicken katsu bowl takes less time than folding laundry and delivers way more joy.
- The panko crust stays ridiculously crunchy, even after you’ve plated everything — no sad, soggy breading here.
- It’s totally customizable, so if your kiddos hate cabbage or you’re team pork over chicken, you can swap things around without breaking a sweat.
- According to Serious Eats, the key to perfect katsu is all in that panko coating — and this recipe nails it every single time.
Quick Facts ⚡
Here’s the quick scoop on this Japanese Katsu Bowls.
- CourseMain Dish
- Prep Time20 minutes
- Cook Time25 minutes
- Total Time45 minutes
- Servings4 servings
- DifficultyEasy
Table of Contents
Nutritional Peek
Look, I’m not here to make you feel guilty about enjoying crispy, fried deliciousness. But if you’re curious about what’s going into your Japanese Katsu Bowls, here’s the breakdown per serving. Keep in mind, this is comfort food with a side of crunch — and that’s totally okay.
| Nutrient | Amount per Serving |
|---|---|
| Calories | 620 kcal |
| Protein | 32g |
| Carbohydrates | 78g |
| Fat | 18g |
| Fiber | 3g |
| Sugar | 6g |
Japanese Katsu Bowls Ingredients
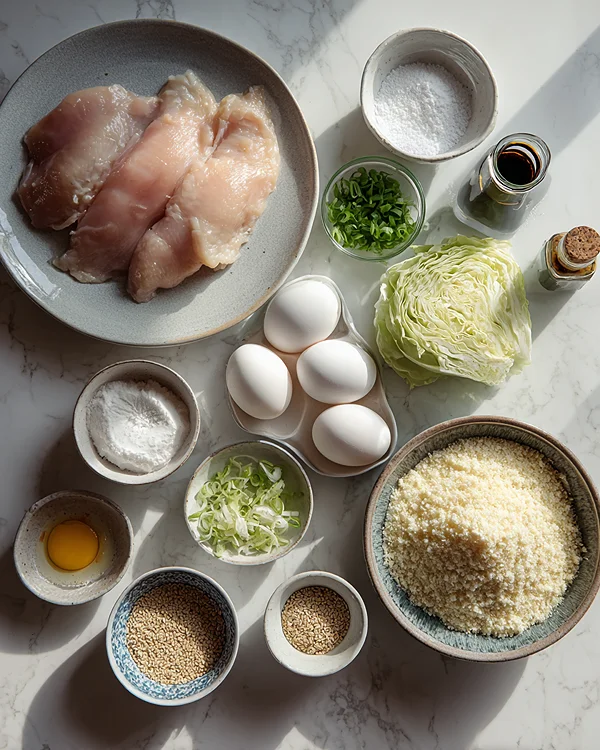
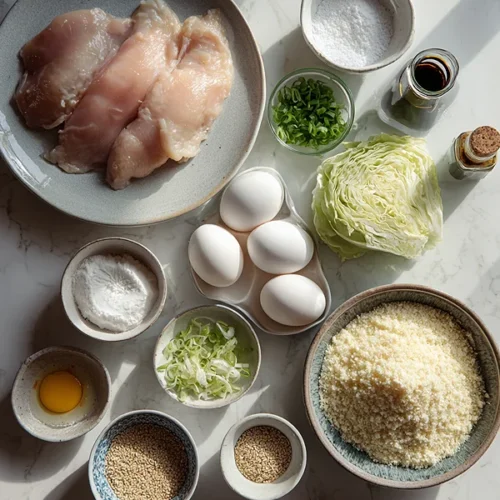
The magic of a great Chicken Katsu Curry bowl starts with simple, quality ingredients — nothing fancy or hard to find.
You’re basically making crispy fried chicken, perfect rice, and a sauce that tastes like it came from a little ramen shop in Tokyo (but really just came from your kitchen).
| Amount | Ingredient |
|---|---|
| 2 | boneless chicken breasts (or pork loin, if you’re feeling adventurous) |
| To taste | Salt and pepper |
| 1 cup | All-purpose flour |
| 2 | Large eggs |
| 1 cup | Panko breadcrumbs (the secret to that ridiculous crunch) |
| As needed | Vegetable oil, for frying |
| 2 cups | Japanese short-grain rice |
| 2 ½ cups | Water |
| 1 tablespoon | Rice vinegar |
| 1 tablespoon | Sugar |
| ½ teaspoon | Salt |
| ¼ cup | Tonkatsu sauce (store-bought is totally fine — I won’t tell) |
| 1 tablespoon | Soy sauce |
| 1 teaspoon | Worcestershire sauce |
| 1 teaspoon | Ketchup (yes, really!) |
| 1 cup | Shredded cabbage |
| 2 | Green onions, sliced |
| For garnish | Sesame seeds |
| Optional | Pickled ginger |
Claire’s note: Yes, real eggs and real panko. The texture just doesn’t work the same with substitutes, so trust me on this one. And if you can’t find tonkatsu sauce, making your own with that little mix of soy, Worcestershire, and ketchup is shockingly good.
Tools You’ll Actually Use
You don’t need a fancy Japanese kitchen to pull this off. Here’s what you’ll want on hand:
- Medium saucepan with a lid (for the rice)
- Large skillet or frying pan
- Three shallow bowls or plates (for your breading station)
- Meat mallet or rolling pin (for pounding the chicken)
- Paper towels (for draining)
- Sharp knife and cutting board
- Small mixing bowl (for the sauce)
- Tongs or a fork (for flipping)
Step-by-Step Instructions
Alright, let’s make some Japanese Katsu Bowls magic happen. Don’t stress — this is way easier than it looks, and the payoff is so worth it.
Make the Rice:
- Rinse your rice under cold water until it runs clear — this gets rid of excess starch so your rice isn’t gummy. Transfer it to a saucepan, add the water, and let it soak for 30 minutes. I know, I know — waiting is hard. But this step makes the rice extra fluffy.
- Cover the pan and bring it to a boil, then immediately drop the heat to low and simmer for 15 minutes. No peeking! Lifting that lid releases all the steam.
- Turn off the heat and let the rice hang out, still covered, for another 10 minutes. This is where the magic happens.
- While it’s resting, mix your rice vinegar, sugar, and salt in a small bowl until everything dissolves. Gently fold this into your cooked rice — don’t stir aggressively or you’ll end up with rice mush.
Prep the Chicken:
5. Lay your chicken breasts on a cutting board and cover them with plastic wrap. Use a meat mallet (or the bottom of a heavy pan, no judgment) to pound them to about ½ inch thick. This helps them cook evenly and makes breading easier.
6. Season both sides with salt and pepper — don’t be shy here.
Bread the Chicken:
7. Set up your breading station with three shallow bowls: one with flour, one with beaten eggs, and one with panko breadcrumbs. This is your assembly line.
8. Take each chicken breast and dredge it in flour, shaking off the excess. Then dip it into the eggs (let the extra drip off), and finally press it firmly into the panko so every inch is coated. You want that crunch everywhere.
Fry the Chicken:
9. Heat about ½ inch of vegetable oil in a large skillet over medium-high heat. You’ll know it’s ready when a panko crumb sizzles immediately when dropped in.
10. Carefully lay your breaded chicken in the hot oil and fry for 4-5 minutes on each side until it’s golden brown and cooked through (internal temp should hit 165°F). Don’t crowd the pan — work in batches if you need to.
11. Transfer the cooked chicken to a paper towel-lined plate and let it rest for a few minutes before slicing. This keeps it juicy.
Make the Sauce:
12. In a small bowl, whisk together the tonkatsu sauce (or your homemade mix), soy sauce, Worcestershire sauce, and ketchup. Taste it — if you want it sweeter or tangier, adjust to your liking.
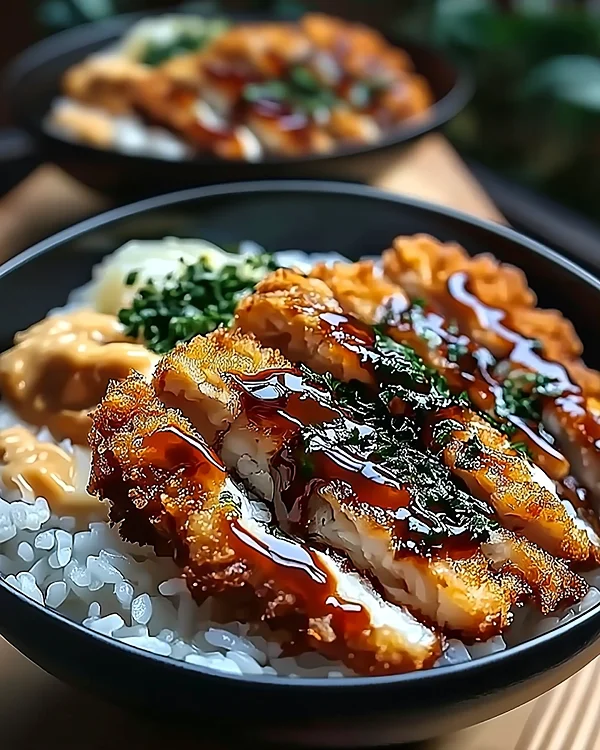
Assemble Your Japanese Katsu Bowls: 13. Scoop a generous amount of that beautiful seasoned rice into each bowl. Slice your rested katsu into strips and fan them out on top of the rice.
Add a little pile of shredded cabbage, sprinkle with sliced green onions and sesame seeds, and drizzle that sauce all over everything. If you’ve got pickled ginger, toss some on the side for a zingy bite.
Bake until golden and your kitchen smells like a cozy Tokyo street café. Actually, scratch that — we’re frying, not baking. But trust me, your kitchen is going to smell absolutely incredible.
Claire’s Pro Tips & Gentle Guidance
Making a killer Japanese chicken katsu rice bowl isn’t hard, but there are a few little tricks that’ll take yours from good to “Can I have the Japanese Katsu Bowls recipe?” level.
Don’t skip pounding the chicken. I’ve tried it both ways, and evenly thick chicken breasts cook way more consistently. No dry edges with a raw center — we’re going for perfection here.
Press that panko in hard. You want those breadcrumbs really stuck on there. Give it a good press with your palm after coating, and the breading will stay put during frying instead of floating away into the oil (been there, cried about that).
Keep your oil at the right temp. Too hot and your breading burns before the chicken’s cooked through; too cool and you get greasy, soggy katsu. Medium-high heat is your friend. If you have a thermometer, aim for around 350°F.
Let the chicken rest before slicing. I know you’re hungry, but give it 3-4 minutes. This lets the juices redistribute so every bite stays moist and tender.
One thing I learned the hard way? Don’t reuse your breading station ingredients for anything else. Cross-contamination is real, and nobody wants a side of salmonella with their crispy chicken.
The folks at Just One Cookbook swear by using Japanese panko specifically — it’s coarser and stays crunchier — and I couldn’t agree more. Regular breadcrumbs just don’t give you that same epic texture.
Quick Fixes for Japanese Katsu Bowls
Even if you’ve made katsu a hundred times (or this is your first rodeo), things can go a little sideways. Here’s how to troubleshoot like a pro.
Problem: Breading falls off during frying Make sure your chicken is dry before you start breading — pat it down with paper towels. Also, let the breaded chicken sit for 5 minutes before frying. This helps everything “set” and stick better.
Problem: Chicken is dry or overcooked This usually means your pieces were too thin or your oil was too hot. Stick to ½-inch thickness and watch that oil temp. An instant-read thermometer is your best friend here — pull the chicken at 165°F and it’ll be perfect.
Problem: Katsu is greasy or soggy Your oil probably wasn’t hot enough. Next time, test it with a breadcrumb first — it should sizzle immediately. Also, make sure you’re draining on paper towels and not stacking the pieces on top of each other (they’ll steam and get soggy).
Problem: Rice is mushy or sticky You might’ve skipped the rinsing step or added too much water. Rinse until the water runs clear, and use the exact ratio: 1 part rice to 1.25 parts water for short-grain rice.
Problem: Sauce is too sweet or too tangy Totally fixable! Add a splash more soy sauce if it’s too sweet, or a pinch of sugar if it’s too tangy. Taste as you go and adjust until it’s just right for your palate.
If this recipe made your day, you’re in for a treat. The full Grain & Buddha Bowls guide is filled with tried-and-true favorites that real home cooks swear by. Trust me, you won’t be able to pick just one.
Variations & Fun Twists
The beauty of Chicken Katsu Curry bowls is that they’re ridiculously versatile. Once you’ve nailed the basic recipe, you can play around and make it your own.
Swap the protein: Pork loin is traditional and absolutely delicious if you want to go classic Japanese. You could even try chicken thighs for extra juiciness, or tofu if you’re going plant-based (press it really well first).
Make it curry-style: Add a scoop of Japanese curry sauce over the top instead of (or in addition to) the tonkatsu sauce. It’s rich, a little spicy, and totally comforting. You can find curry roux blocks at most Asian grocery stores, and they’re stupid easy to use.
Go gluten-free: Use rice flour instead of all-purpose flour, and swap in gluten-free panko (yes, it exists!). The texture’s a little different but still super crunchy.
Load up on veggies: Add steamed broccoli, edamame, cucumber slices, or even roasted sweet potato wedges for extra color and nutrition. My kids actually eat their veggies this way because everything tastes good with that sauce.
Make it spicy: Mix sriracha or Japanese togarashi into your tonkatsu sauce, or serve it on the side for people to add their own heat level.
Fancy it up: Serve your katsu over sushi rice in a lacquered bowl, add a perfectly soft-boiled egg with a jammy yolk, and arrange everything like a piece of art. Instagram will love you.
Serving, Storage & Reheating
Let’s talk about what to do with your gorgeous crispy chicken katsu bowl once it’s made (besides eating it immediately, which is totally valid).
Serving: These Japanese Katsu Bowls are pretty much a complete meal on their own, but if you want to round things out, serve them with a simple miso soup, some easy dango for dessert, or a light cucumber salad on the side. Green tea or a cold Japanese beer pairs beautifully too.
Storage: If you somehow have leftovers (which honestly, I doubt), store the components separately. The rice keeps in an airtight container in the fridge for up to 4 days.
The cooked katsu will last 3 days in the fridge, but fair warning — it won’t be as crispy once it’s been refrigerated.
Reheating: Here’s where things get real: Microwaving katsu turns it into a sad, rubbery mess. Don’t do it. Instead, reheat it in a 375°F oven for about 10 minutes, or even better, in an air fryer at 400°F for 5-6 minutes. This brings back a lot of that original crunch. The rice reheats fine in the microwave with a damp paper towel over it.
Freezing: You can freeze the breaded (but uncooked) chicken for up to 2 months. Just freeze them on a baking sheet first, then transfer to a freezer bag.
Fry them straight from frozen — they’ll just take a few extra minutes. Cooked katsu doesn’t freeze as well; it gets soggy.
No-Waste Kitchen Magic
I’m all about using every last bit of what you’ve got, so here are some ways to make sure nothing goes to waste with this Japanese Katsu Bowls recipe.
Leftover rice: Turn it into fried rice the next day with some scrambled eggs, frozen peas, and soy sauce. Or make onigiri (rice balls) for an easy lunch. You could even try making soft sugar cookies if you’re feeling creative — just kidding, that’s a totally different vibe.
Leftover katsu: Chop it up and make katsu sandwiches with soft white bread, tonkatsu sauce, and cabbage. Or slice it thin and toss it into a salad or ramen Japanese Katsu Bowls.
Leftover cabbage: Use it for coleslaw, add it to stir-fries, or toss it into soup. It keeps for ages in the crisper drawer.
Extra panko: Store it in the pantry and use it for topping casseroles, making meatballs, or breading other proteins. Panko lasts forever.
Vegetable scraps: Save your green onion roots in water on the windowsill and they’ll regrow. Same with cabbage cores — you can regrow a whole new cabbage if you’re patient enough.
Japanese Katsu Bowls FAQs
Can I bake the katsu instead of frying it?
Yep! Spray both sides with cooking oil and bake on a wire rack at 400°F for about 20-25 minutes, flipping halfway. It won’t be quite as crispy as fried, but it’s still really good and way less messy.
Can I make Japanese Katsu Bowls ahead of time?
The rice and sauce can definitely be made ahead. The katsu is best cooked fresh for maximum crunch, but you can bread the chicken a few hours ahead and keep it in the fridge until you’re ready to fry.
What if I can’t find panko breadcrumbs?
Regular breadcrumbs will work in a pinch, but they won’t give you that same light, airy crunch. If you have regular breadcrumbs, pulse them in a food processor for just a second to make them a bit coarser — it helps.
Can I freeze Japanese Katsu Bowls?
The cooked rice freezes great. The breaded raw chicken freezes well too. But cooked, fried katsu gets pretty sad after freezing and thawing. I’d recommend freezing components separately and assembling fresh.
Is tonkatsu sauce the same as teriyaki sauce?
Nope! Tonkatsu sauce is thicker, tangier, and a bit sweeter — kind of like a Japanese version of Worcestershire sauce mixed with ketchup (which is basically what we’re doing in this Japanese Katsu Bowls recipe). Teriyaki is soy-based and thinner.
Japanese Katsu Bowls Cozy Closing
And there you have it — a bowlful of crispy, golden, totally crave-worthy Japanese Katsu Bowls that’ll make you feel like you just stepped out of a little restaurant in Tokyo (but without the jet lag or the plane ticket).
This recipe has become a regular weeknight star in my kitchen, and I have a feeling it’s about to become one in yours too.
I’d love to see your spin on this Japanese Katsu Bowls recipe! Did you go classic chicken, or did you switch it up with pork? Did your kids actually eat the cabbage (because that’s a win in my book)?
Leave a note below or tag me on Instagram so we can share a sweet moment together. Or, you know, a savory crunchy one.
I’m Claire Whitmore — a dessert daydreamer from Asheville, NC. For me, baking isn’t about perfect pastries — it’s about the joy of sharing something sweet (and maybe sneaking an extra scoop of icing).
But honestly? Some nights I just want something crispy, savory, and satisfying — and that’s when recipes like this one save the day.
Easy Japanese Katsu Bowls
Equipment
- Medium saucepan with lid
- Large skillet or frying pan
- Three shallow bowls or plates
- Meat mallet or rolling pin
- Paper towels
- Sharp knife and cutting board
- Small mixing bowl
- Tongs or fork
Ingredients
For the Chicken
- 2 boneless chicken breasts or pork loin
- Salt and pepper to taste
- 1 cup all-purpose flour
- 2 large eggs
- 1 cup panko breadcrumbs
- vegetable oil for frying, as needed
For the Rice
- 2 cups Japanese short-grain rice
- 2 ½ cups water
- 1 tablespoon rice vinegar
- 1 tablespoon sugar
- ½ teaspoon salt
For the Sauce
- ¼ cup tonkatsu sauce store-bought or homemade
- 1 tablespoon soy sauce
- 1 teaspoon Worcestershire sauce
- 1 teaspoon ketchup
For Serving
- 1 cup shredded cabbage
- 2 green onions sliced
- sesame seeds for garnish
- pickled ginger optional
Instructions
- Rinse the rice under cold water until it runs clear to remove excess starch. Transfer to a saucepan, add the water, and let soak for 30 minutes.
- Cover the pan and bring to a boil, then immediately reduce heat to low and simmer for 15 minutes without lifting the lid.
- Turn off the heat and let the rice rest, still covered, for another 10 minutes.
- While the rice rests, mix the rice vinegar, sugar, and salt in a small bowl until dissolved. Gently fold this mixture into the cooked rice.
- Lay the chicken breasts on a cutting board and cover with plastic wrap. Use a meat mallet to pound them to about ½ inch thick.
- Season both sides of the chicken with salt and pepper.
- Set up your breading station with three shallow bowls: one with flour, one with beaten eggs, and one with panko breadcrumbs.
- Dredge each chicken breast in flour, shaking off excess. Dip into the beaten eggs, letting excess drip off, then press firmly into the panko to coat completely.
- Heat about ½ inch of vegetable oil in a large skillet over medium-high heat until a panko crumb sizzles immediately when dropped in.
- Carefully place the breaded chicken in the hot oil and fry for 4-5 minutes on each side until golden brown and cooked through (internal temperature should reach 165°F). Work in batches if needed to avoid crowding.
- Transfer the cooked chicken to a paper towel-lined plate and let rest for a few minutes before slicing.
- In a small bowl, whisk together the tonkatsu sauce, soy sauce, Worcestershire sauce, and ketchup. Adjust to taste.
- Scoop seasoned rice into each bowl. Slice the rested katsu into strips and fan them out on top of the rice. Add shredded cabbage, drizzle with sauce, and garnish with green onions, sesame seeds, and pickled ginger if desired.