Chocolate Peanut Butter Rice Krispie Bars
Chocolate Peanut Butter Rice Krispie Bars are the no-bake treat you didn’t know you desperately needed in your life. Hey there, I’m Claire Whitmore — a pastry whisperer in Asheville, NC, where butter totally counts as self-care.
This recipe combines gooey mini marshmallows, rich semi-sweet chocolate chips, creamy peanut butter, real butter, and crispy rice cereal into one irresistible no-bake dessert. It’s easy enough for beginners, ready in under two hours (most of that is just chilling), and makes 16 generous squares or 32 bite-sized bars — perfect for sharing at a potluck, school bake sale, or just Tuesday night.
I stumbled onto this combo one lazy Sunday when I didn’t want to turn the oven on but absolutely needed something chocolatey and peanut buttery. One microwave moment later, my entire household was gathered around the pan. That’s the magic of a great no-bake treat — zero drama, maximum reward.
Table of Contents
Little Snapshot: What This Recipe Delivers
These Chocolate Peanut Butter Rice Krispie Bars are a quick, no-bake peanut butter dessert made with just five simple ingredients — peanut butter, chocolate chips, butter, mini marshmallows, and crispy rice cereal.
They take about 10 minutes of hands-on prep and 90 minutes of chilling time, making them an easy, crowd-pleasing treat for any occasion. Think of them as a fudgy, chewy, chocolatey hug in bar form — no oven required.
Why You’ll Love This Recipe
- These chocolate peanut butter rice krispie bars come together in about 10 minutes of actual effort — which means more time for literally everything else.
- No oven, no mixer, no fancy equipment — just one microwave-safe bowl, a pan, and some parchment paper. Even on your most exhausted mom-brain day, you’ve got this.
- They store in the fridge for up to a week, so you can make them ahead for parties, school events, or your own personal 3pm snack stash (no judgment here).
- According to King Arthur Baking in their guide to no-bake peanut butter chocolate squares, the combination of peanut butter and chocolate in a no-bake format is basically a homemade peanut butter cup — and this recipe proves exactly why that combination is undefeatable.
Quick Facts
Here’s the quick scoop on this chocolate peanut butter rice krispie bars recipe.
- Course: Dessert / No-Bake Treat
- Prep Time: 10 minutes
- Chill Time: 1 hour 30 minutes
- Total Time: 1 hour 40 minutes
- Servings: 16 squares or 32 bars
- Difficulty: Easy
Nutritional Peek
Here’s a general breakdown per serving (based on 16 squares). These are estimates and will vary based on exact brands used.
| Nutrient | Amount Per Serving |
|---|---|
| Calories | ~210 kcal |
| Total Fat | ~11g |
| Saturated Fat | ~5g |
| Carbohydrates | ~26g |
| Sugar | ~17g |
| Protein | ~3g |
| Fiber | ~1g |
Ingredients for These Rice Krispie Bars
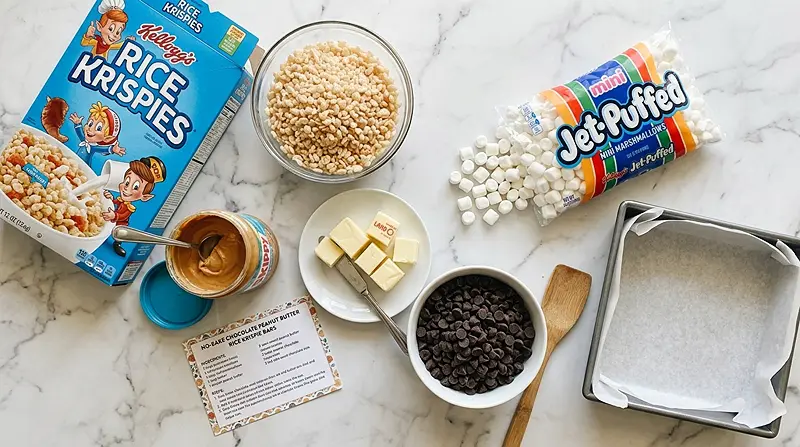
These rice krispie bars keep things beautifully simple — just five ingredients standing between you and dessert bliss. For the creamy base, you’ll need smooth or crunchy peanut butter and real butter (yes, real — margarine just won’t give you that rich, glossy finish).
For the sweet, sticky binder and chocolatey depth, grab a bag of mini marshmallows and semi-sweet chocolate chips. The crispy rice cereal ties it all together with that classic satisfying crunch.
| Amount | Ingredient |
|---|---|
| 1/2 cup | Smooth or crunchy peanut butter |
| 1 cup | Semi-sweet dark or milk chocolate chips |
| 1/2 cup (1 stick) | Butter, cut into 4 pieces (yes, real butter — it makes a difference!) |
| 1 (10 oz) package | Mini marshmallows |
| 3 cups | Crispy rice cereal (such as Rice Krispies) |
Tools You’ll Actually Use
- 9×9 square baking pan
- Parchment paper or aluminum foil
- Large microwave-safe mixing bowl
- Rubber spatula or wooden spoon
- Trivet or kitchen towel (to set the hot bowl on)
- Knife and cutting board (for slicing bars)
How to Make Chocolate Peanut Butter Rice Krispie Bars Step by Step
Making these chocolate peanut butter rice krispie bars is as easy as it gets — here’s exactly how to do it.
Step 1: Prep Your Pan
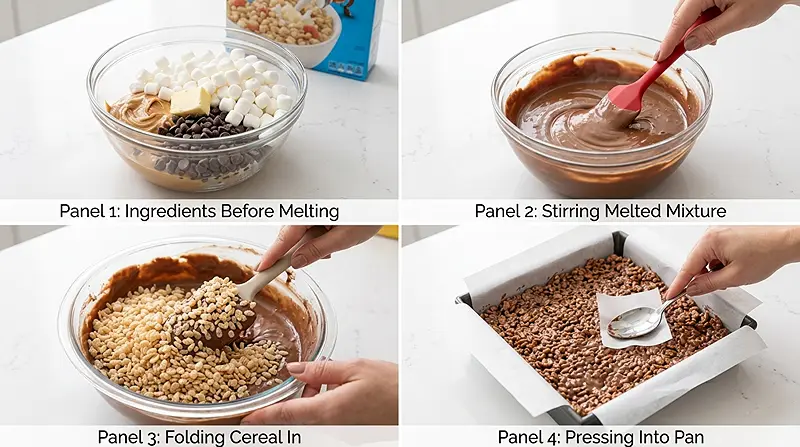
Line a 9×9 square baking pan with parchment paper, leaving some overhang on the sides so you can lift the bars out easily later. Alternatively, lightly coat the pan with cooking spray, or line it with aluminum foil and then coat that with cooking spray. Either way works — just don’t skip this step or you’ll be chiseling bars out of the pan!
Step 2: Combine Your Ingredients in One Bowl
In a large, microwave-safe bowl, add the 1/2 cup peanut butter, 1 cup chocolate chips, 1/2 cup (1 stick) butter cut into 4 pieces, and the full 10-ounce package of mini marshmallows. No need to stir just yet — just pile everything in together.
Step 3: Microwave the Mixture
Microwave on HIGH for 1 minute and 30 seconds. If your microwave runs at a higher wattage than 1100 watts, reduce the time by about 15 seconds to avoid scorching. Every microwave is a little different, so keep that in mind!
Step 4: Stir Until Smooth and Glossy
Carefully remove the hot bowl and place it on a trivet or folded kitchen towel. Slowly stir the mixture — the residual heat will melt the marshmallows and butter as you go. Keep stirring until everything is completely smooth, combined, and gloriously glossy.
If there are still lumpy marshmallows or the mixture isn’t quite glossy yet, just pop it back in the microwave for 15 seconds at a time, stirring between each burst, until it’s perfectly melted and silky.
Step 5: Fold in the Crispy Rice Cereal
Add the 3 cups of crispy rice cereal to the chocolate peanut butter mixture and stir just until every piece of cereal is fully coated. Don’t overmix — you want the cereal to stay crispy, not get crushed into dust.
Step 6: Press Into the Pan and Chill
Pour the coated cereal mixture into your prepared 9×9 pan and spread it into an even layer. Press it down gently with a spatula or the back of a spoon. Place the pan in the refrigerator for 1.5 hours, or until firm enough to slice cleanly. No need to cover it while it chills.
Step 7: Slice and Serve
Once firm, lift the bars out using the parchment paper overhang and transfer to a cutting board. Slice into 16 squares or 32 smaller bars. Store them in the fridge or at a cool spot on your counter until you’re ready to devour them.
Claire’s Pro Tips for Perfect No-Bake Treats
This peanut butter dessert is wonderfully forgiving, but a few little tricks will take your bars from “pretty good” to “people are asking for the recipe before they’ve even finished chewing.”
Here’s what I’ve learned (sometimes the hard way) after making these more times than I can count.
Use mini marshmallows, not the big ones. Mini marshmallows melt more evenly in the microwave, which means a smoother, glossier mixture and less risk of scorchy bits. If all you have are the regular-sized ones, they’ll work — just expect a little more stirring time.
Don’t skip the parchment paper. This is non-negotiable. That overhang is what lets you lift the whole slab out cleanly for slicing. Trying to cut bars directly in a pan with no liner is a recipe for crumbled edges and a sad afternoon.
Stir gently when adding the cereal. The goal is fully coated cereal, not crushed cereal. Fold it in with a wide spatula using big, sweeping motions. You’ll preserve the crunch that makes these bars so satisfying.
Give them the full chill time. I know it’s tempting to peek at the 45-minute mark. But a full 90 minutes in the fridge means the bars firm up completely and slice into neat, clean squares. Worth every minute of waiting.
Quick Fixes for Chocolate Peanut Butter Rice Krispie Bars
Even the simplest recipes have their little moments. Here’s how to handle the most common hiccups.
My mixture isn’t smooth and the marshmallows are still lumpy. No panic needed — just microwave in 15-second bursts, stirring well between each one. The marshmallows just need a little more heat to fully melt into that glossy, smooth base.
My bars are too soft and won’t hold their shape when I cut them. They probably need more time in the fridge. Pop them back in for another 30 to 60 minutes. If your kitchen runs warm, the fridge is always the better storage option anyway.
The bars are too hard and crumbly. This usually means the mixture was over-microwaved, causing the chocolate or butter to scorch slightly. Next time, reduce the microwave time by 15 seconds and stir more between bursts. They’ll still taste great though — just crumble them over ice cream!
My cereal got soggy. The mixture was probably too hot when you added the cereal. Let the melted mixture sit for about 60 to 90 seconds before stirring in the cereal next time. The cooler temperature helps preserve that beautiful crunch.
My bars stuck to the pan. Parchment paper is your best friend here — make sure those sides are fully lined with overhang next time. If this already happened, run a butter knife gently around the edges and use a wide spatula to ease them out.
Variations and Fun Twists
These no bake treats are incredibly easy to customize depending on what you’re craving or what’s already in your pantry.
Go salty-sweet: Sprinkle flaky sea salt over the top right before chilling. The contrast with the chocolate and peanut butter is absolutely addictive.
Make them extra chocolatey: Use dark chocolate chips instead of semi-sweet for a richer, slightly bitter edge that balances beautifully against the sweet marshmallows.
Add mix-ins: Fold in 1/2 cup of mini M&Ms, chocolate chips, or chopped peanuts along with the cereal for extra texture and fun color.
Try almond or sunflower seed butter: Swap the peanut butter for almond butter or sunflower seed butter to make these nut-free-friendly. The flavor shifts slightly but stays equally delicious.
Make them festive: Press seasonal sprinkles on top right after spreading into the pan. Christmas red and green, Halloween orange and black — these bars dress up beautifully for any holiday spread.
Serving, Storage, and Reheating
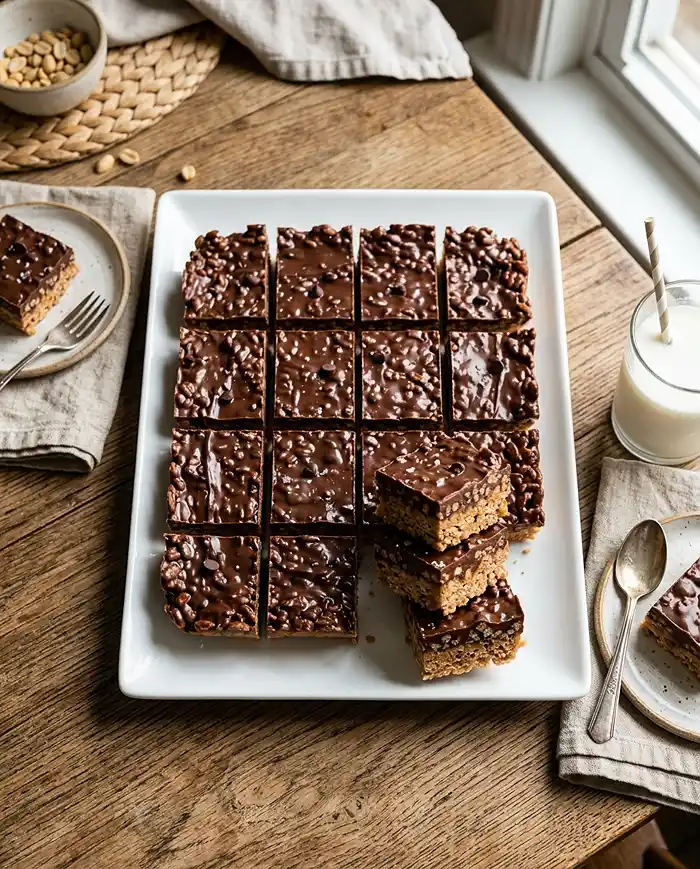
These rice krispie bars are best served cold or at cool room temperature. Arrange them on a pretty platter for parties, pack them into lunchboxes, or just keep the pan in the fridge and call it “personal chef energy.”
Store bars in an airtight container in the refrigerator for up to one week. They can also be kept in a cool spot on the counter if your kitchen isn’t too warm — but the fridge keeps them firmer and extends freshness. No need to separate layers with wax paper; they don’t tend to stick once chilled.
These bars don’t need reheating — they’re meant to be enjoyed cold or at room temperature. If you want them slightly softer, just let them sit on the counter for 10 to 15 minutes before serving. That’s really all the “reheating” they need!
Love easy make-ahead dishes? You might also enjoy this refreshing bow tie pasta salad for your next gathering spread.
No-Waste Kitchen Magic
Got leftover bars that are starting to soften? Crumble them and layer over vanilla ice cream for an instant sundae topping that tastes completely intentional.
Soft or slightly over-chilled bars that are crumbling when sliced can be pressed into silicone muffin cups as individual “bites” — great for portion control and cute for serving at parties.
If you have extra crispy rice cereal hanging around, try tossing it into yogurt for a crunchy breakfast parfait. Nothing goes to waste in this kitchen!
Frequently Asked Questions
Can I freeze these chocolate peanut butter rice krispie bars?
Yes, you can! Wrap individual bars in plastic wrap and store them in a freezer-safe bag or container for up to two months. Thaw in the refrigerator overnight or on the counter for about 30 minutes before serving. The texture holds up surprisingly well after freezing.
What’s the best way to store rice krispie bars long-term?
The refrigerator is your best bet for keeping these bars fresh and firm for up to a week. An airtight container is all you need — no layering with wax paper required since they don’t tend to stick together once fully chilled.
How do I know when the chocolate peanut butter mixture is ready?
The mixture is ready when it looks smooth, shiny, and glossy with no lumps of unmelted marshmallow or butter. If it still looks chunky after stirring, microwave in additional 15-second bursts, stirring between each, until it’s silky and fully combined.
Can I use crunchy peanut butter instead of smooth?
Absolutely! Crunchy peanut butter adds little pockets of peanut texture throughout the bars, which is a lovely bonus. Both smooth and crunchy work equally well in this recipe — it really just comes down to personal preference.
Why should I use mini marshmallows in this recipe?
Mini marshmallows melt more quickly and evenly in the microwave than full-sized ones, which gives you a smoother, glossier mixture with less risk of scorching. They also require less stirring time, which means you get to the good part — eating — a little faster.
There’s a whole world of cookies & brownies waiting for you over at the Cookies & Brownies collection. Each one is made with the same love and attention, and they’re all absolutely worth trying. Happy cooking!
A Cozy Closing Note
There’s something so satisfying about a recipe that asks almost nothing of you and delivers so much in return. These Chocolate Peanut Butter Rice Krispie Bars are exactly that — five ingredients, one bowl, and zero oven time standing between you and something truly delicious.
I’d love to see your spin on these bars! Drop a comment below with your photos — did you add sea salt on top? Try a different nut butter? Mix in some M&Ms? I’d love to see how you made these chocolate peanut butter rice krispie bars your own.
This recipe is so flexible and forgiving, I just know you’ve already got some amazing ideas brewing. Now go make a pan — you deserve it!
I’m Claire Whitmore — a dessert daydreamer from Asheville, NC. For me, baking isn’t about perfect pastries — it’s about the joy of sharing something sweet (and maybe sneaking an extra square straight from the fridge at midnight).
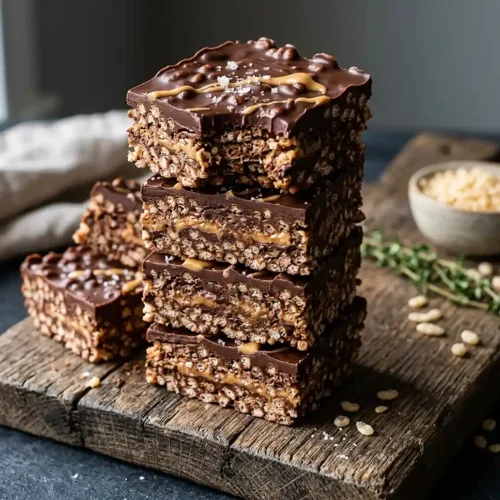
Chocolate Peanut Butter Rice Krispie Bars
Equipment
- 9×9 square baking pan
- Parchment paper or aluminum foil
- Large microwave-safe mixing bowl
- Rubber spatula or wooden spoon
- Trivet or kitchen towel
- Knife and cutting board
Ingredients
- ½ cup Peanut butter smooth or crunchy
- 1 cup Semi-sweet chocolate chips dark or milk chocolate
- ½ cup Butter 1 stick, cut into 4 pieces
- 10 oz Mini marshmallows 1 standard package
- 3 cups Crispy rice cereal such as Rice Krispies
Instructions
- Line a 9×9 square baking pan with parchment paper, leaving overhang on the sides for easy removal. Alternatively, lightly coat the pan with cooking spray, or line with aluminum foil and coat with cooking spray.
- In a large microwave-safe bowl, add the peanut butter, chocolate chips, butter, and mini marshmallows. No need to stir yet — just add everything to the bowl.
- Microwave on HIGH for 1 minute 30 seconds. If your microwave wattage is higher than 1100 watts, reduce the time by 15 seconds to avoid scorching.
- Carefully remove the hot bowl and place it on a trivet or folded kitchen towel. Slowly stir the mixture until the marshmallows and butter are fully melted and everything is smooth and glossy. If lumps remain, microwave in additional 15-second bursts, stirring between each, until silky and combined.
- Add the crispy rice cereal to the chocolate peanut butter mixture and stir gently with a wide spatula just until every piece of cereal is fully coated. Do not overmix — you want the cereal to stay crispy.
- Pour the mixture into the prepared pan and spread into an even layer, pressing down gently with a spatula or the back of a spoon. Place the pan in the refrigerator for 1 hour 30 minutes, or until firm enough to cut cleanly. No need to cover while chilling.
- Once firm, lift the bars out using the parchment paper overhang and transfer to a cutting board. Slice into 16 squares or 32 smaller bars. Store in the refrigerator or in a cool spot on the counter until ready to serve.