Brownie Ice Cream Sandwiches
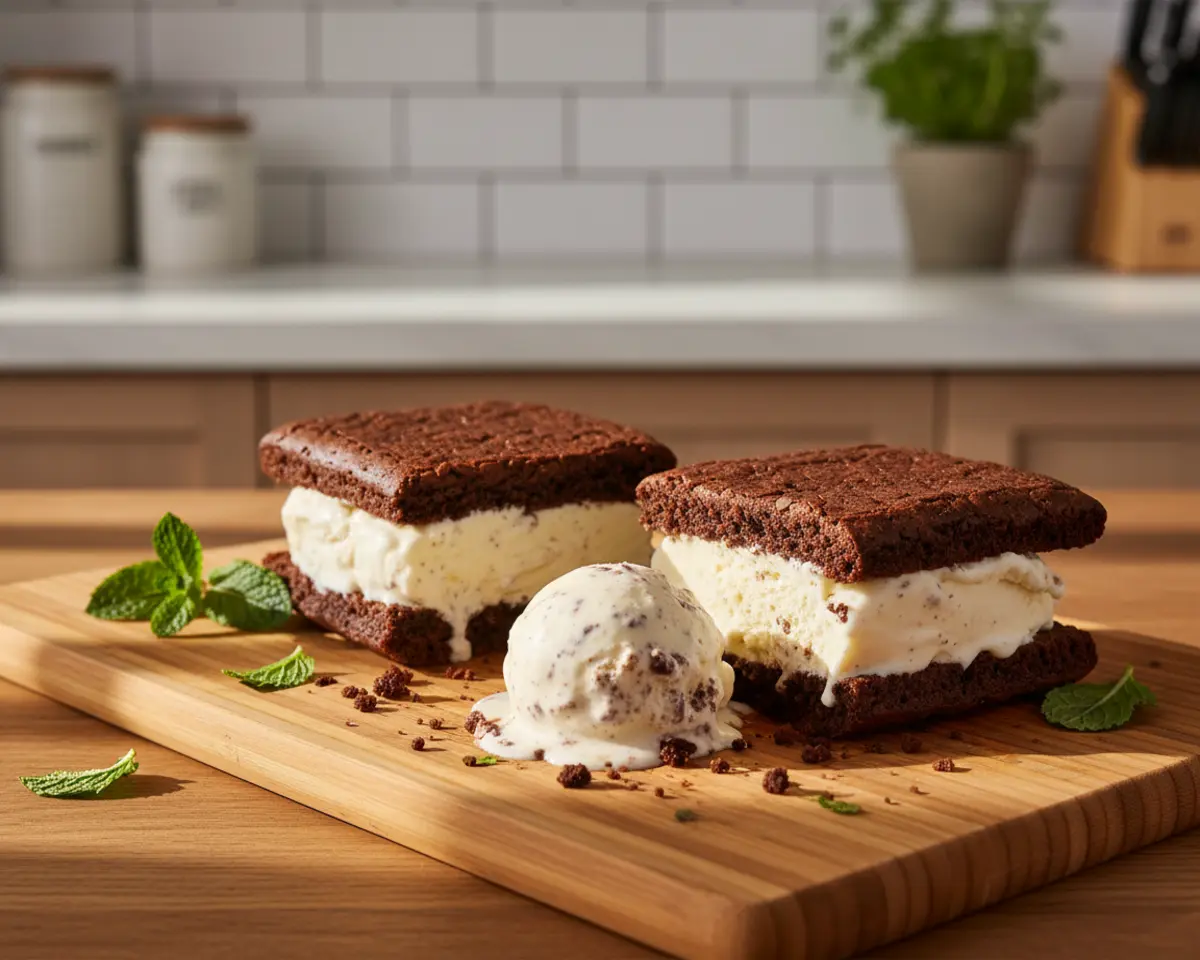
Brownie Ice Cream Sandwiches are the ultimate make-ahead frozen dessert combining thick, fudgy brownies with creamy vanilla ice cream layered into a dreamy, sliceable treat. Perfect for summer parties or weeknight indulgence, these brownie ice cream sandwiches deliver rich chocolate flavor and cool, creamy satisfaction in every bite.
I’m Claire Whitmore, your Asheville pastry pal, and I’m here to tell you that Brownie Ice Cream Sandwiches are basically edible hugs. When July heat makes turning on the oven feel questionable, these frozen beauties are worth every degree.
I first made these for a neighbor’s block party and watched grown adults nearly weep with joy. One dad literally asked if I’d cater his birthday. The secret is baking the brownies just until set—no overbaking—so they stay tender enough to bite through when frozen.
Table of Contents
Quick Overview
Can’t get enough of these flavors? You’re going to love what’s waiting in the Cookies & Brownies lineup. Every single recipe is made to impress without the stress. Happy cooking, friend!
Little Snapshot: What This Recipe Delivers
Brownie Ice Cream Sandwiches combine two sheets of fudgy brownies with a thick layer of vanilla ice cream, frozen into bars that slice cleanly and taste like a bakery-quality frozen dessert. You’ll bake, layer, freeze, and slice into 8-12 servings that store beautifully for up to a month.
Why You’ll Love This Recipe 🌸
- This Brownie Ice Cream Sandwich recipe takes less time than folding laundry—and tastes a thousand times better.
- You’ll have a freezer stash of homemade ice cream treats ready whenever your kiddos (or you) need a chocolate fix.
- No fancy equipment or ice cream maker required—just a 9-inch pan, basic ingredients, and a little freezer patience.
- According to Serious Eats, the secret to chewy brownies is using melted butter and granulated sugar—and this recipe proves exactly why.
Quick Facts ⚡
Here’s the quick scoop on this Brownie Ice Cream Sandwich.
- CourseDessert
- Prep Time25 minutes
- Cook Time32 minutes
- Total Time12 hours 57 minutes (includes freezing)
- Servings8-12 sandwiches
- DifficultyEasy
Nutritional Peek
| Nutrient | Amount per serving (1/10 recipe) |
| Calories | 485 |
| Protein | 6g |
| Carbohydrates | 62g |
| Fat | 25g |
| Fiber | 3g |
| Sugar | 48g |
What You’ll Need
You probably have most of these tools hanging out in your kitchen already. A 9-inch square baking pan is essential for getting the right thickness, and parchment paper makes lifting and layering so much easier.
- 9-inch square baking pan (ideally two identical pans if you want to bake both brownie sheets at once)
- Parchment paper
- Microwave-safe bowl or medium saucepan
- Whisk
- Rubber spatula or wooden spoon
- Ice cream scoop or large spoon
- Sharp knife for slicing
- Aluminum foil or plastic wrap
Ingredients
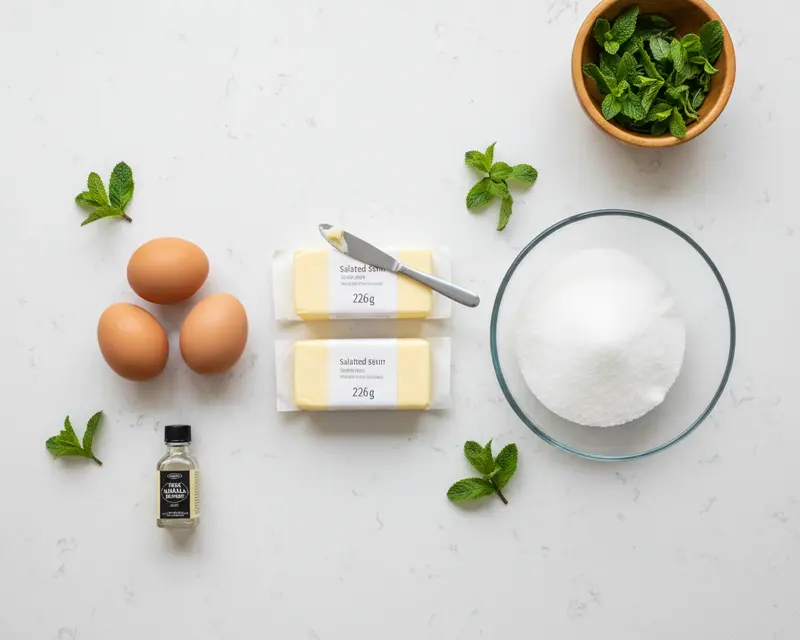
Brownie Ice Cream Sandwiches start with a rich, fudgy brownie base made from pantry staples like unsalted butter, granulated sugar, and cocoa powder. The ice cream layer is totally customizable—vanilla is classic, but feel free to swap in your favorite flavor.
| Group | Ingredient | Amount | Notes |
| Brownies | Unsalted butter | 1 cup (226g) | Melted and slightly cooled |
| Brownies | Granulated sugar | 2 cups (400g) | Creates that shiny, crackly top |
| Brownies | Large eggs | 3 | Room temperature works best |
| Brownies | Pure vanilla extract | 1 Tablespoon | Don’t skimp—this adds depth |
| Brownies | Unsweetened cocoa powder | 1 cup (82g) | Natural or Dutch-process both work |
| Brownies | All-purpose flour | 1 cup (125g) | Spooned and leveled, not packed |
| Brownies | Salt | 1 teaspoon | Balances the sweetness beautifully |
| Brownies | Baking powder | 3/4 teaspoon | Just a touch for structure |
| Ice Cream Layer | Vanilla ice cream | 2 quart container (1/2 gallon) | Slightly softened; you’ll have a little leftover for snacking |
Step-by-Step Instructions
Let’s make this happen. I recommend reading through all the steps and watching any helpful videos before you start—this recipe has a few quirks that make all the difference.
Preheat your oven to 350°F (177°C) and line a 9-inch square baking pan with parchment paper, leaving enough overhang on the sides to lift the baked brownies out easily. If you have two identical 9-inch square pans, line both so you can bake both brownie sheets at the same time.
In a microwave-safe bowl or a medium saucepan on the stove, melt the unsalted butter until fully liquid. Whisk in the granulated sugar until the mixture looks smooth and glossy, then whisk in the eggs and vanilla extract until combined.
Add the cocoa powder, all-purpose flour, salt, and baking powder to the butter mixture. Fold everything together with a rubber spatula or wooden spoon until a thick, fudgy batter forms—it will look very dense, and that’s exactly right.
Spoon and spread half of the brownie batter (about 2 cups) into your prepared pan, using the back of a spoon to smooth it into an even layer. Lightly cover the remaining batter and keep it at room temperature while the first batch bakes.
Place a small sheet of parchment paper directly on top of the brownie batter in the pan and gently press it down to create a flat surface. This top parchment paper prevents the brownies from puffing up too much and keeps them nice and even.
Bake the first brownie sheet for 15-16 minutes—any longer and the brownies will be too hard to bite through once frozen. Remove the pan from the oven and cool for 5 minutes, then carefully lift the entire brownie sheet out using the parchment overhang.
Peel off the top piece of parchment paper and set the baked brownie sheet aside on a cooling rack or clean counter. You can reuse that top parchment for the second batch if you like.
Line the still-warm pan with another sheet of parchment paper, leaving overhang on the sides. Give the remaining brownie batter a stir—it will be very thick by now, so you can add a teaspoon of water if needed to loosen it slightly.
Spoon and spread the remaining brownie batter into the pan, place another small sheet of parchment on top, and bake for 15-16 minutes. Remove from the oven and let the brownies cool in the pan for 15 minutes while the ice cream softens on the counter.
Scoop the slightly softened vanilla ice cream onto the warm brownie layer still in the pan, using almost all of the half-gallon container. Use the back of a spoon or your ice cream scoop to spread the ice cream into a thick, even layer.
Carefully pick up the first baked brownie sheet and place it on top of the ice cream layer, gently pressing down so it sticks. Cover the entire pan with aluminum foil or plastic wrap and freeze for at least 12 hours—I find 12-18 hours is perfect.
Remove the frozen brownie ice cream sandwich slab from the freezer and lift it out of the pan using the parchment overhang. Use a very sharp knife and a little arm muscle to cut the slab into 8-12 squares or rectangles, wiping the knife clean between cuts.
Serve immediately, or wrap each sandwich individually in plastic wrap or foil and store in the freezer for up to 1 month. If they get super solid after a few weeks, let them sit out for a few minutes before biting in.
Expert Tips
Brownie Ice Cream Sandwiches are forgiving, but a few smart moves will make them bakery-level gorgeous. Start with room-temperature eggs so they blend smoothly into the melted butter, and don’t overbake the brownie sheets—15-16 minutes is the sweet spot for tender, sliceable texture.
Use a 9-inch square pan for both brownie sheets to ensure they’re the same size and stack perfectly. Other pan sizes will change the thickness and baking time, making the assembly tricky.
Let the ice cream soften on the counter for 10-15 minutes before spreading—it should be scoopable but not melty. If it’s too hard, you’ll tear the brownie layer underneath; too soft and it’ll squish out the sides.
Place a small sheet of parchment directly on top of the brownie batter before baking to keep the surface flat and prevent doming. This trick is a game-changer for even layering and clean slicing.
Freeze the assembled sandwiches for at least 12 hours before cutting—this gives the ice cream time to firm up and the brownies time to set. According to Bon Appétit’s guide to ice cream sandwiches, proper freezing is the key to clean cuts and easy eating.
Wipe your knife clean with a warm, damp towel between each cut to get smooth, pretty edges. A sharp chef’s knife works better than a serrated blade for slicing through frozen layers.
Variations
Swap vanilla ice cream for any flavor you love—mint chip, salted caramel, coffee, or strawberry all work beautifully. Just make sure the ice cream is slightly softened before spreading.
Stir mini chocolate chips, chopped nuts, or toffee bits into the brownie batter for extra texture and flavor. About 1/2 cup of mix-ins is perfect without weighing down the batter.
Make them gluten-free by using a 1:1 gluten-free flour blend in place of all-purpose flour. The texture stays fudgy and delicious, and your gluten-free friends will thank you.
Add a layer of hot fudge, caramel sauce, or peanut butter between the brownie and ice cream for an extra-decadent twist. Freeze the sauce layer for 30 minutes before adding the ice cream.
Roll the edges of each sandwich in mini chocolate chips, sprinkles, or crushed cookies for a fun, bakery-style finish. Press the toppings on gently right after cutting, then pop them back in the freezer.
Try making individual cookie dough ice cream sandwiches or DIY ice cream sandwiches for Fourth of July if you want more grab-and-go options.
Troubleshooting
Problem: The brownies are too hard to bite through once frozen. Solution: You likely overbaked them—stick to 15-16 minutes max, even if they look slightly underdone. Let the sandwiches sit out for 3-5 minutes before serving to soften slightly.
Problem: The ice cream layer is too soft and squishes out when I cut. Solution: Freeze the assembled sandwiches for at least 12 hours, and make sure your freezer is set to 0°F or below. Use a very sharp knife and work quickly.
Problem: The brownie batter is too thick to spread evenly. Solution: Add a teaspoon of water to loosen it slightly, especially for the second batch that sits at room temperature while the first bakes. Use the back of a spoon to press and smooth.
Problem: The top brownie layer cracks when I place it on the ice cream. Solution: Work while the second brownie sheet is still slightly warm—it’ll be more pliable. If it does crack, gently press the pieces together and the ice cream will hold everything in place once frozen.
Problem: My sandwiches are uneven or lopsided. Solution: Make sure both brownie sheets are the same thickness by using identical pans and dividing the batter evenly. The parchment trick on top also helps keep the surface flat.
Storage & Reheating
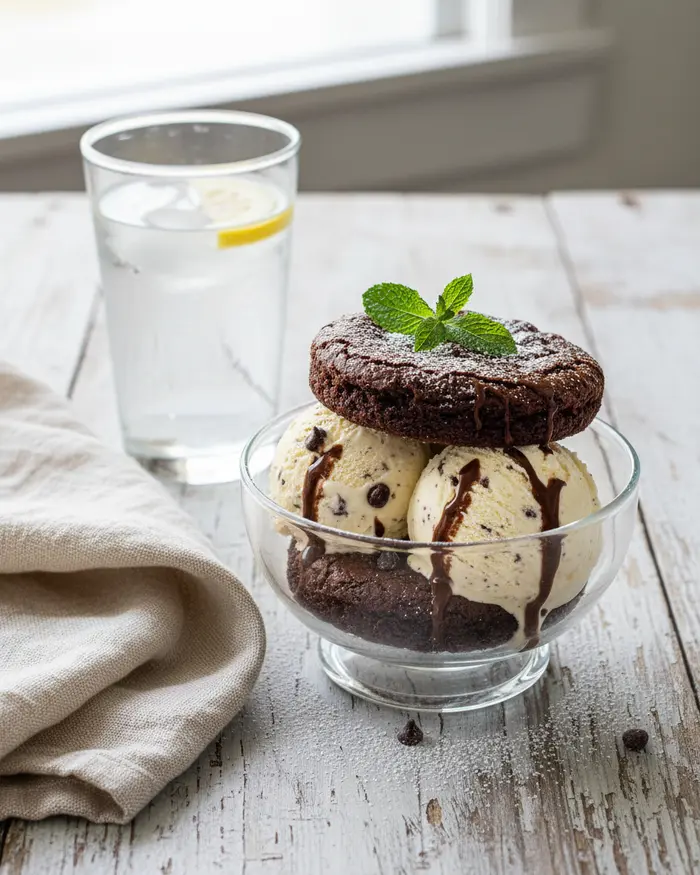
Brownie Ice Cream Sandwiches are best served straight from the freezer, cut into neat squares or rectangles. If they’ve been frozen for more than a few days and feel super solid, let them sit at room temperature for 3-5 minutes to soften just enough to bite through easily.
Wrap each sandwich individually in plastic wrap or aluminum foil and store in an airtight container or freezer bag for up to 1 month. Individually wrapped sandwiches are perfect for grabbing a quick treat without thawing the whole batch.
These don’t reheat in the traditional sense—enjoy them frozen! If you prefer a slightly softer texture, let them rest on the counter for a few minutes before eating.
| Storage Method | Duration | Best Practice |
| Freezer (whole slab, covered) | Up to 1 week | Cover tightly with foil or plastic wrap before slicing |
| Freezer (individually wrapped) | Up to 1 month | Wrap each sandwich in plastic wrap, then store in a freezer bag |
| Counter thaw before serving | 3-5 minutes | Let sit at room temp if very firm from extended freezing |
No-Waste Kitchen Ideas
Use leftover brownie scraps from trimming the edges as ice cream topping, or crumble them over yogurt for breakfast. Every last crumb is delicious and deserves love.
Save any extra ice cream for making melted ice cream French toast the next morning. It’s a genius way to use up that last scoop sitting in the container.
Freeze brownie batter scraps in a small container and bake them later as brownie bites for a quick snack. Just portion into a mini muffin tin and bake for 10-12 minutes.
Repurpose parchment paper by wiping it clean and reusing it for the second brownie batch. A little cocoa dust won’t hurt anything, and it saves waste.
Turn slightly freezer-burned sandwiches into a milkshake by blending them with a splash of milk. You’ll never know they weren’t perfectly fresh.
Frequently Asked Questions
Here are answers to the most common questions about making and storing these frozen treats.
What is a brownie ice cream sandwich?
A brownie ice cream sandwich is a dessert made by placing a scoop or layer of ice cream between two brownie pieces. The brownies serve as the cookie portion of a traditional ice cream sandwich, creating a rich, chocolatey treat.
How do you store brownie ice cream sandwiches?
Brownie ice cream sandwiches should be stored in the freezer, wrapped individually in plastic wrap or parchment paper, and placed in an airtight container. They can be stored for up to 2-3 months and should be kept at 0 degrees Fahrenheit or below.
What type of ice cream works best for brownie ice cream sandwiches?
Vanilla ice cream is the most popular choice as it complements the chocolate brownie flavor. However, chocolate, mint chocolate chip, coffee, peanut butter, or salted caramel ice cream also work well. Slightly softened ice cream spreads more easily between the brownies.
Can you make brownie ice cream sandwiches ahead of time?
Yes, brownie ice cream sandwiches are ideal for making ahead. After assembling, freeze them for at least 2-4 hours until firm. They can be made several days or weeks in advance, making them perfect for parties or meal prep desserts.
How do you prevent brownie ice cream sandwiches from being too hard to bite?
Let the sandwiches sit at room temperature for 3-5 minutes before serving to soften slightly. Using fudgy brownies instead of cakey ones also helps, as they remain softer when frozen. Avoid over-freezing and ensure brownies are completely cooled before assembly.
Final Dish
Brownie Ice Cream Sandwiches are the ultimate make-ahead dessert that delivers rich chocolate, creamy ice cream, and zero stress at party time. Whether you’re feeding a crowd or stashing treats for weeknight sanity, these frozen beauties are pure joy in every bite.
I’d love to see your creations—tag me on Instagram or drop a comment below with your favorite ice cream flavor combo. Did you go classic vanilla, or did you get wild with salted caramel or mint chip?
Grab your pan, preheat that oven, and let’s make some magic. These patriotic mini ice cream sandwiches are waiting to become your new summer tradition.
I’m Claire Whitmore — a dessert daydreamer from Asheville, NC. For me, baking isn’t about perfect pastries — it’s about the joy of sharing something sweet (and maybe sneaking an extra scoop of icing).
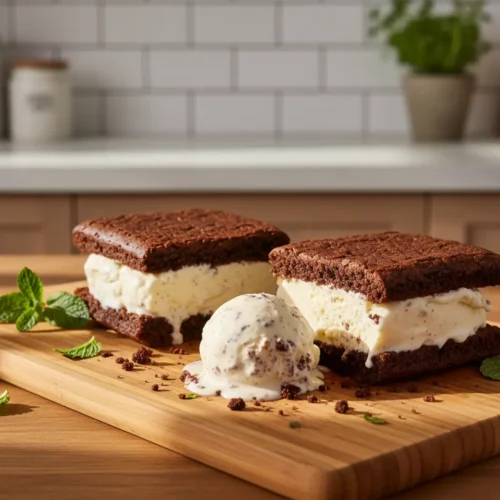
Brownie Ice Cream Sandwiches
Ingredients
- 1 cup 226g unsalted butter
- 2 cups 400g granulated sugar
- 3 large eggs at room temperature
- 1 Tablespoon pure vanilla extract
- 1 cup 82g unsweetened natural or dutch-process cocoa powder
- 1 cup 125g all-purpose flour (spooned & leveled)
- 1 teaspoon salt
- ¾ teaspoon baking powder
- 2 quart container 1/2 gallon vanilla ice cream (slightly softened—you can use any flavor and you’ll have a little leftover)
Instructions
- For best success, review the recipe notes and video tutorial above before beginning.
- Preheat the oven to 350°F (177°C) and line a 9-inch square baking pan with parchment paper, leaving enough overhang on the sides to lift the warm brownies out. Set aside.
- In a microwave-safe bowl or a saucepan on the stove, melt the butter. After melting, whisk in the sugar until completely combined, then whisk in the eggs and vanilla. The batter will be a little dull looking.
- Add the cocoa powder, flour, salt, and baking powder. Fold it all together with a rubber spatula or wooden spoon. Batter will be very thick. You will have about 4 cups of batter.
- Spoon and spread half of the batter (about 2 cups) into prepared pan. The batter is thick and heavy, so do your best to spread it evenly in the lined baking pan. Place a small sheet of parchment paper directly on top of the brownie batter, smoothing it down. The top parchment paper helps the brownies stay flat and prevents them from puffing up too much.
- Bake for 15-16 minutes. Remove brownies from the oven and cool for 5 minutes in the pan. Carefully, using the overhanging parchment paper on the sides, lift the warm and soft square sheet of brownies out of the pan as a whole. Remove top piece of parchment and set aside.
- Line the warm pan with another sheet of parchment paper, leaving enough overhang on the sides to lift the warm brownies out. Give the remaining brownie batter a stir. It will be very thick at this point. Add a teaspoon of water to thin out if necessary. Spoon and spread the remaining brownie batter in the pan. Place a small sheet of parchment paper directly on top of the brownie batter.
- Bake for 15-16 minutes. Remove brownies from the oven and cool for 15 minutes in the pan. During this cooling time, remove the ice cream from the freezer so it has a chance to soften.
- Scoop the softened ice cream onto the warm brownie layer in the pan. You’ll use almost all of the 1/2 gallon of ice cream. Using the back of a spoon or your ice cream scoop, gently spread it into an even and thick layer.
- Carefully pick up the 1st square sheet of brownies and place on top of the ice cream layer. Gently press it down into the ice cream to help it stick. Cover the entire pan with aluminum foil or plastic wrap and freeze for at least 12 hours and up to 1 week.
- Remove the pan of ice cream brownies from the freezer. Carefully lift them out as a whole using the parchment paper overhang on the sides. Using a very sharp knife, cut into 8-12 squares or rectangles. Enjoy immediately.
- Wrap each leftover sandwich individually and store in the freezer for up to 1 month. If they’re super solid, let them sit out for a few minutes before enjoying.