Zero-Waste Veggie Broth from Kitchen Scraps
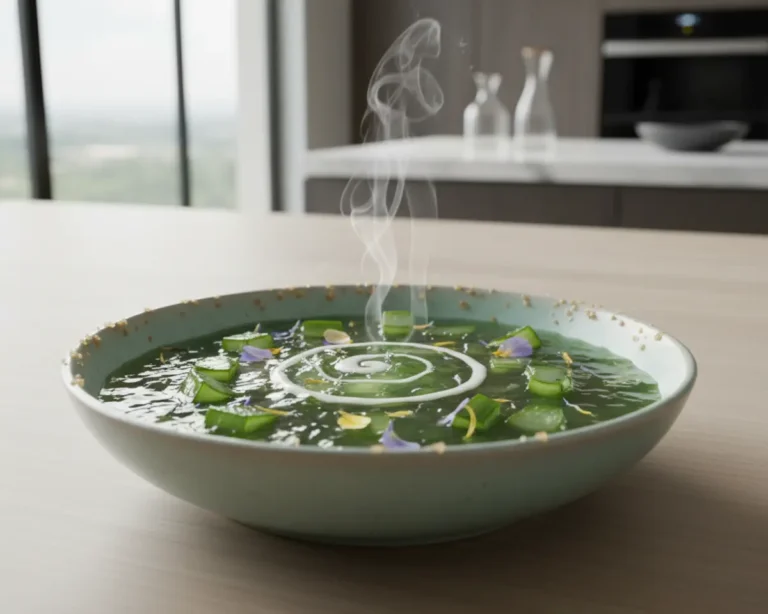
Zero-Waste Veggie Broth from Kitchen Scraps turns everyday peelings and trimmings into liquid gold. This zero waste cooking method saves money while creating rich, flavorful homemade vegetable stock perfect for soups, grains, and sauces.
I’m Linda Sandra, a Charleston home cook who believes that the best recipes come from resourcefulness and love. Making free vegetable broth from kitchen scraps is one of those kitchen secrets that transforms how you cook.
This homemade vegetable stock technique connects you to generations of smart cooks who knew every carrot top, onion peel, and celery end held flavor potential. Those scraps you’ve been tossing? They’re the foundation for deeply satisfying soups, tender grains, and silky sauces.
I remember my first batch simmering on a chilly Charleston afternoon, filling my kitchen with that warm, earthy aroma. My daughter walked in from school and said it smelled like grandma’s house—and that’s when I knew this DIY vegetable broth wasn’t just about saving scraps, it was about creating comfort.
Table of Contents
Quick Overview
Little Snapshot: What This Recipe Delivers
Free vegetable broth from kitchen scraps requires no shopping, no special skills, and minimal effort. You collect scraps over time, simmer them with water, strain, and store—turning trash into treasure with zero waste cooking principles.
Why You’ll Love This Recipe 🌸
- This free vegetable broth from kitchen scraps costs absolutely nothing and uses what you already have.
- It’s the ultimate zero waste cooking hack that makes you feel like a kitchen genius without any extra effort.
- You’ll never buy boxed broth again once you taste the deep, personalized flavor of your own homemade vegetable stock.
- According to NRDC, reducing food waste is one of the most effective ways to lower your carbon footprint—and this recipe proves exactly why.
Quick Facts ⚡
Here’s the quick scoop on this free vegetable broth from kitchen scraps.
- CourseBase/Staple
- Prep Time10 minutes
- Cook Time1-3 hours
- Total Time1 hour 10 minutes to 3 hours 10 minutes
- Servings6-8 cups
- DifficultyEasy
Nutritional Peek
| Nutrient | Amount per serving (1 cup) |
|---|---|
| Calories | 10-15 kcal |
| Protein | 0.5g |
| Carbohydrates | 2g |
| Fat | 0g |
| Fiber | 0g |
| Sugar | 1g |
What You’ll Need
You don’t need fancy equipment to make this food scrap broth. Just a few kitchen basics you already own.
- Large stockpot or Dutch oven (at least 6-quart capacity)
- Fine-mesh sieve or colander
- Cheesecloth (optional, for clearer broth)
- Large bowl or container for straining
- Airtight containers or freezer-safe bags for storage
- Freezer bag or container for collecting scraps
Ingredients
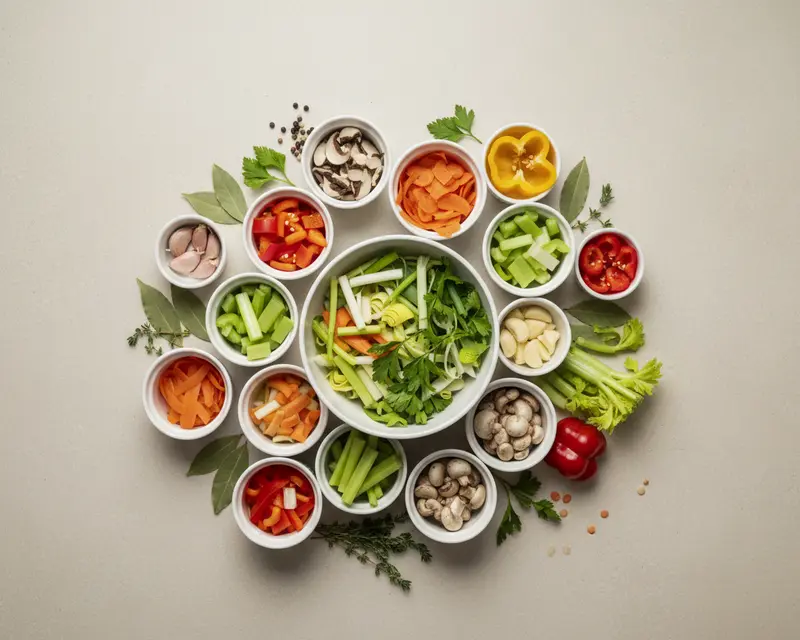
Homemade vegetable stock starts with saving the trimmings you’d normally toss. Think of it as giving your scraps a second chance to shine—onion skins bring golden color, carrot ends add sweetness, and celery leaves deliver that classic veggie broth backbone.
| Group | Ingredient | Amount | Notes |
|---|---|---|---|
| Aromatic Base | Onion peels and ends | 1 cup | Yellow onion skins give beautiful color |
| Aromatic Base | Garlic skins and ends | 1/2 cup | Don’t skip these flavor bombs |
| Aromatic Base | Carrot tops and ends | 1/2 cup | Adds earthy sweetness |
| Aromatic Base | Celery ends and leaves | 1/2 cup | The leafy tops pack the most flavor |
| Supporting Scraps | Bell pepper cores | 1 cup | Any color works beautifully |
| Supporting Scraps | Mushroom stems | 1 cup | Adds umami depth |
| Supporting Scraps | Zucchini ends | 1 cup | Mild and mellow |
| Supporting Scraps | Potato peels | 1 cup | Use sparingly—can get starchy |
| Supporting Scraps | Herb stems (parsley, cilantro) | 1 cup | Fresh or wilted both work |
| Seasonings | Bay leaf | 1 | Optional but adds warmth |
| Seasonings | Black peppercorns | 4-6 | Just a few for gentle spice |
| Liquid | Cold water | Enough to cover scraps by 1-2 inches | Usually 8-10 cups |
Step-by-Step Instructions
Let’s make this happen.
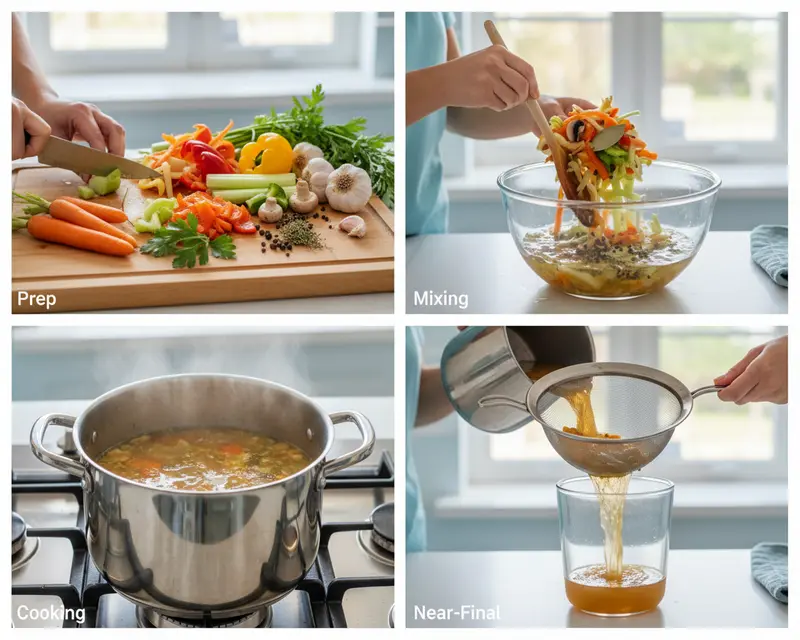
- Collect Your Scraps: Store vegetable trimmings in a sealed freezer bag or container as you cook throughout the week. Aim for 6-8 cups total—a mix of aromatic and supporting scraps creates the best flavor balance.
- Prep the Pot: Once you’ve gathered enough scraps, dump them all into your large stockpot. Toss in the bay leaf and peppercorns if you’re using them—they’ll infuse subtle warmth and complexity.
- Add Cold Water: Pour cold water over the scraps until they’re fully submerged with at least an inch or two of water above. Cold water helps extract maximum flavor as it slowly heats.
- Bring to a Boil: Set your pot over high heat and bring everything to a rolling boil. You’ll see bubbles breaking the surface and steam rising—this is where the magic begins.
- Reduce and Simmer: Immediately lower the heat to a gentle simmer. You want tiny bubbles barely breaking the surface, not a vigorous boil. Let it go for at least 1 hour—longer simmering (up to 2-3 hours) deepens the flavor.
- Avoid Stirring: Resist the urge to stir frequently. Agitation releases starches and makes your DIY vegetable broth cloudy instead of clear and beautiful.
- Strain Carefully: Remove the pot from heat. Set a fine-mesh sieve or cheesecloth-lined colander over a large bowl, then slowly pour the broth through. Press gently on the scraps to extract every last drop of flavor.
- Cool Completely: Let your homemade vegetable stock cool to room temperature before storing. Hot liquid can raise your fridge temperature and compromise other foods.
- Store Smart: Transfer cooled broth into airtight containers or freezer bags. Label with the date—this zero waste cooking treasure keeps 5 days refrigerated or 6 months frozen.
Pro Tips & Gentle Guidance
Homemade vegetable stock rewards a few simple habits that make all the difference. Keep these tips in your back pocket and you’ll be simmering pro-level broth in no time.
Save the Right Scraps: Stick with mild, sweet vegetables like onions, carrots, celery, bell peppers, zucchini, and mushrooms. Avoid bitter greens like kale stems, cruciferous scraps like broccoli or cabbage, and starchy peels in excess—they can muddy the flavor.
Freeze as You Go: Keep a dedicated gallon freezer bag and toss in scraps after each meal prep session. When the bag is full, it’s broth day—no extra shopping required.
Don’t Oversalt: Your food scrap broth is unsalted by design, making it versatile for any recipe. Season the final dish instead, giving you total control over sodium levels.
Roast for Deeper Flavor: For a richer, caramelized taste, spread frozen scraps on a baking sheet and roast at 400°F for 20-25 minutes before simmering. According to Epicurious, roasting vegetables before making stock intensifies umami and adds complexity.
Freeze in Portions: Use ice cube trays or muffin tins to freeze small amounts of broth. Pop them out into a freezer bag for easy grab-and-go portions when recipes call for just a splash.
Variations & Adaptations
This DIY vegetable broth is endlessly adaptable. Swap, add, or tweak based on what’s in your freezer and what flavors you love.
Asian-Inspired Broth: Add ginger scraps, green onion roots, and a splash of soy sauce during the last 30 minutes of simmering. Perfect for noodle soups and healing broths.
Italian Herb Broth: Toss in basil stems, oregano sprigs, and a parmesan rind for a robust base ideal for minestrone or Italian soups.
Spicy Southwest Broth: Include jalapeño or poblano scraps, cilantro stems, and a pinch of cumin. Use it in chili, rice, or bean dishes for a subtle kick.
Mushroom-Forward Broth: Double up on mushroom stems and add dried shiitakes for deep, earthy umami. This zero waste cooking hack shines in risottos and gravies.
Instant Pot Method: Combine all scraps and water in your Instant Pot, seal, and cook on high pressure for 30 minutes. Natural release, then strain—same flavor, less time.
Slow Cooker Method: Dump everything in your slow cooker, set on low, and let it go for 6-8 hours. Your house will smell incredible and your homemade vegetable stock will be rich and golden.
Quick Fixes for Free Vegetable Broth from Kitchen Scraps
Problem: Broth tastes weak or watery.
Solution: Simmer it longer to concentrate flavors, or return strained broth to the pot and reduce by half over medium heat. More scraps relative to water also boosts intensity.
Problem: Broth is cloudy or murky.
Solution: Avoid stirring during simmering and strain through cheesecloth. Cloudiness doesn’t affect flavor, but a gentle simmer and careful straining yield crystal-clear broth.
Problem: Broth tastes bitter.
Solution: You likely included bitter scraps like brassicas, beet peels, or too many dark leafy greens. Stick to mild vegetables and avoid turnip or radish trimmings next time.
Problem: Broth is too salty or bland.
Solution: If you accidentally salted it, dilute with more water or unsalted broth. If it’s bland, add a splash of vinegar or lemon juice to brighten flavors—acidity lifts everything.
Problem: I don’t have enough scraps yet.
Solution: Keep collecting! A half-full bag can wait in the freezer for weeks. You can also supplement frozen scraps with a few whole vegetables like a halved onion or carrot.
Storage & Reheating
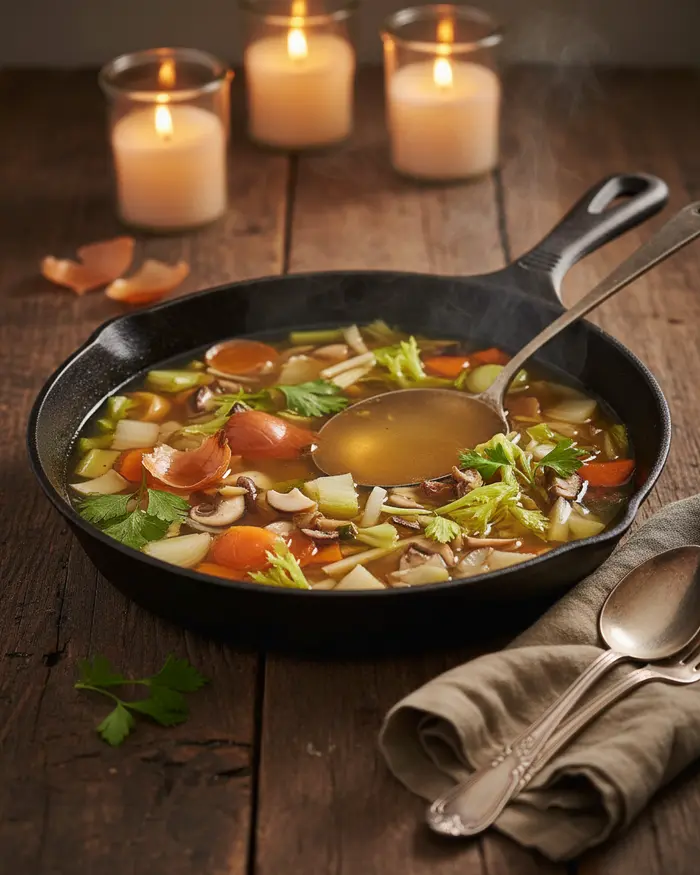
Homemade vegetable stock is incredibly versatile once it’s made. Use it as a base for cozy soups and chilis, cook grains and pasta in it for extra flavor, or sip it warm with a pinch of salt on chilly mornings.
Store cooled broth in airtight containers in the refrigerator for up to 5 days. For longer storage, freeze in quart containers, freezer bags, or ice cube trays for up to 6 months—label with the date so you know what you’re grabbing.
Reheat gently on the stovetop over medium heat or in the microwave in 1-minute intervals. Frozen broth can go straight into soups or be thawed overnight in the fridge—no need to overthink it.
| Storage Method | Duration | Best For |
|---|---|---|
| Refrigerator (airtight container) | Up to 5 days | Immediate use in soups, grains, sauces |
| Freezer (containers or bags) | Up to 6 months | Long-term storage, batch cooking |
| Ice cube trays | Up to 6 months | Small portions for sautés, deglazing |
| Room temperature | Not recommended | Broth spoils quickly at room temp |
No-Waste Kitchen Magic
Once you’ve strained your food scrap broth, you’re left with cooked vegetable scraps. Compost them if you can—they’ve given their all and will nourish your garden beautifully.
If you don’t compost, consider blending a small amount of the cooked scraps into smoothies, pet food (check with your vet first), or even mixing them into homemade veggie burgers for added moisture and fiber.
Save your broth containers and reuse them. Glass jars with tight lids work perfectly and eliminate single-use plastics—another small step toward zero waste cooking.
Repurpose leftover herb stems beyond broth. Tie them into bundles and dry them for homemade seasoning blends, or chop finely and stir into compound butters or pestos.
Frequently Asked Questions
Got questions about making homemade vegetable stock? You’re not alone—here are the answers to what folks ask me most.
What vegetable scraps can I use to make broth?
You can use onion skins and ends, carrot peels and tops, celery leaves and ends, garlic skins, mushroom stems, potato peels, herb stems, leek tops, and other clean vegetable trimmings. Avoid cruciferous vegetables like broccoli and cabbage as they can make the broth bitter.
How should I store vegetable scraps until I have enough to make broth?
Keep a container or freezer bag in your freezer and add clean vegetable scraps to it as you cook throughout the week. Once the container is full, you have enough scraps to make a batch of broth. Frozen scraps can be stored for up to 3 months.
How long does it take to make vegetable broth from scraps?
Vegetable broth typically takes 45 minutes to 2 hours to simmer. The longer you simmer, the more flavorful the broth becomes. Bring the scraps and water to a boil, then reduce heat and let it simmer gently until the vegetables have released their flavor.
How long can I store homemade vegetable broth?
Homemade vegetable broth can be stored in the refrigerator for up to 5 days in an airtight container. For longer storage, freeze the broth in portions for up to 6 months. Ice cube trays or freezer bags work well for freezing in convenient serving sizes.
Can I reuse vegetable scraps to make multiple batches of broth?
No, vegetable scraps should only be used once. After simmering, the scraps have released most of their nutrients and flavor into the broth. Using them again would result in a very weak and watery broth with little taste or nutritional value.
Final Dish
Free vegetable broth from kitchen scraps is one of those kitchen habits that changes everything. It saves money, reduces waste, and gives you total control over what goes into your cooking—all while filling your home with the warmest, most comforting aroma.
Once you start saving scraps and simmering your own DIY vegetable broth, you’ll wonder why you ever bought it in a box. This is cooking at its most resourceful, creative, and kind—to your budget, your family, and the earth.
Make a batch this week and tell me how it goes. Share your scrap combinations, your favorite uses, or a photo of your golden broth in the comments—I’d love to cheer you on.
I’m Linda Sandra — a Charleston home chef and comfort-food daydreamer. Around here, cooking’s not about perfection — it’s about cozy vibes, creative twists, and food that feels like love.
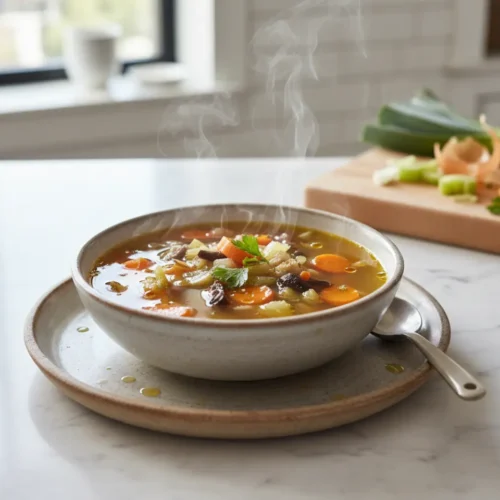
Free Vegetable Broth from Kitchen Scraps
Ingredients
- 2 cups of aromatic scraps onion peels, garlic skins, carrot tops and ends, celery ends
- 4-6 cups of other vegetable scraps bell pepper cores, mushroom stems, zucchini ends, potato peels, herb stems like parsley or cilantro
- 1 bay leaf optional
- a few black peppercorns optional
- Water to cover
Instructions
- Collect Scraps: Store vegetable scraps in a sealed container or bag in the freezer until you have enough, typically around 6-8 cups.
- Combine Ingredients: Place all accumulated vegetable scraps into a large pot. Add the bay leaf and peppercorns, if using.
- Add Water: Pour enough cold water over the scraps to completely submerge them. Ensure the water level is at least an inch or two above the vegetables.
- Simmer: Bring the water to a boil over high heat, then immediately reduce the heat to low. Simmer gently, uncovered, for at least 1 hour, or up to 2-3 hours for a richer flavor. Do not stir frequently, as this can make the broth cloudy.
- Strain: Once the broth has simmered, remove the pot from the heat. Carefully strain the broth through a fine-mesh sieve or colander lined with cheesecloth into a large bowl or container. Discard the cooked vegetable scraps.
- Cool and Store: Allow the broth to cool completely before storing it. Once cooled, transfer the broth to airtight containers or freezer-safe bags. It can be stored in the refrigerator for up to 5 days or frozen for up to 6 months.