Vasilopita Recipe
This Vasilopita recipe creates a fluffy, orange-scented Greek New Year’s cake with a hidden coin for good luck. Easy steps, rich flavor, and stunning presentation for your celebration.
Hey there, I’m Claire Whitmore — a pastry whisperer in Asheville, NC, where butter totally counts as self-care. This Vasilopita recipe is your ticket to bringing authentic Greek New Year’s tradition right into your kitchen, complete with that hidden lucky coin that makes midnight so exciting.
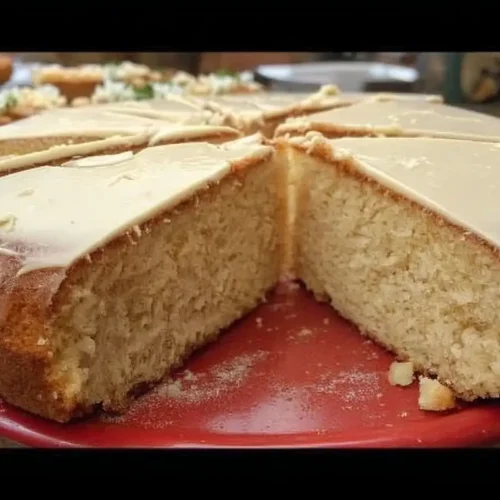
We’re talking about a tender, citrus-kissed cake made with real butter, fresh orange zest, creamy yogurt, and a glossy white glaze that looks absolutely stunning on your holiday table.
It’s got that perfect crumb — not too dense, not too airy — and the orange flavor is bright without being overpowering. Plus, the tradition of hiding a coin inside makes cutting the cake an actual event, which is pretty magical if you ask me.
Table of Contents
Little Snapshot: What This Recipe Delivers
This Vasilopita recipe delivers a beautifully golden Greek New Year’s cake with bright orange flavor, tender crumb, and smooth vanilla glaze.
It takes about 90 minutes total (30 minutes prep, 60 minutes baking) and serves 16 people, making it perfect for family gatherings and New Year’s celebrations where you want something both meaningful and delicious.
Why You’ll Love This Recipe 🌸
- This Vasilopita recipe brings actual tradition to your table — complete with the hidden coin that makes New Year’s Eve feel like a treasure hunt.
- The orange zest and yogurt combo creates this incredibly moist cake that stays fresh for days (if it lasts that long).
- It looks fancy with that glossy glaze, but the steps are totally manageable even if you’re not a pro baker.
- According to King Arthur Baking’s guide to traditional celebration cakes, the best holiday baking connects us to centuries of shared joy — and this Greek New Year’s cake proves exactly why.
Quick Facts ⚡
Here’s the quick scoop on this Vasilopita recipe.
- CourseDessert
- Prep Time30 minutes
- Cook Time60 minutes
- Total Time90 minutes
- Servings16 servings
- DifficultyMedium
Nutritional Peek
Here’s a friendly look at what you’re working with per slice (because knowing never hurts, right?):
| Nutrient | Amount per Serving |
|---|---|
| Calories | 420 kcal |
| Protein | 6g |
| Carbohydrates | 62g |
| Fat | 17g |
| Fiber | 1g |
| Sugar | 42g |
Vasilopita Recipe Ingredients
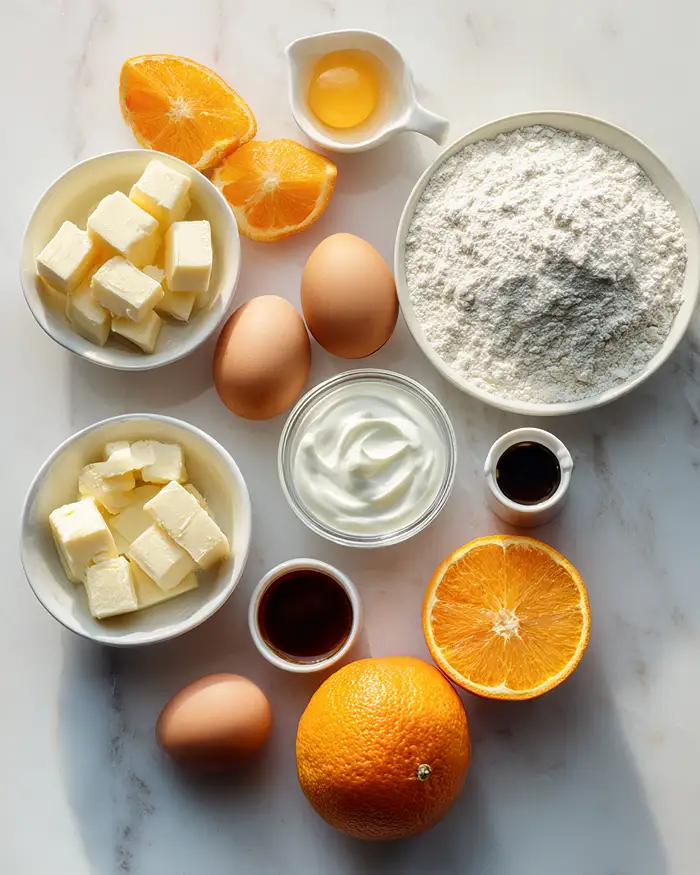
This Vasilopita Cake needs just a handful of classic baking ingredients that come together to create something really special.
For the wet ingredients — butter, eggs, orange juice, yogurt, and vanilla extract — you’ll want everything at room temperature so it blends smoothly without lumps. The orange zest is what gives this cake its signature brightness, so don’t skip it! For the dry mix, we’re using self-rising flour which already has leavening built in, making your life easier.
For the Cake
| Amount | Ingredient |
|---|---|
| 375g (13oz) | butter, softened (Yes, real butter — margarine just doesn’t give you that rich flavor here) |
| 600g (21oz, 3 cups) | sugar |
| 6 | eggs, divided into yolks and whites |
| pinch | salt |
| 2 | oranges, zested |
| 1/2 cup | orange juice, freshly squeezed if possible |
| 200g (7oz) | yogurt, strained (Greek yogurt works beautifully) |
| 1 tsp | vanilla extract |
| 750g (26.5oz) | self-rising flour, sifted |
For the Glaze
| Amount | Ingredient |
|---|---|
| 450g (15.8oz, 3 cups) | icing sugar |
| 5 tbsp | hot water or milk |
| 2 tsp | vanilla extract |
Tools You’ll Actually Use
- Stand mixer with paddle and whisk attachments (or a hand mixer and some patience)
- Two large mixing bowls
- Rubber spatula
- 30-35cm (12-14 inch) round cake tin
- Parchment paper or butter and flour for the tin
- Wooden skewer or toothpick
- Wire cooling rack
- Flat spatula for glazing
- Aluminum foil for wrapping the coin
This recipe is just the start of something delicious. Browse the entire Classic Comfort Foods collection and discover all the ways you can bring more flavor to your table. Your family will thank you.
Step-by-Step Instructions
Making this Vasilopita recipe is all about technique, but don’t let that scare you — we’re just being a little mindful about how we combine things.
Step 1: Start by separating your 6 eggs carefully into yolks and whites. Make absolutely sure your mixer bowl, whisk attachment, and the egg whites themselves are completely clean and free of any grease or water — even a tiny bit will keep your whites from whipping properly.
Add a pinch of salt to the whites and whisk on high speed until you’ve got thick, glossy meringues with stiff peaks that stand up straight when you lift the whisk. Transfer this cloud of meringue to a separate bowl and set it aside while you work on the rest.
Step 2: Clean your mixer bowl thoroughly (any meringue residue will mess with your creaming) and add the softened 375g butter and 600g sugar.
Using the paddle attachment, beat on medium-high speed for about 20 minutes — yes, really 20 minutes! You want the mixture super pale, fluffy, and almost like whipped cream. This is what gives your cake that tender crumb, so don’t rush it.
Step 3: With the mixer on low, add the 6 egg yolks one at a time, letting each one fully incorporate before adding the next. Pour in the 1/2 cup orange juice, 1 tsp vanilla extract, zest from 2 oranges, and 200g strained yogurt. Mix until everything’s beautifully combined and smooth.
Step 4: Remove the bowl from your mixer (we’re going manual now to keep things gentle). Add one-third of the sifted 750g self-rising flour and fold it in gently with your rubber spatula using broad strokes.
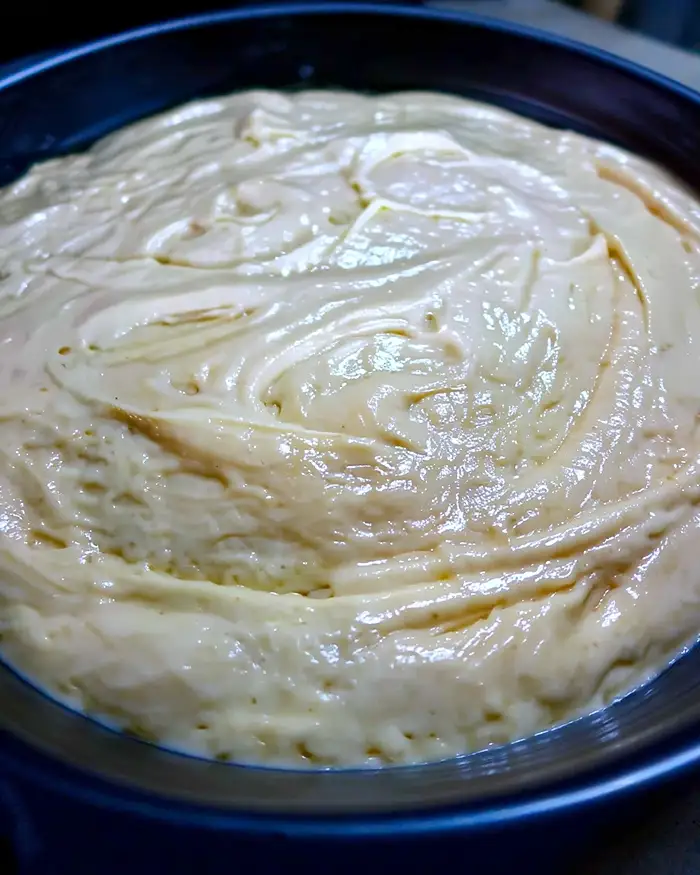
Then add one-third of those gorgeous meringues and fold with light, circular movements from the bottom up — you’re trying to keep all that air you just whipped in. Repeat this process two more times, alternating flour and meringue, until everything’s just combined. Don’t overmix or you’ll deflate all your hard work.
Step 5: Preheat your oven to 200°C (390°F) with both top and bottom heating elements, or 180°C (356°F) if you’re using a fan setting.
Prepare your 30-35cm round cake tin by buttering it generously and dusting with flour, or line the bottom with parchment paper. Pour in your Vasilopita batter and spread it evenly with your spatula so it bakes uniformly.
Step 6: Place your cake tin on the lower third rack of the preheated oven, immediately turn the temperature down to 175°C (350°F) or 160°C (320°F) fan, and bake for approximately 60 minutes.
Here’s the hard part: don’t open that oven door for the first 30 minutes or your cake will collapse! After 30 minutes, you can peek if you must. The cake is done when it’s beautifully golden and a wooden skewer inserted in the center comes out clean.
Step 7: Let your Vasilopita cake cool completely in the pan — and I mean completely, like wait a couple hours if you need to. If you try to flip it while it’s still warm, it’ll break your heart (and the cake). Once cool, invert the pan onto a plate. Then use a second plate to invert again so the domed top is facing up.
Step 8: Wrap your lucky coin tightly in aluminum foil (make sure it’s completely sealed). Gently press it into the bottom of the cake. Now flip the cake one more time onto your serving platter so the flat bottom is facing up — this gives you a perfect smooth surface for that gorgeous glaze.
Step 9: Make your glaze by combining 450g icing sugar, 5 tablespoons hot water or milk, and 2 tsp vanilla extract in a large bowl. Stir with a spatula until it’s completely smooth and glossy with a thick, pourable consistency — it should look like glue but spread beautifully.
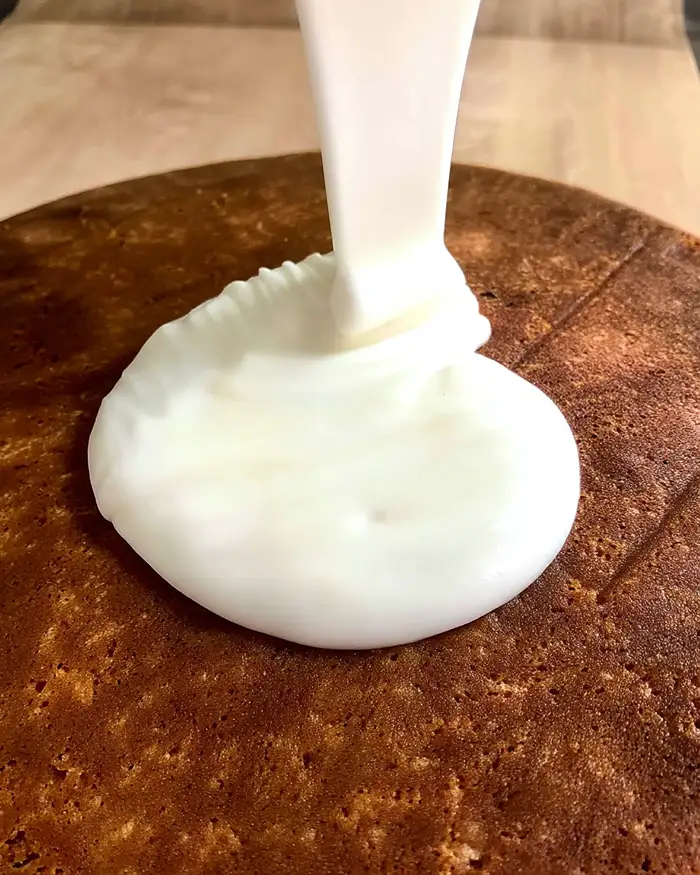
If it’s too thick, add a tiny bit more hot water, one teaspoon at a time. Pour the glaze over your Vasilopita and smooth it out with a flat spatula, letting it drip down the sides naturally.
Step 10: Before the glaze sets, carve the new year into the top using a toothpick or arrange toasted almonds to form the numbers. Let the glaze set completely (about 30 minutes) before serving. Your kitchen should smell like a combination of fresh oranges and a Paris patisserie by now!
Claire’s Pro Tips & Gentle Guidance
This Vasilopita Cake recipe has a few little tricks that make all the difference between good and absolutely stunning.
Room temperature ingredients are your best friend here. I learned this the hard way when my cold eggs refused to emulsify with the butter and I ended up with a grainy mess. Take everything out of the fridge about an hour before you start.
Don’t skimp on the 20-minute creaming time for the butter and sugar. I know it feels excessive, but this is what creates that incredibly light, tender crumb. Set a timer, walk away, fold some laundry — just let that mixer do its thing.
When folding in the meringue, use a light hand and work quickly but gently. Think of it like you’re folding delicate fabric, not stirring pancake batter. You want to keep all those air bubbles intact.
According to Sally’s Baking Addiction’s detailed guide on cake leavening, understanding how your flour works is crucial for perfect texture — and since we’re using self-rising flour here, you’ve already got your leavening built in, which is pretty magical.
The flat-bottom trick for glazing changed my life. Cakes always dome a bit on top, and trying to glaze a domed surface means your icing slides right off. Flipping it so the flat bottom is your canvas? Chef’s kiss.
Quick Fixes for Vasilopita Recipe Mishaps
Problem: My cake sank in the middle! You probably opened the oven too early or your oven temperature dropped. Next time, resist peeking for at least 30 minutes, and make sure your oven is fully preheated. If it still happens, your baking powder in the self-rising flour might be old — check the expiration date.
Problem: The texture is dense instead of fluffy. This usually means the meringue got deflated during folding, or you didn’t cream the butter and sugar long enough. Really take your time with both of these steps — patience is everything here.
Problem: My glaze is too runny and slides right off! Add more icing sugar, a tablespoon at a time, until you get that thick but spreadable consistency. It should coat the back of your spatula and slowly drip off, not run like water.
Problem: The cake cracked on top while baking. Your oven might be running too hot. Get an oven thermometer (they’re like $5 and will change your baking life) and check if your actual temperature matches what the dial says. Also, make sure you lowered the temp after putting the cake in.
Variations & Fun Twists
This traditional Vasilopita Cake is pretty perfect as-is, but here are some ways to make it your own.
Lemon Lover’s Version: Swap the orange juice and zest for lemon. It’s brighter and slightly more tart, which is gorgeous if you’re not a huge orange fan.
Chocolate Drizzle: After the white glaze sets, melt some dark chocolate and drizzle it over the top in a zigzag pattern. It’s not traditional, but it’s stunning and adds a nice flavor contrast.
Gluten-Free Adaptation: Use a good quality gluten-free self-rising flour blend (or make your own by combining gluten-free flour with baking powder and xanthan gum). The texture will be slightly different but still delicious. Check out this matcha bubble tea recipe for more gluten-free baking inspiration.
Nut Topping: Press toasted slivered almonds into the glaze while it’s still wet for gorgeous texture and a slightly more rustic look.
Serving, Storage & Reheating
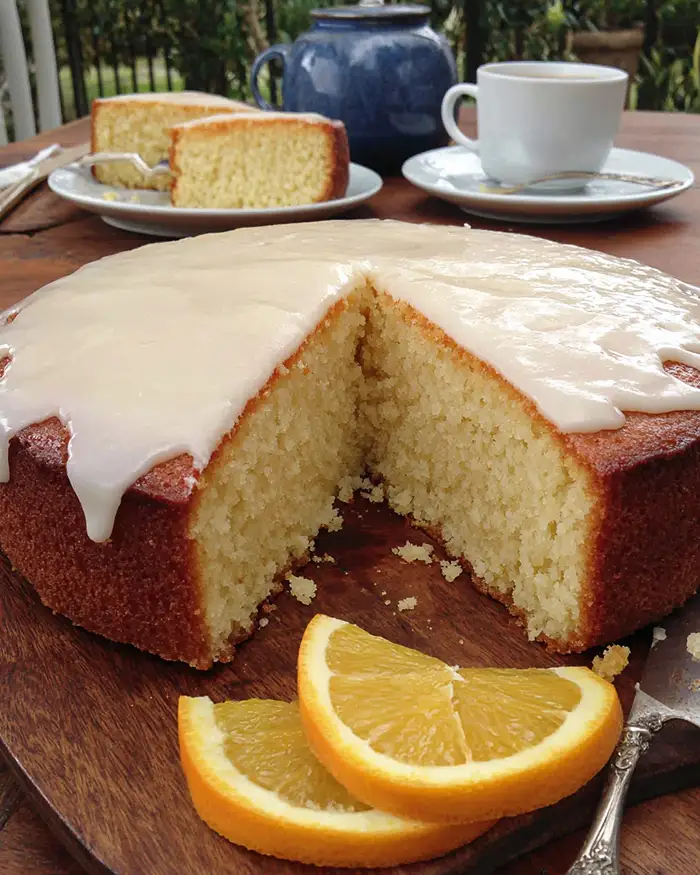
Serve this Vasilopita Cake at room temperature on New Year’s Eve, cutting it ceremoniously at midnight so someone can discover the lucky coin. Each person should get a slice, starting with the head of the household, then moving through family members, and traditionally there’s even a slice “for the house” and one “for the poor.”
Store any leftover cake (if you actually have leftovers, which I doubt) wrapped tightly in plastic wrap or in an airtight container at room temperature for up to 4 days. The yogurt keeps it incredibly moist.
If you want to make it ahead, you can bake the cake a day early and leave it unglazed, wrapped well at room temperature. Add the glaze a few hours before serving for that fresh, glossy look.
No-Waste Kitchen Magic
Got leftover Vasilopita after a few days? Cut it into cubes and toast them in the oven with a little butter for incredible bread pudding croutons. You can also crumble day-old cake into yogurt parfaits for breakfast — it’s like having dessert for breakfast but slightly more acceptable.
If you’ve got extra glaze that didn’t make it onto the cake, thin it out with a little milk and use it to drizzle over your morning Texas caviar… just kidding! Save that glaze for drizzling over pound cake or cinnamon rolls later in the week.
The orange peels from zesting? Toss them in your garbage disposal with ice cubes for a natural freshener, or dry them out and add to your tea.
Vasilopita Recipe FAQs
Can I freeze this Vasilopita recipe for later?
Absolutely! Wrap the completely cooled, unglazed cake tightly in plastic wrap, then aluminum foil, and freeze for up to 3 months. Thaw overnight in the fridge, bring to room temperature, then add your glaze fresh.
What’s the best way to store Vasilopita Cake once it’s been cut?
Press plastic wrap directly against the cut edges to keep them from drying out, then cover the whole cake. It’ll stay moist for about 4 days at room temperature. Don’t refrigerate unless your kitchen is really warm — it’ll dry out faster in the fridge.
How do I know when my Vasilopita is done baking?
The top should be deep golden brown, the edges should pull away slightly from the pan, and a wooden skewer inserted in the center should come out clean or with just a few moist crumbs. If it comes out wet with batter, give it another 5-10 minutes.
Why should I use strained yogurt in this Vasilopita recipe?
Strained or Greek yogurt has less water content, which means your batter won’t be too loose and your cake will have better structure. Regular yogurt can make the cake denser and heavier because of all that extra liquid.
Time to Bring Greek Tradition Home
There’s something really special about making this Vasilopita recipe — it’s not just a cake, it’s an entire tradition wrapped up in orange-scented, buttery goodness.
Whether you’re Greek and keeping family traditions alive, or you’re just looking for a stunning New Year’s cake that comes with built-in excitement (hidden treasure, anyone?), this is your recipe.
I’d love to see your spin on this Vasilopita recipe! Drop a comment below with your Vasilopita photos — I’d love to see how you decorated yours or which family member found the lucky coin. This Greek New Year’s cake is so versatile; I bet you’ve got amazing variations already in mind!
And hey, if you’re feeling inspired by celebratory drinks to go with this cake, check out my cherry pie mocktail recipe — it’s the perfect toast to the new year.
I’m Claire Whitmore — a dessert daydreamer from Asheville, NC. For me, baking isn’t about perfect pastries — it’s about the joy of sharing something sweet (and maybe sneaking an extra scoop of icing). Happy New Year, and may your slice have the lucky coin!
Vasilopita Recipe
Equipment
- Stand mixer with paddle and whisk attachments
- Two large mixing bowls
- Rubber spatula
- 30-35cm round cake tin
- Parchment paper
- Wooden skewer or toothpick
- Wire cooling rack
- Flat spatula
- Aluminum foil
Ingredients
For the Cake
- 375 g butter softened (13oz)
- 600 g sugar 21oz, 3 cups
- 6 eggs divided into yolks and whites
- 1 pinch salt
- 2 oranges zested
- ½ cup orange juice freshly squeezed if possible
- 200 g yogurt strained, 7oz, Greek yogurt works beautifully
- 1 tsp vanilla extract
- 750 g self-rising flour sifted, 26.5oz
For the Glaze
- 450 g icing sugar 15.8oz, 3 cups
- 5 tbsp hot water or milk
- 2 tsp vanilla extract
Instructions
- Start by separating your 6 eggs carefully into yolks and whites. Make absolutely sure your mixer bowl, whisk attachment, and the egg whites themselves are completely clean and free of any grease or water. Add a pinch of salt to the whites and whisk on high speed until you’ve got thick, glossy meringues with stiff peaks that stand up straight when you lift the whisk. Transfer this cloud of meringue to a separate bowl and set it aside while you work on the rest.
- Clean your mixer bowl thoroughly and add the softened 375g butter and 600g sugar. Using the paddle attachment, beat on medium-high speed for about 20 minutes until the mixture is super pale, fluffy, and almost like whipped cream. This is what gives your cake that tender crumb, so don’t rush it.
- With the mixer on low, add the 6 egg yolks one at a time, letting each one fully incorporate before adding the next. Pour in the 1/2 cup orange juice, 1 tsp vanilla extract, zest from 2 oranges, and 200g strained yogurt. Mix until everything’s beautifully combined and smooth.
- Remove the bowl from your mixer. Add one-third of the sifted 750g self-rising flour and fold it in gently with your rubber spatula using broad strokes. Then add one-third of those gorgeous meringues and fold with light, circular movements from the bottom up. Repeat this process two more times, alternating flour and meringue, until everything’s just combined. Don’t overmix or you’ll deflate all your hard work.
- Preheat your oven to 200°C (390°F) with both top and bottom heating elements, or 180°C (356°F) if you’re using a fan setting. Prepare your 30-35cm round cake tin by buttering it generously and dusting with flour, or line the bottom with parchment paper. Pour in your Vasilopita batter and spread it evenly with your spatula so it bakes uniformly.
- Place your cake tin on the lower third rack of the preheated oven, immediately turn the temperature down to 175°C (350°F) or 160°C (320°F) fan, and bake for approximately 60 minutes. Don’t open that oven door for the first 30 minutes or your cake will collapse! After 30 minutes, you can peek if you must. The cake is done when it’s beautifully golden and a wooden skewer inserted in the center comes out clean.
- Let your Vasilopita cake cool completely in the pan. Once cool, invert the pan onto a plate. Then use a second plate to invert again so the domed top is facing up.
- Wrap your lucky coin tightly in aluminum foil. Gently press it into the bottom of the cake. Now flip the cake one more time onto your serving platter so the flat bottom is facing up.
- Make your glaze by combining 450g icing sugar, 5 tablespoons hot water or milk, and 2 tsp vanilla extract in a large bowl. Stir with a spatula until it’s completely smooth and glossy with a thick, pourable consistency. If it’s too thick, add a tiny bit more hot water, one teaspoon at a time. Pour the glaze over your Vasilopita and smooth it out with a flat spatula, letting it drip down the sides naturally.
- Before the glaze sets, carve the new year into the top using a toothpick or arrange toasted almonds to form the numbers. Let the glaze set completely (about 30 minutes) before serving.