Peanut Butter Spider Cookies
Hey there, I’m Claire Whitmore — a pastry whisperer in Asheville, NC, where butter totally counts as self-care. These Peanut Butter Spider Cookies are proof that Halloween treats don’t have to be scary to make or eat — just adorably spooky enough to make your kids squeal with delight.
Last October, my neighbor’s six-year-old took one look at these little chocolate-legged cuties and declared them “too cute to eat” before promptly devouring three. That’s the magic of combining everyone’s favorite peanut butter cookie with mini Reese’s cups and a splash of Halloween creativity. Sometimes the best recipes are born from a “what if” moment and a pantry full of possibilities.
Little Snapshot: What This Recipe Delivers
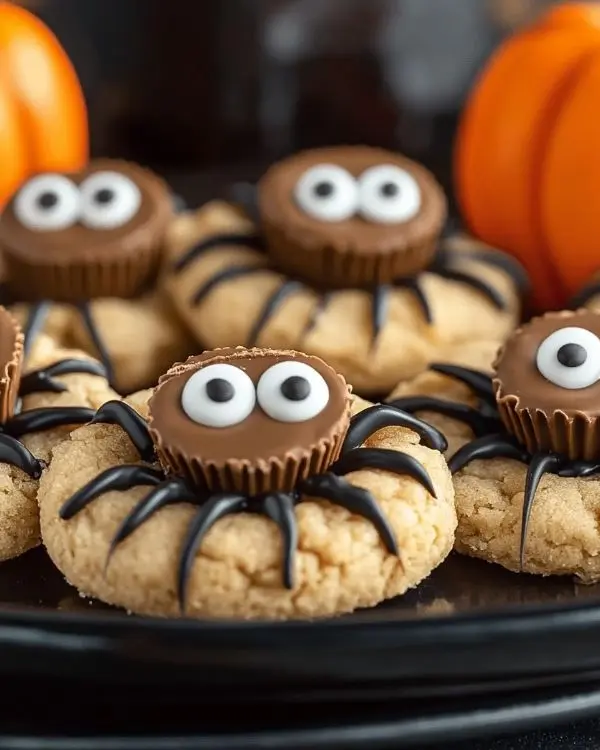
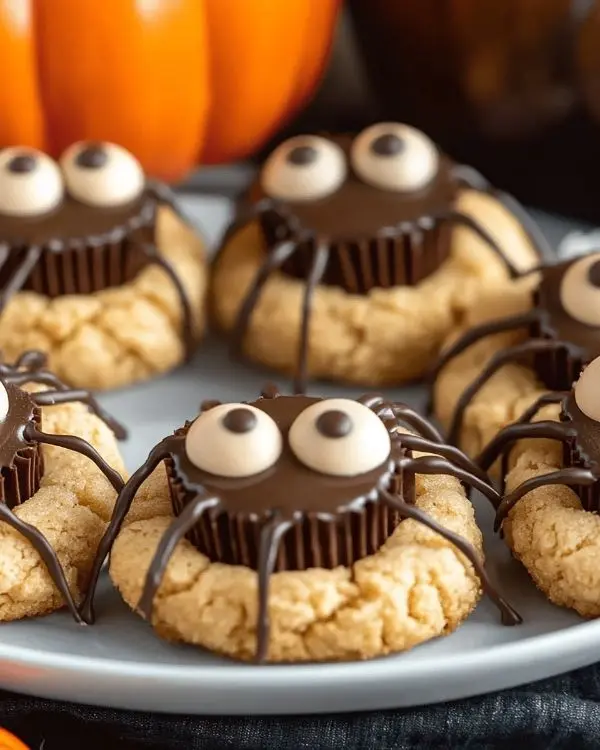
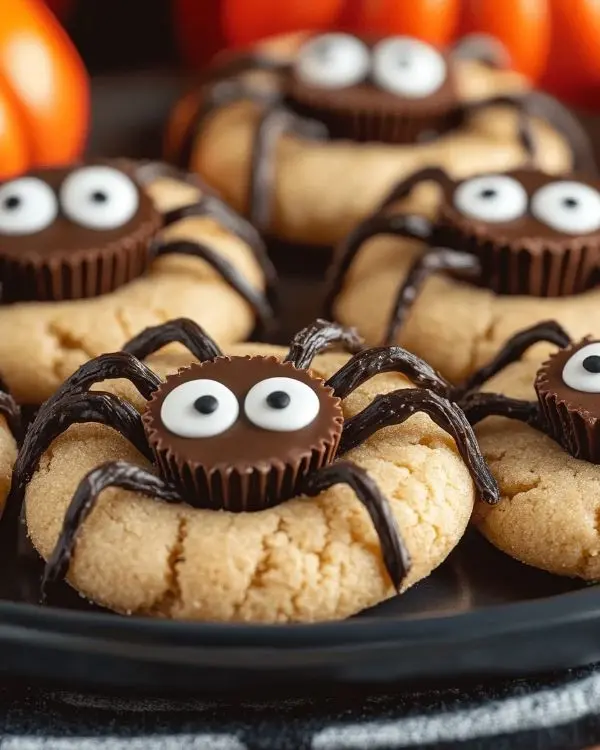
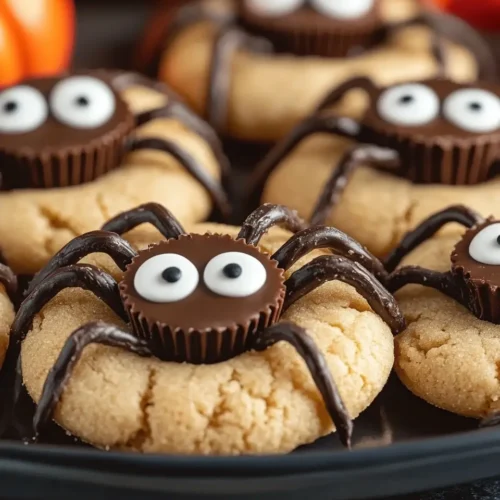
These Peanut Butter Spider Cookies transform classic soft peanut butter cookies into Halloween magic by crowning each one with a mini Reese’s cup “body” and drawing on chocolate “legs.” You’ll get 24 irresistibly cute cookies that are perfect for trick-or-treaters, classroom parties, or anyone who believes dessert should always come with a side of whimsy.
Why You’ll Love This Recipe 🌸
- These Peanut Butter Spider Cookies look fancy but take less time than picking out Halloween costumes.
- They’re made with pantry staples you probably already have (plus some mini Reese’s cups, because duh).
- Kids can totally help with the decorating part — it’s messy, giggly fun that creates memories.
- According to Food Network, baking with children builds confidence and math skills — and these spider cookies prove that learning can be absolutely delicious.
Quick Facts ⚡
Here’s the quick scoop on these Peanut Butter Spider Cookies.
- Course:Dessert
- Prep Time:15 minutes
- Cook Time:10 minutes
- Total Time:25 minutes
- Servings:24 cookies
- Difficulty:Easy
Table of Contents
Nutritional Peek
Here’s what you’re working with per cookie (because we’re all about that balanced life, even during Halloween):
| Nutrient | Amount per Cookie |
|---|---|
| Calories | 185 |
| Protein | 4g |
| Carbohydrates | 22g |
| Fat | 9g |
| Fiber | 1g |
| Sugar | 14g |
Ingredients
These Halloween Peanut Butter Eyeballs start with the dreamiest peanut butter cookie base — think soft, chewy perfection that melts in your mouth. Here’s what you’ll need to create 24 of these little cuties:
| Amount | Ingredient |
|---|---|
| ½ cup (113g) | Unsalted butter, 1 stick, room temperature |
| ½ cup (107g) | Brown sugar |
| ⅓ cup (66g) | Granulated sugar |
| ¾ cup (201g) | Creamy peanut butter (not natural — trust me on this) |
| 1 large | Egg |
| 1 tsp | Vanilla extract |
| 1½ cups (180g) | All-purpose flour |
| 1 tsp | Baking soda |
| ½ tsp | Baking powder |
| ½ tsp | Salt |
| Extra | Granulated sugar for rolling |
| 24 | Mini Reese’s Peanut Butter Cups |
| ½ cup (85g) | Semi-sweet chocolate chips for melting |
| As needed | Candy eyeballs |
Tools You’ll Actually Use
Here’s your lineup of kitchen heroes for these spider cookies:
• Large mixing bowl • Electric mixer (hand or stand mixer works great) • Small cookie scoop or tablespoon • Silicone-lined baking sheets • Microwave-safe bowl • Squeeze bottle or sandwich bag for chocolate piping • Cooling rack
So glad you tried this one! The Cookies & Brownies collection has even more recipes that are just as comforting and crowd-pleasing. Go ahead, take a look — your next favorite dish is right there.
Step-by-Step Instructions
Let’s turn these Peanut Butter Spider Cookies into Halloween reality, one adorable step at a time:
- Prep your mini stars: Unwrap about 24 mini Reese’s cups and pop them in the freezer. This little trick helps them keep their shape when they meet the warm cookies. Preheat your oven to 350°F while you’re at it.
- Create the cookie magic: In your mixing bowl, combine butter, brown sugar, and granulated sugar. Beat with an electric mixer for about a minute until it’s smooth and fluffy — like sweet, buttery clouds.
- Add the peanut butter love: Mix in the peanut butter, egg, and vanilla extract. Beat again for less than a minute. The mixture should look creamy and dreamy.
- Bring it all together: Add flour, baking soda, baking powder, and salt. Mix on low speed (or fold with a spatula) just until combined. Don’t overthink this part — overmixing leads to tough cookies, and nobody wants that.
- Shape and sugar coat: Use a small cookie scoop or tablespoon to form tablespoon-sized balls. Roll each ball between your hands to make it uniform, then roll in granulated sugar. Place them 2-3 inches apart on your lined baking sheet.
- Bake to golden perfection: Bake for 8-11 minutes until the edges start to crack and turn golden. Your kitchen should smell like peanut butter heaven right about now.
- Crown them with Reese’s: The moment they come out of the oven, gently press a frozen mini Reese’s cup into the center of each cookie. Let them cool for 15-20 minutes before moving to a cooling rack (patience, my friend — moving them too early makes the Reese’s cups sink).
- Create those spider legs: Melt chocolate chips in a microwave-safe bowl on 50% power for 3 minutes, stirring every minute until completely melted. Transfer to a squeeze bottle or sandwich bag with the corner snipped off. Draw 4 legs on each side of your cookies.
- Add the finishing touch: Use a tiny dab of melted chocolate to attach candy eyeballs to each Reese’s cup. Let the chocolate set before moving to your serving platter.
Claire’s Pro Tips & Gentle Guidance
These Halloween Nutter Butter Cookies (well, our homemade version) are pretty forgiving, but here are my little secrets for success:
The freezer trick with the Reese’s cups is non-negotiable — I learned this the hard way when my first batch had sunken candy centers that looked more sad than spooky. Room temperature butter makes all the difference for that perfect cookie texture, so plan ahead if yours is still rock-solid from the fridge.
When drawing the spider legs, don’t stress about perfection. Wonky legs actually make them look more realistic and charming. The experts at King Arthur Baking always say that homemade charm beats store-bought perfection — and these little spiders are living proof of that philosophy.
Quick Fixes for Peanut Butter Spider Cookies
Cookies spreading too much? Your butter might be too warm, or you skipped chilling the dough. Pop the shaped dough balls in the fridge for 15 minutes before baking.
Reese’s cups sinking? Make sure they’re properly frozen and press them in immediately after removing cookies from the oven. The residual heat will help them stick without completely melting.
Chocolate legs not sticking? Let your cookies cool completely before piping. Warm cookies will make the chocolate melt and run.
Eyeballs falling off? Use a tiny bit more chocolate as “glue” and let it set completely before moving the cookies.
Variations & Fun Twists
Want to put your own spin on these Peanut Butter Cup Spider Cookies? Here are some ideas that’ll make your creativity soar:
Seasonal swaps: Try mini dark chocolate peanut butter cups for a more grown-up version, or white chocolate Reese’s for “albino spiders” that are equally adorable.
Gluten-free option: Swap the all-purpose flour for a 1:1 gluten-free baking flour blend. The texture will be slightly different but still delicious.
Vegan version: Use vegan butter, flax egg (1 tbsp ground flaxseed + 3 tbsp water), and dairy-free mini peanut butter cups. Your plant-based friends will be over the moon.
Color play: Add a few drops of orange food coloring to the dough for extra Halloween vibes, or use colored candy melts instead of chocolate for rainbow spiders.
Serving, Storage & Reheating
These Halloween Peanut Butter Eyeballs are best served at room temperature when the peanut butter flavor really shines through. If you actually have leftovers (which I doubt), store them in an airtight container at room temperature for up to 5 days. The chocolate may develop a slight bloom, but the taste remains perfect.
For longer storage, freeze the cookies (without decorations) for up to 3 months. Thaw at room temperature and add your spider legs and eyes fresh — it’s like a fun little craft project all over again.
No-Waste Kitchen Magic
Got extra cookie dough? Roll it into balls and freeze them on a baking sheet, then transfer to a freezer bag. You can bake them straight from frozen (just add 1-2 extra minutes) whenever a spider cookie craving hits.
Leftover melted chocolate? Drizzle it over ice cream or use it to make chocolate bark with crushed cookies mixed in. Those candy eyeballs can decorate cupcakes, brownies, or even be stirred into vanilla ice cream for a fun surprise.
Extra Reese’s cups? As if that’s really a problem — but they’re perfect for pressing into brownies, mixing into trail mix, or “accidentally” eating while you clean up.
Easy Peanut Butter Spider Cookies FAQs
Can I freeze these Peanut Butter Spider Cookies?
Absolutely! Freeze them without decorations for up to 3 months. Add the chocolate legs and eyeballs after thawing for the best look and taste.
What if I can’t find candy eyeballs?
No worries! Use mini white chocolate chips or even small dots of white chocolate piped on, then add a tiny chocolate chip or dot of dark chocolate for pupils.
Can I make these ahead for a Halloween party?
Perfect party planning! Make the cookies up to 2 days ahead and store in airtight containers. They actually taste better after a day because the flavors meld together beautifully.
My kids want to help — what parts can they do?
Kids love rolling the dough balls in sugar, pressing in the Reese’s cups (with supervision), and definitely adding the eyeballs. Let them get messy with the fun parts while you handle the hot oven and melted chocolate.
Can I use natural peanut butter instead?
I really recommend sticking with regular creamy peanut butter for these. Natural peanut butter can make the cookies too oily and affect the texture. Save that fancy stuff for your morning toast!
Cozy Closing
There’s something magical about watching kids’ faces light up when they see these Peanut Butter Spider Cookies for the first time. They’re the perfect blend of spooky and sweet, scary and silly — just like Halloween should be.
I’d love to see your spin on these adorable spiders! Leave a note below or tag me on Instagram so we can share a sweet (and slightly spooky) moment together. Don’t forget to check out my Halloween Brains Marshmallow Rice Krispies for more creepy-cute treats, or try my Easy Caramel Apple Cheesecake Dip for a grown-up Halloween indulgence.
I’m Claire Whitmore — a dessert daydreamer from Asheville, NC. For me, baking isn’t about perfect pastries — it’s about the joy of sharing something sweet (and maybe sneaking an extra spider cookie when nobody’s looking).
Peanut Butter Spider Cookies
Equipment
- Large mixing bowl
- Electric mixer
- Small cookie scoop or tablespoon
- Silicone-lined baking sheets
- Microwave-safe bowl
- Squeeze bottle or sandwich bag
- cooling rack
Ingredients
Cookie Dough
- ½ cup (113g) Unsalted butter room temperature
- ½ cup (107g) Brown sugar
- ⅓ cup (66g) Granulated sugar
- ¾ cup (201g) Creamy peanut butter not natural
- 1 large Egg
- 1 tsp Vanilla extract
- 1 ½ cups (180g) All-purpose flour
- 1 tsp Baking soda
- ½ tsp Baking powder
- ½ tsp Salt
- Extra Granulated sugar for rolling
Decoration
- 24 Mini Reese’s Peanut Butter Cups
- ½ cup (85g) Semi-sweet chocolate chips for melting
- As needed Candy eyeballs
Instructions
- Unwrap mini Reese’s cups and freeze. Preheat oven to 350°F (175°C).
- Cream butter, brown sugar, and granulated sugar until fluffy.
- Mix in peanut butter, egg, and vanilla until smooth.
- Stir in flour, baking soda, baking powder, and salt until combined.
- Shape dough into balls, roll in sugar, and place on baking sheet.
- Bake 8-11 minutes until golden at edges.
- Press frozen Reese’s into centers immediately after baking. Cool before moving.
- Melt chocolate and pipe 8 legs per cookie.
- Attach candy eyeballs with melted chocolate. Let set before serving.