Halloween Brains Marshmallow Rice Krispies
Marshmallow Rice Krispies get a deliciously creepy makeover that’s perfect for your Halloween spread! Hey there, I’m Claire Whitmore — a pastry whisperer in Asheville, NC, where butter totally counts as self-care. This Halloween Brains recipe is proof that dessert doesn’t have to be complicated to feel special.
I’ll never forget the first time my neighbor brought these to our kids’ Halloween party. Everyone was squealing with delight (and maybe a tiny bit of disgust) at how realistic they looked. The best part? They’re easier to make than carving a pumpkin, and way less messy than fake blood everywhere.
Little Snapshot: What This Recipe Delivers
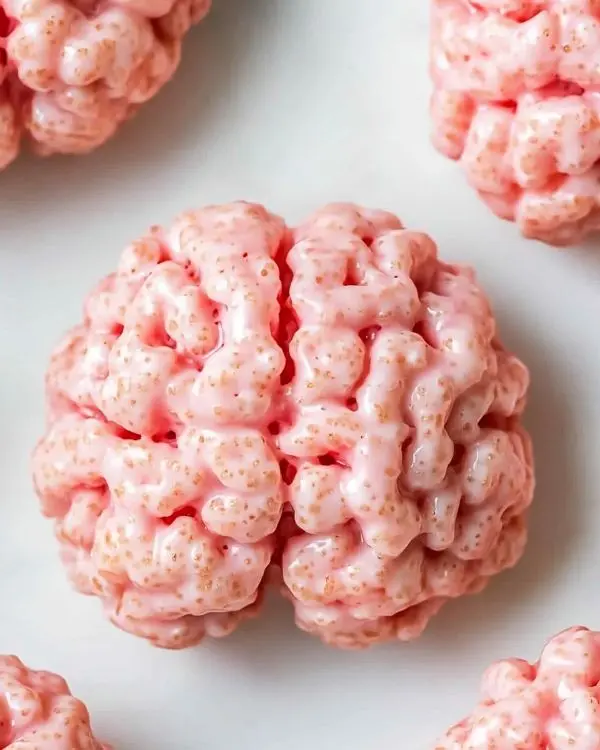
These Halloween Brains transform classic marshmallow Rice Krispies into eerily realistic brain-shaped treats that taste as good as they look spooky. Perfect for Halloween parties or anyone who loves a good food prank, they’re gooey, sweet, and guaranteed to be the conversation starter at any gathering.
Why You’ll Love This Recipe 🌸
- These Marshmallow Rice Krispies take less time than deciding what costume to wear.
- They look incredibly realistic but taste like childhood comfort food — the perfect Halloween magic trick.
- No fancy tools needed, just your hands and a little creativity (plus they’re kid-friendly to make together).
- According to Food Network, the best Halloween treats balance spooky presentation with familiar flavors — and these brains nail it perfectly.
Quick Facts ⚡
Here’s the quick scoop on this Halloween Brains recipe.
- CourseDessert/Halloween Treat
- Prep Time10 minutes
- Cook Time5 minutes
- Total Time15 minutes
- Servings14 brain treats
- DifficultyEasy
Table of Contents
Nutritional Peek
| Nutrient | Amount per serving |
|---|---|
| Calories | 145 |
| Protein | 1.2g |
| Carbs | 32g |
| Fat | 3.5g |
| Fiber | 0.2g |
| Sugar | 24g |
Ingredients
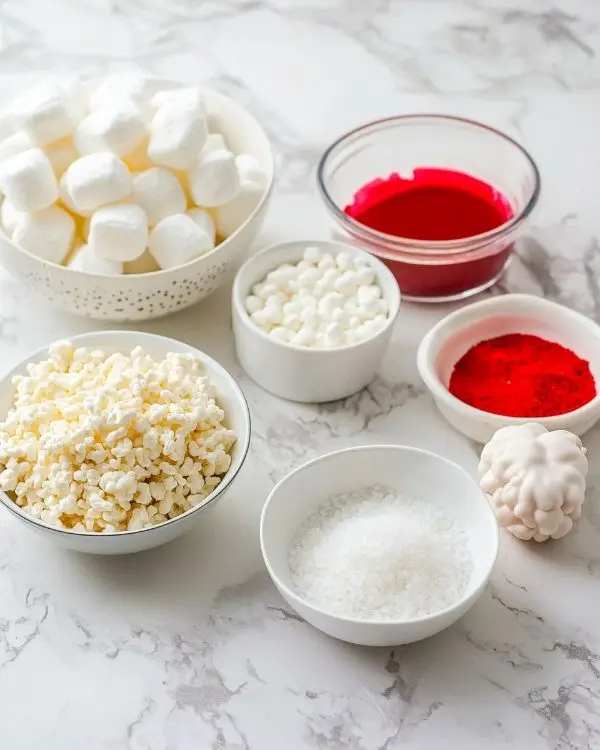
These spooky snacks for kids use simple pantry staples that you probably already have hiding in your kitchen. I love how this Party Halloween Food recipe transforms basic ingredients into something so dramatically fun!
| Amount | Ingredient |
|---|---|
| 85g | Unsalted butter (yes, real butter — margarine just doesn’t have the same magic) |
| 6 cups | Regular marshmallows (the fluffy white ones work best) |
| 4 cups | Rice Bubbles/Rice Krispies (go for the classic — trust me on this) |
| ½ tsp | Salt (brings out all those sweet flavors) |
| As needed | Red food coloring (gel works better than liquid for vibrant color) |
Tools You’ll Actually Use
- Small pot for your bain-marie
- Large heatproof bowl (glass or metal works great)
- Whisk (for getting that perfect smooth consistency)
- Large mixing bowl
- Butter knife (for creating those brain grooves)
- Toothpicks (your artistic tools for veining)
- Oven mitts or tea towel (safety first!)
Step-by-Step Instructions
Creating these Marshmallow Rice Krispies is like edible art class, but way more delicious. Here’s how to bring these spooky treats to life:
- Set up your bain-marie by adding ½ cup water to a small pot and bringing it to a gentle boil. Place your large heatproof bowl over the pot — it should sit snugly without touching the water.
- Melt into magic by adding butter and marshmallows to your bowl. Whisk continuously for 2-4 minutes until everything becomes a silky smooth paste. Your kitchen will smell like a carnival, and that’s exactly what we want!
- Add the drama by carefully removing the bowl with oven mitts (that steam is sneaky hot!). Whisk in salt and start with just one drop of red food coloring — you can always add more, but you can’t take it back.
- Create the base by placing Rice Bubbles in a large mixing bowl. Pour that gorgeous marshmallow mixture over them and mix thoroughly until every single bubble is coated. This is where kids love to help!
- Shape your masterpieces by oiling your hands (this prevents everything from sticking to you instead of staying together). Form the mixture into brain-sized ovals, then use a butter knife to create that signature center groove. Dip a toothpick in food coloring and draw squiggly veins across the surface — get creative!
Claire’s Pro Tips & Gentle Guidance
These Halloween Brains have taught me a thing or two about working with marshmallow mixtures. The key is timing — work quickly once you remove the bowl from heat, because marshmallow hardens faster than you’d think. If your mixture gets too firm while shaping, just pop the bowl back over the warm water for 30 seconds.
I learned this the hard way during my first attempt when I got distracted answering the door. Half my “brains” ended up looking more like abstract art than anything anatomical! The wonderful folks at King Arthur Baking have fantastic tips for working with marshmallow treats, and their advice about keeping everything warm while working is spot-on.
Quick Fixes for Halloween Brains
Too sticky to shape? Oil your hands more generously, or let the mixture cool for just 1-2 minutes longer before handling.
Color too pale? Add food coloring one drop at a time while the mixture is still warm — it distributes much better than trying to add it later.
Brains falling apart? Your marshmallow mixture might have cooled too much. Warm it gently over the bain-marie for 30 seconds and try again.
Veining not showing up? Use gel food coloring on your toothpick instead of liquid — it’s more concentrated and creates better definition.
Variations & Fun Twists
Want to make your Party Halloween Food even more spectacular? Try these spooky variations:
Zombie Brain Edition: Add a few drops of green food coloring along with the red for a more undead look.
Gluten-Free Ghostly: Swap regular Rice Krispies for gluten-free puffed rice — the texture stays perfectly crispy.
Mini Brain Bites: Make smaller, bite-sized versions perfect for trick-or-treaters with smaller appetites.
Bloody Brain Special: Drizzle a tiny bit of strawberry syrup on top just before serving for extra gore factor (adults love this twist!).
This recipe is just the start of something delicious. Browse the entire Halloween & Spooky Treats collection and discover all the ways you can bring more flavor to your table. Your family will thank you.
Serving, Storage & Reheating
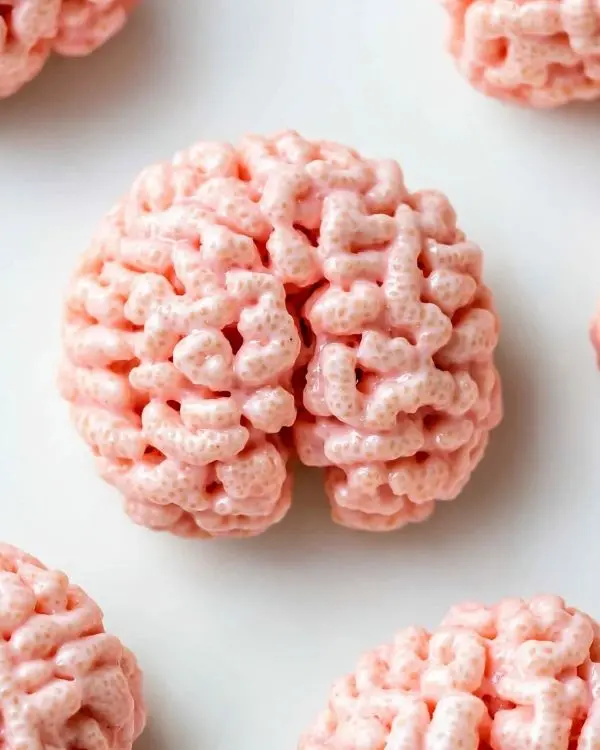
These Halloween Brains are best served at room temperature when they have that perfect chewy-crispy texture combination. If you actually have leftovers (which I doubt — they disappear faster than candy on Halloween night), store them in an airtight container for up to a week.
Pro tip: They actually taste better after sitting overnight, as all the flavors meld together beautifully. No need to reheat — they’re perfect straight from storage.
No-Waste Kitchen Magic
Got leftover marshmallows? They’re perfect for hot chocolate bombs or s’mores bars. Extra Rice Krispies make fantastic crunchy toppings for ice cream sundaes or yogurt parfaits.
If your brains don’t turn out picture-perfect, crumble them up and use as a topping for Halloween-themed cupcakes or mix into vanilla ice cream for a spooky sundae!
Halloween Brains Marshmallow Rice Krispies FAQs
Is rice crispy marshmallow halal?
Most marshmallows contain gelatin, which isn’t halal. Look for halal-certified marshmallows at your local grocery store or specialty market — they work exactly the same way in this recipe!
What is the marshmallow brain?
It’s basically a creative twist on classic Rice Krispies treats! We shape the mixture into brain-like forms and add food coloring details to create a spooky Halloween dessert that looks realistic but tastes like sweet childhood nostalgia.
What was the fourth Rice Krispies mascot?
Fun fact — after Snap, Crackle, and Pop, there was briefly a fourth mascot named Pow in the 1950s! He represented the “power” of Rice Krispies but didn’t stick around long. These brain treats would definitely make all four mascots proud!
Why do bodybuilders eat rice krispie treats?
They’re actually a popular post-workout snack because they provide quick carbs for muscle recovery and are easy to digest. Plus, they’re way more fun than plain rice cakes! Our Halloween version adds some extra sweetness to celebrate those gains.
Cozy Closing
I hope these Halloween Brains become a treasured part of your spooky season traditions! There’s something so satisfying about creating treats that make people do a double-take, then smile when they realize how delicious they taste.
I’d love to see your spin on this Marshmallow Rice Krispies recipe! Leave a note below or tag me on Instagram so we can share a sweet (and slightly spooky) moment together. Did your kids help with the veining? Did anyone actually think they were real brains for a hot second? I’m here for all the Halloween magic stories!
I’m Claire Whitmore — a dessert daydreamer from Asheville, NC. For me, baking isn’t about perfect pastries — it’s about the joy of sharing something sweet (and maybe sneaking an extra scoop of icing).
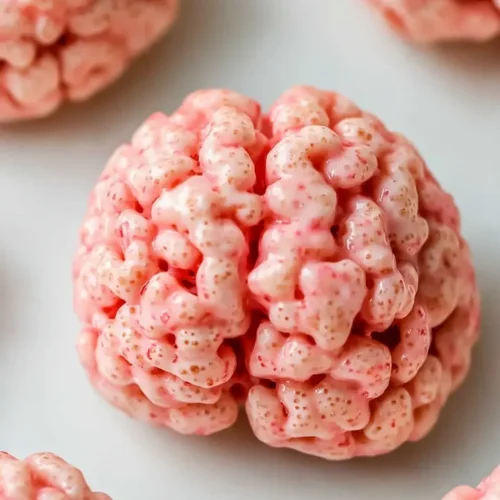
Halloween Brains Marshmallow Rice Krispies
Equipment
- Small pot
- Large heatproof bowl
- Whisk
- Large mixing bowl
- Butter knife
- Toothpicks
- Oven mitts or tea towel
Ingredients
Main
- 85 g Unsalted butter real butter preferred
- 6 cups Regular marshmallows fluffy white ones work best
- 4 cups Rice Bubbles/Rice Krispies classic version
- ½ tsp Salt enhances sweet flavors
- as needed Red food coloring gel preferred for vibrant color
Instructions
- Set up your bain-marie by adding ½ cup water to a small pot and bringing it to a gentle boil. Place your large heatproof bowl over the pot.
- Add butter and marshmallows to the bowl. Whisk continuously for 2-4 minutes until smooth and melted.
- Remove the bowl carefully with oven mitts. Whisk in salt and a drop of red food coloring, adjusting color as needed.
- In a large mixing bowl, combine Rice Krispies with the marshmallow mixture until evenly coated.
- Oil your hands and form the mixture into oval brain shapes. Use a butter knife to create grooves and a toothpick dipped in food coloring to add veins.