Easy Mini Fruit Tarts
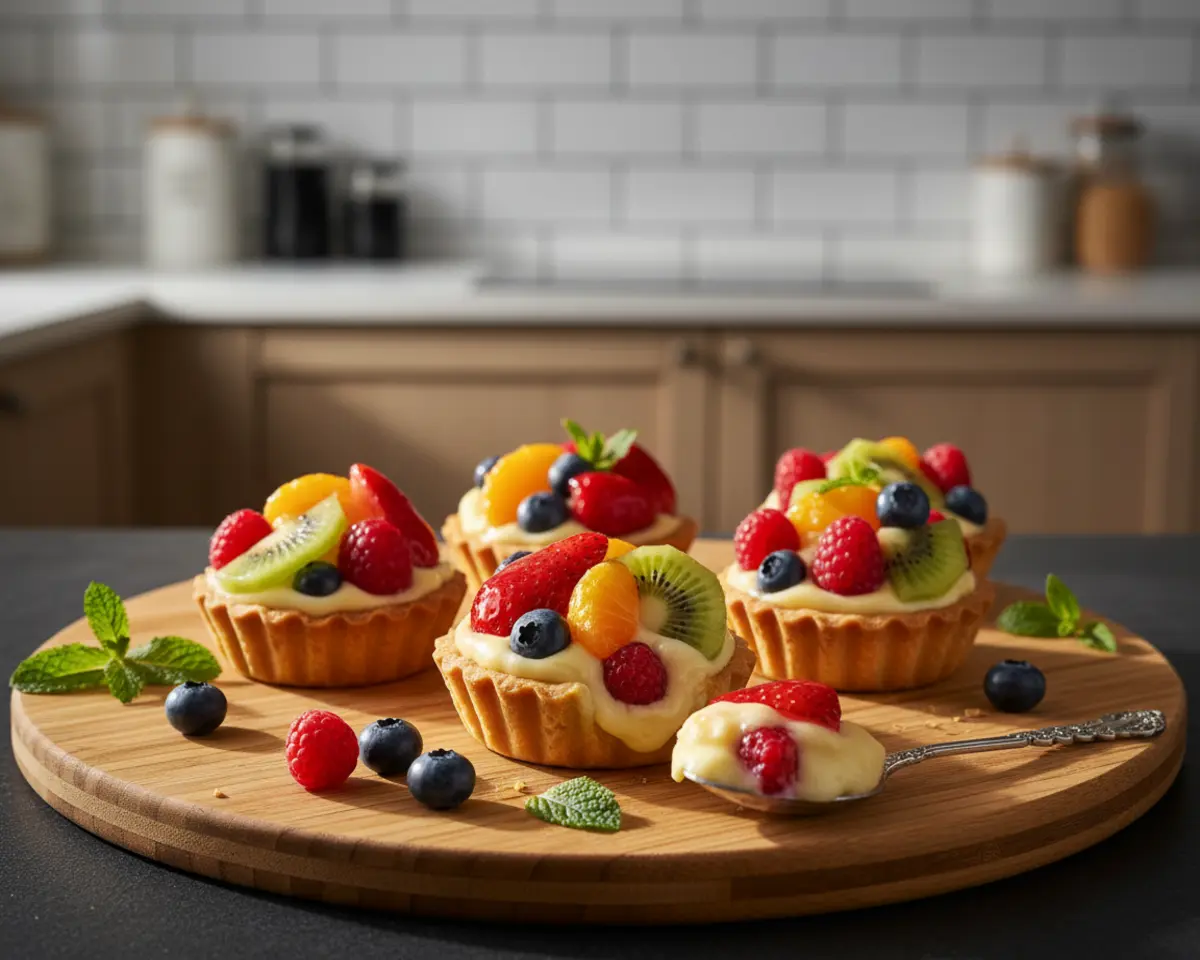
These Mini Fruit Tarts are adorable individual desserts filled with creamy, dreamy filling and topped with vibrant fresh fruit. Perfect for parties, showers, or any time you need a sweet bite that looks like you spent hours (but didn’t). With a buttery crust, luscious cream cheese whipped filling, and colorful fruit, these easy fruit tarts are pure joy on a plate.
I’m Claire Whitmore, a pastry daydreamer from Asheville, NC, and Mini Fruit Tarts are my love language when I need something that feels fancy without the fuss. These fruit tartlets recipe gems bring together buttery crusts, silky cream cheese filling, and jewel-toned berries in the most charming little packages.
Last spring, I made these for my neighbor’s baby shower, and I swear every single tray disappeared before the games even started. One guest told me she loved how each mini dessert tarts felt like a tiny edible bouquet. That’s exactly the magic I want you to feel when you make these—like you’re creating something beautiful, delicious, and totally doable on a weeknight.
Table of Contents
Quick Overview
This is the kind of recipe that makes you want to cook everything in sight. Lucky for you, the Classic Comfort Foods collection is full of exactly that. Go explore and find your new go-to dish.
Little Snapshot: What This Recipe Delivers
Mini Fruit Tarts combine buttery pastry shells, luscious cream cheese whipped filling, and fresh colorful fruit into individual servings that are perfect for any celebration. They’re easy to assemble, endlessly customizable, and look absolutely stunning on any dessert table.
Why You’ll Love This Recipe 🌸
- This fruit tartlets recipe takes less time than folding laundry and looks like it came from a French patisserie.
- You can customize each mini tart with whatever fruit your kids (or you!) love most—no two have to be the same.
- They’re individual servings, so no slicing, no mess, and everyone gets their own perfect little dessert.
- According to Healthline, cream cheese adds calcium and vitamin A to your diet — and this recipe proves exactly why indulging can feel a little less guilty.
Quick Facts ⚡
Here’s the quick scoop on this Mini Fruit Tarts recipe.
- CourseDessert
- Prep Time20 minutes
- Cook Time12 minutes
- Total Time1 hour 2 minutes
- Servings12 mini tarts
- DifficultyEasy
Nutritional Peek
| Nutrient | Amount per serving |
|---|---|
| Calories | 195 kcal |
| Protein | 2g |
| Carbohydrates | 16g |
| Fat | 14g |
| Fiber | 1g |
| Sugar | 8g |
What You’ll Need
You probably have most of these tools hanging out in your kitchen already. Here’s what makes assembling these individual fruit tarts a total breeze.
- Mini tart pans or muffin tin
- Rolling pin (if using homemade dough)
- Round cookie cutter or drinking glass (3-inch diameter)
- Fork (for pricking dough)
- Wire cooling rack
- Medium mixing bowls
- Electric hand mixer or stand mixer
- Rubber spatula
- Piping bag or spoon
- Small saucepan (for optional glaze)
- Pastry brush
Ingredients
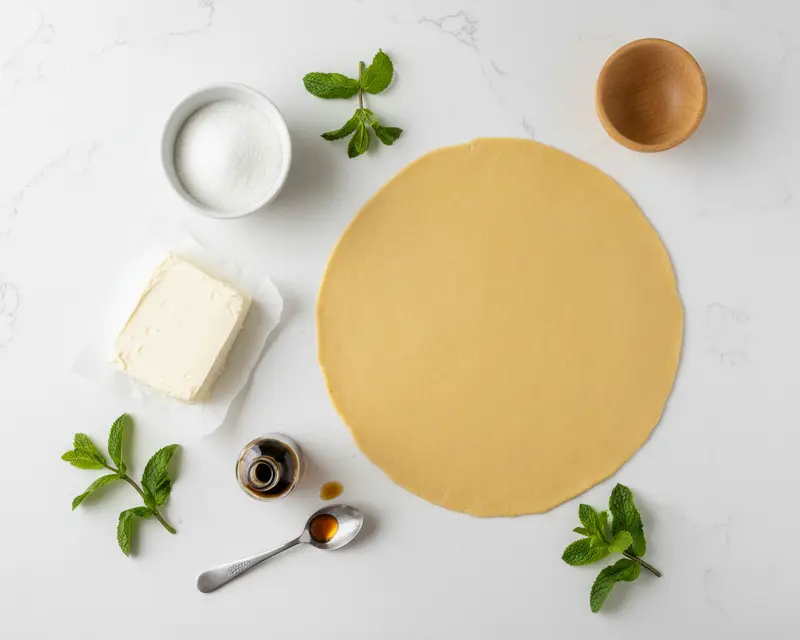
This fruit tartlets recipe is all about balancing buttery pastry, silky filling, and juicy fruit in perfect harmony. The cream cheese filling is tangy and light, while fresh berries, kiwi, and citrus bring natural sweetness and gorgeous pops of color. You can mix and match fruit based on what’s in season or what your family loves most.
| Group | Ingredient | Amount | Notes |
|---|---|---|---|
| Crust | Pre-made pie crust (or homemade) | 1 crust | Store-bought saves time; homemade adds charm |
| Filling | Cream cheese, softened | 8 ounces | Must be room temp for silky texture |
| Filling | Granulated sugar | 1/4 cup | Sweetens the cream cheese base |
| Filling | Vanilla extract | 1 teaspoon | Pure vanilla is best |
| Filling | Heavy cream | 1 cup | Whips into fluffy clouds |
| Topping | Assorted fresh fruit | 2-3 cups | Strawberries, blueberries, raspberries, kiwi, grapes, mandarin oranges |
| Glaze (optional) | Apricot jam | 2 tablespoons | Adds bakery shine |
Step-by-Step Instructions
Let’s make this happen. These Mini Fruit Tarts come together in easy stages—bake the shells, whip the filling, top with fruit, and chill. You’ll feel like a pastry chef by the time you’re done, I promise.
Preheat and Prep Your Dough
Preheat your oven to 375°F (190°C). If you’re using a pre-made pie crust, unroll it gently onto a clean work surface. If you’re working with homemade dough, lightly flour your counter and roll it out to about 1/8-inch thickness. Either way, you want a smooth, even layer ready to cut.
Cut and Press into Tart Pans
Use a round cookie cutter or the rim of a drinking glass (about 3 inches across) to cut circles from your pie crust. Press each circle gently into your mini tart pans, making sure the dough fits snugly against the bottom and sides. If you don’t have tart pans, a muffin tin works beautifully—just press the dough into each cup and trim any overhang.
Prick and Bake the Shells
Use a fork to prick the bottom of each crust a few times—this prevents puffing during baking. Slide the tart pans into your preheated oven and bake for 10 to 12 minutes, or until the crusts turn a lovely golden brown. Let them cool completely on a wire rack before filling. Patience here pays off with crisp, sturdy shells.
Make the Cream Cheese Filling
In a medium bowl, beat the softened cream cheese, granulated sugar, and vanilla extract with an electric mixer until the mixture is smooth, creamy, and lump-free. This should take about 2 minutes on medium speed. The filling should look glossy and inviting.
Whip the Heavy Cream
In a separate clean bowl, whip the heavy cream on high speed until stiff peaks form—this means the cream holds its shape when you lift the beaters. It usually takes 3 to 4 minutes. Don’t overbeat, or you’ll end up with butter instead of fluffy clouds.
Fold the Whipped Cream into Cream Cheese
Gently fold the whipped cream into the cream cheese mixture using a rubber spatula. Use a sweeping motion, lifting from the bottom and folding over the top, until everything is combined and airy. This keeps the filling light and dreamy instead of dense.
Fill the Cooled Tart Shells
Spoon or pipe the cream cheese filling into each cooled tart shell, filling them almost to the top. I like using a piping bag for a neat look, but a spoon works perfectly fine if you’re keeping it casual. Either way, you want a generous dollop in each shell.
Arrange Fresh Fruit on Top
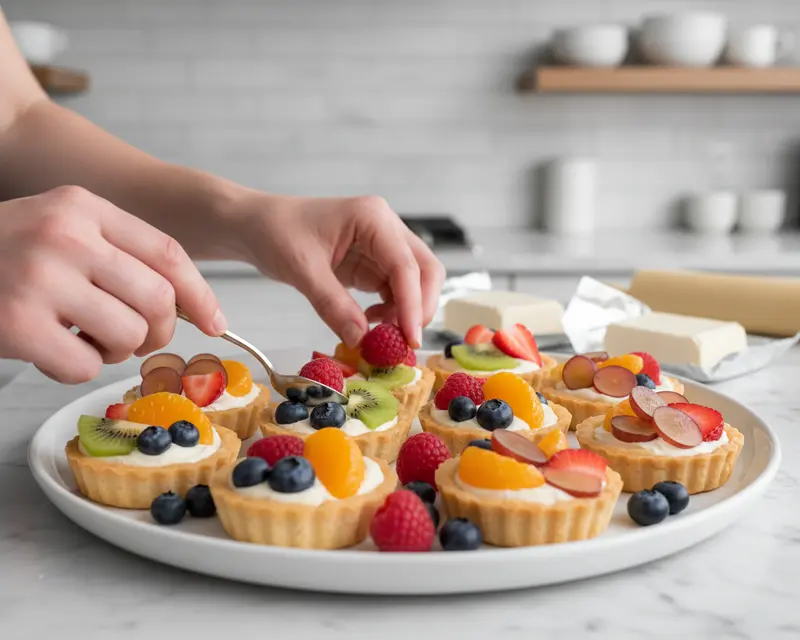
Now comes the fun part—decorating! Arrange your assorted fresh fruit on top of the cream cheese filling in whatever pattern makes you happy. I love starting with a sliced strawberry in the center, then adding blueberries, raspberries, kiwi slices, and grapes around the edges. Let your inner artist shine.
Prepare Optional Apricot Glaze
If you want that glossy bakery finish, heat the apricot jam with a tablespoon of water in a small saucepan over low heat until melted and smooth. Strain it if you want a perfectly clear glaze (I usually skip this step). Use a pastry brush to gently brush the warm glaze over the fruit. It adds shine and a subtle sweetness.
Chill Before Serving
Pop the filled mini dessert tarts into the fridge and chill for at least 30 minutes before serving. This sets the filling and makes the tarts easier to handle. They’re best served cold, with the fruit still crisp and the filling firm but creamy.
Expert Tips
These easy fruit tarts are forgiving and flexible, but a few little tricks will make them even more stunning. I’ve learned these through plenty of trial, error, and joyful taste-testing in my Asheville kitchen.
Use Room Temperature Cream Cheese
Cold cream cheese will give you lumps no matter how long you beat it. Let it sit on the counter for 30 to 45 minutes before you start, and you’ll get a silky, smooth filling that’s absolutely dreamy. If you’re in a hurry, microwave it for 10 seconds at a time, but watch carefully so it doesn’t melt.
Don’t Skip the Crust Pricking Step
Pricking the dough with a fork before baking releases steam and keeps the bottoms flat and even. Without this step, you’ll end up with puffed-up crusts that don’t leave much room for filling. It takes five seconds and makes a huge difference.
Whip the Cream Just to Stiff Peaks
Stiff peaks mean the cream holds its shape when you lift the beaters, but it’s still glossy and smooth. Overwhipped cream turns grainy and buttery, which isn’t what you want in this filling. Stop as soon as you see those peaks standing tall.
Fold, Don’t Stir, the Whipped Cream
Stirring deflates all the air you just whipped into the cream. Folding gently preserves that fluffy texture and keeps the filling light. Use a rubber spatula and take your time with broad, sweeping motions from the bottom up.
Pat Fruit Dry Before Arranging
Wet berries can make your filling watery and dilute that beautiful cream cheese flavor. After washing your fruit, lay it on a clean kitchen towel and pat it completely dry. This keeps everything crisp and gorgeous. According to Epicurious, properly dried berries also last longer and taste better.
Customize Fruit to the Season
Use whatever fruit is fresh and beautiful at the market. In summer, think berries and peaches. In fall, try figs and pomegranate seeds. In winter, citrus segments and kiwi shine. Fresh, seasonal fruit always tastes better and costs less.
Chill Before Transporting
If you’re taking these to a party or potluck, chill them for at least an hour so the filling firms up. They travel much better when they’re cold and set. I like to arrange them in a single layer in a shallow container with a lid.
Variations
Once you’ve mastered the basic fruit tartlets recipe, it’s so fun to play around with flavors and toppings. Here are some of my favorite twists that keep things interesting.
Lemon Cream Cheese Filling
Add the zest of one lemon and a tablespoon of fresh lemon juice to the cream cheese mixture for a bright, citrusy filling. It pairs beautifully with blueberries, raspberries, and blackberries. This variation is especially refreshing in the summer.
Chocolate Ganache Base
Skip the cream cheese filling and spread a thin layer of chocolate ganache (equal parts heavy cream and chopped dark chocolate, melted together) in the bottom of each tart shell. Top with strawberries or raspberries for a decadent twist.
Mascarpone Instead of Cream Cheese
Swap the cream cheese for mascarpone cheese for an even richer, slightly sweeter filling. Mascarpone is smoother and less tangy, giving the tarts a luxurious Italian flair. It’s lovely with figs, berries, or sliced peaches.
Graham Cracker Crust
Use a graham cracker crust instead of pie dough for a no-bake version. Mix 1 1/2 cups graham cracker crumbs with 1/4 cup melted butter and 2 tablespoons sugar, press into tart pans, and chill. Fill and top as directed.
Tropical Fruit Tarts
Top your tarts with diced mango, pineapple, kiwi, and passionfruit for a sunny, island-inspired version. A coconut whipped cream filling (swap heavy cream for coconut cream) makes this variation extra special.
Berry Compote Topping
Instead of fresh fruit, top each tart with a spoonful of homemade berry compote. Simmer mixed berries with a little sugar and lemon juice until thick and jammy. It’s gorgeous, delicious, and a great way to use up overripe fruit.
Troubleshooting
Even the easiest recipes can throw a little curveball now and then. Here’s how to handle the most common hiccups with these mini dessert tarts so you can troubleshoot like a pro.
Problem: Tart Shells Puff Up During Baking
If your crusts puffed up like little balloons, you likely forgot to prick them with a fork before baking. Steam gets trapped under the dough and lifts it. Next time, poke the bottoms several times before they go in the oven. If it happens, just gently press the puffed part down with the back of a spoon while the shells are still warm.
Problem: Cream Cheese Filling Is Lumpy
Lumpy filling usually means your cream cheese was too cold when you started mixing. Let it sit at room temperature for at least 30 minutes before beating, and make sure you beat it long enough to get it completely smooth before adding anything else. If you’re already mid-recipe, try microwaving the mixture for 10 seconds and beating again.
Problem: Whipped Cream Won’t Hold Peaks
If your whipped cream stayed soupy, your heavy cream might not have been cold enough, or your bowl and beaters weren’t chilled. Pop the bowl and beaters in the freezer for 10 minutes, then try again with fresh, very cold heavy cream. Make sure you’re using heavy cream, not half-and-half or whipping cream.
Problem: Filling Is Too Runny
A runny filling usually means the whipped cream was underwhipped or the cream cheese mixture was too warm. Make sure the whipped cream reaches stiff peaks before folding, and that your cream cheese mixture is cool (not warm). Chill the filled tarts for at least an hour to help the filling firm up.
Problem: Fruit Makes the Filling Watery
Wet fruit releases moisture and dilutes the filling. Always wash your fruit first, then pat it completely dry with a clean kitchen towel before arranging it on the tarts. If you’re using juicy fruit like oranges or watermelon, let them drain on paper towels for a few minutes first.
Problem: Tart Shells Are Too Hard
Overbaking makes crusts tough and dry. Keep a close eye on them and pull them out as soon as they turn golden brown, usually around 10 to 12 minutes. Every oven is different, so start checking at 10 minutes. If your crusts are already too hard, brush them lightly with milk before baking next time to keep them tender.
Storage & Reheating
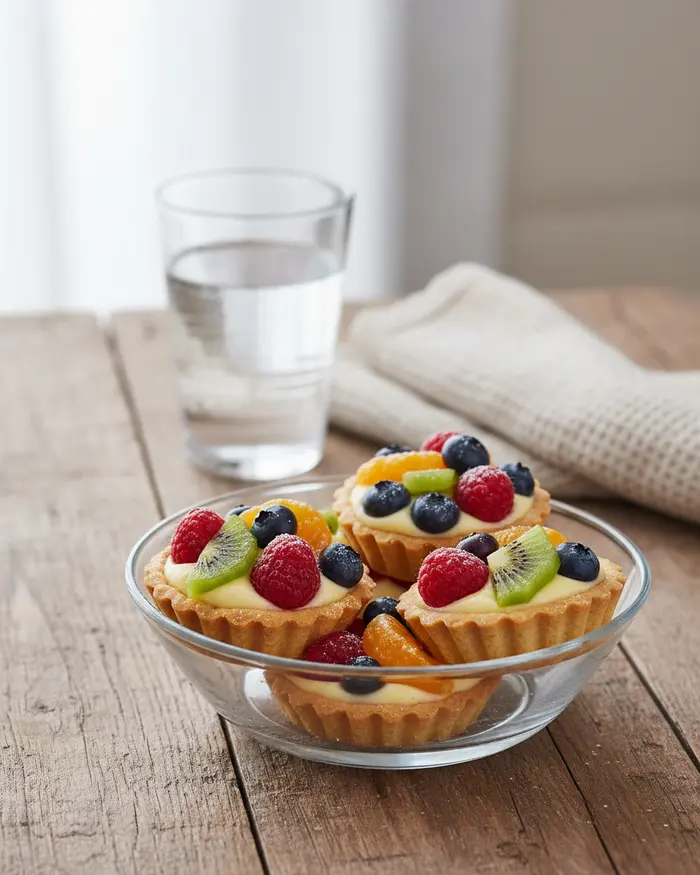
These individual fruit tarts are best enjoyed fresh, but with proper storage, you can make them a day ahead and still have them taste amazing. Here’s how to keep them looking and tasting bakery-fresh.
Serving Suggestions
Serve these mini tarts chilled, straight from the fridge, for the best texture and flavor. They’re perfect on their own, but a dollop of extra whipped cream, a drizzle of honey, or a light dusting of powdered sugar makes them even more special. I love pairing them with a pot of hot tea or a glass of sparkling lemonade for an elegant afternoon treat.
Storage
Store assembled tarts in an airtight container in the refrigerator for up to 2 days. If you need to stack them, place a sheet of parchment paper between layers to protect the fruit. The cream cheese filling holds up beautifully, but the fruit may start to soften and release juice after a day or two, so enjoy them sooner rather than later.
Reheating
These are meant to be served cold, so there’s no reheating needed. If you stored them in the fridge and the crust softened slightly, you can pop them back in a 300°F oven for 3 to 5 minutes to crisp up the shells—just do this before adding the filling and fruit. Once filled, keep them chilled.
| Storage Method | Duration | Notes |
|---|---|---|
| Refrigerator (assembled) | Up to 2 days | Store in airtight container; fruit may soften after 1 day |
| Refrigerator (shells only) | Up to 5 days | Store unfilled shells in airtight container; fill just before serving |
| Freezer (shells only) | Up to 2 months | Wrap shells individually; thaw at room temp before filling |
| Refrigerator (filling only) | Up to 3 days | Store in airtight container; stir gently before using |
No-Waste Kitchen Ideas
I hate wasting food, and these mini fruit tarts offer plenty of creative ways to use up every last bit. Here’s how to keep your kitchen eco-friendly and delicious.
Use Leftover Pie Crust Scraps
Don’t toss those dough scraps! Roll them out, sprinkle with cinnamon sugar, cut into strips, and bake until crispy. They make wonderful snacks or toppers for yogurt parfaits. You can also freeze the scraps and use them later for a small hand pie or decorative lattice.
Save Overripe Fruit for Compote
If your berries are getting too soft for fresh topping, simmer them with a little sugar and lemon juice to make a quick compote. Spoon it over yogurt parfait cups, pancakes, or even these tarts for a jammy twist.
Freeze Extra Cream Cheese Filling
If you have leftover filling, spoon it into an airtight container and freeze for up to a month. Thaw it in the fridge overnight and give it a quick stir before using. It’s perfect for filling crepes, spreading on bagels, or topping berry popsicles.
Turn Leftover Tarts into Trifle
If you have a few tarts that didn’t get eaten, crumble them into a trifle dish and layer with extra whipped cream, fresh fruit, and a drizzle of fruit sauce. It’s a gorgeous, no-waste dessert that feels totally different from the original.
Make Fruit Infused Water
Any leftover fruit slices that didn’t make it onto the tarts can go straight into a pitcher of ice water for a refreshing infused drink. Strawberries, kiwi, and citrus make especially delicious combinations.
Compost Fruit Peels and Scraps
Kiwi skins, strawberry tops, and citrus peels are perfect for your compost bin. If you don’t compost yet, this is a great excuse to start. Your garden will thank you, and you’ll feel good about closing the loop.
Frequently Asked Questions
Here are answers to the questions I hear most often about making these mini fruit tarts. If you have more, drop them in the comments—I love helping!
How long can mini fruit tarts be stored?
Mini fruit tarts are best consumed within 1-2 days when stored in the refrigerator in an airtight container. The pastry may become soggy if stored longer due to moisture from the fruit and cream filling.
Can I make mini fruit tarts ahead of time?
Yes, you can prepare components ahead of time. Bake the tart shells up to 2 days in advance and store them in an airtight container. Prepare the pastry cream and assemble the tarts with fresh fruit no more than 4-6 hours before serving for best results.
What types of fruit work best for mini fruit tarts?
Berries such as strawberries, blueberries, raspberries, and blackberries work excellently. Other good options include kiwi, mandarin oranges, grapes, and fresh figs. Choose firm, ripe fruits that hold their shape and are not overly juicy.
What kind of cream filling is used in mini fruit tarts?
The most common filling is pastry cream, which is a thick custard made from milk, eggs, sugar, and cornstarch. Other popular options include vanilla custard, whipped cream, cream cheese filling, or lemon curd.
Do I need special pans to make mini fruit tarts?
Mini tart pans or muffin tins work well for making mini fruit tarts. You can use individual fluted tart pans, typically 3-4 inches in diameter, or a standard muffin tin. Removable bottom pans make it easier to release the finished tarts.
Final Dish
These Mini Fruit Tarts are everything I love about baking—beautiful, delicious, and way easier than they look. Whether you’re making them for a party, a special brunch, or just because you deserve something sweet, they’re guaranteed to make you smile. The buttery crust, creamy filling, and jewel-toned fruit come together in perfect harmony, and every bite feels like a little celebration.
I’d love to see your Mini Fruit Tarts! Tag me on Instagram or drop a photo in the comments below. Tell me which fruit combo you loved most, or if you tried any fun variations. And if you’re looking for more easy, gorgeous desserts, check out my no-bake strawberry cheesecake cups or this stunning watermelon pizza dessert—both are total showstoppers.
I’m Claire Whitmore — a dessert daydreamer from Asheville, NC. For me, baking isn’t about perfect pastries — it’s about the joy of sharing something sweet (and maybe sneaking an extra scoop of icing).
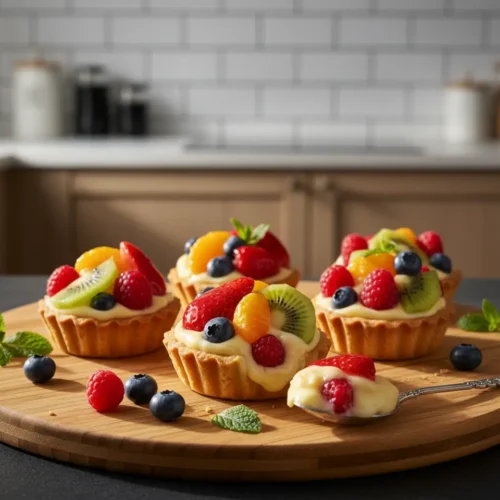
Mini Fruit Tarts
Ingredients
- 1 pre-made pie crust or homemade pie crust dough
- 8 ounces cream cheese softened
- ¼ cup granulated sugar
- 1 teaspoon vanilla extract
- 1 cup heavy cream
- Assorted fresh fruit strawberries, blueberries, raspberries, kiwi, mandarin oranges, grapes, etc.
- 2 tablespoons apricot jam optional, for glaze
Instructions
- Preheat oven to 375°F (190°C). If using a pre-made pie crust, unroll it. If using dough, roll it out.
- Cut out circles from the pie crust using a round cookie cutter or the rim of a glass, slightly larger than your mini tart pans. Press the circles into mini tart pans.
- Prick the bottoms of the crusts with a fork. Bake for 10-12 minutes, or until golden brown. Let cool completely on a wire rack.
- In a medium bowl, beat the softened cream cheese, granulated sugar, and vanilla extract until smooth and creamy.
- In a separate bowl, whip the heavy cream until stiff peaks form. Gently fold the whipped cream into the cream cheese mixture.
- Spoon or pipe the cream cheese filling into the cooled tart shells.
- Arrange assorted fresh fruit decoratively on top of the cream cheese filling.
- (Optional glaze): In a small saucepan, gently heat the apricot jam with a tablespoon of water until melted and smooth. Strain if desired. Brush the warm glaze over the fruit for a shiny finish.
- Chill the mini fruit tarts for at least 30 minutes before serving.