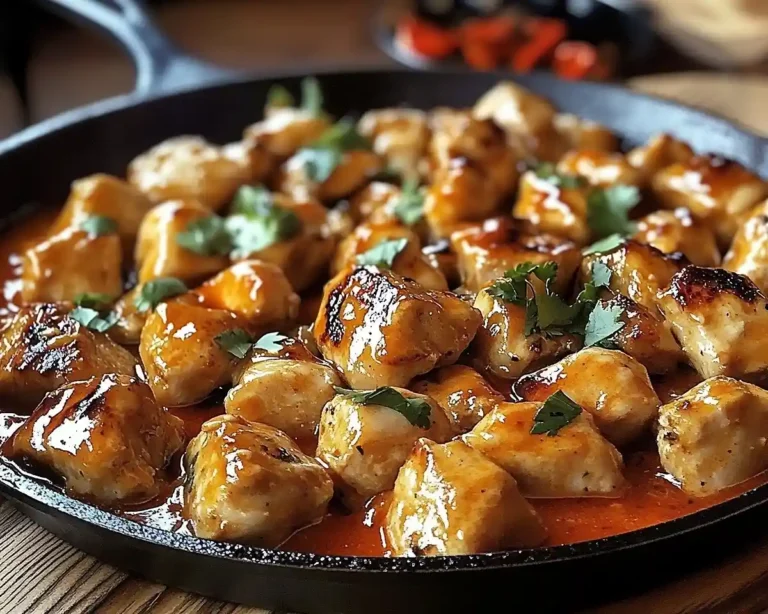
Cheesy Garlic Chicken Wraps
These Cheesy Garlic Chicken Wraps are the kind of weeknight dinner that makes you feel like you totally have your life together — golden, crispy on the outside, melty and garlicky on the inside, and ready in under 30 minutes.
I’m Linda Sandra, a Charleston home cook who believes comfort food doesn’t have to mean complicated food. And this recipe? It’s my weeknight secret weapon.
These wraps check every box: they’re high in protein, low in carbs, and packed with real-food ingredients. We’re talking tender shredded chicken, two kinds of cheese, cream cheese, fresh garlic, and a handful of spinach — all hugged tight in a golden low-carb tortilla. It’s the kind of clean chicken recipe that feels indulgent without the guilt trip afterward.
Table of Contents
What Are Cheesy Garlic Chicken Wraps?
Cheesy Garlic Chicken Wraps are a quick, high-protein, low-carb dinner made with shredded chicken breast (or rotisserie), mozzarella, cheddar, cream cheese, and minced garlic folded into a low-carb tortilla and pan-seared until golden and crispy.
Ready in under 30 minutes, easy enough for beginners, and satisfying enough for the whole family — this is your new go-to for easy meal prep low calorie eating that never feels like diet food.
Why You’ll Love This Recipe 🌸
- This Cheesy Garlic Chicken Wrap comes together in under 30 minutes — faster than waiting for delivery and way more satisfying.
- It’s the perfect clean chicken recipe that actually tastes like comfort food, not diet food — golden, crispy, and packed with gooey melted cheese.
- It works beautifully for easy meal prep low calorie lunches: make a batch, slice, wrap, and refrigerate for the week ahead.
- According to Healthline’s guide to building balanced meals, pairing lean protein with fiber-rich greens is one of the simplest ways to stay full without overeating — and these wraps do exactly that.
Quick Facts ⚡
Here’s the quick scoop on this Cheesy Garlic Chicken Wrap.
- CourseMain Dish
- Prep Time10 minutes
- Cook Time10 minutes
- Total Time20 minutes
- Servings4 wraps
- DifficultyEasy
Nutritional Peek
Here’s an approximate breakdown per serving (1 wrap) — keeping it real without making you feel like you’re doing math homework.
| Nutrient | Amount Per Serving |
|---|---|
| Calories | ~390 kcal |
| Protein | ~34g |
| Total Carbohydrates | ~10g |
| Total Fat | ~22g |
| Saturated Fat | ~10g |
| Fiber | ~4g |
| Sugar | ~1g |
Nutritional values are estimates based on standard ingredients. They may vary depending on your specific brands and add-ins.
Ingredients for Cheesy Garlic Chicken Wraps
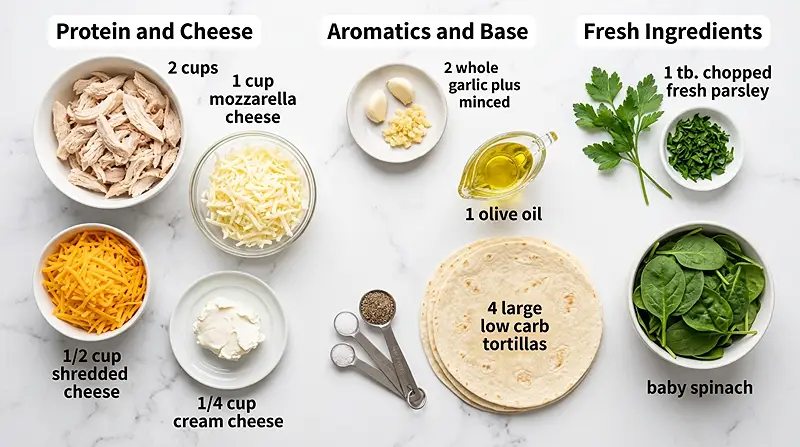
For the clean chicken recipe filling — shredded chicken breast, two kinds of melty cheese, and cream cheese — you’ll want everything at room temperature so it blends smoothly and coats every bite evenly.
For the flavor base — minced garlic, parsley, olive oil, salt, and pepper — fresh is always better here. And if you’re adding spinach (please do, it’s amazing), just toss it in raw and let the heat do the rest.
| Amount | Ingredient |
|---|---|
| 2 cups | Cooked chicken breast, shredded (rotisserie works great!) |
| 1 cup | Shredded mozzarella cheese |
| 1/2 cup | Shredded cheddar cheese |
| 2 cloves | Garlic, minced |
| 1/4 cup | Cream cheese, softened |
| 1 tablespoon | Olive oil |
| 4 large | Low-carb tortillas or wraps |
| 1 tablespoon | Fresh parsley, chopped |
| To taste | Salt and pepper |
| 1 handful | Baby spinach (optional, but so worth it) |
Tools You’ll Actually Use
- Large skillet or grill pan
- Mixing bowl (medium or large)
- Spatula or tongs
- Microwave-safe plate + damp paper towel (for warming tortillas)
- Sharp knife + cutting board
- Measuring cups and spoons
How to Make Cheesy Garlic Chicken Wraps: Step-by-Step
Let’s get into it — these Cheesy Garlic Chicken Wraps come together so fast, you’ll want to bookmark this recipe for every busy weeknight ever.

Step 1: Heat your skillet and warm your tortillas.
Preheat a large skillet or grill pan over medium heat and add 1 tablespoon of olive oil. While the pan heats up, wrap your 4 large low-carb tortillas in a damp paper towel and microwave for 10–15 seconds. This keeps them pliable so they don’t crack when you roll them — trust me, this little step makes a big difference.
Step 2: Mix the cheesy garlic chicken filling.
In a medium mixing bowl, combine 2 cups shredded cooked chicken breast, 1 cup mozzarella, 1/2 cup cheddar, 1/4 cup softened cream cheese, 2 cloves minced garlic, 1 tablespoon chopped fresh parsley, and salt and pepper to taste. If you’re adding a handful of baby spinach, toss it in now.
Mix everything together until the cream cheese coats the chicken and cheese mixture evenly — it should look rich, creamy, and absolutely irresistible.
Step 3: Fill and roll the wraps.
Divide the chicken mixture evenly between the 4 warmed low-carb tortillas, placing about 1/2 cup of filling in the center of each one. Fold in the sides first, then roll the tortilla up tightly from the bottom — like a burrito — tucking everything in snugly so the filling doesn’t escape during cooking.
Step 4: Pan-sear until golden and crispy.
Place each wrap seam-side down in your preheated, olive-oiled skillet. Cook for 2–3 minutes per side without moving them — resist the urge to peek! You want that beautiful golden-brown crust to form. When the cheese is starting to ooze out the edges and the wrap smells absolutely amazing, you’re right on track.
Step 5: Slice, garnish, and serve.
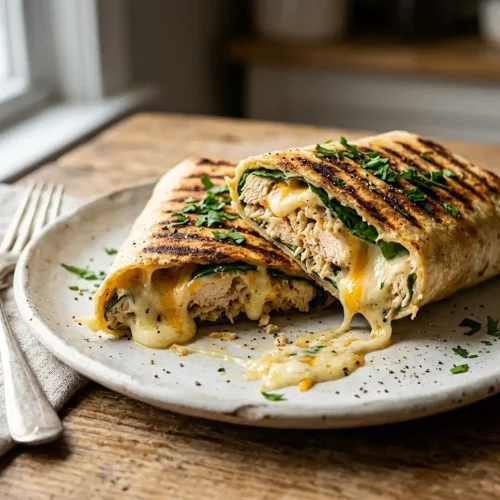
Remove the wraps from the skillet and let them rest for just a minute before slicing each one in half diagonally. Garnish with extra fresh parsley if you like a little pop of green. Serve immediately while they’re hot, golden, and gooey. Enjoy every single bite.
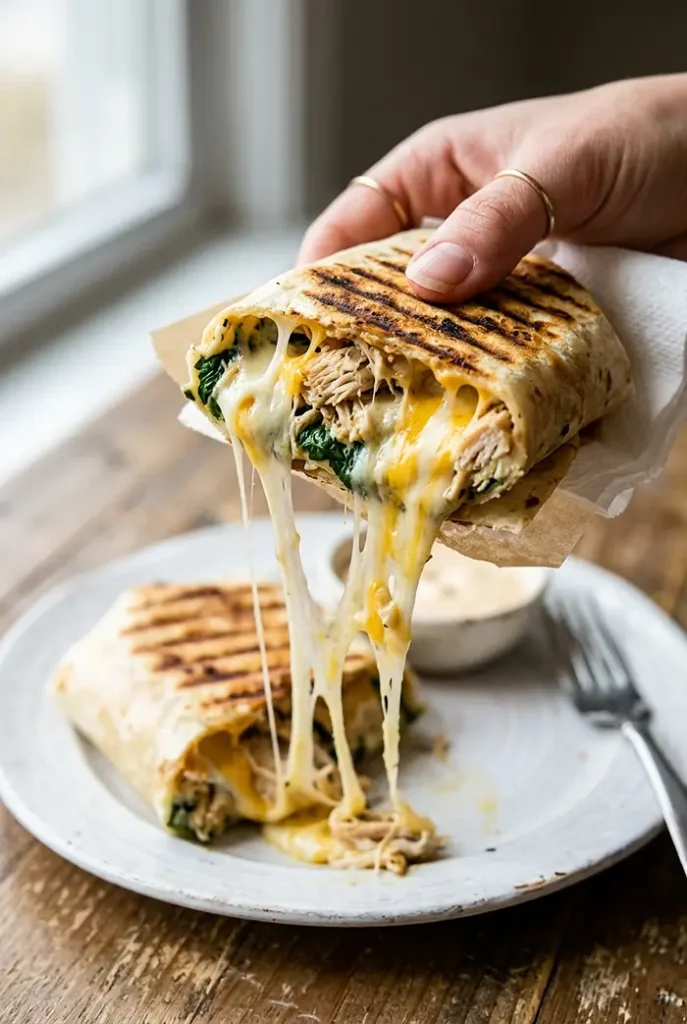
Pro Tips for the Best Clean Chicken Wraps
These clean chicken recipes healthy tips will take your wraps from “pretty good” to “wait, can I have another one?” Let’s set you up for success.
Use rotisserie chicken when you can.
Rotisserie chicken is hands-down the easiest shortcut here. It’s already seasoned, already shredded, and it adds a depth of flavor that plain poached chicken just can’t match. Grab one on your grocery run and you’ve already saved yourself 20 minutes.
Let your cream cheese soften at room temperature.
Cold cream cheese won’t blend — it’ll stay in chunks and make your filling uneven. Pull it out of the fridge 20–30 minutes before you start. Your filling will be silky, creamy, and so much easier to mix.
Don’t skip warming the tortillas.
Cold, stiff tortillas crack and split when you try to roll them. Ten seconds in the microwave makes them soft, flexible, and roll-ready. It’s such a small step but it really does make the whole process smoother.
Press the wraps down gently in the pan.
Use your spatula to lightly press each wrap against the skillet while it’s cooking. This ensures full contact with the hot surface, which means more even browning and a crispier crust on every side.
If you’re looking for more practical meal prep strategies for busy weeks, the Academy of Nutrition and Dietetics has some really solid guidance — especially if you’re batch-cooking proteins like chicken to use across multiple recipes throughout the week.
Quick Fixes for Cheesy Garlic Chicken Wraps
My wrap is falling apart while I roll it.
Your tortilla probably wasn’t warm enough. Microwave it for another 10–15 seconds in a damp paper towel and try again. Also, make sure you’re not overfilling — 1/2 cup of filling per wrap is the sweet spot.
The filling seems dry or not creamy enough.
Make sure your cream cheese was fully softened before mixing. If it’s still a little dry, add an extra tablespoon of softened cream cheese and mix again — it’ll smooth right out.
My wraps are browning too fast or burning.
Your heat is too high. Drop it down to medium-low and give the wraps a little more time per side. Low and slow is the key to a golden crust without a burnt exterior.
The cheese isn’t melting inside.
This usually means the skillet wasn’t hot enough before you added the wraps. Make sure the oil is shimmering before you place the wraps in the pan, and cover the skillet loosely with a lid for the first minute to trap a little heat and help the cheese melt faster.
My wrap is soggy on the bottom.
Too much oil can cause sogginess. One tablespoon of olive oil for four wraps is all you need. You can also let the finished wraps rest on a wire rack or paper towel for a minute before serving — it helps keep that crust crispy.
Variations & Adaptations
One of the best things about these yummy low carb dinners is how easily you can remix them for different dietary needs or flavor moods.
Dairy-Free Version: Swap the mozzarella, cheddar, and cream cheese for your favorite dairy-free alternatives. There are some really great plant-based cream cheeses and shredded cheeses on the market now that melt beautifully.
Spicy Kick: Add 1/4 teaspoon of red pepper flakes or a drizzle of hot sauce into the filling mixture. You can also swap regular cheddar for pepper jack for a built-in heat boost.
Mediterranean Twist: Swap the parsley for fresh basil, add a tablespoon of sun-dried tomatoes, and toss in some crumbled feta instead of cheddar. Total flavor transformation with barely any extra effort.
Extra Veggie-Packed: Add diced roasted red peppers, sautéed mushrooms, or caramelized onions to the filling for more texture and nutrients.
Regular Tortillas: If you’re not following a low-carb plan, regular flour tortillas or whole wheat wraps work just as well. Just be gentle — flour tortillas can get a little softer when pan-seared, so use medium heat and don’t rush them.
If you love easy, flavor-packed weeknight dinners like this, you’ll also want to try my Hawaiian Chicken Sheet Pan or these gorgeous Teriyaki Pineapple Chicken and Rice Stuffed Peppers — both are on the same easy, cozy dinner rotation around here.
Serving, Storage & Reheating for Clean Chicken Wraps
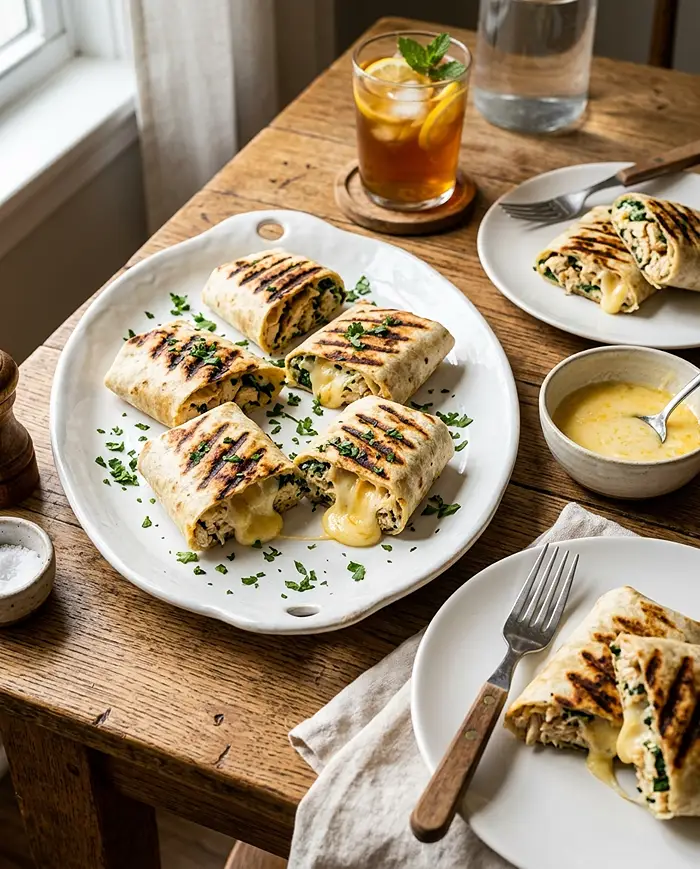
Serving suggestions:
Serve these wraps hot off the skillet, sliced diagonally for that gorgeous melty cross-section reveal. They pair beautifully with a simple side salad, some sliced avocado, or a little bowl of salsa for dipping. If you’re serving these for meal prep lunches, slice them before refrigerating so they’re ready to grab and go.
Storage:
If you somehow manage not to eat all four wraps in one sitting (no judgment if you do), let them cool completely before storing. Place in an airtight container and refrigerate for up to 3 days. Keep them whole rather than sliced for the best texture during storage.
Reheating:
The best way to reheat these wraps is back in a dry skillet over medium heat for 2–3 minutes per side — it brings back that crispy exterior perfectly. You can also use an air fryer at 350°F for 3–4 minutes. The microwave works in a pinch but the wrap will be softer rather than crispy, so the skillet method is always worth the extra two minutes.
One recipe down, and so many more to explore! Head over to our complete Classic Chicken Dinners lineup for more delicious ideas that’ll keep your kitchen buzzing. Bookmark this one — you’ll thank yourself later.
No-Waste Kitchen Magic
Got leftover filling that didn’t quite make it into a wrap? Don’t let it go to waste — it’s delicious spooned over steamed rice or cauliflower rice for a simple next-day bowl. Or stuff it into halved bell peppers and bake at 375°F for 20 minutes for an entirely new meal.
Extra shredded chicken you didn’t use? Toss it into soups, pasta, grain bowls, or scrambled eggs the next morning. Shredded chicken is honestly one of the most versatile leftovers you can have in the fridge.
If your cream cheese is getting close to its use-by date, blend it into a quick pasta sauce with garlic and herbs — it’s a creamy, dreamy five-minute sauce that uses up what you have. No waste, all flavor.
And if you have leftover low-carb tortillas, they’re perfect for quick quesadillas, mini pizzas, or wrapping up breakfast eggs and veggies the next morning. One pack of tortillas = so many easy meals.
FAQs About Cheesy Garlic Chicken Wraps
Can I freeze Cheesy Garlic Chicken Wraps?
Yes, you can freeze these wraps before or after cooking! For best results, assemble them but don’t pan-sear them yet, then wrap tightly in plastic wrap and freeze for up to 2 months. When you’re ready to eat, thaw overnight in the fridge and cook as directed — add an extra minute per side. They come out just as golden and delicious.
Can I make Cheesy Garlic Chicken Wraps ahead for meal prep?
Absolutely — these are fantastic for easy meal prep low calorie lunches. Assemble and cook all four wraps, let them cool completely, then store in an airtight container in the fridge for up to 3 days. Reheat in a skillet or air fryer to get that crispy crust back and you’re all set.
What’s the best way to keep Cheesy Garlic Chicken Wraps crispy?
The key to keeping them crispy is reheating in a skillet or air fryer rather than the microwave. Also, let them cool on a wire rack (not a plate) before storing — this prevents steam from making the bottoms soggy. A dry pan at medium heat for 2–3 minutes per side is your best friend.
How do I know when Cheesy Garlic Chicken Wraps are done cooking?
You’ll know they’re done when both sides are a deep golden-brown color, the wrap feels firm and crispy to the touch, and the cheese is visibly melting out of the edges. That gooey cheese peek is the green light to plate up!
Will Cheesy Garlic Chicken Wraps work with flour tortillas instead of low-carb?
Yes, regular flour or whole wheat tortillas work perfectly here. Just know that flour tortillas tend to get a little softer when pan-seared compared to low-carb wraps, so use medium heat and don’t rush the cooking. They’ll still taste amazing — just slightly different in texture.
Go Make These Cheesy Garlic Chicken Wraps Tonight
So there you go — Cheesy Garlic Chicken Wraps that feel fancy but are secretly the easiest thing you’ll make all week. Golden on the outside, cheesy and garlicky on the inside, and done in 20 minutes flat. What’s not to love?
I’d genuinely love to see your version of these! Drop a comment below with your Cheesy Garlic Chicken Wrap photos — did you add any fun twists? Extra spice? A secret ingredient? Tell me everything. This recipe is so versatile, I bet you’ve got some amazing variations already brewing.
And if you make these for meal prep, I want to hear how they held up through the week. Tag me, share your wins, and let’s keep building this little cozy kitchen community together. Happy cooking, friend.
I’m Linda Sandra — a Charleston home chef and comfort-food daydreamer. Around here, cooking’s not about perfection — it’s about cozy vibes, creative twists, and food that feels like love.
Cheesy Garlic Chicken Wraps
Equipment
- Large skillet or grill pan
- mixing bowl
- Spatula or tongs
- Microwave-safe plate
- Sharp knife and cutting board
- Measuring cups and spoons
Ingredients
Filling
- 2 cups Cooked chicken breast, shredded Rotisserie chicken works great
- 1 cup Shredded mozzarella cheese
- ½ cup Shredded cheddar cheese
- 2 cloves Garlic, minced
- ¼ cup Cream cheese, softened
- 1 tablespoon Fresh parsley, chopped
- Salt and pepper To taste
- 1 handful Baby spinach Optional
For Cooking
- 1 tablespoon Olive oil
- 4 large Low-carb tortillas or wraps
Instructions
- Preheat a large skillet or grill pan over medium heat and add 1 tablespoon of olive oil. While the pan heats up, wrap your 4 large low-carb tortillas in a damp paper towel and microwave for 10–15 seconds to keep them pliable so they don’t crack when you roll them.
- In a medium mixing bowl, combine 2 cups shredded cooked chicken breast, 1 cup mozzarella, 1/2 cup cheddar, 1/4 cup softened cream cheese, 2 cloves minced garlic, 1 tablespoon chopped fresh parsley, and salt and pepper to taste. If using a handful of baby spinach, add it now. Mix everything together until the cream cheese coats the chicken and cheese mixture evenly.
- Divide the chicken mixture evenly between the 4 warmed low-carb tortillas, placing about 1/2 cup of filling in the center of each one. Fold in the sides first, then roll the tortilla up tightly from the bottom, tucking everything in snugly so the filling doesn’t escape during cooking.
- Place each wrap seam-side down in the preheated, olive-oiled skillet. Cook for 2–3 minutes per side without moving them until the wraps are a deep golden-brown and the cheese is visibly melting out of the edges.
- Remove the wraps from the skillet and let them rest for one minute before slicing each one in half diagonally. Garnish with extra fresh parsley if desired and serve immediately while hot and gooey.