Cantaloupe Seed Pepitas
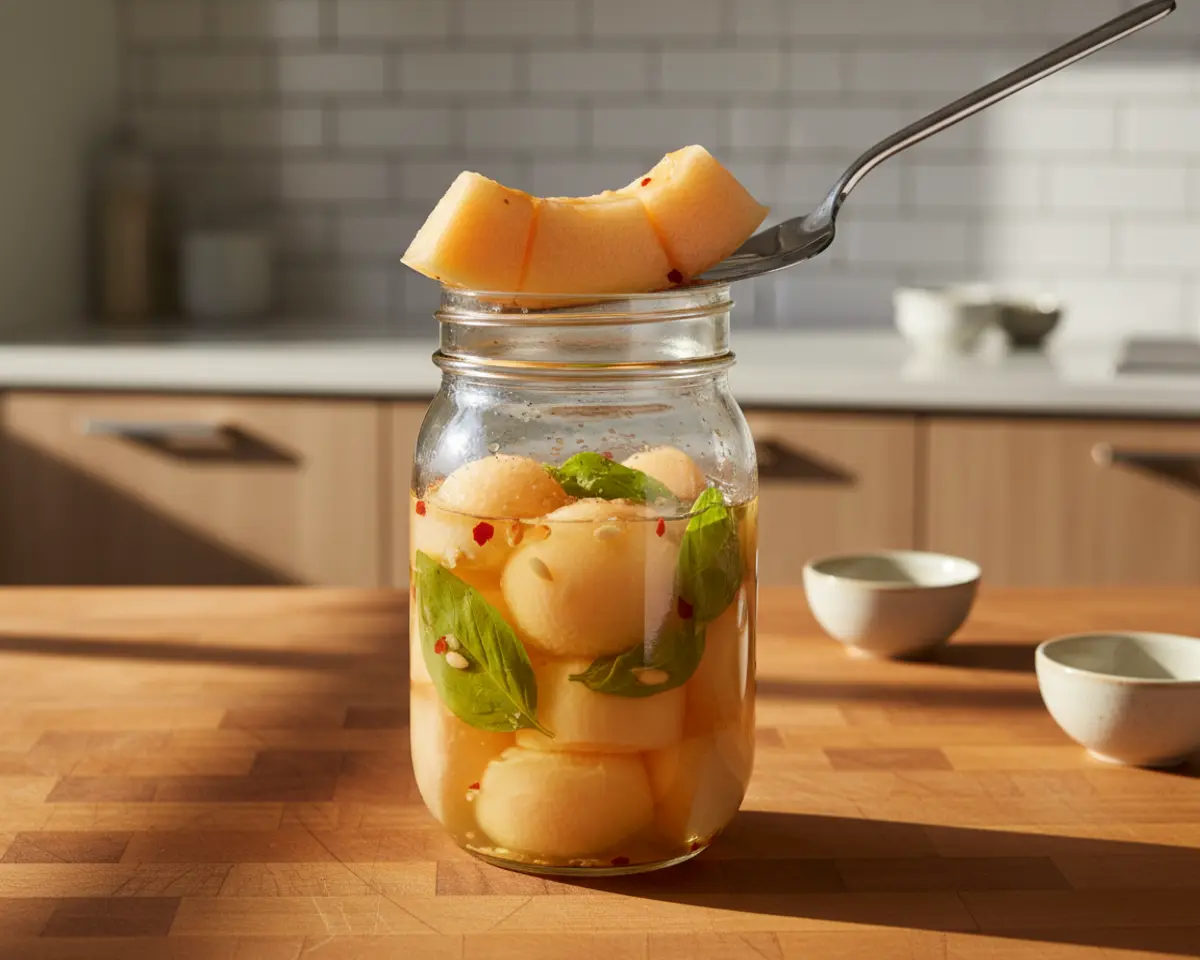
This cantaloupe seed pepitas and rind pickles recipe transforms every part of the melon into something magical. Sweet and sour pickled cantaloupe delivers bright, tangy flavor with zero waste and minimal effort.
I’m Linda Sandra, and I believe every scrap of food deserves a second chance at glory. When summer melons flood the Charleston farmers market, I pickle the rinds and roast the seeds into crunchy pepitas that rival any store-bought snack.
Last August, I watched my neighbor toss three cantaloupe rinds into the compost, and my heart just sank. I ran over with a jar and showed her how a simple brine could turn those scraps into the crunchiest, most refreshing pickles she’d ever tasted—and she’s been hooked ever since.
Table of Contents
Quick Overview
This recipe is just the beginning. Over in the Classic Comfort Foods collection, you’ll find even more dishes that are just as easy and packed with flavor. Go take a peek — your next favorite is waiting.
Little Snapshot: What This Recipe Delivers
This cantaloupe seed pepitas and rind pickles recipe uses the entire melon to create two pantry staples in under 15 minutes of active time. You’ll get crispy roasted seeds and tangy refrigerator pickles that last for weeks.
Why You’ll Love This Recipe 🌸
- This cantaloupe seed pepitas and rind pickles recipe takes less time than scrolling through your favorite cooking videos.
- You’ll feel like a kitchen wizard turning “trash” into treasure while teaching your kids about zero-waste cooking.
- Everything goes straight into the fridge—no canning equipment, no stress, just pure cozy satisfaction.
- According to National Institutes of Health, melon seeds contain beneficial fatty acids and minerals — and this recipe proves exactly why we should never toss them.
Quick Facts ⚡
Here’s the quick scoop on this cantaloupe seed pepitas and rind pickles.
- CourseCondiment / Snack
- Prep Time15 minutes
- Cook Time5 minutes (plus 2 days pickling)
- Total Time20 minutes active
- Servings1 quart pickles + ½ cup pepitas
- DifficultyEasy
Nutritional Peek
| Nutrient | Amount per serving (¼ cup pickles) |
|---|---|
| Calories | 25 |
| Protein | 0.5g |
| Carbohydrates | 5g |
| Fat | 0g |
| Fiber | 1g |
| Sugar | 4g |
What You’ll Need
This recipe keeps things beautifully simple. You probably have most of these tools sitting in your cabinet right now.
- Melon baller (or a small spoon works too)
- 1-quart mason jar with lid
- Medium saucepan
- Measuring cups and spoons
- Baking sheet (for roasting seeds)
- Parchment paper
- Wooden spoon for stirring
Ingredients
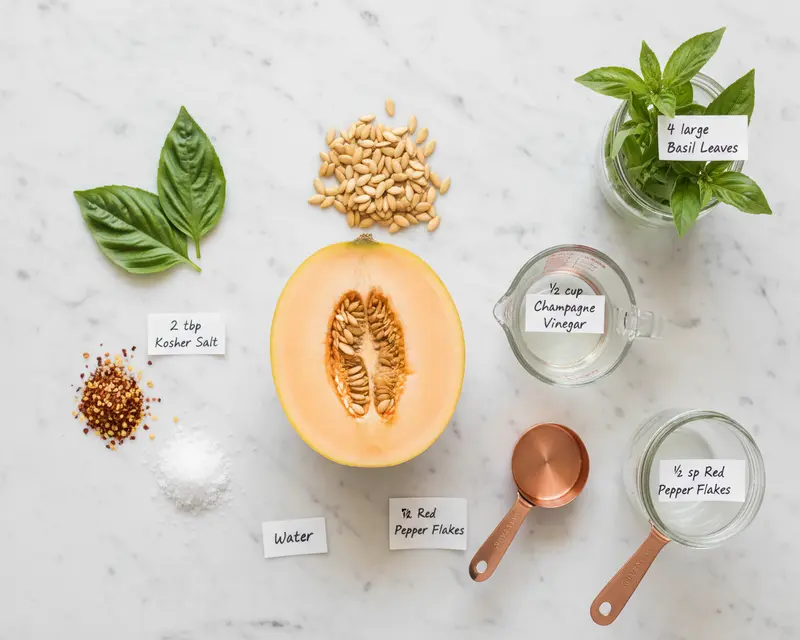
Sweet and sour pickled cantaloupe shines when you embrace the whole melon philosophy. The rind holds up beautifully in brine, while the flesh adds natural sweetness to balance the vinegar’s tang. Don’t skip the basil—it brings an herbal brightness that makes these pickles absolutely sing.
| Group | Ingredient | Amount | Notes |
|---|---|---|---|
| Main | Cantaloupe | ½ melon | Seeds removed and saved for roasting |
| Brine | Champagne Vinegar | ½ cup | White wine vinegar works in a pinch |
| Brine | Kosher Salt | 2 tbsp | Don’t use table salt—it clouds the brine |
| Brine | Red Pepper Flakes | ½ tsp | Adjust for your heat preference |
| Aromatics | Fresh Basil Leaves | 4 large | Bruise them gently to release oils |
| Brine | Water | As needed | To cover the melon balls completely |
Step-by-Step Instructions
Let’s make this happen.
Step 1: Prep Your Cantaloupe
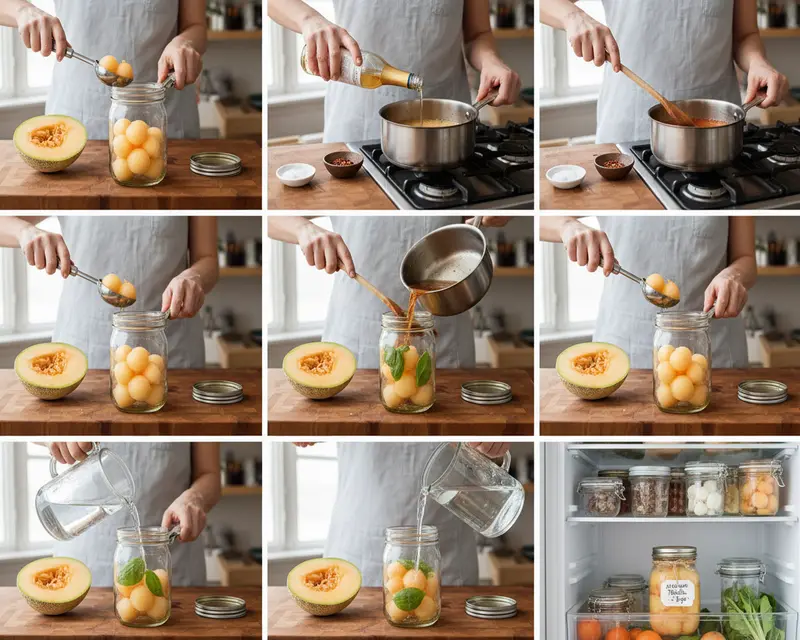
Cantaloupe seed pepitas and rind pickles start with proper melon prep. Slice your half cantaloupe and scoop out all the seeds into a small bowl—rinse them under cool water to remove the stringy pulp, then pat dry with a clean kitchen towel. Use your melon baller to create uniform cantaloupe spheres from the flesh, dropping them directly into your clean mason jar as you go.
Step 2: Capture the Melon Juice
Pour any juice that collected in your jar or on your cutting board into a medium saucepan. This natural melon nectar adds sweetness and body to your brine, creating a more complex flavor profile than vinegar alone.
Step 3: Build Your Brine
Add the champagne vinegar, kosher salt, and red pepper flakes to the saucepan with your melon juice. Place the pan over medium-high heat and stir constantly with a wooden spoon until the salt crystals completely dissolve and the mixture begins to bubble at the edges. The moment you see a rolling boil, remove the pan from heat—overcooking will dull the vinegar’s bright acidity.
Step 4: Pour and Perfume
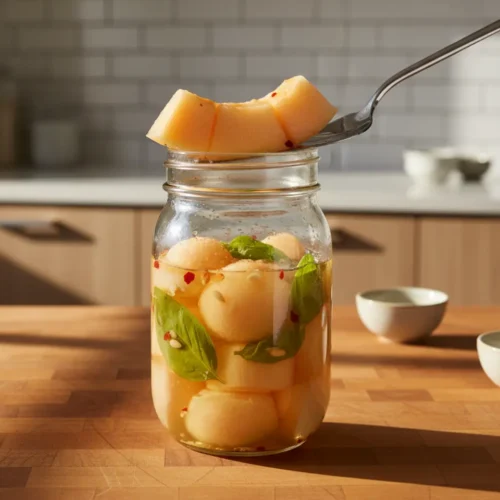
Carefully pour the hot brine over your melon balls in the jar, leaving about half an inch of headspace at the top. Tuck the fresh basil leaves down into the brine, pressing them gently with a spoon so they release their aromatic oils into the liquid.
Step 5: Top with Water
Add enough cool filtered water to the jar to completely submerge all the cantaloupe balls. Make sure nothing floats above the brine line, as exposed fruit can develop mold or off flavors during the pickling process.
Step 6: Seal and Chill
Screw the lid on tightly and give the jar a gentle shake to distribute the basil and spices evenly. Place the jar in your refrigerator and resist the urge to taste for at least two full days—patience rewards you with pickles that have fully absorbed the tangy, herbal brine.
Pro Tips & Gentle Guidance
Sweet and sour pickled cantaloupe rewards attention to detail, but don’t stress the small stuff. A few thoughtful choices make the difference between good pickles and show-stopping ones that disappear from your fridge in days.
Choose a Firm, Ripe Melon
Your cantaloupe should smell sweet at the stem end but feel firm when you press the rind. Overripe melons turn mushy in brine, while underripe fruit lacks the natural sweetness that balances the vinegar. Look for a melon with a golden, net-like skin and avoid any with soft spots or bruises.
Use Quality Vinegar
Champagne vinegar brings a delicate, refined acidity that doesn’t overpower the melon’s natural flavor. If you can’t find it, white wine vinegar or rice vinegar work beautifully—just avoid distilled white vinegar, which tastes harsh and one-dimensional in refrigerator pickles.
Keep Everything Submerged
Floating melon balls can develop surface mold or slimy texture during the pickling period. If your balls keep bobbing up, tuck a small piece of parchment paper just under the lid to act as a weight, or add a clean fermentation weight to keep everything safely below the brine line.
Don’t Skip the Rest Time
Two days feels like forever when you’re excited to taste your creation, but the waiting period allows the flavors to marry and the melon to absorb the brine’s tangy complexity. According to food science research on pickling processes, vegetable and fruit pickles reach peak flavor development between 48 and 72 hours of refrigeration.
Roast Those Seeds Low and Slow
High heat burns cantaloupe seeds before they crisp up properly. A gentle 325°F roast allows moisture to evaporate slowly while the seeds toast to golden perfection. Stir them every 5-7 minutes to ensure even browning and prevent any scorched edges.
Variations & Adaptations
Spicy Jalapeño Cantaloupe Pickles
Add two sliced fresh jalapeños to your jar along with the melon balls for a pickle that brings serious heat. The capsaicin plays beautifully against the sweet melon, creating a complex flavor profile that’s perfect for topping tacos or grilled fish.
Honeydew or Watermelon Swap
This recipe works with any firm melon, though each brings its own character. Honeydew creates a more delicate, floral pickle, while watermelon rind pickles offer a crunchier texture and slightly earthier flavor.
Asian-Inspired Ginger Pickles
Replace the basil with thin slices of fresh ginger and add a tablespoon of rice vinegar to the brine. Toss in a star anise pod for an aromatic twist that pairs beautifully with summer rolls or dense bean salads.
Herb Garden Variation
Swap the basil for fresh mint, dill, or cilantro depending on what’s thriving in your garden. Each herb creates a completely different pickle personality—mint adds coolness, dill brings classic pickle vibes, and cilantro leans bright and citrusy.
Sweet Tea Pickles
Add two black tea bags to your hot brine before pouring it over the melon balls, then remove them after 5 minutes. The tannins add depth and a subtle bitterness that balances the melon’s natural sweetness beautifully.
Quick Fixes for Cantaloupe Seed Pepitas and Rind Pickles
Problem: My pickles taste too salty.
Solution: Drain half the brine and replace it with fresh water and a tablespoon of champagne vinegar. Let the jar sit for another day in the fridge to rebalance the flavors. Next time, measure your salt precisely and avoid substituting fine sea salt for kosher salt, which packs more sodium per tablespoon.
Problem: The melon balls turned mushy.
Solution: Your cantaloupe was likely overripe when you started, or you poured boiling-hot brine directly over delicate fruit. Always let the brine cool for 2-3 minutes before pouring, and choose melons that feel firm to the touch. Mushy pickles are still safe to eat—just chop them up for a tangy salsa or blend into a gazpacho.
Problem: My pepitas won’t get crispy.
Solution: You probably didn’t dry the seeds thoroughly after rinsing, or your oven temperature was too low. Pat seeds completely dry with paper towels, then roast at 325°F for a full 20 minutes, stirring every 5 minutes. Let them cool completely on the baking sheet before storing—they crisp up even more as they cool.
Problem: The pickles smell funky or fizzy.
Solution: Discard the batch immediately—funkiness indicates unwanted bacterial growth. Make sure all your equipment is spotlessly clean before starting, and always keep the melon completely submerged in brine. Refrigerator pickles should smell tangy and bright, never yeasty or sour in an off-putting way.
Problem: My brine is cloudy.
Solution: Cloudy brine is usually harmless and caused by using table salt instead of kosher salt, or by minerals in your tap water. The pickles are still safe to eat. For crystal-clear brine next time, use filtered water and pure kosher salt.
Storage & Reheating
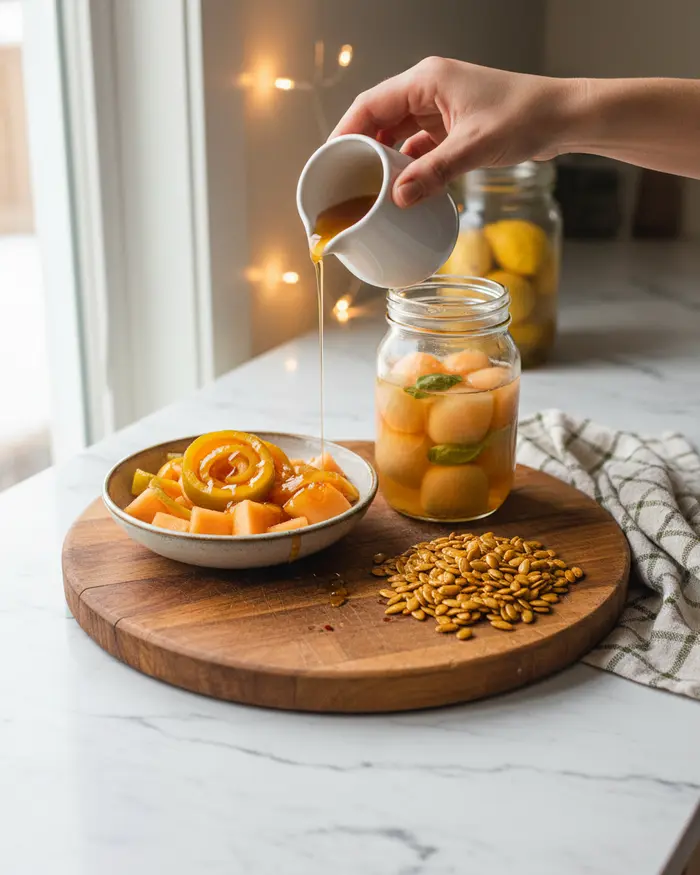
Sweet and sour pickled cantaloupe keeps beautifully in the refrigerator for up to three weeks when stored properly. Serve them straight from the jar as a palate-cleansing side dish, chop them into summer salads, or nestle them alongside creamy pasta dishes for a bright, acidic contrast.
Keep your jar tightly sealed in the coldest part of your fridge, away from the door where temperature fluctuates. Always use a clean fork or spoon to remove pickles from the jar—introducing bacteria from your fingers or a dirty utensil shortens their shelf life significantly.
These pickles are best enjoyed cold and crisp, so no reheating needed. Your roasted cantaloupe seed pepitas stay crunchy in an airtight container at room temperature for up to two weeks—just keep them away from moisture and heat sources.
| Storage Method | Duration | Best Practice |
|---|---|---|
| Refrigerator (pickles) | Up to 3 weeks | Keep submerged in brine, use clean utensils |
| Room temp (pepitas) | Up to 2 weeks | Store in airtight container away from moisture |
| Freezer (pickles) | Not recommended | Texture becomes mushy when thawed |
| Freezer (pepitas) | Up to 3 months | Freeze in freezer bag, refresh in 300°F oven 5 min |
No-Waste Kitchen Magic
Turn Pickle Brine into Vinaigrette
When your pickles are gone, whisk the leftover brine with olive oil and a touch of Dijon mustard for an instant salad dressing. That sweet-tangy liquid already contains salt, acid, and aromatics—it’s a flavor bomb waiting to dress your summer greens.
Blend Overripe Cantaloupe into Smoothies
If your melon was a bit too soft for pickling, cube it and freeze it in single-serve portions. Blend frozen cantaloupe chunks with Greek yogurt, honey, and a squeeze of lime for a creamy breakfast smoothie that tastes like summer in a glass.
Compost the Basil Stems
After you’ve used the basil leaves in your pickles, toss the stems into your compost bin or worm farm. Those stems break down quickly and add valuable nitrogen to your compost pile, completing the circle of zero-waste cooking.
Use Pickle Brine in Marinades
Add a quarter cup of your cantaloupe pickle brine to chicken or pork marinades for a tenderizing boost and subtle fruity flavor. The acid helps break down proteins while the salt seasons from the inside out.
Save the Rind for Soup Stock
If you’re not pickling the rind itself, toss it into a freezer bag with other veggie scraps like onion ends and carrot peels. When the bag is full, simmer everything with water and herbs for a light, flavorful vegetable stock perfect for soup recipes.
Frequently Asked Questions
Here are the questions I hear most often about making cantaloupe seed pepitas and rind pickles at home.
What are cantaloupe seed pepitas?
Cantaloupe seed pepitas are the edible seeds from inside a cantaloupe melon that have been cleaned, dried, and often roasted. Similar to pumpkin seeds, they can be seasoned and eaten as a nutritious snack, providing a crunchy texture and nutty flavor while reducing food waste.
How do you make cantaloupe rind pickles?
To make cantaloupe rind pickles, remove the outer skin and inner flesh from the cantaloupe rind, cut the firm white part into cubes or strips, then pickle them in a brine solution made with vinegar, sugar, salt, and spices like cinnamon, cloves, or ginger. The pickles need to be processed in sterilized jars and refrigerated.
What do cantaloupe rind pickles taste like?
Cantaloupe rind pickles have a sweet and tangy flavor profile with a crisp, cucumber-like texture. The taste is mild and slightly reminiscent of watermelon rind pickles, taking on the flavors of the pickling spices used. They are less sweet than the cantaloupe flesh but offer a pleasant crunch.
Are cantaloupe seed pepitas healthy?
Yes, cantaloupe seed pepitas are nutritious and contain protein, healthy fats, fiber, vitamins, and minerals including magnesium, zinc, and iron. They provide similar nutritional benefits to other edible seeds and make a healthy snack option when consumed in moderation as part of a balanced diet.
How long do cantaloupe rind pickles last?
When properly canned and sealed in sterilized jars, cantaloupe rind pickles can last up to one year in a cool, dark pantry. Once opened, they should be refrigerated and consumed within 2 to 3 months for best quality and flavor. Refrigerator pickles that were not heat-processed should be kept cold and used within 2 to 4 weeks.
Final Dish
This cantaloupe seed pepitas and rind pickles recipe turns ordinary melon prep into an opportunity for kitchen creativity and zero-waste magic. You’ll end up with crunchy roasted seeds and tangy refrigerator pickles that prove sustainable cooking doesn’t require special skills—just a willingness to see potential in every part of your ingredients.
I’d love to see how your batch turns out! Snap a photo of your jar of pickles or your bowl of golden pepitas and tag me on social media. Leave a comment below and tell me which variation you’re trying first, or share your own creative twist on this whole-melon approach.
I’m Linda Sandra — a Charleston home chef and comfort-food daydreamer. Around here, cooking’s not about perfection — it’s about cozy vibes, creative twists, and food that feels like love.
Cantaloupe Seed Pepitas and Rind Pickles
Ingredients
- ½ Cantaloupe seeds removed
- ½ cup Champagne Vinegar
- 2 tbsp Kosher Salt
- ½ tsp Red Pepper Flakes
- 4 large Basil Leaves
- Water
Instructions
- Create cantaloupe balls by using a melon baller. Add melon balls to a 1 quart mason jar. Add the juice to a saucepan.
- Add the champagne vinegar to the saucepan, along with the kosher salt and red pepper flakes. Bring the mixture to a boil while stirring to dissolve the salt. Remove from heat once the mixture begins to boil.
- Pour vinegar mixture over the melon balls. Add the basil leaves.
- Add water to the jar to cover the melon balls. Make sure the cantaloupe is completely submerged.
- Place the jar in the refrigerator and wait for a minimum of 2 days before eating.