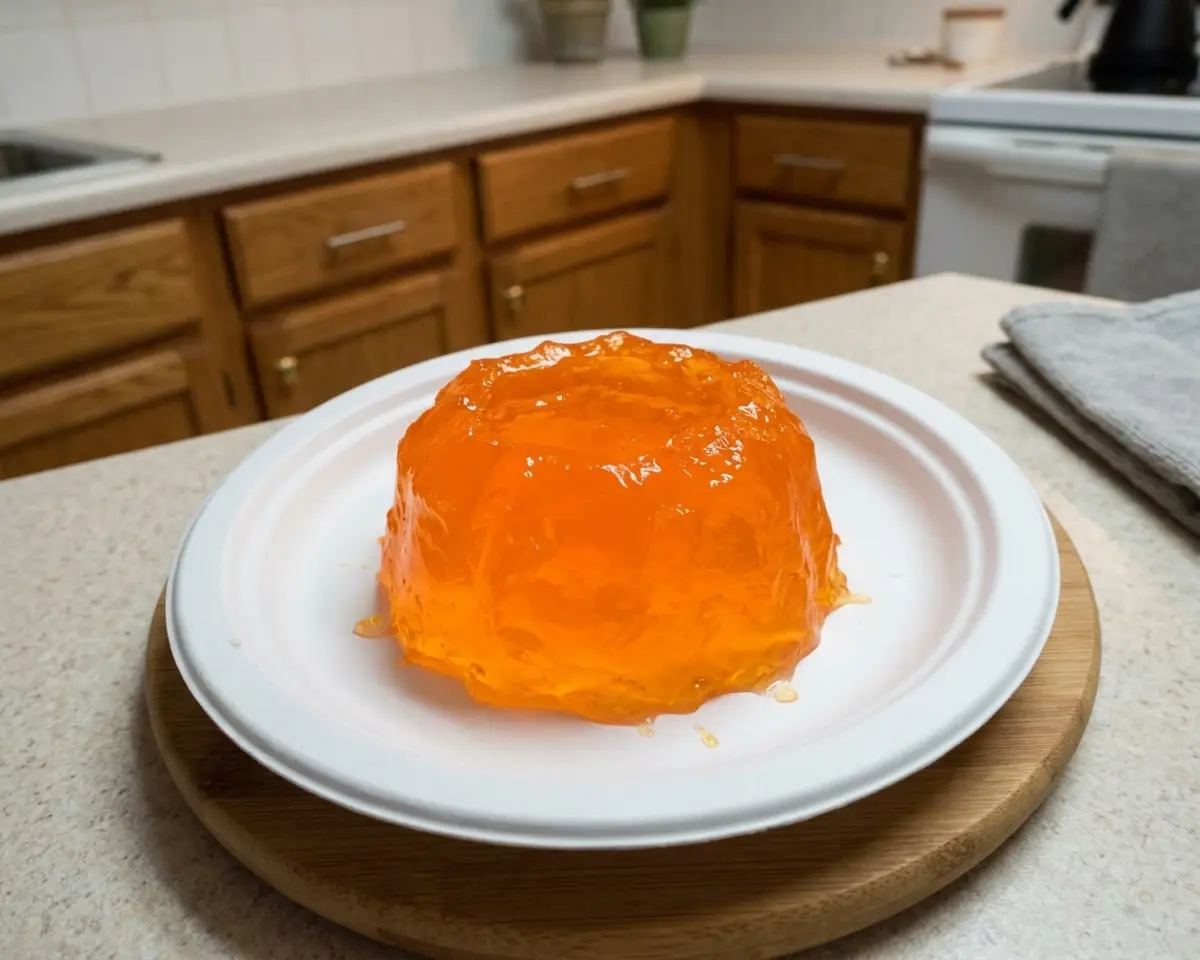
Viral Soda Jelly
Viral Soda Jelly transforms your favorite fizzy drink into wobbly, jewel-toned treats with just three ingredients and zero baking. The secret is blooming unflavored gelatin in cold water, then gently dissolving it into barely-warm soda so you keep every bubble of flavor without boiling off the fun.
You’ll need about five minutes of hands-on work, a few hours of fridge time, and absolutely no special skills—if you can stir and pour, you’re golden.
Table of Contents
The Short Answer
Viral Soda Jelly is a three-ingredient gelatin dessert made by blooming unflavored gelatin in cold water, dissolving it into gently warmed soda, then chilling until firm. It takes about five minutes of active prep and two to four hours in the fridge, requires no baking or special equipment, and delivers wobbly, fizzy-sweet treats that taste exactly like your favorite soda in spoonable form.
Reasons This Recipe Wins Hearts 💕
- This homemade soda jelly recipe uses just three pantry ingredients and takes less than five minutes of actual work—no stand mixer, no oven, no fuss.
- You can use any soda flavor you love, from classic cola to tropical fruit punch, making it endlessly customizable for picky eaters, themed parties, or whatever craving strikes.
- The texture is pure nostalgia—wobbly, jiggly, and fun to eat—but with a grown-up twist since you control the sweetness and flavor intensity.
- The team at Scientific American explains the science of gelatin setting in their detailed guide to how proteins form those signature jiggly bonds—which is exactly the magic happening when your cold water bloom meets warm soda and transforms into this viral soda jelly.
At a Glance ✨
Everything you need to know about this Viral Soda Jelly, in one quick look.
- CourseDessert
- Prep Time5 minutes
- Cook Time3 minutes
- Total Time2 hours 8 minutes (includes chilling)
- Yield4 servings
- Skill LevelBeginner
What You’ll Need (Ingredients)
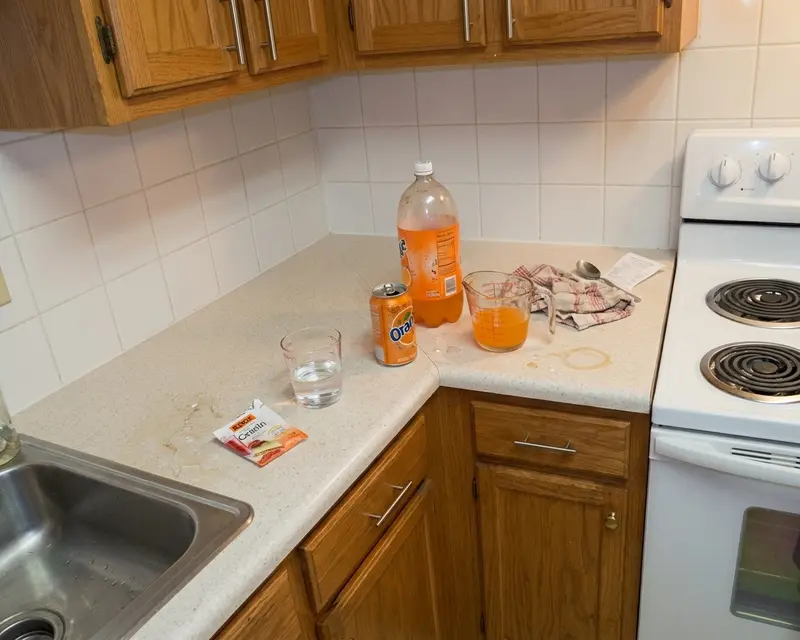
This easy soda jelly dessert starts with three simple players. The unflavored gelatin provides the wobble and structure—it’s the backbone that holds everything together once chilled. Cold water is where the gelatin blooms, swelling and softening so it dissolves smoothly without clumps.
Your soda of choice brings all the flavor and sweetness, whether you go classic cola, bright lemon-lime, or fruity orange—just make sure it’s fizzy and delicious straight from the bottle, because that flavor is the star of the show.
| Ingredient | Amount | Quick Note |
|---|---|---|
| Unflavored gelatin | 1 packet (7g) | Standard grocery store packets work perfectly—no fancy brands needed. |
| Cold water | 1/4 cup | Tap-cold is fine; this is where the gelatin blooms and softens. |
| Soda (any flavor) | 1 cup | Cola, lemon-lime, orange, cherry—pick your favorite. Avoid diet sodas if you want the best set. |
Kitchen Gear Checklist (Equipment)
Must-haves:
- Small bowl (for blooming the gelatin)
- Small saucepan (to gently warm the soda)
- Whisk or spoon (for stirring)
- Molds, glasses, or a shallow dish (for setting)
Nice-to-haves:
- Silicone molds (for fun shapes—stars, hearts, cubes)
- Measuring cups and spoons (for precision)
Let’s Make It (Step-by-Step Instructions)
Here’s how this Viral Soda Jelly comes together, one easy step at a time. Each instruction is simple and self-contained, so even if you’ve never worked with gelatin before, you’ll feel confident from start to finish.
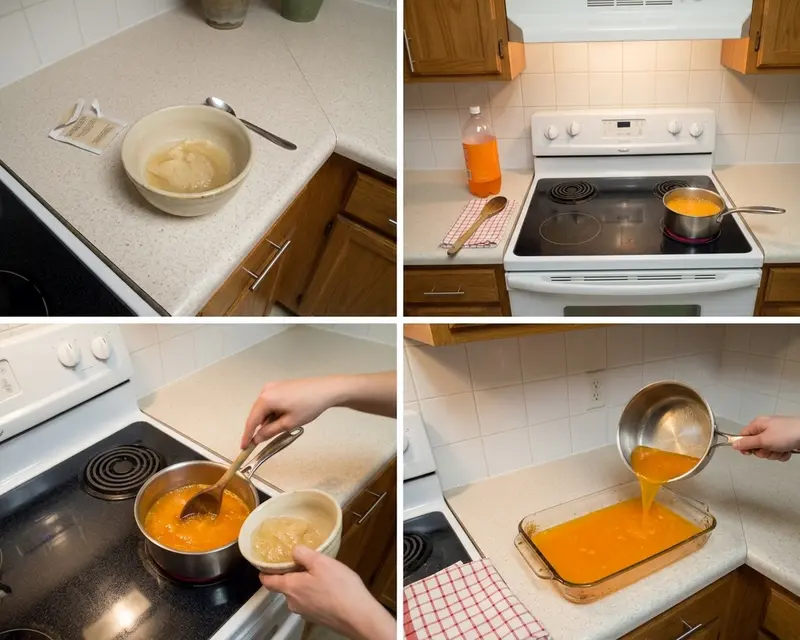
- Bloom the gelatin: In a small bowl, sprinkle the 7g packet of unflavored gelatin evenly over the 1/4 cup of cold water. Let it sit undisturbed for five minutes—you’ll see it thicken and absorb the water, turning soft and spongy. This blooming step ensures the gelatin dissolves smoothly without lumps when you add it to the warm soda.
- Warm the soda gently: Pour the 1 cup of soda into a small saucepan and heat it over low heat until it’s warm to the touch but not simmering or boiling. You want it just warm enough to dissolve the gelatin—boiling can weaken the gelatin’s setting power and kill the fizzy flavor, so keep the heat gentle and watch it closely.
- Dissolve the gelatin: Add the bloomed gelatin to the warm soda in the saucepan, stirring continuously with a whisk or spoon. Keep stirring for about one minute until the gelatin is completely dissolved and the mixture looks clear and smooth, with no lumps or grainy bits floating around.
- Pour into molds: Carefully pour the soda-gelatin mixture into small silicone molds, clear glasses, or a shallow dish. If you’re using molds, fill them about three-quarters full to leave room for easy unmolding later. Work slowly so you don’t splash or spill—this mixture is thin and moves fast.
- Chill until firm: Transfer the filled molds or dish to the refrigerator and let the jelly set for at least two to four hours, or until it’s firm and jiggly when you gently tap the surface. The exact time depends on the size and depth of your molds—shallow dishes set faster, while deeper cups take longer.
- Unmold and serve: Once the jelly is fully set, run a knife around the edges of each mold or glass, or gently press the bottom of silicone molds to pop the jellies out. If you used a shallow dish, cut the jelly into cubes or scoop it out with a spoon. Serve chilled, and watch everyone’s eyes light up when they see those wobbly, colorful treats.
Nutrition Snapshot
| Nutrient | Per Serving |
|---|---|
| Calories | 35 |
| Protein | 2g |
| Carbohydrates | 7g |
| Total Fat | 0g |
| Fiber | 0g |
| Sugar | 7g |
| Sodium | 10mg |
These values are estimates based on standard ingredients and may vary depending on the specific soda and gelatin brand you use.
Little Secrets for Success (Pro Tips)
This DIY soda jelly is forgiving, but a few little tricks make the difference between good and truly stellar results. Here’s what I’ve learned from making batch after batch for curious kids and equally curious adults.
Bloom patiently: Let the gelatin sit in the cold water for the full five minutes without stirring. Rushing this step can leave you with clumps that don’t dissolve evenly, and you’ll end up with grainy bits in your final jelly. The gelatin needs time to absorb the water and soften completely.
Keep the heat low: Resist the urge to crank up the burner—boiling soda weakens the gelatin’s ability to set and can cook off the carbonation and flavor. Warm it just until it feels comfortably hot to the touch, like bathwater, and you’ll get a firm, jiggly jelly every time.
Choose full-sugar soda: Diet or zero-sugar sodas often don’t set as firmly because artificial sweeteners can interfere with gelatin structure. For the best wobble and flavor, stick with regular soda—the sugar helps the gelatin do its job beautifully.
Spray your molds: A quick spritz of neutral cooking spray inside your molds or glasses makes unmolding a breeze. Just a light coat is enough—you won’t taste it, and the jellies will slide right out without tearing or sticking.
For a deeper dive into how gelatin proteins interact with liquids and sugars, the Exploratorium’s jelly-making science guide is my go-to—it’s clear, practical, and totally beginner-friendly, with visuals that make the chemistry click.
Oops, Fixed It! (Troubleshooting for Viral Soda Jelly)
Why didn’t my jelly set? You probably heated the soda too hot or let it boil, which weakens the gelatin’s gelling power. Next time, keep the heat low and remove the pan as soon as the soda feels warm to the touch. If your jelly is still liquid after four hours, you can reheat it gently, dissolve a little more gelatin, and chill again.
Why is my jelly rubbery or too firm? You might have used too much gelatin or chilled it for way longer than needed. Stick to the 7g packet for one cup of soda, and check the jelly after two hours—once it’s firm and jiggly, it’s ready. If it’s already rubbery, serve it in smaller cubes so the texture feels more playful than tough.
Why does my jelly have clumps or grainy bits? The gelatin didn’t dissolve completely, usually because it wasn’t bloomed long enough or the soda wasn’t warm enough. Make sure you let the gelatin sit in cold water for the full five minutes, then stir it into warm (not hot) soda until the mixture is totally smooth and clear.
Can I use diet soda and still get a good set? Diet sodas can work, but they often set softer or unevenly because artificial sweeteners don’t support gelatin structure the same way sugar does. If you want to use diet soda, consider adding a pinch of extra gelatin (about half a teaspoon more) to help it firm up properly.
Make It Your Own (Variations)
One of the best things about this fizzy jelly treat is how easily it bends to your mood, your pantry, and whatever flavor adventure you’re craving. Here are a few twists to keep things fun.
Rainbow layers: Make three or four small batches using different soda flavors—orange, grape, lemon-lime, cherry—and pour them into the same mold one layer at a time, chilling each layer for about 30 minutes before adding the next. You’ll end up with a stunning striped jelly that’s perfect for parties.
Boozy grown-up version: Swap half the soda for a splash of vodka, rum, or flavored liqueur (like peach schnapps or coconut rum) and warm only the non-alcoholic portion before dissolving the gelatin. Chill as usual, and you’ve got a playful, wiggly cocktail that’s a total conversation starter.
Lower-sugar twist: Use a naturally sweetened soda like Zevia or a lightly sweetened sparkling water with a tablespoon of honey or maple syrup stirred in. The flavor will be more subtle, and the jelly will be a touch softer, but it’s a great option if you’re watching sugar intake.
Fruity add-ins: Drop a few fresh berries, diced peaches, or mandarin orange segments into your molds before pouring in the soda-gelatin mixture. The fruit will suspend beautifully as the jelly sets, adding pops of color and a little extra texture.
Creamy dreamsicle style: Use orange soda and stir in two tablespoons of heavy cream or coconut cream after dissolving the gelatin. The result is a creamy, dreamy orange jelly that tastes like a creamsicle in spoonable form—sweet, tangy, and impossibly nostalgic.
Serve, Store & Reheat
This homemade soda jelly recipe shines brightest when served ice-cold, straight from the fridge. Pile the cubes into clear cups or bowls so the jewel-toned colors can show off, or serve them on a platter alongside fresh fruit and whipped cream for a playful dessert spread.
They’re especially fun at kids’ birthday parties, summer picnics, or any time you want a treat that feels nostalgic and surprising at once. If you’re feeling fancy, pair them with no-bake s’mores bars or a slice of Oreo Basque cheesecake for a dessert table that covers every texture and craving.
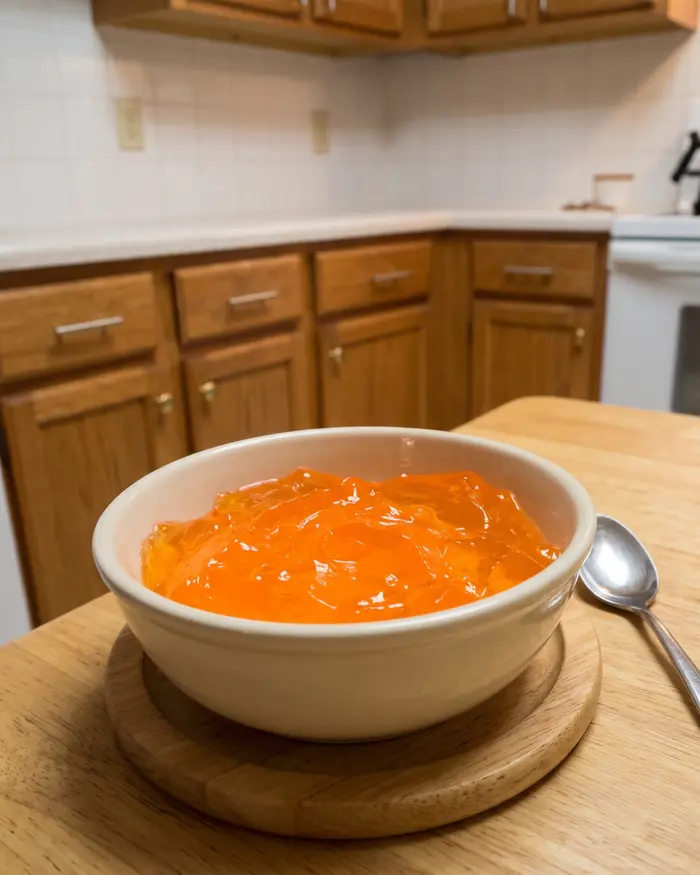
Store any leftovers—assuming there are leftovers, which is a big assumption—in an airtight container in the refrigerator for up to five days. Stack the cubes gently with a piece of parchment paper between layers if you’re worried about sticking, though a quick spritz of cooking spray on your storage container usually does the trick.
The jelly will stay firm and jiggly the whole time, so you can snack on it all week without any loss of texture or flavor.
Reheating isn’t really a thing here—these are meant to be enjoyed cold. If your jelly gets too warm and starts to soften, just pop it back in the fridge for 20 minutes and it’ll firm right back up. If you want to unmold a stubborn jelly, dip the bottom of the mold in warm water for five seconds, then flip it out—it’ll release like a charm without melting the whole thing.
Love Your Leftovers (Waste-Free Ideas)
Jelly parfait cups: Layer leftover soda jelly cubes with vanilla yogurt, granola, and fresh berries in clear cups for a fun breakfast or snack that looks Instagram-ready and tastes like a treat.
Freeze into popsicles: Blend the jelly cubes with a splash of extra soda or fruit juice, pour the mixture into popsicle molds, and freeze. You’ll get icy, fizzy-flavored pops that are perfect for hot afternoons.
Top ice cream or sundaes: Chop the jelly into small cubes and scatter them over vanilla ice cream or frozen yogurt. The jiggly texture and sweet soda flavor add a playful twist to a classic sundae.
Add to fruit salad: Toss jelly cubes into a bowl of fresh fruit salad for pops of color and a little extra sweetness. It’s especially fun with watermelon, pineapple, and grapes—everything stays cold, juicy, and summery.
Your Questions, Answered (FAQs)
Here are the questions that pop up most often when folks try this recipe for the first time. Each answer is short, friendly, and designed to keep you moving forward with confidence.
What is Viral Soda Jelly?
Viral Soda Jelly is a trending dessert made by combining gelatin with carbonated soda to create a fizzy, jiggly treat that has gained popularity on social media platforms.
How do you make Viral Soda Jelly?
To make Viral Soda Jelly, you dissolve gelatin in hot water, add your choice of soda, pour the mixture into molds or a container, and refrigerate for several hours until set.
What type of soda works best for Viral Soda Jelly?
Any carbonated soda can be used, but popular choices include Sprite, Coca-Cola, fruit-flavored sodas, and cream soda. The flavor of the soda will determine the taste of your jelly.
How long does Viral Soda Jelly last?
When stored properly in an airtight container in the refrigerator, Viral Soda Jelly typically lasts for 3 to 5 days. It should be kept chilled to maintain its texture.
Can you make Viral Soda Jelly without gelatin?
Yes, you can use alternative setting agents like agar-agar for a vegetarian or vegan version of Soda Jelly. The proportions and setting time may vary from traditional gelatin-based recipes.
Before You Go
If you give this Viral Soda Jelly a try, I’d genuinely love to hear how it went! Leave a comment with your favorite soda flavor, snap a photo of your wobbly creations, or tag me on social—it makes my whole week when I see your colorful jellies lined up in cute little cups.
This recipe is proof that the simplest ideas—three ingredients, five minutes, and a little chill time—can turn into something unexpectedly delightful and totally share-worthy.
Pin it for your next party, bookmark it for a rainy-day project with the kids, or just tuck it away for when you need a dessert that feels like pure, jiggly joy.
For more easy, no-bake treats that deliver big smiles with minimal effort, check out our easy no-bake peach icebox cake, no-bake blueberry cheesecake bars, or browse the full collection of delicious desserts that prove you don’t need an oven to make magic.
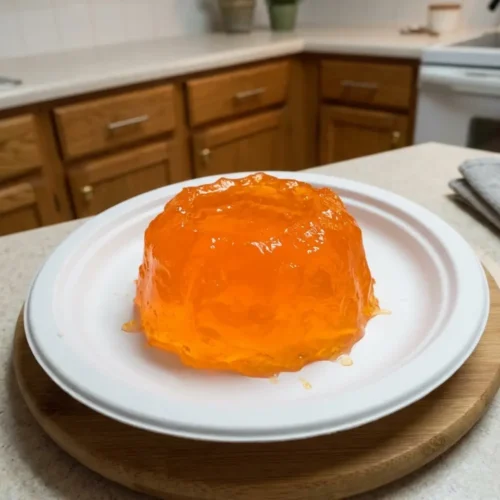
Viral Soda Jelly
Ingredients
- 1 packet 7g unflavored gelatin
- ¼ cup cold water
- 1 cup soda any flavor, e.g., cola, lemon-lime, orange
Instructions
- In a small bowl, sprinkle the unflavored gelatin over the cold water. Let it sit for 5 minutes to bloom (thicken and absorb the water).
- Heat the soda in a saucepan over low heat until it’s warm but not boiling. Do not let it boil, as this can affect the gelatin’s setting ability.
- Add the bloomed gelatin to the warm soda, stirring continuously until the gelatin is completely dissolved. Ensure there are no lumps.
- Carefully pour the mixture into small molds, glasses, or a shallow dish.
- Refrigerate for at least 2-4 hours, or until the jelly is firm and set.
- Once set, you can cut the jelly into cubes or use a spoon to scoop it out. Serve chilled and enjoy your viral soda jelly!