Salted Caramel Apple Bars
These Salted Caramel Apple Bars combine buttery shortbread crust, tender cinnamon apples, and gooey caramel in one easy pan dessert. Perfect for fall gatherings or your next cozy afternoon baking session.
Hey there, I’m Claire Whitmore — a pastry whisperer in Asheville, NC, where butter totally counts as self-care. This Salted Caramel Apple Bars recipe is basically autumn in dessert form, and honestly? It’s become my go-to whenever I need something that looks like I spent hours in the kitchen but actually didn’t.
Last October, I brought these to a potluck and three people asked if I’d gotten them from a fancy bakery. Nope — just me, my trusty 9×13 pan, and a serious weakness for anything involving caramel and apples.
The best part? You don’t need any special skills or weird ingredients. Just real butter (always), fresh apples, and about an hour of your time.
What This Recipe Delivers
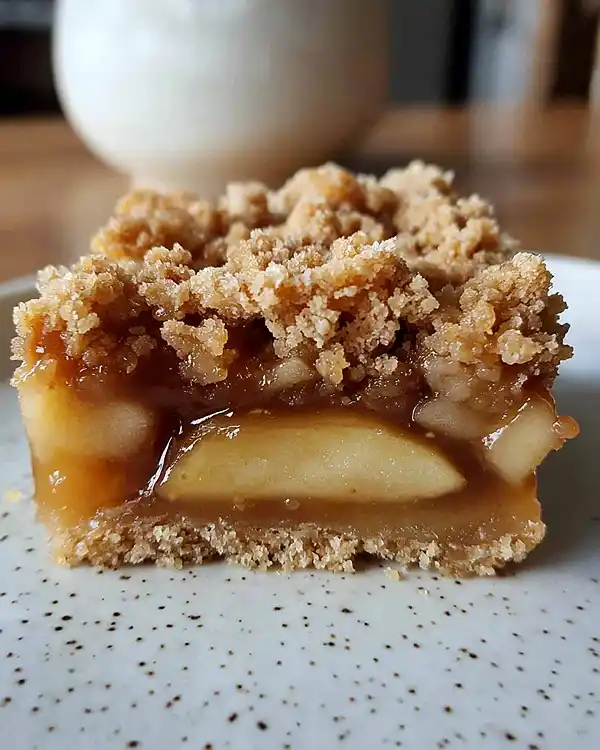
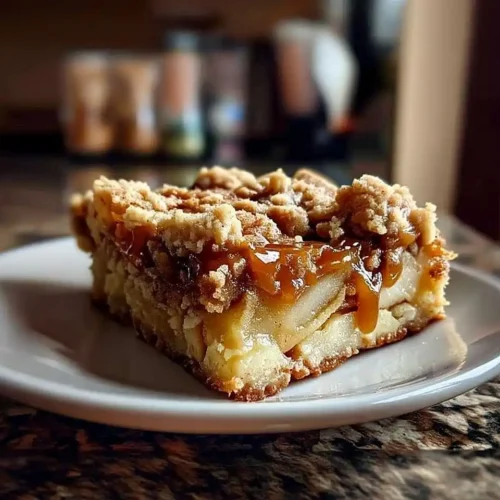
These Salted Caramel Apple Bars feature a buttery shortbread-style crust topped with tender spiced apples and ribbons of salted caramel, finished with a golden crumble topping. They’re easier than pie, more impressive than cookies, and they slice beautifully for sharing (or not — no judgment here). Perfect for fall gatherings, holiday dessert tables, or any Tuesday when you need a little sweetness in your life.
Why You’ll Love This Recipe 🌸
- These Caramel Apple Bars give you all the cozy vibes of apple pie without the stress of rolling out pastry dough or crimping edges.
- Everything happens in one pan, which means fewer dishes to wash and more time to actually enjoy your creation (or scroll through your phone while they bake).
- The combo of sweet-tart apples, buttery crumble, and that salty-sweet caramel drizzle is honestly chef’s kiss material.
- According to Serious Eats, the secret to great apple desserts is balancing sweetness with a touch of salt and spice — which is exactly what’s happening here with that salted caramel magic.
Quick Facts ⚡
Here’s the quick scoop on this Salted Caramel Apple Bars recipe.
- CourseDessert
- Prep Time15 minutes
- Cook Time45 minutes
- Total Time1 hour (plus cooling time)
- Servings12-16 bars
- DifficultyEasy
Table of Contents
Nutritional Peek
Here’s a friendly breakdown of what you’re getting in each delicious bar. Remember, these numbers are approximate and can vary based on the exact ingredients you use and how generously you cut your portions.
| Nutrient | Amount per serving |
|---|---|
| Calories | 285 kcal |
| Protein | 2g |
| Carbohydrates | 42g |
| Total Fat | 13g |
| Saturated Fat | 8g |
| Fiber | 1g |
| Sugar | 26g |
| Sodium | 145mg |
Based on 16 servings
Ingredients
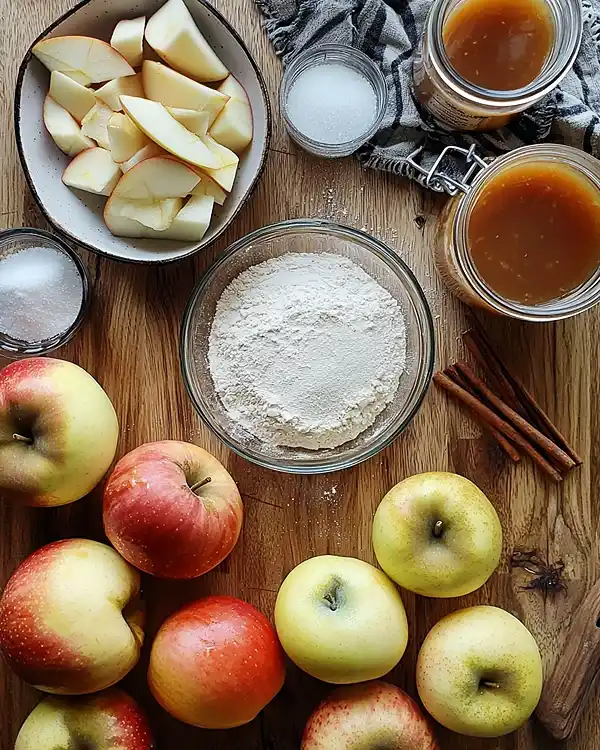
These Apple Pie Bars start with ingredients you probably already have hanging out in your pantry — nothing fancy or hard to find, promise.
| Amount | Ingredient |
|---|---|
| 1 cup (2 sticks) | Unsalted butter, melted — yes, real butter, because margarine just doesn’t cut it here |
| 1 1/2 cups | Granulated sugar |
| 1 teaspoon | Vanilla extract (the real stuff makes a difference!) |
| 1/2 teaspoon | Salt |
| 2 1/2 cups | All-purpose flour |
| 3 cups | Peeled and thinly sliced apples (about 3 medium) — I love Granny Smith or Honeycrisp |
| 1/2 cup | Salted caramel sauce (store-bought works great, or use homemade if you’re feeling ambitious) |
| 1 teaspoon | Ground cinnamon |
| 1/4 teaspoon | Ground nutmeg (don’t skip this — it adds that cozy warmth) |
Tools You’ll Actually Use
- 9×13 inch baking pan
- Parchment paper (saves your sanity during cleanup)
- Large mixing bowl
- Medium bowl for the apples
- Wooden spoon or sturdy spatula
- Peeler and sharp knife for the apples
- Measuring cups and spoons
Step-by-Step Instructions
Making Salted Caramel Apple Bars is honestly as simple as mix, layer, bake, and try not to eat them all before they cool completely (that last part is the hardest step, not gonna lie).
Step 1: Prep Your Pan
Preheat your oven to 375°F (190°C). Line your 9×13 inch baking pan with parchment paper, letting it hang over the edges a bit — this creates little handles for lifting out your bars later, and trust me, it’s a game-changer.
Step 2: Make the Buttery Base
In a large bowl, stir together your melted butter, sugar, vanilla extract, and salt until everything’s nice and combined. Add the flour and mix until you get a crumbly texture — kind of like wet sand at the beach. It should hold together when you squeeze it but still look crumbly.
Step 3: Create the Crust
Press about two-thirds of this crumbly mixture firmly and evenly into the bottom of your prepared pan. Use your hands or the bottom of a measuring cup to really pack it down. This creates that sturdy, cookie-like base that holds everything together.
Step 4: Prep Those Apples
In your medium bowl, toss your thinly sliced apples with the cinnamon and nutmeg. The slices should be pretty thin — about 1/4 inch — so they cook through and get all tender and sweet. Spread this spiced apple mixture evenly over your crust.
Step 5: The Caramel Drizzle
Drizzle that gorgeous salted caramel sauce over the apples. Don’t worry about making it perfect — rustic and random actually looks better and tastes better because you get little pockets of extra caramel throughout.
Step 6: Top It Off
Crumble the remaining flour mixture over everything. Let it fall naturally in clumps and clusters — this creates that beautiful, bakery-style crumble topping.
Step 7: Bake to Golden Perfection
Slide your pan into the oven and bake for 40-45 minutes, until the topping is golden brown and the apples are tender when you poke them with a knife. Your kitchen should smell absolutely amazing — like a cozy fall café.
Step 8: The Hardest Part — Waiting
Let your bars cool completely in the pan before cutting. I know, I know — the wait is brutal. But if you cut them while they’re hot, they’ll fall apart. Once cool, use your parchment paper handles to lift the whole thing out, then slice into bars.
Claire’s Pro Tips & Gentle Guidance
These Caramel Apple Bars are pretty forgiving, but here are some little secrets I’ve picked up after making them roughly a hundred times:
Choose the Right Apples: I’m a Granny Smith girl for baking because they hold their shape and bring that perfect tart contrast to all the sweetness. But Honeycrisp, Braeburn, or even a mix of varieties work beautifully too. Just avoid Red Delicious — they get mushy and don’t have enough flavor oomph.
Slice Thin and Consistent: If your apple slices are too thick, they won’t cook through in time and you’ll end up with crunchy bits. Aim for about 1/4 inch thickness, and try to keep them consistent so everything bakes evenly.
Don’t Skimp on the Crust-Pressing: Really pack down that bottom layer. I learned this the hard way when my first batch basically dissolved into apple soup because I was too gentle. A firm crust = structural integrity.
Caramel Quality Matters: I’ve used both homemade and store-bought salted caramel, and honestly? Good store-bought (like Ghirardelli or Trader Joe’s) works perfectly. According to Bon Appétit, choosing a quality caramel sauce with real cream and butter makes all the difference in your final result — and I couldn’t agree more.
The Cooling Situation: I get it — waiting is hard. But these bars really do need to cool completely to set up properly. I usually make them in the afternoon and let them chill until after dinner. If you’re in a rush, pop the pan in the fridge for about an hour.
Quick Fixes for Salted Caramel Apple Bars
Even easy recipes can have their moments. Here’s how to troubleshoot the most common hiccups:
Problem: The bars are falling apart when I cut them
Fix: They probably weren’t cool enough yet, or the bottom crust wasn’t pressed firmly enough. Make sure they’re completely cooled (even refrigerate them), and use a sharp knife wiped clean between cuts.
Problem: The topping is browning too fast
Fix: Tent some aluminum foil loosely over the top for the last 10-15 minutes of baking. The apples will continue cooking while the crumble won’t over-brown.
Problem: The apples seem undercooked or crunchy
Fix: Your slices might have been too thick, or your apples were super firm. Just pop the pan back in the oven for another 10 minutes. You can test doneness by poking an apple slice with a knife — it should slide through easily.
Problem: My bars are too crumbly/dry
Fix: This usually means too much flour or not enough butter. Next time, measure your flour by spooning it into the measuring cup rather than scooping (which packs it down and gives you more than you need).
Problem: There’s too much liquid pooling in the bottom
Fix: Your apples probably released a lot of juice. Next time, toss the sliced apples with a tablespoon of flour along with the spices — it’ll help absorb some of that extra moisture.
Variations & Fun Twists
Once you’ve nailed the basic recipe for these Apple Pie Bars, here are some fun ways to switch things up:
Pear & Caramel Version: Swap the apples for thinly sliced pears (Bosc or Anjou work great). They’re a little sweeter and softer, and the caramel plays beautifully with them.
Pecan Crumble Topping: Add 1/2 cup chopped pecans to your crumble topping for extra crunch and that classic autumn flavor combo.
Maple Twist: Replace half the caramel sauce with pure maple syrup for a more subtle, woodsy sweetness.
Gluten-Free Option: Use a 1:1 gluten-free flour blend in place of all-purpose flour. Bob’s Red Mill works great here. The texture will be slightly different but still delicious.
Extra Spice: If you’re a spice lover like me, add a pinch of cardamom or ginger to your apple mixture. It gives everything a warm, chai-like vibe.
Individual Servings: Press the crust into a muffin tin instead, add a spoonful of apples and caramel to each cup, then top with crumble. Bake for about 25-30 minutes for cute mini versions.
Fancy Presentation: Serve warm bars with a scoop of vanilla ice cream and an extra drizzle of caramel. Suddenly your easy dessert looks like it belongs in a restaurant.
Serving, Storage & Reheating
These Caramel Apple Bars are flexible and forgiving when it comes to serving and storing — which is exactly what busy bakers need.
Serving Suggestions:
Honestly, these are perfect at room temperature, which makes them ideal for potlucks, bake sales, or packing in lunches. But if you want to get fancy, warm them slightly and add a scoop of vanilla ice cream or a dollop of whipped cream. A little extra caramel drizzle never hurt anyone either.
I also love pairing these with coffee for an afternoon treat, or serving them alongside creamy mashed potatoes and easy cranberry sauce as part of a Thanksgiving dessert spread.
Storage:
If you actually have leftovers (which I doubt), store them in an airtight container at room temperature for up to 3 days. For longer storage, keep them in the fridge for up to a week. The cold makes them a bit firmer, which some people actually prefer for easier eating.
Freezing:
These freeze beautifully! Cut into bars, wrap individually in plastic wrap, then store in a freezer bag for up to 3 months. Thaw overnight in the fridge or at room temperature for a few hours.
Reheating:
To bring back that fresh-from-the-oven warmth, microwave individual bars for about 15-20 seconds, or warm them in a 300°F oven for 10 minutes. The caramel gets all melty and gooey again — it’s dangerous, honestly.
No-Waste Kitchen Magic
I’m all about getting the most out of your ingredients and reducing waste wherever possible. Here are some ideas for these bars:
Apple Scraps: Don’t toss those peels and cores! Simmer them with water, cinnamon, and a bit of sugar to make a quick homemade apple syrup for pancakes or oatmeal.
Extra Caramel Sauce: Got leftover caramel? Drizzle it over ice cream, stir it into coffee, or use it as a dip for apple slices (meta, I know).
Day-Old Bars: If your bars get a bit dry after a few days, crumble them up and use them as a topping for yogurt parfaits or ice cream. They’re also amazing mixed into vanilla yogurt for a quick dessert-for-breakfast situation.
Overripe Apples: Those apples that are past their prime for snacking? Perfect for this recipe! They’ll soften up beautifully and you’re saving them from the compost bin.
Crumble Mixture Scraps: Made too much crumble topping? Freeze it in a bag and use it to top other fruit crisps, muffins, or even sprinkle over oatmeal before baking.
Salted Caramel Apple Bars FAQs
Can I freeze Salted Caramel Apple Bars?
Absolutely! These bars freeze really well. Just wrap them individually and freeze for up to 3 months. They thaw quickly and taste just as good as fresh.
What kind of apples work best for Apple Pie Bars?
Granny Smith are my favorite because they’re tart and hold their shape when baked. Honeycrisp, Braeburn, and Jonagold are also excellent choices. Avoid softer apples like Red Delicious or McIntosh — they get too mushy.
Can I use homemade caramel sauce instead of store-bought?
Yes! Homemade salted caramel is amazing in this recipe if you have the time. Just make sure it’s thick enough to drizzle but not so thick it won’t spread.
My bars are too soft and won’t hold together — what happened?
Usually this means they needed to cool longer, or the bottom crust wasn’t pressed firmly enough. Pop them in the fridge for an hour to help them firm up, and make sure to really pack down that crust layer next time.
Can I make these ahead for a party?
Definitely! These actually taste better the next day after all the flavors have had time to meld. Make them up to 2 days ahead and store covered at room temperature
Cozy Closing
There you have it — the easiest, coziest Salted Caramel Apple Bars that’ll make you look like a baking superstar without breaking a sweat. Whether you’re bringing them to a holiday gathering, making them for a lazy Sunday afternoon, or just need something sweet to get through the week, these bars have got your back.
The best part? Every time I make these, someone asks for the recipe. And now you’ve got it, complete with all my little secrets and mishaps so you don’t have to learn the hard way like I did.
I’d love to see your spin on these Salted Caramel Apple Bars! Did you add pecans? Try a different caramel? Eat them straight from the pan at midnight? Leave a note below or tag me on Instagram so we can share a sweet moment together. And if you’re looking for more fall dessert inspiration, check out these caramel apple cheesecake bars too!
Happy baking, friend! 🍎
I’m Claire Whitmore — a dessert daydreamer from Asheville, NC. For me, baking isn’t about perfect pastries — it’s about the joy of sharing something sweet (and maybe sneaking an extra scoop of icing). When I’m not covered in flour, you’ll find me exploring mountain trails or searching for the perfect coffee shop.
Salted Caramel Apple Bars
Equipment
- 9×13 inch baking pan
- Parchment paper
- Large mixing bowl
- Medium bowl
- Wooden spoon or spatula
- Peeler
- Sharp knife
- Measuring cups and spoons
Ingredients
Main
- 1 cup (2 sticks) Unsalted butter melted
- 1 ½ cups Granulated sugar
- 1 teaspoon Vanilla extract the real stuff makes a difference
- ½ teaspoon Salt
- 2 ½ cups All-purpose flour
- 3 cups Apples peeled and thinly sliced, about 3 medium, Granny Smith or Honeycrisp
- ½ cup Salted caramel sauce store-bought or homemade
- 1 teaspoon Ground cinnamon
- ¼ teaspoon Ground nutmeg
Instructions
- Preheat oven to 375°F (190°C). Line a 9×13 inch baking pan with parchment paper, leaving overhang for easy removal.
- In a large bowl, mix melted butter, sugar, vanilla, and salt until combined. Add flour and stir until crumbly and sandy in texture.
- Press two-thirds of the mixture into the bottom of the pan to form a firm crust.
- Toss apple slices with cinnamon and nutmeg. Spread evenly over the crust.
- Drizzle salted caramel sauce over the apples.
- Sprinkle the remaining crumb mixture evenly over the top to create a crumble topping.
- Bake for 40–45 minutes until golden and the apples are tender.
- Cool completely before slicing into bars. Lift out using parchment handles and cut into 12–16 bars.