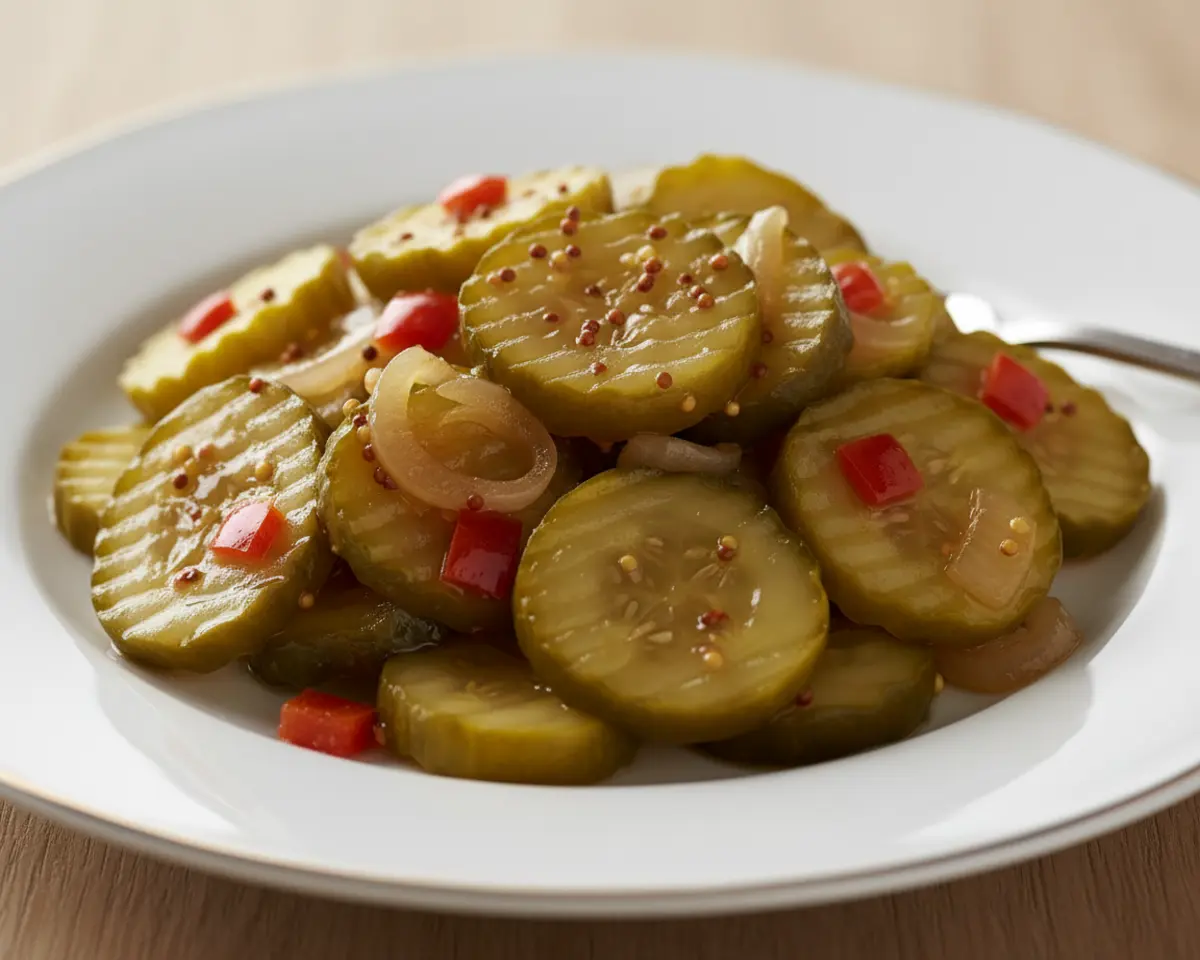
Mount Olive Bread and Butter Pickles
Mount Olive Bread and Butter Pickles are the sweet, tangy crunch that makes every sandwich better and every relish tray shine. If you’ve ever stood in the grocery aisle wishing you could recreate that iconic flavor at home, you’re in exactly the right place. This homemade sweet pickles recipe delivers that perfect balance of sugar, vinegar, and spice—just like the jar you grew up loving.
Making your own bread and butter pickle recipe is easier than you think, and honestly? It’s kind of magical watching cucumbers transform into golden, flavor-packed slices. You’ll need just a handful of pantry ingredients and a little patience while the brine does its thing.
Plus, canning bread and butter pickles means you’ll have jars of sunshine ready to gift, snack on, or stack on burgers all year long.
This mount olive pickles copycat nails that nostalgic sweetness without any mystery ingredients. Let’s get those cucumbers soaking and that brine bubbling—your kitchen’s about to smell incredible.
Table of Contents
Quick Overview
Craving more fantastic ways to kick off your meals? If these zesty pickles have your taste buds tingling, you’ll absolutely love diving into our curated collection of irresistible classic appetizers perfect for any occasion!
Little Snapshot: What This Recipe Delivers
Mount Olive Bread and Butter Pickles are sweet, tangy cucumber slices preserved in a spiced vinegar brine with onions, mustard seeds, and a hint of turmeric. This recipe makes about 8 pints of crisp, golden pickles perfect for canning or refrigerator storage. Ready in about 4 hours including brining time, they’re an easy, flavorful homemade alternative to store-bought jars.
Why You’ll Love This Recipe 🌸
- This bread and butter pickle recipe takes less hands-on time than a Target run and gives you jars of homemade magic.
- You control the sweetness, the crunch, and every single ingredient—no weird preservatives or mystery spices here.
- These pickles make the best gifts, and they’ll last on your pantry shelf for months of snacking bliss.
- According to Healthline, pickled vegetables can support gut health and add beneficial probiotics to your diet—and this recipe proves exactly why homemade is worth it.
Quick Facts ⚡
Here’s the quick scoop on this Mount Olive Bread and Butter Pickles.
- CourseCondiment/Preserve
- Prep Time20 minutes
- Cook Time15 minutes
- Total Time3 hours 35 minutes (includes brining)
- ServingsAbout 8 pints
- DifficultyEasy
Nutritional Peek
| Nutrient | Amount per serving (1/4 cup) |
|---|---|
| Calories | 35 |
| Protein | 0g |
| Carbohydrates | 9g |
| Fat | 0g |
| Fiber | 0g |
| Sugar | 8g |
What You’ll Need
You don’t need fancy gadgets to make these pickles, but a few trusty tools will make the process smooth and safe. Here’s what to gather before you start slicing and brining.
- Large mixing bowl (for salting cucumbers)
- Colander or mesh strainer
- Large heavy-bottomed pot or Dutch oven
- Wooden spoon or silicone spatula
- Sharp knife and cutting board
- 8 pint-sized canning jars with lids and bands
- Boiling water canner (or large stockpot with rack)
- Jar lifter and canning funnel
- Clean kitchen towels
- Measuring cups and spoons
Ingredients
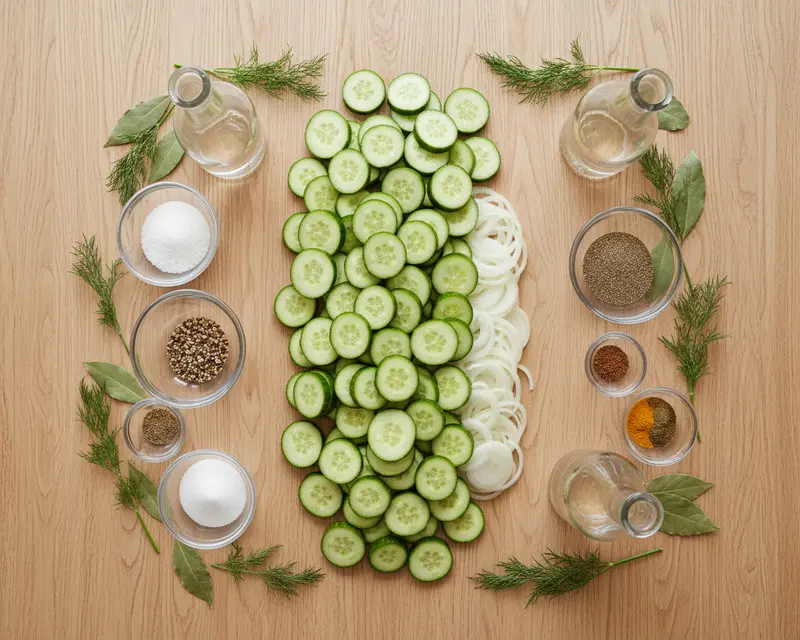
A great bread and butter pickle recipe starts with fresh, firm cucumbers and the right balance of sweet and tangy brine ingredients. You’ll layer cucumbers with onions, salt them to draw out moisture, then bathe everything in a golden, spiced vinegar syrup. It’s simple, traditional, and totally customizable if you want to tweak the sweetness or spice level.
| Group | Ingredient | Amount | Notes |
|---|---|---|---|
| Vegetables | Sliced cucumbers | 10 cups (about 4-5 medium) | Choose firm, fresh cukes—pickling varieties work best |
| Vegetables | Sliced onions | 2 cups (about 1 large) | Yellow or sweet onions add a gentle bite |
| Brine Base | Pickling salt | 1/2 cup | Draws out water and keeps pickles crisp |
| Brine Base | White vinegar | 4 cups | 5% acidity—don’t substitute with anything weaker |
| Brine Base | Granulated sugar | 2 cups | The “butter” in bread and butter pickles |
| Spices | Mustard seeds | 2 tablespoons | Adds that signature tangy pop |
| Spices | Celery seeds | 1 teaspoon | Subtle herbal note |
| Spices | Turmeric | 1/2 teaspoon | Gives that gorgeous golden color |
Step-by-Step Instructions
Let’s make this happen. Mount Olive Bread and Butter Pickles start with a simple salt brine to firm up the cucumbers, then a quick simmer in a sweet, spiced vinegar bath. The process is straightforward, and the reward is jars of crispy, golden pickles that taste like summer all year long.
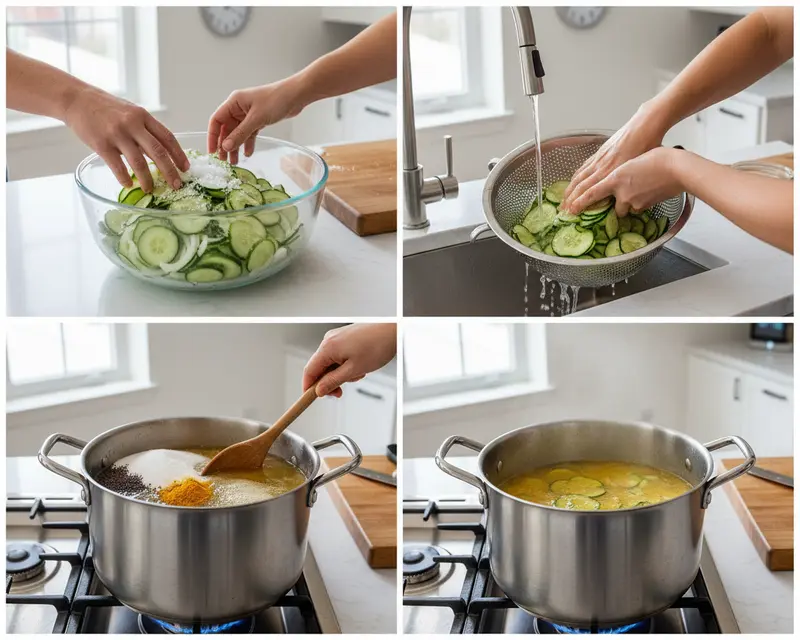
- In a large bowl, toss together the sliced cucumbers and onions. Sprinkle the pickling salt evenly over the top and toss gently to coat every piece. Cover loosely and let the mixture sit at room temperature for exactly 3 hours—this draws out water and keeps your pickles crisp.
- After 3 hours, pour the cucumber and onion mixture into a colander. Press down gently to squeeze out as much liquid as possible. Rinse everything thoroughly under cold running water to remove excess salt, then drain again and set aside.
- In a large pot, combine the white vinegar, granulated sugar, mustard seeds, celery seeds, and turmeric. Bring the mixture to a rolling boil over medium-high heat, stirring frequently until the sugar dissolves completely and the brine turns a lovely golden hue.
- Add the drained cucumber and onion mixture to the boiling brine. Reduce the heat to medium-low and let everything simmer gently for 5 to 7 minutes. You want the cucumbers heated through but still firm and snappy—don’t let them go soft.
- While the pickles simmer, prepare your canning jars by washing them in hot, soapy water and keeping them hot until you’re ready to fill. Sterilize the lids according to package directions. This keeps everything safe and shelf-stable.
- Using a canning funnel and a ladle, carefully fill each hot jar with the hot pickles and brine, leaving exactly 1/2 inch of headspace at the top. Work slowly so you don’t splash or overfill.
- Run a clean chopstick or plastic spatula around the inside edge of each jar to release any trapped air bubbles. Wipe the jar rims with a damp, clean towel to remove any sticky residue. Center the lids on top and screw the bands on until they’re fingertip tight—not gorilla tight.
- Process the filled jars in a boiling water canner for 10 minutes, making sure the water covers the jars by at least 1 inch. Start timing once the water returns to a full boil. Adjust processing time if you’re at high altitude.
- Turn off the heat, remove the canner lid, and let the jars sit in the hot water for 5 minutes. This helps prevent jar breakage from temperature shock. Then carefully lift the jars out with a jar lifter and place them on a wire rack or folded towel to cool completely.
- Leave the jars undisturbed for 12 to 24 hours. You’ll hear the satisfying “ping” as the lids seal. Check each seal by pressing the center of the lid—if it doesn’t flex, you’re golden. Any unsealed jars should go straight into the fridge and be enjoyed within a few weeks.
Pro Tips & Gentle Guidance
Canning bread and butter pickles is forgiving, but a few insider tricks will take your batch from good to “where did you buy these?” Here’s what I’ve learned after making jars and jars of these golden beauties in my Charleston kitchen.
Use pickling or Kirby cucumbers if you can find them—they’re bred to stay crisp and never turn hollow or mushy. Regular slicing cucumbers work in a pinch, but they have more seeds and water, so your texture won’t be quite as snappy.
Don’t mess with the vinegar ratio. The acidity level is what keeps your pickles safe for shelf storage, so always use vinegar with at least 5% acidity. If you want less tang, add a bit more sugar—but never dilute the vinegar itself.
Let your sealed jars sit for at least 2 weeks before cracking one open. The flavors meld and mellow over time, and the pickles get even better as they cure. I know it’s hard to wait, but trust me on this one.
If you’re new to water bath canning, check out the National Center for Home Food Preservation’s guide for detailed safety tips and altitude adjustments. It’s a fantastic resource that’ll answer all your canning questions.
Label your jars with the date so you know when you made them. Properly sealed pickles will keep for up to a year in a cool, dark pantry—but honestly, they rarely last that long around here.
Variations & Adaptations
Once you’ve nailed the classic Mount Olive Bread and Butter Pickles, it’s fun to play around with flavors and textures. Here are a few twists that keep things interesting without changing the core magic.
Spicy Bread and Butter Pickles: Add 1 to 2 teaspoons of red pepper flakes or a few sliced jalapeños to the brine. You’ll get a gentle kick that balances beautifully with the sweetness.
Garlic Lover’s Version: Toss in 4 to 6 cloves of peeled, smashed garlic when you add the cucumbers to the brine. The garlic mellows as it pickles and adds an extra layer of savory goodness.
Lower Sugar Option: Cut the sugar down to 1 1/2 cups if you prefer a less sweet pickle. They’ll be tangier and more vinegar-forward, but still delicious. Don’t go below 1 cup or the flavor balance gets wonky.
Add-In Fun: Try thinly sliced bell peppers, carrots, or even cauliflower florets mixed in with the cucumbers. You’ll end up with a colorful, crunchy pickle medley that’s perfect for relish trays.
Refrigerator Pickles: Skip the canning process entirely and store your pickles in clean jars in the fridge. They’ll be ready to eat in 24 hours and keep for about 2 months—perfect if you’re not ready to dive into water bath canning yet.
Quick Fixes for Mount Olive Bread and Butter Pickles
Problem: My pickles turned out mushy and soft instead of crisp.
Solution: This usually happens when cucumbers aren’t salted long enough or when they’re overcooked. Make sure you let them sit in salt for the full 3 hours and only simmer them for 5 to 7 minutes—just until heated through, not soft.
Problem: The brine tastes too vinegary and harsh.
Solution: Give your sealed jars at least 2 weeks to cure before tasting. The sharpness mellows significantly as the flavors marry. If it’s still too strong, add an extra 1/4 cup of sugar next time you make a batch.
Problem: My jar lids didn’t seal after processing.
Solution: Check that your jar rims were completely clean before applying the lids, and make sure you processed them for the full 10 minutes in boiling water. Unsealed jars are still safe—just refrigerate them and eat within 3 weeks.
Problem: The pickles are too salty even after rinsing.
Solution: Rinse the cucumber and onion mixture more thoroughly under cold water after the 3-hour salt soak. You can even soak them in fresh cold water for 10 minutes, then drain and rinse again before adding to the brine.
Problem: My pickles look pale instead of golden.
Solution: Make sure you’re using turmeric—it’s what gives that signature yellow color. Also, give the brine a good stir before ladling it into jars so the spices distribute evenly.
Storage & Reheating
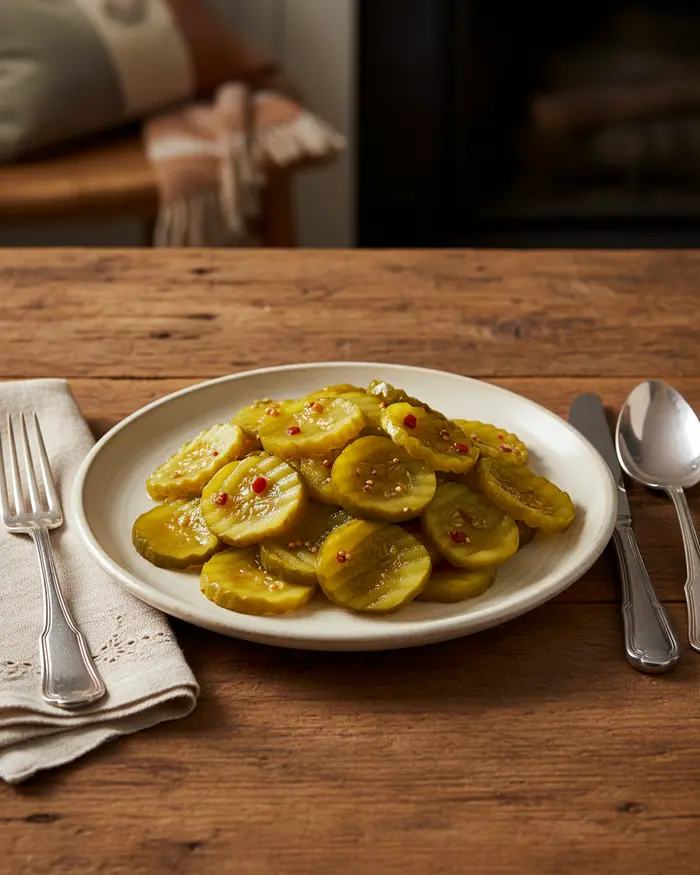
Homemade sweet pickles are meant to be savored slowly, and proper storage keeps them crisp and flavorful for months. Sealed jars can live happily in your pantry, while opened jars need a cozy spot in the fridge.
Store sealed jars in a cool, dark place like a pantry or cupboard away from direct sunlight. They’ll stay at peak flavor and crunch for up to 12 months. Once you crack open a jar, keep it refrigerated with the lid tightly closed—it’ll stay fresh for about 2 months.
No reheating needed here! These pickles are meant to be enjoyed cold or at room temperature, straight from the jar. Pile them on sandwiches, chop them into potato salad, or snack on them right out of the fridge.
| Storage Method | Duration | Best Practices |
|---|---|---|
| Pantry (sealed jars) | Up to 12 months | Store in a cool, dark spot; check seals before opening |
| Refrigerator (opened jars) | Up to 2 months | Keep lid tightly closed; always use a clean fork |
| Refrigerator pickles (no canning) | Up to 2 months | Ready to eat in 24 hours; store in clean glass jars |
Variations & Adaptations
There’s so much room to play once you’ve mastered the basic bread and butter pickle recipe. Try these fun spins to match your taste or use up what’s in your garden.
Zucchini Bread and Butter Pickles: Swap half the cucumbers for thinly sliced zucchini. The texture is slightly softer, but the flavor is just as addictive and it’s a great way to use up a bumper crop.
Dill-Infused Twist: Add a tablespoon of dill seeds or a few sprigs of fresh dill to each jar before filling. You’ll get a savory, herbaceous note that pairs beautifully with the sweetness.
Asian-Inspired Pickles: Replace half the white vinegar with rice vinegar, cut the sugar to 1 1/2 cups, and add a tablespoon of grated fresh ginger and a teaspoon of sesame seeds. It’s a fun fusion that’s amazing on rice bowls.
Extra Onion Lovers: Bump the onions up to 3 cups and reduce the cucumbers slightly. You’ll get more of that sweet, tangy onion flavor in every bite—perfect for topping hot dogs or burgers.
No-Waste Kitchen Magic
Making pickles at home is already a beautiful way to preserve the season, but there are even more ways to stretch every ingredient and avoid waste. Here’s how to use every bit.
Save that leftover pickle brine! It’s packed with flavor and perfect for quick-pickling sliced onions, hard-boiled eggs, or even marinating chicken. Pour it over sliced veggies and let them sit in the fridge for a few hours—instant snack.
Cucumber peels and ends can go straight into your compost bin or be tossed into a pitcher of water for a refreshing, spa-like drink. If you have chickens, they’ll happily munch on cucumber scraps too.
Any jars that didn’t seal properly are still perfectly safe and delicious. Pop them in the fridge and enjoy them first, or give them to a neighbor as a “fresh batch” gift. They’ll never know the difference.
Onion peels and tops make excellent additions to homemade vegetable broth. Toss them in a freezer bag along with other veggie scraps, and when the bag’s full, simmer everything for a rich, flavorful stock.
Reuse your canning jars year after year—they’re dishwasher safe and practically indestructible. Just buy new lids each season for a proper seal, and your jars will last a lifetime.
Frequently Asked Questions
Got questions about making your own Mount Olive Bread and Butter Pickles at home? Here are the answers to the most common pickle puzzles.
What are Mount Olive Bread and Butter Pickles?
Mount Olive Bread and Butter Pickles are sweet and tangy pickle chips made from fresh cucumbers, sliced and preserved in a blend of vinegar, sugar, and spices. They have a distinctive sweet flavor profile with hints of mustard and turmeric, making them a popular condiment for sandwiches and burgers.
What ingredients are in Mount Olive Bread and Butter Pickles?
Mount Olive Bread and Butter Pickles typically contain cucumbers, high fructose corn syrup, vinegar, salt, calcium chloride, natural flavors, polysorbate 80, turmeric extract for color, and mustard seed. The exact ingredients may vary by product variety, so checking the label is recommended.
How should Mount Olive Bread and Butter Pickles be stored?
Unopened jars of Mount Olive Bread and Butter Pickles should be stored in a cool, dry place away from direct sunlight. Once opened, they should be refrigerated and kept tightly sealed. When properly refrigerated, opened pickles can last for several months while maintaining their quality and flavor.
Are Mount Olive Bread and Butter Pickles gluten-free?
Yes, Mount Olive Bread and Butter Pickles are generally considered gluten-free as they do not contain wheat, barley, rye, or other gluten-containing ingredients. However, those with severe gluten sensitivities should check the specific product label or contact the manufacturer to confirm, as manufacturing processes can vary.
What are common uses for Mount Olive Bread and Butter Pickles?
Mount Olive Bread and Butter Pickles are versatile and can be used in many ways. They are commonly served on hamburgers, sandwiches, and hot dogs. They can also be chopped and added to potato salad, egg salad, tuna salad, or relish trays. Some people enjoy eating them straight from the jar as a sweet and tangy snack.
Final Dish
Mount Olive Bread and Butter Pickles are the kind of recipe that makes you feel like a kitchen wizard—sweet, tangy, crunchy, and totally worth the few hours of hands-on love. Once you taste these golden beauties, you’ll never look at store-bought jars the same way again.
Whether you’re stacking them on a burger, stirring them into tuna salad, or sneaking slices straight from the jar, they’re pure comfort in every bite.
I’d love to see your jars lined up on the counter or hear how you used your pickles! Snap a photo, tag me, or drop a comment below with your favorite way to enjoy them. And if you’re looking for more homemade preserves and pantry staples, explore the rest of the recipe collection—there’s always something delicious waiting for you.
I’m Linda Sandra — a Charleston home chef and comfort-food daydreamer. Around here, cooking’s not about perfection — it’s about cozy vibes, creative twists, and food that feels like love.
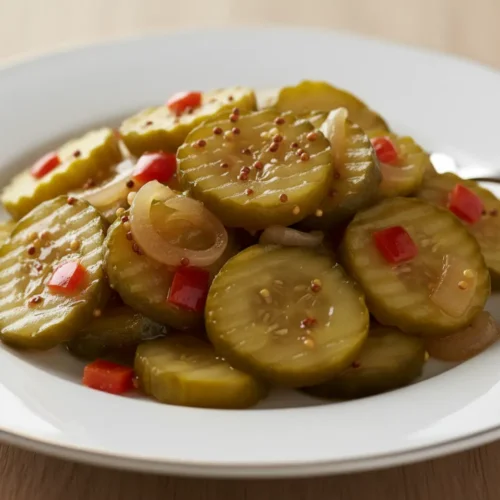
Mount Olive Bread and Butter Pickles
Ingredients
- 10 cups sliced cucumbers about 4-5 medium cucumbers
- 2 cups sliced onions about 1 large onion
- ½ cup pickling salt
- 4 cups white vinegar
- 2 cups granulated sugar
- 2 tablespoons mustard seeds
- 1 teaspoon celery seeds
- ½ teaspoon turmeric
Instructions
- In a large bowl, combine the sliced cucumbers and onions. Sprinkle with pickling salt and toss to coat. Let stand for 3 hours.
- After 3 hours, drain the cucumber and onion mixture thoroughly, pressing out excess liquid. Rinse well under cold water and drain again.
- In a large pot, combine white vinegar, granulated sugar, mustard seeds, celery seeds, and turmeric. Bring to a boil over medium-high heat, stirring until sugar dissolves.
- Add the drained cucumber and onion mixture to the boiling brine. Reduce heat and simmer for 5-7 minutes, or until the cucumbers are heated through but still crisp.
- Carefully ladle the hot pickles and brine into hot, sterilized canning jars, leaving 1/2 inch headspace.
- Remove air bubbles and wipe jar rims clean. Center lids on jars and apply screw bands until fingertip tight.
- Process in a boiling water canner for 10 minutes (adjusting for altitude if necessary).
- Turn off heat, remove canner lid, and let jars sit in the canner for 5 minutes.
- Remove jars from canner and place on a wire rack to cool completely. Check seals after 24 hours. Any unsealed jars should be refrigerated and consumed within a few weeks.