Green Chile Chicken Enchilada Casserole
I’m Linda Sandra — a Charleston home cook who believes every meal should feel like a hug, and this Green Chile Chicken Enchilada Casserole recipe is exactly that kind of comfort. It’s the dish I make when I need to feed a hungry crowd without spending hours in the kitchen rolling individual enchiladas.
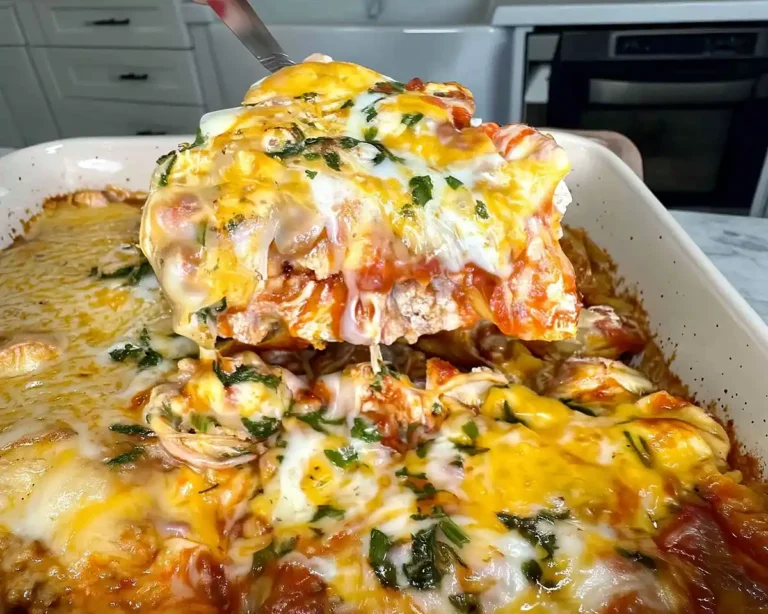
This casserole brings together tender shredded chicken, tangy green chile sauce, melty Monterey Jack cheese, and charred corn tortillas in layers that practically beg you to dig in. The green chiles add just the right amount of mild heat without overwhelming anyone at the table, making it perfect for families with different spice tolerances.
I first made this for a neighborhood potluck where I was totally frazzled and needed something foolproof. Everyone went back for seconds, and three people asked for the recipe before dessert even came out. That’s when I knew this one was a keeper.
Table of Contents
Little Snapshot: What This Recipe Delivers
This Green Chile Chicken Enchilada Casserole combines seasoned baked chicken, charred corn tortillas, tangy green chile sauce, Monterey Jack cheese, and sour cream in easy layers that serve 20 people.
It takes about 2 hours total with minimal hands-on work, making it perfect for potlucks, family gatherings, or meal prep when you want maximum flavor with minimum fuss.
Nutritional Peek
Here’s what you’re getting per serving — because sometimes it’s nice to know, even when comfort food is calling your name.
| Nutrient | Amount per Serving |
|---|---|
| Calories | 285 |
| Protein | 22g |
| Carbohydrates | 18g |
| Total Fat | 14g |
| Saturated Fat | 8g |
| Fiber | 2g |
| Sugar | 2g |
| Sodium | 520mg |
Ingredients
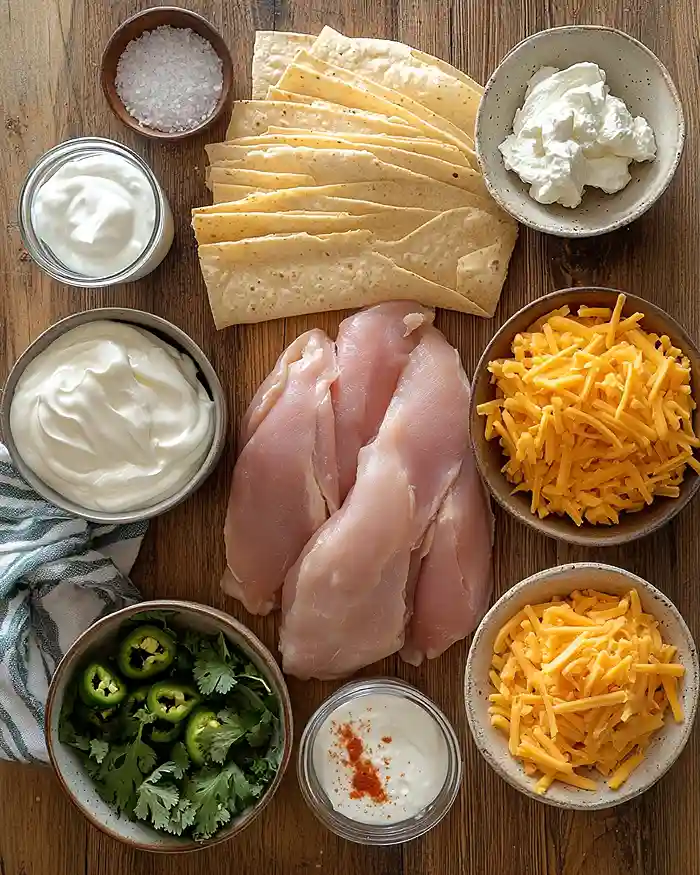
This Enchilada Casserole comes together with simple ingredients you can grab at any grocery store. For the protein base, you’ll need chicken breasts that’ll get seasoned with garlic salt and baked until tender before shredding.
For the layering components — corn tortillas, green chile enchilada sauce, Monterey Jack cheese, and reduced-fat sour cream — you’ll want everything ready before you start assembling so the process flows smoothly.
| Amount | Ingredient |
|---|---|
| 4 breasts | boneless, skinless chicken breasts |
| to taste | garlic salt |
| 18 tortillas | 6-inch corn tortillas, torn in half |
| 28 oz | can green chile enchilada sauce |
| 16 oz | package shredded Monterey Jack cheese |
| 8 oz | container reduced-fat sour cream |
Tools You’ll Actually Use
Here’s what you’ll need to pull this together — nothing fancy, I promise:
- Medium-sized baking dish (9×13 works beautifully)
- Metal tongs (for charring tortillas)
- Mixing bowl
- Sharp knife or two forks (for shredding chicken)
- Aluminum foil or baking dish cover
- Meat thermometer (optional but helpful)
Step-by-Step Instructions
Let’s make this Green Chile Chicken Enchilada Casserole happen — it’s easier than you think, and your kitchen’s about to smell incredible.
Step 1: Preheat your oven to 350°F and give a medium-sized baking dish a light coating of cooking spray or butter. Season those chicken breasts generously with garlic salt on both sides — don’t be shy, this is where the flavor starts.
Step 2: Place the seasoned chicken breasts in your prepared baking dish and slide them into the oven. Bake for about 45 minutes, or until the chicken reaches 165°F internally and the juices run clear when you pierce the thickest part. This is your chance to prep everything else while the chicken does its thing.
Step 3: Once the chicken is cooked through, pull it from the oven and let it cool for about 10 minutes — you don’t want to burn your fingers. Use two forks or your hands to shred it into bite-sized pieces, then set it aside in a bowl.
Step 4: Here’s where the magic happens — grab your metal tongs and char those tortilla halves directly over an open flame on your stovetop. Hold each one over the flame for about a minute until it puffs slightly and gets those gorgeous char marks. This step adds a smoky depth that makes the whole dish sing.
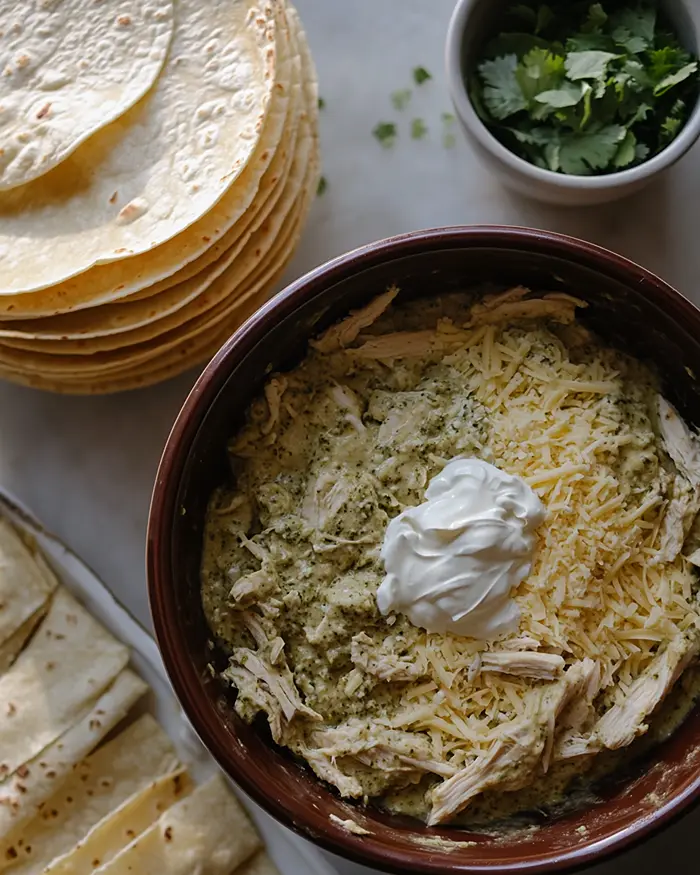
Step 5: Pour about 1/2 inch of green chile enchilada sauce into the bottom of your baking dish — this prevents sticking and creates a saucy base. Arrange 6 charred tortilla halves in a single layer right on top of that sauce.
Step 6: Time to build your first layer. Spread half of your shredded chicken over the tortillas, then sprinkle on about one-third of the Monterey Jack cheese.
Dollop half of the sour cream across the cheese layer (don’t worry about making it perfect), then drizzle about one-third of the remaining enchilada sauce over everything.
Step 7: Repeat the whole layering process one more time — tortillas, remaining chicken, another third of cheese, the rest of the sour cream, and another third of sauce. Top it all off with your final layer of tortillas and the last of your cheese and sauce. It should look gloriously messy and delicious.
Step 8: Cover your assembled casserole with foil or a lid and bake in that 350°F oven for 45 minutes. The cheese should be melted and bubbly, and all those flavors will have melded together beautifully.
Step 9: Let the Green Chile Chicken Enchilada Casserole cool for about 5-10 minutes before serving — this helps it set up so you get nice, clean portions instead of a soupy mess. Then dig in and watch it disappear.
Pro Tips & Gentle Guidance
These little tricks will take your Chicken Enchiladas from good to “can I have the recipe?” great. Trust me, I learned most of these the hard way so you don’t have to.
If you’re short on time, use a rotisserie chicken instead of baking your own — just shred about 4 cups of meat and you’re golden. No one will judge you for taking the shortcut.
The tortilla charring step might feel extra, but it’s worth it. If you don’t have a gas stove, you can toast them in a dry skillet over high heat for about 30 seconds per side until they get those beautiful brown spots.
Let your sour cream come to room temperature before assembling — it spreads way easier and won’t tear your tortilla layers. If you’re new to casserole building King Arthur , that applies to savory dishes too.
Don’t skip the resting time after baking. I know it’s tempting to dive right in, but those 5-10 minutes let everything settle so your slices actually hold together instead of sliding everywhere.
Quick Fixes for Green Chile Chicken Enchilada Casserole
Sometimes things go sideways in the kitchen — here’s how to rescue your casserole when they do.
Problem: The casserole is too watery. Next time, drain any excess liquid from your cooked chicken before shredding, and don’t go overboard with the sauce between layers. If it’s already baked and soupy, let it rest for 15-20 minutes uncovered — a lot of that liquid will reabsorb.
Problem: The tortillas are soggy instead of having texture. This usually means you skipped the charring step or the sauce was too thin. For next time, definitely char those tortillas — it creates a barrier that prevents them from turning to mush. You can also pat the tortillas dry if your enchilada sauce is particularly watery.
Problem: The cheese separated or got greasy. This happens when the oven’s too hot or you used pre-shredded cheese with too many additives. Stick with the 350°F temperature, and if possible, shred your own cheese from a block — it melts way better and tastes creamier.
Problem: The top layer burned before the inside heated through. Cover your casserole with foil for the entire baking time, removing it only for the last 5-10 minutes if you want extra browning on top. This protects the cheese while everything underneath comes together.
Variations & Adaptations
This Green Chile Chicken Enchilada Casserole is super versatile — here are some fun ways to make it your own.
Make it vegetarian: Skip the chicken entirely and layer in roasted vegetables like bell peppers, zucchini, black beans, and corn. You’ll want about 6 cups of veggie filling to replace the chicken.
Go gluten-free: Good news — corn tortillas are naturally gluten-free. Just double-check your enchilada sauce label to make sure it doesn’t have any sneaky wheat-based thickeners.
Spice it up: Add diced jalapeños or use hot enchilada sauce instead of mild. You can also mix some cayenne pepper into the sour cream layer for an extra kick.
Make it lighter: Swap the sour cream for Greek yogurt and use a Mexican cheese blend instead of all Monterey Jack. You can also use chicken breast tenderloins or even ground turkey seasoned with cumin and chili powder.
Breakfast version: Add scrambled eggs to your layers along with the chicken, use breakfast sausage instead of plain chicken, and serve with salsa verde on the side. It’s basically a breakfast enchilada situation and it’s incredible.
Serving, Storage & Reheating
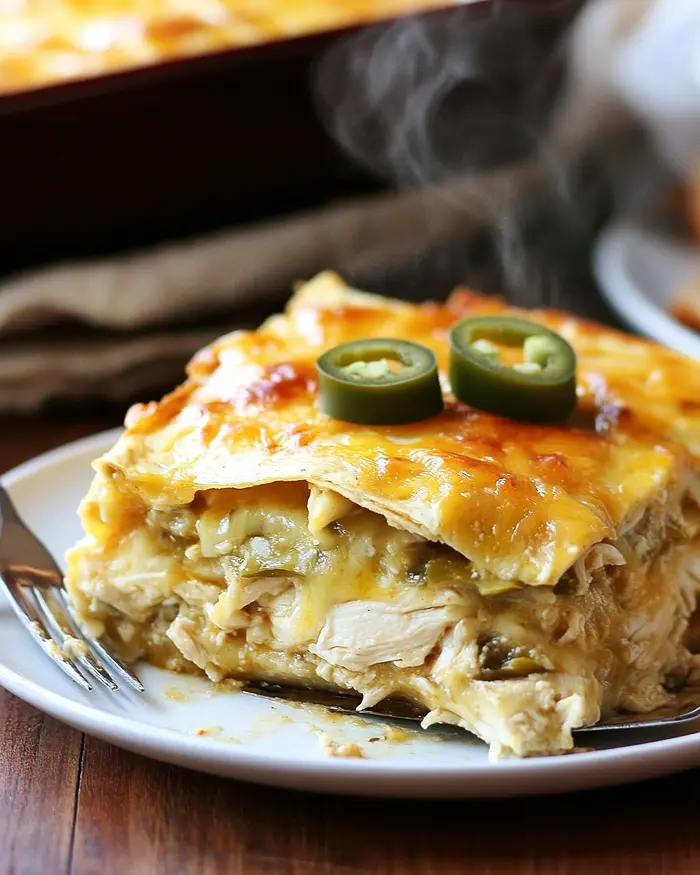
This Enchilada Casserole is one of those dishes that actually gets better the next day as all the flavors meld together.
Serve it straight from the baking dish with your favorite toppings like fresh cilantro, diced avocado, pickled jalapeños, extra sour cream, or a squeeze of lime juice. I love pairing it with my crispy mini tacos as an appetizer or some Hoppin’ John on the side for a full spread.
Store leftovers in an airtight container in the fridge for up to 4 days. The casserole holds up beautifully, though the tortillas will soften a bit more as they sit in the sauce — which honestly just makes it even more comforting.
To reheat, cover individual portions with a damp paper towel and microwave for 2-3 minutes until heated through. For larger portions, reheat in a covered baking dish at 350°F for about 20 minutes. You can also freeze the entire casserole before baking — just thaw overnight in the fridge and add an extra 15 minutes to the baking time.
One recipe down, and so many more to explore! Head over to our complete Chicken Casseroles lineup for more delicious ideas that’ll keep your kitchen buzzing. Bookmark this one — you’ll thank yourself later.
No-Waste Kitchen Magic
Got leftover Green Chile Chicken Enchilada Casserole? Here are some creative ways to give it a second life instead of letting it languish in the fridge.
Chop it up and use it as a filling for quesadillas or breakfast burritos — the tortillas have already softened so they blend right in with scrambled eggs and cheese.
Turn it into enchilada soup by breaking up a portion in a pot, adding chicken broth, some canned diced tomatoes, and a handful of frozen corn. Simmer for 10 minutes and you’ve got a completely different meal.
Use it as a topping for loaded nachos or taco salad. The casserole has all the right flavors already built in, so you’re basically just changing the delivery method.
If you’ve got individual corn tortillas that didn’t get used, freeze them flat in a freezer bag with parchment paper between each one. They’ll keep for months and you can pull out exactly how many you need for your next taco night.
Extra enchilada sauce? Freeze it in ice cube trays, then pop the cubes into a freezer bag. You’ll have perfect portions ready whenever you need to add a splash of sauce to eggs, rice, or even easy mini bacon ranch cheeseballs for a fusion twist.
FAQs
Can I freeze this Green Chile Chicken Enchilada Casserole?
Absolutely! You can freeze it either before or after baking. For unbaked, assemble everything, wrap tightly in plastic wrap and foil, then freeze for up to 3 months. Thaw overnight in the fridge and bake as directed, adding 10-15 extra minutes.
What’s the best way to store leftover Chicken Enchiladas?
Keep them in an airtight container in the fridge for up to 4 days. The casserole actually tastes even better the next day as the flavors meld together. Just reheat individual portions in the microwave or the whole thing covered in the oven.
How do I know when the casserole is fully done?
The cheese should be melted and bubbly, and the edges should be slightly golden. If you insert a knife into the center, it should come out hot to the touch. The casserole will also pull away slightly from the edges of the pan when it’s ready.
Can I use flour tortillas instead of corn tortillas?
You can, but the texture and flavor will be different — flour tortillas are softer and don’t char as well. If you do use them, you might want to skip the charring step entirely and just layer them in as-is.
Corn tortillas give you that authentic enchilada taste and hold up better to all the sauce.
Closing
So there you go — Green Chile Chicken Enchilada Casserole that looks impressive but is secretly one of the easiest things you’ll make all week. It’s become my go-to for everything from Tuesday night dinners to weekend gatherings where I want to spend more time with people and less time stuck in the kitchen.
I’d love to see your spin on this Green Chile Chicken Enchilada Casserole! Drop a comment below with your photos or any fun variations you tried — I’m always looking for new twists on old favorites. Did you add extra cheese? Throw in some black beans? Make it breakfast-style? Tell me everything!
Thanks for cooking with me today. Now go layer, bake, and enjoy every cheesy, saucy, comforting bite.
I’m Linda Sandra — a Charleston home chef and comfort-food daydreamer. Around here, cooking’s not about perfection — it’s about cozy vibes, creative twists, and food that feels like love.
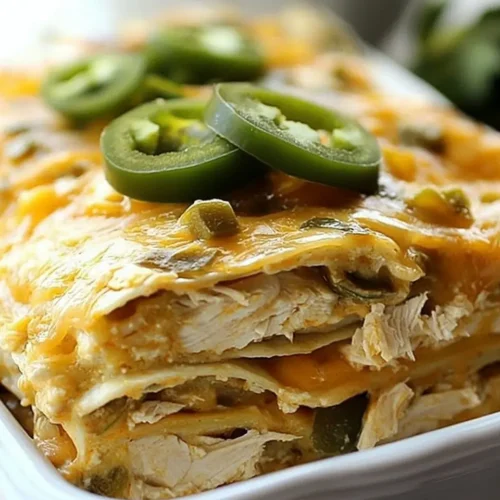
Green Chile Chicken Enchilada Casserole
Equipment
- 9×13 inch baking dish
- Metal tongs
- Mixing bowls
- Sharp knife
- Cutting board
- Spoon
Ingredients
For the Chicken
- 4 breasts boneless, skinless chicken breasts
- to taste garlic salt
For the Layers
- 18 corn tortillas 6-inch, torn in half
- 1 can (28 oz) green chile enchilada sauce
- 1 package (16 oz) shredded Monterey Jack cheese
- 1 container (8 oz) reduced-fat sour cream
Instructions
- Preheat your oven to 350°F and give your medium-sized baking dish a light coating of cooking spray or butter. Pop your four boneless, skinless chicken breasts in there, season them generously with garlic salt, and slide them into the oven for about 45 minutes. You’re looking for an internal temperature of 165°F and clear juices when you poke them with a knife.
- Once your chicken is cooked through, pull it out and let it cool on a cutting board for about 10 minutes. This makes it way easier to shred without burning your fingers. Use two forks or your hands to pull the chicken into bite-sized pieces, then set it aside while you work on the tortillas.
- Grab your metal tongs and char those corn tortilla halves over an open flame on your stovetop for about one minute each. They’ll puff up slightly and get those gorgeous dark spots that add so much flavor. If you don’t have a gas stove, you can do this under the broiler for a minute or two, just watch them closely.
- Pour about half an inch of the green chile enchilada sauce into the bottom of your baking dish — this creates a non-stick base and keeps everything moist. Arrange six of the charred tortilla halves in a single layer on top of the sauce, overlapping them slightly if needed.
- Now for the layering — top those tortillas with half of your shredded chicken, then sprinkle with a third of the Monterey Jack cheese. Dollop half of the sour cream over the cheese (don’t worry about being perfect, it’ll spread as it bakes), then drizzle a third of the remaining enchilada sauce over everything.
- Repeat the layers using the remaining tortillas, chicken, cheese, sour cream, and enchilada sauce. You should end with a final layer of cheese and sauce on top — this creates that gorgeous golden, bubbling top everyone fights over.
- Cover the casserole with aluminum foil and bake in the preheated oven for 45 minutes. The foil keeps everything moist while all those flavors meld together beautifully.
- After baking, remove the foil and let the casserole cool for about 10 minutes before serving. This helps it set up so you get clean, beautiful slices instead of a saucy mess (though honestly, both taste equally amazing).