Easy Hot Italian Sub Sliders
Hey there! I’m Linda Sandra — a Charleston home cook who believes every meal should feel like a hug, and this Hot Italian Sub Sliders recipe is one of my go-to ways to prove it.
Whether you’re feeding hungry kids after soccer practice, hosting game day, or just want something ridiculously delicious without the fuss, these little beauties have your back.
Little Snapshot: What This Recipe Delivers
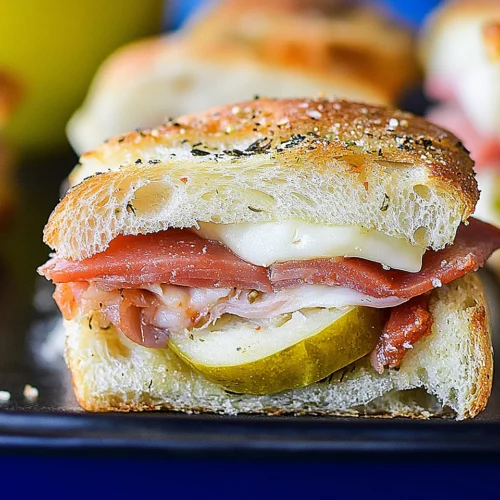
These Hot Italian Sub Sliders are buttery, melty, Italian-flavored sandwiches baked on soft Hawaiian rolls and loaded with layers of ham, salami, pepperoni, provolone, and zesty peppers.
They’re ridiculously easy to throw together, serve a crowd, and disappear faster than you can say “pass the marinara.”
Why You’ll Love This Recipe 🌸
- These hot italian sliders take less time than folding laundry — seriously, 10 minutes of prep and the oven does the rest.
- They’re total crowd-pleasers that work for picky eaters AND adults who appreciate good flavor (everyone wins!).
- You can make them ahead, freeze them, or customize the meats and cheese to whatever you’ve got on hand — no judgment here.
- According to King’s Hawaiian, their rolls are the secret to making any sandwich feel extra special — and this recipe proves exactly why.
Quick Facts ⚡
Here’s the quick scoop on this Hot Italian Sub Sliders recipe.
- CourseMain Dish / Appetizer
- Prep Time10 minutes
- Cook Time30 minutes
- Total Time40 minutes
- Servings12 sliders
- DifficultyEasy
Table of Contents
Nutritional Peek
Here’s a friendly look at what you’re getting per slider. No guilt, just good food that happens to have some protein and carbs to keep everyone happy!
| Nutrient | Amount per Serving |
|---|---|
| Calories | 285 |
| Protein | 14g |
| Carbohydrates | 22g |
| Fat | 15g |
| Fiber | 1g |
| Sugar | 6g |
Hot Italian Sub Sliders Ingredients
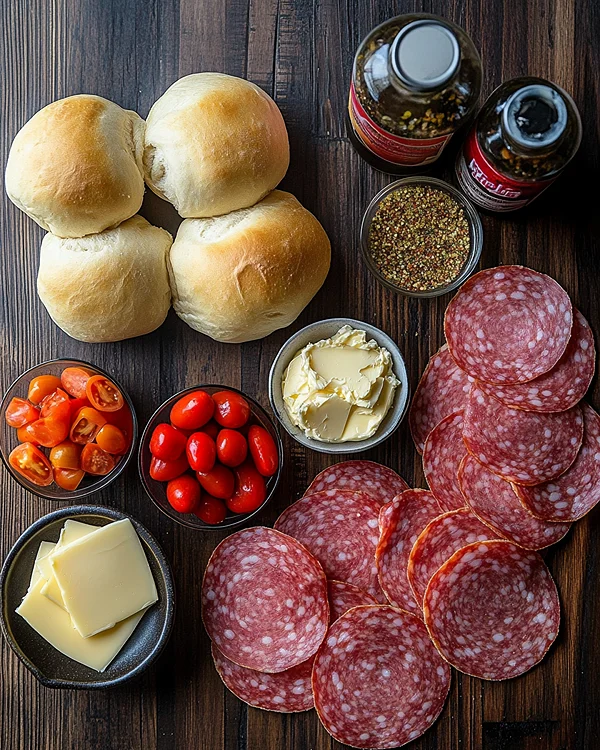
Let’s talk about what makes these mini slider sandwiches so dang good. You probably have most of this stuff already, and if not, it’s all easy to grab on your next grocery run.
| Amount | Ingredient |
|---|---|
| 12 pack | Rolls, halved lengthwise (I’m obsessed with Kings Hawaiian rolls for this) |
| 6 oz | Ham, thinly sliced |
| 5 oz | Salami, thinly sliced |
| 5 oz | Pepperoni, thinly sliced |
| 9 slices | Provolone cheese |
| ⅓ cup | Pepperoncini, sliced |
| ⅓ cup | Pickled hot cherry peppers, sliced |
| ¼ cup | Salted butter, melted (real butter — because it just makes everything better) |
| 1 tsp | Italian seasoning |
| 2 cloves | Garlic, crushed (fresh over jarred, trust me on this) |
| 1 cup | Marinara sauce for serving (optional but highly recommended) |
Tools You’ll Actually Use
You don’t need fancy equipment for these sliders sandwiches — just the basics:
- Baking sheet or 9×13-inch baking pan
- Small mixing bowl
- Pastry brush (or a spoon works too!)
- Aluminum foil
- Sharp knife for slicing
Step-by-Step Instructions
Alright, let’s make some Hot Italian Sub Sliders magic happen. This is so easy you might wonder if you’re forgetting something (you’re not).
Step 1: Preheat your oven to 350°F. Get that going first so you’re not standing around waiting later.
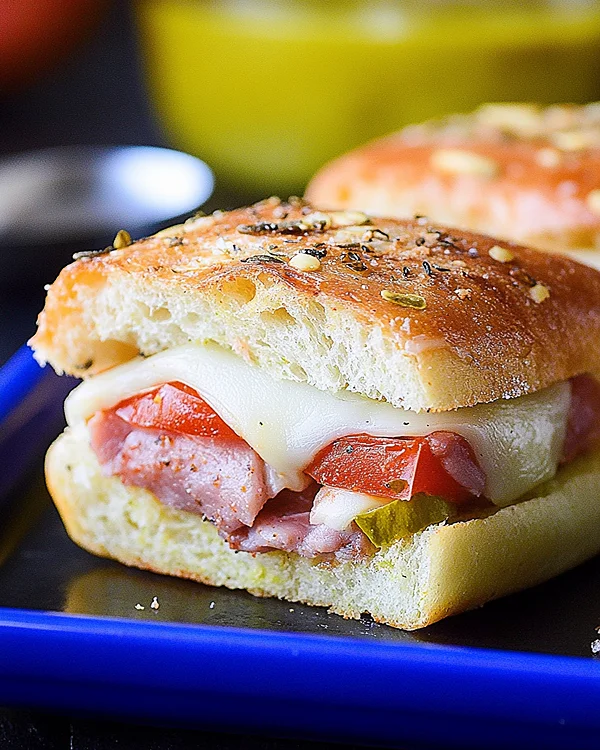
Step 2: Lay the bottom half of your rolls on a baking sheet or in a 9×13-inch pan. Now comes the fun part — start layering! First the ham, then the salami, then pepperoni, then those gorgeous provolone slices. Top everything with the sliced hot cherry peppers and pepperoncini. Pop the top buns back on and admire your work.
Step 3: In a small bowl, mix together your melted butter, Italian seasoning, and crushed garlic. Give it a good stir until everything’s buddied up together.
Step 4: Brush that buttery garlic goodness all over the tops of your sliders. Get into those nooks and crannies — that’s where the flavor lives!
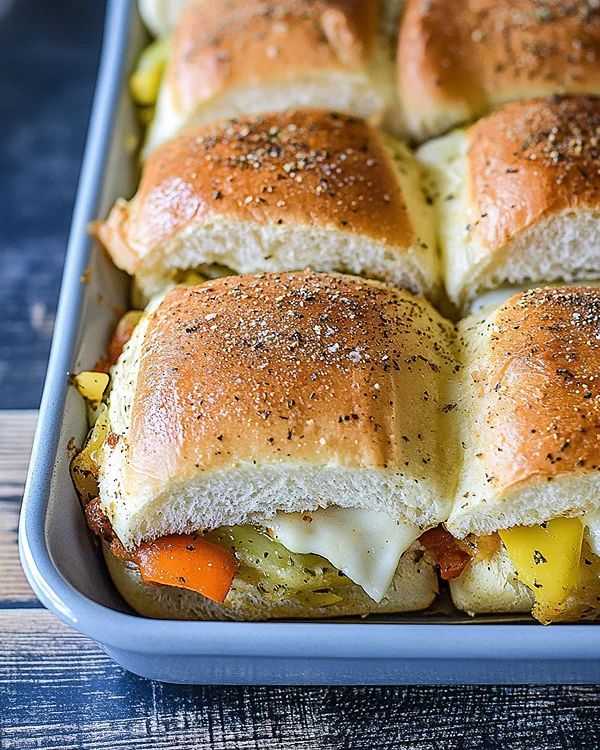
Step 5: Cover the whole pan with foil (this keeps them from getting too brown on top before they’re melty inside). Bake for about 30 minutes until everything’s golden and your kitchen smells like heaven.
Step 6: Pull them out, slice them apart, and try not to burn your mouth diving in too fast. Serve with marinara for dipping if you’re feeling extra.
Pro Tips & Gentle Guidance
Want to take your hot italian sliders to the next level? Here’s what I’ve learned:
- Don’t skip the garlic butter on top — that’s literally what makes these taste like they came from a fancy deli instead of your kitchen.
- If you want a little crunch on top, uncover the foil for the last 5 minutes of baking. Game changer!
- You can assemble these completely in the morning, cover them, and pop them in the fridge until you’re ready to bake. Add 5 extra minutes to the bake time if they’re cold from the fridge.
- Not a fan of spicy? Just skip the hot peppers and use roasted red peppers or sliced tomatoes instead.
- According to Serious Eats, the key to great sandwiches is layering your ingredients thoughtfully — which is exactly what we’re doing here with all those beautiful Italian meats and tangy peppers.
Quick Fixes for Hot Italian Sub Sliders
Sometimes things don’t go perfectly, and that’s totally okay! Here’s how to troubleshoot:
Problem: Tops are browning too fast
- Cover with foil sooner or tent loosely with foil from the start. Every oven’s a little different!
Problem: Cheese isn’t melting enough
- Make sure your slices of provolone are touching the warm meats underneath, and give them an extra 5 minutes in the oven.
Problem: Sliders are soggy on the bottom
- This usually happens if there’s too much moisture from the peppers. Pat them dry with a paper towel before adding them to your sliders.
Problem: Not enough flavor
- Don’t be shy with that garlic butter! Make sure you’re brushing it generously and getting it into all the crevices.
Variations & Adaptations
The beauty of these mini slider sandwiches is that you can totally make them your own:
For the Meat Lovers: Add a layer of cooked Italian sausage or bacon. More is more, right?
Make It Milder: Swap the hot peppers for banana peppers or roasted red peppers. Still delicious, way less heat.
Cheese Switch-Up: Try mozzarella, pepper jack, or even a sharp white cheddar instead of provolone.
Veggie Version: Skip the meats and load up on grilled vegetables like zucchini, eggplant, and bell peppers with fresh mozzarella.
Gluten-Free: Use your favorite gluten-free slider buns — just watch the baking time as they might cook faster.
Extra Italian Vibes: Add a layer of fresh basil leaves or arugula after baking for a peppery kick.
One recipe down, and so many more to explore! Head over to our complete Classic Comfort Foods lineup for more delicious ideas that’ll keep your kitchen buzzing. Bookmark this one — you’ll thank yourself later.
Serving, Storage & Reheating
So you’ve made these amazing sliders sandwiches — now what?
Serving Ideas: These are perfect with a side of chips, a simple green salad, or some of my One Pot Garlic Butter Shrimp Pasta if you’re going all out.
The marinara dipping sauce is non-negotiable in my book — it takes them from great to “I’m making these every week.”
Storage: If you somehow manage not to eat these all at once (impressive!), store leftovers in an airtight container in the fridge for up to 3 days.
Reheating: Pop them back in a 300°F oven for about 10 minutes, or microwave individual sliders for 30-45 seconds. The oven method keeps them from getting soggy.
Freezing: Yes! You can freeze these before OR after baking. Wrap them tightly in foil, then in a freezer bag. To bake from frozen, add 15-20 minutes to the bake time. Already baked? Thaw overnight and reheat as directed above.
No-Waste Kitchen Magic
Let’s make sure nothing goes to waste with these beauties:
Extra Deli Meat: Chop it up and add to scrambled eggs, pasta dishes like my One Pan Cheesy Meat and Potato Skillet, or throw it on a homemade pizza.
Leftover Peppers: Toss them into salads, pasta, or rice bowls. They add instant flavor and keep in the fridge for weeks.
Day-Old Sliders: Honestly, they’re still delicious the next day! But if you want to get creative, chop them up and use them as croutons in a hearty Italian salad.
Extra Garlic Butter: Save it! Brush it on bread for garlic toast, toss with pasta, or drizzle over roasted vegetables.
Hot Italian Sub Sliders FAQs
Can I freeze Hot Italian Sub Sliders before baking?
Absolutely! Assemble them completely, wrap tightly in foil and a freezer bag, then freeze for up to 2 months. Bake from frozen, adding 15-20 extra minutes to the cook time.
Can I make these ahead for a party?
Yes! Assemble them in the morning, keep them covered in the fridge, and bake right before serving. They stay warm for about 20 minutes, which is usually plenty of time.
What if I can’t find Kings Hawaiian rolls?
Any soft slider buns or dinner rolls work great. Just avoid anything too crusty or it’ll overpower the fillings.
Can I use different meats?
For sure! Turkey, roast beef, or even leftover rotisserie chicken would be delicious. Mix and match to your heart’s content.
Are these spicy?
They’ve got a little kick from the peppers, but it’s not overwhelming. You can always reduce or skip them if spice isn’t your thing.
How do I keep the bottoms from getting soggy?
Pat those peppers dry before layering them on, and don’t skip the baking — the heat helps everything meld together without making things mushy.
Wrapping It Up
So there you go — Hot Italian Sub Sliders that feel fancy but are secretly easy enough for a Tuesday night.
They’re the kind of recipe that makes you look like a kitchen rockstar with minimal effort, which is exactly the kind of cooking I’m all about.
Whether you’re feeding a crowd or just want leftovers for lunch tomorrow (if they last that long), these sliders deliver every single time.
I’d love to hear how yours turn out! Drop a comment below, snap a pic and tag me, or just come back and tell me which variation you tried.
And if you’re looking for more easy crowd-pleasers, check out my Perfect Sweet Chili Chicken Recipe — it’s another total winner.
About Linda Sandra: I’m Linda Sandra — a Charleston home chef and comfort-food daydreamer. Around here, cooking’s not about perfection — it’s about cozy vibes, creative twists, and food that feels like love.
Hot Italian Sub Sliders
Equipment
- Baking sheet or 9×13-inch baking pan
- Small mixing bowl
- Pastry brush
- Aluminum foil
- Sharp knife
Ingredients
Main Ingredients
- 12 pack Rolls, halved lengthwise Kings Hawaiian rolls recommended
- 6 oz Ham thinly sliced
- 5 oz Salami thinly sliced
- 5 oz Pepperoni thinly sliced
- 9 slices Provolone cheese
- ⅓ cup Pepperoncini sliced
- ⅓ cup Pickled hot cherry peppers sliced
Garlic Butter Topping
- ¼ cup Salted butter melted
- 1 tsp Italian seasoning
- 2 cloves Garlic crushed, fresh recommended
For Serving (Optional)
- 1 cup Marinara sauce for dipping
Instructions
- Preheat your oven to 350°F.
- Lay the bottom half of your rolls on a baking sheet or in a 9×13-inch pan. Start layering: first the ham, then the salami, then pepperoni, then the provolone slices. Top everything with the sliced hot cherry peppers and pepperoncini. Pop the top buns back on.
- In a small bowl, mix together your melted butter, Italian seasoning, and crushed garlic. Give it a good stir until everything’s combined.
- Brush the buttery garlic mixture all over the tops of your sliders, getting into those nooks and crannies.
- Cover the whole pan with foil and bake for about 30 minutes until everything’s golden and melted.
- Remove from the oven, slice them apart, and serve with marinara sauce for dipping if desired.