1 Minute Microwave Brownie
1 minute microwave brownie — those three words might just change your entire relationship with late-night chocolate cravings. Hey there, I’m Claire Whitmore, a pastry whisperer from Asheville, NC, where melted chocolate absolutely counts as a love language.
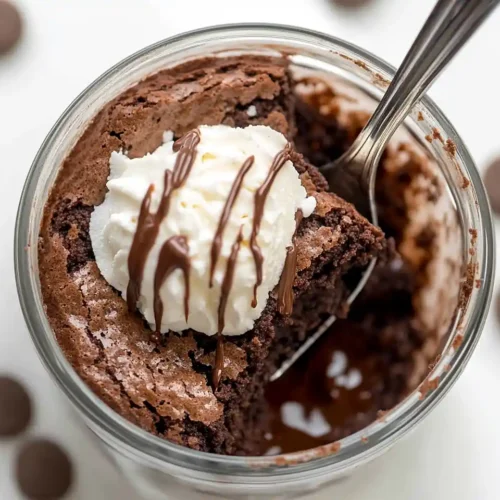
This ultra-fast microwave brownie in a mug delivers rich, fudgy texture, simple pantry ingredients like butter and chocolate chips, single-serving convenience, and that warm gooey center we all dream about — all in less time than it takes to scroll through dessert photos on Pinterest.
Whether you’re craving something sweet after dinner, need a quick pick-me-up during a Netflix binge, or just want chocolate RIGHT NOW without turning on the oven, this one minute brownie has your back.
It’s made with everyday ingredients you probably already have, requires zero fancy equipment, and tastes like you spent way more than 60 seconds making it.
I’ll be honest — I discovered this recipe during a particularly intense chocolate emergency at 10 PM on a Tuesday. The oven felt like a commitment I just wasn’t ready for, but store-bought cookies weren’t cutting it either.
Table of Contents
Little Snapshot: What This Recipe Delivers
This 1 minute microwave brownie gives you a warm, fudgy, single-serve chocolate treat made with just butter, chocolate chips, one egg yolk, brown sugar, flour, and optional vanilla.
In under 3 minutes total — including prep — you’ll have a rich, gooey brownie with that perfect slightly underdone center, all cooked right in your favorite microwave-safe mug with minimal cleanup required.
Why You’ll Love This Recipe 🌸
- This 1 minute microwave brownie literally goes from craving to chocolate bliss faster than your coffee reheats.
- You only dirty one mug — which means cleanup is basically nonexistent (finally, a win for the perpetually behind-on-dishes crowd).
- It’s perfectly portioned so you can have your chocolate fix without the whole pan calling your name at midnight.
- According to King Arthur Baking’s guide to single-serving treats, individual desserts give you all the satisfaction with zero guilt — and this recipe is proof that magic happens in minutes.
Quick Facts ⚡
Here’s the quick scoop on this 1 minute microwave brownie.
- CourseDessert
- Prep Time2 minutes
- Cook Time45 seconds to 1 minute
- Total Time3 minutes
- Servings1 serving
- DifficultyEasy
1 Minute Microwave Brownie
Equipment
- Microwave-safe mug or ramekin (8-12 oz capacity)
- Spoon or small whisk
- Measuring spoons
- Small bowl (optional)
Ingredients
- 1 tbsp salted butter or unsalted butter plus a pinch of salt
- 2 tbsp semi-sweet chocolate chips for melting
- 1 egg yolk save the white for another use
- 1 tbsp brown sugar plus 1 teaspoon, light or dark
- ⅛ tsp vanilla extract optional but recommended
- 2 tbsp all-purpose flour
- 1 tbsp chocolate chips optional, for mix-ins
Instructions
- Drop the 1 tablespoon of salted butter into your microwave-safe mug and microwave it for about 15-20 seconds until completely melted. Add in the 2 tablespoons of semi-sweet chocolate chips and stir them into the melted butter. If the chocolate chips aren’t fully melted from the residual heat, pop the mug back in the microwave for another 10-15 seconds and stir again until you have a smooth, glossy chocolate mixture. This creates your rich, fudgy foundation.
- To your melted chocolate-butter mixture, add the egg yolk, 1 tablespoon plus 1 teaspoon of brown sugar, and the 1/8 teaspoon of vanilla extract if you’re using it. Stir everything together vigorously until the mixture is smooth, glossy, and completely combined — you want that egg yolk fully incorporated so you get consistent texture throughout. The mixture should look thick, shiny, and totally irresistible already.
- Sprinkle the 2 tablespoons of flour over your chocolate mixture and gently stir until the flour just disappears into the batter — don’t overmix here or you’ll end up with a tougher brownie instead of that tender, fudgy texture we’re after. If you’re adding the optional 1 tablespoon of chocolate chips for extra pockets of melty chocolate (highly recommend), fold them in gently now.
- Microwave your brownie on high for 45 seconds. Watch through the microwave door as it puffs up slightly — it should look barely set on top with a slightly glossy center. If your microwave runs cool or the brownie looks super wet still, add another 10-15 seconds and check again. Remember, it’s better to slightly undercook than overcook (it’ll continue cooking a bit from residual heat, and that gooey center is the whole point).
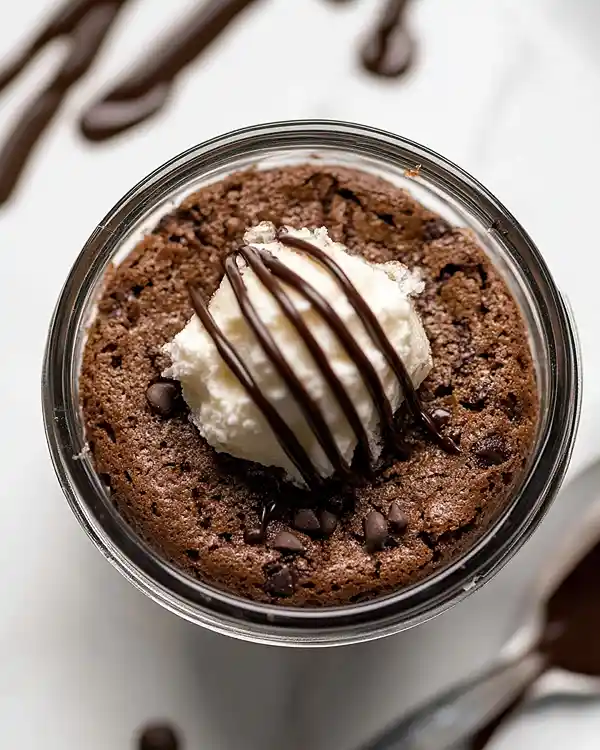
- Let your microwave brownie in a mug sit for about 30-60 seconds before diving in. This gives the texture a chance to set slightly so it’s fudgy rather than molten lava (though honestly, molten lava isn’t the worst problem to have). Top it with a scoop of vanilla ice cream, a dollop of whipped cream, or just grab a spoon and go to town.
Notes
Nutritional Peek
Here’s what you’re getting in each chocolatey, gooey serving (because sometimes it helps to know, even when we’re fully committed to the indulgence):
| Nutrient | Amount per Serving |
|---|---|
| Calories | 285 kcal |
| Protein | 4g |
| Carbohydrates | 32g |
| Total Fat | 16g |
| Saturated Fat | 9g |
| Fiber | 2g |
| Sugar | 22g |
| Sodium | 95mg |
Note: Nutritional values are approximate and may vary based on specific ingredients used.
There’s a whole world of cookies & brownies waiting for you over at the Cookies & Brownies collection. Each one is made with the same love and attention, and they’re all absolutely worth trying. Happy cooking!
Ingredients
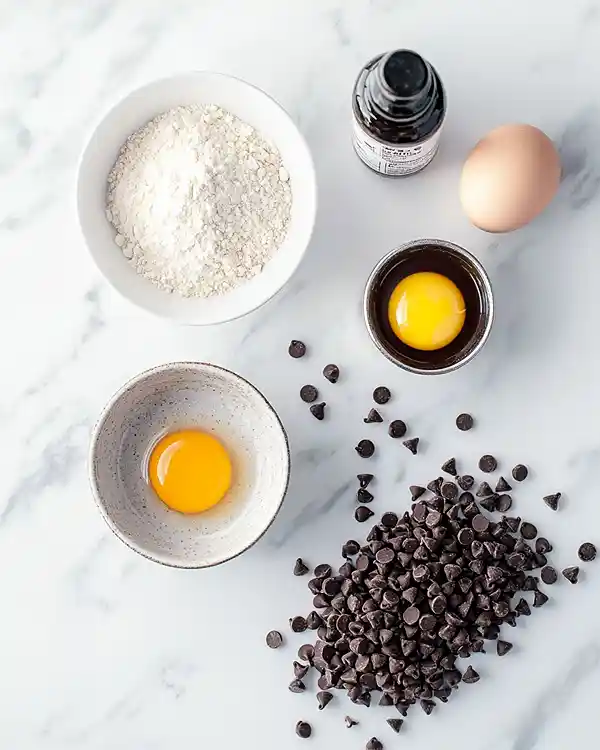
This microwave brownie 1 minute magic starts with a handful of ingredients you’ve probably got stashed in your pantry right now — no specialty items or random extracts you’ll use once and forget about.
For the chocolatey base — salted butter and semi-sweet chocolate chips — you’ll want quality chocolate here since it’s the star of the show (trust me, this is not the time to use those dusty chips from 2019).
The egg yolk gives you that rich, fudgy texture without making things cakey, while brown sugar adds a deeper molasses-y sweetness that white sugar just can’t match. A splash of vanilla extract is optional but totally worth it, and just two tablespoons of all-purpose flour holds everything together without turning your brownie into a muffin.
| Amount | Ingredient |
|---|---|
| 1 tbsp | Salted butter (or unsalted butter plus a pinch of salt) |
| 2 tbsp | Semi-sweet chocolate chips (for melting) |
| 1 | Egg yolk (save that white for tomorrow’s omelet) |
| 1 tbsp + 1 tsp | Brown sugar (light or dark — both work beautifully) |
| 1/8 tsp | Vanilla extract (optional but highly recommended) |
| 2 tbsp | All-purpose flour |
| 1 tbsp | Chocolate chips (optional, for extra chocolatey pockets) |
Tools You’ll Actually Use
Here’s everything you need to make this one minute brownie happen (spoiler: it’s basically just a mug and a spoon):
- Microwave-safe mug or ramekin (at least 8-12 oz capacity so it doesn’t overflow)
- Spoon or small whisk for stirring
- Measuring spoons (or just eyeball it if you’re feeling confident)
- Small bowl (optional, if you want to separate your egg beforehand)
Step-by-Step Instructions
Let’s make this 1 minute microwave brownie happen — and I mean literally ONE minute of cooking time, because sometimes chocolate waits for no one.
Step 1: Melt the butter and chocolate base Drop the 1 tablespoon of salted butter into your microwave-safe mug and microwave it for about 15-20 seconds until completely melted. Add in the 2 tablespoons of semi-sweet chocolate chips and stir them into the melted butter.
If the chocolate chips aren’t fully melted from the residual heat, pop the mug back in the microwave for another 10-15 seconds and stir again until you have a smooth, glossy chocolate mixture. This creates your rich, fudgy foundation.
Step 2: Add the wet ingredients To your melted chocolate-butter mixture, add the egg yolk, 1 tablespoon plus 1 teaspoon of brown sugar, and the 1/8 teaspoon of vanilla extract if you’re using it.
Stir everything together vigorously until the mixture is smooth, glossy, and completely combined — you want that egg yolk fully incorporated so you get consistent texture throughout. The mixture should look thick, shiny, and totally irresistible already.
Step 3: Incorporate the flour Sprinkle the 2 tablespoons of flour over your chocolate mixture and gently stir until the flour just disappears into the batter — don’t overmix here or you’ll end up with a tougher brownie instead of that tender, fudgy texture we’re after.
If you’re adding the optional 1 tablespoon of chocolate chips for extra pockets of melty chocolate (highly recommend), fold them in gently now.
Step 4: Microwave to perfection Microwave your brownie on high for 45 seconds. Watch through the microwave door as it puffs up slightly — it should look barely set on top with a slightly glossy center.
If your microwave runs cool or the brownie looks super wet still, add another 10-15 seconds and check again. Remember, it’s better to slightly undercook than overcook (it’ll continue cooking a bit from residual heat, and that gooey center is the whole point).
Step 5: Let it rest (if you can) Let your microwave brownie in a mug sit for about 30-60 seconds before diving in.
This gives the texture a chance to set slightly so it’s fudgy rather than molten lava (though honestly, molten lava isn’t the worst problem to have). Top it with a scoop of vanilla ice cream, a dollop of whipped cream, or just grab a spoon and go to town.
Claire’s Pro Tips & Gentle Guidance
These little tricks have saved my microwave brownie 1 minute experiments more times than I can count (turns out I’ve made A LOT of emergency brownies at midnight).
The egg yolk is non-negotiable for fudgy texture. I tried using a whole egg once thinking it wouldn’t matter, and ended up with something closer to chocolate cake than a brownie.
The yolk alone gives you that dense, rich, almost truffle-like center without any cake-y fluffiness. Save the egg white for scrambled eggs tomorrow or freeze it for future baking projects.
Don’t skip melting the chocolate chips first. It’s tempting to just dump everything in together, but melting those 2 tablespoons of chocolate chips with the butter creates a smooth base that distributes evenly throughout your brownie.
According to Serious Eats‘ comprehensive brownie science guide , properly melted chocolate creates better texture and deeper flavor — and this quick method proves exactly that.
Microwave wattages vary wildly, so start with less time. My microwave is apparently the Hulk of microwaves and cooks everything in record time, while my mom’s takes forever.
Start with 45 seconds and add time in 10-second increments if needed. You want the top to look barely set with a slight jiggle in the center — it should NOT look fully cooked or you’ve gone too far into cake territory.
Brown sugar is your secret weapon for extra fudginess. The molasses in brown sugar adds moisture and a subtle caramel undertone that makes this taste way more sophisticated than a 1-minute mug brownie has any right to.
If you only have white sugar, it’ll still work, but try brown sugar next time and you’ll taste the difference immediately.
Choose your mug size wisely. An 8-12 ounce mug is perfect — big enough that your brownie doesn’t overflow mid-cooking, but cozy enough that you get a nice thick brownie layer.
I learned this the hard way when my brownie erupted all over the microwave in a too-small mug (cleaning melted chocolate off a microwave carousel is NOT a vibe).
Quick Fixes for 1 Minute Microwave Brownie
Problem: My brownie came out rubbery or tough. You probably overcooked it or overmixed the batter after adding the flour. Next time, cook for 40-45 seconds max and fold the flour in gently until it just disappears. Overmixing develops the gluten in the flour which makes things chewy in a bad way, not fudgy in a good way.
Problem: The center is still completely liquid after cooking. Your microwave might run cool, or your mug might be extra thick. Add another 10-15 seconds and check again — you want it to look barely set on top with just a slight jiggle in the center. Remember, it continues cooking from residual heat after you take it out.
Problem: My brownie is dry and crumbly. This means it cooked too long or your chocolate-butter mixture wasn’t fully melted before adding the other ingredients.
The moisture comes from that melted chocolate and butter combo, so make sure it’s completely smooth before moving on. Also, try reducing your microwave time by 10 seconds next attempt.
Problem: The texture is gritty instead of smooth. This happens if the brown sugar didn’t fully dissolve into the chocolate mixture. Make sure your chocolate-butter base is still warm when you add the sugar and egg yolk, and stir vigorously until everything looks glossy and unified.
Problem: My brownie overflowed everywhere. Your mug was too small, or you overfilled it with batter. Use at least an 8-ounce mug and don’t fill it more than halfway with batter — it puffs up quite a bit while cooking. Also, placing a paper towel under your mug catches any drips (learned that one the messy way).
Variations & Fun Twists
This one minute brownie is already pretty perfect, but here are some ways to make it your own:
Peanut Butter Swirl: Dollop a teaspoon of peanut butter on top of the batter before microwaving, then swirl it gently with a knife. It creates these gorgeous ribbons of PB throughout and tastes like a Reese’s had a baby with a brownie.
Double Chocolate Overload: Swap the semi-sweet chocolate chips for dark chocolate (70% cacao or higher) for a more intense, less-sweet brownie. Then add a handful of white chocolate chips to the batter for contrast. It’s sophisticated and indulgent at the same time.
Espresso Kick: Add 1/4 teaspoon of instant espresso powder to the melted chocolate mixture. It doesn’t make the brownie taste like coffee — it just amplifies the chocolate flavor and makes everything taste richer and more complex.
Salted Caramel Drizzle: After cooking, drizzle with caramel sauce and sprinkle with flaky sea salt. The sweet-salty combo turns this into something you’d pay $8 for at a fancy café.
Nutty Crunch: Fold in a tablespoon of chopped walnuts, pecans, or almonds for texture. Or go wild and add crushed pretzels for that sweet-salty crunch factor.
Gluten-Free Option: Replace the all-purpose flour with an equal amount of almond flour or a 1-to-1 gluten-free baking blend. The texture will be slightly denser but still totally delicious.
Mint Chocolate Version: Add a tiny drop of peppermint extract (seriously, like 1/16 teaspoon — it’s strong) along with the vanilla for a thin-mint vibe. Or press an Andes mint into the top right after cooking so it melts into the warm brownie.
Serving, Storage & Reheating
Let’s talk about what to do with this microwave brownie in a mug — though honestly, “leftovers” is kind of a theoretical concept here.
Serve this beauty straight from the mug while it’s still warm and gooey, maybe with a scoop of vanilla ice cream melting on top or a generous dollop of whipped cream. I also love adding a drizzle of chocolate syrup, a sprinkle of sea salt, or even a few fresh raspberries to cut through the richness.
If by some miracle you don’t finish it (no judgment if you save half for later), let it cool completely and store it covered in the fridge for up to 2 days. The texture firms up quite a bit when cold, so it becomes more like a dense brownie square than a molten lava cake.
To reheat, microwave for 15-20 seconds on 50% power so it warms through without overcooking. You want it warm and soft again, not rubbery. Honestly though, cold brownie straight from the fridge with a glass of milk is also a vibe — it’s like a fudgy truffle at that point.
No-Waste Kitchen Magic
Since this 1 minute microwave brownie uses such small quantities, here’s how to make sure nothing goes to waste:
Save that egg white! Pop it in a small container in the fridge for up to 2 days and use it in scrambled eggs, an omelet, or even whisk it into your morning overnight oats for extra protein. Or freeze it for future baking projects — egg whites freeze beautifully for up to 3 months.
Day-old brownie crumbs are golden. If your brownie gets a little dry after a day (or if you intentionally make a double batch), crumble it up and use it as an ice cream topping, stir it into yogurt, or layer it in a parfait with whipped cream and berries. It’s like DIY brownie brittle.
Chocolate chip rescue mission. If you’ve got random amounts of different chocolate chips floating around your pantry (we all do), this recipe is perfect for using them up. Mix semi-sweet with dark chocolate, throw in some white chocolate chips, or use whatever’s left in those bags — it all melts into deliciousness.
Scale up smartly. If you want to make multiple servings, mix up 2-3 portions of the batter in separate mugs rather than trying to double everything in one big bowl. Individual portions cook more evenly and you can customize each one (one with nuts, one without, one with extra chocolate chips, etc.).
FAQs
Can I freeze this 1 minute microwave brownie?
Honestly, it’s so quick to make that freezing seems unnecessary, but yes, you technically can. Let it cool completely, wrap it tightly in plastic wrap, and freeze for up to 1 month. Reheat from frozen in the microwave for 30-40 seconds, but the texture won’t be quite as fudgy as fresh.
What’s the best way to store leftover microwave brownie?
Cover your mug with plastic wrap or transfer the brownie to an airtight container and refrigerate for up to 2 days. The texture will firm up considerably when cold, so reheat it for 15-20 seconds to get that gooey center back.
Will this recipe work in a ramekin instead of a mug?
Absolutely! Just make sure your ramekin is microwave-safe and at least 8 ounces in capacity. The cooking time might vary slightly depending on the thickness of your ramekin — ceramic ramekins tend to heat differently than mugs, so check at 40 seconds and add time as needed.
Is there a way to make this microwave brownie 1 minute recipe dairy-free?
Swap the butter for coconut oil (use refined if you don’t want coconut flavor) and choose dairy-free chocolate chips. The texture will be slightly different — a bit more oil-slick and less rich — but it still scratches that chocolate brownie itch beautifully.
Cozy Closing
So there you have it — your new favorite 1 minute microwave brownie that’s basically a warm chocolate hug in a mug. Whether it’s a Tuesday night and you need something sweet RIGHT NOW, or you’re celebrating the fact that you survived another day of chaos, this little brownie has your back without the commitment of a whole pan.
I’d love to see your spin on this 1 minute microwave brownie! Drop a comment below with your photos and tell me if you went classic chocolate or got creative with peanut butter swirls or espresso.
Did you add extra chocolate chips? Try it with a scoop of ice cream? This microwave brownie in a mug is so versatile and forgiving that I bet you’re already dreaming up your own variations.
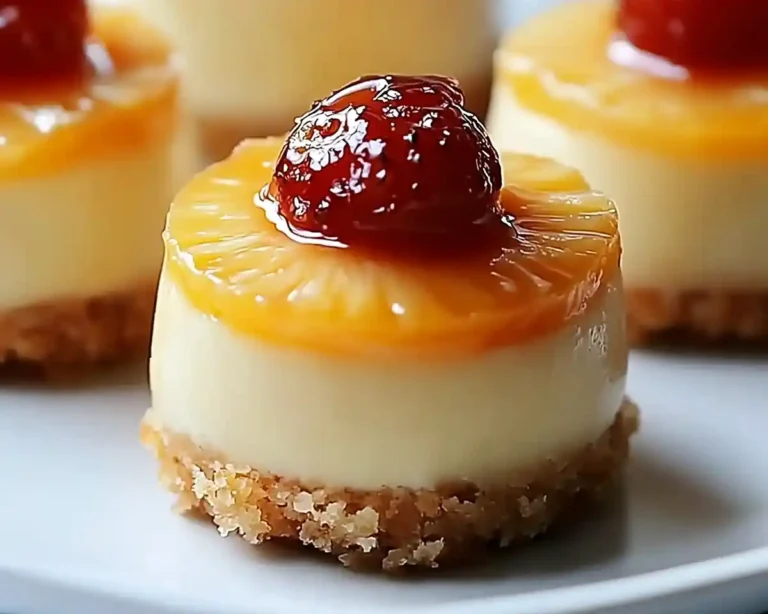
And hey, if you loved this quick dessert fix, you might also fall for my mini pineapple upside down cheesecakes — equally adorable, equally fast, and just as satisfying when you need a little sweet moment in your day.
I’m Claire Whitmore — a dessert daydreamer from Asheville, NC, where chocolate emergencies are taken very seriously and butter is absolutely a food group.
For me, baking isn’t about Instagram-perfect creations or complicated techniques — it’s about those warm, gooey, soul-satisfying moments when you realize you can have fresh-baked happiness in under 3 minutes flat (and only one mug to wash).